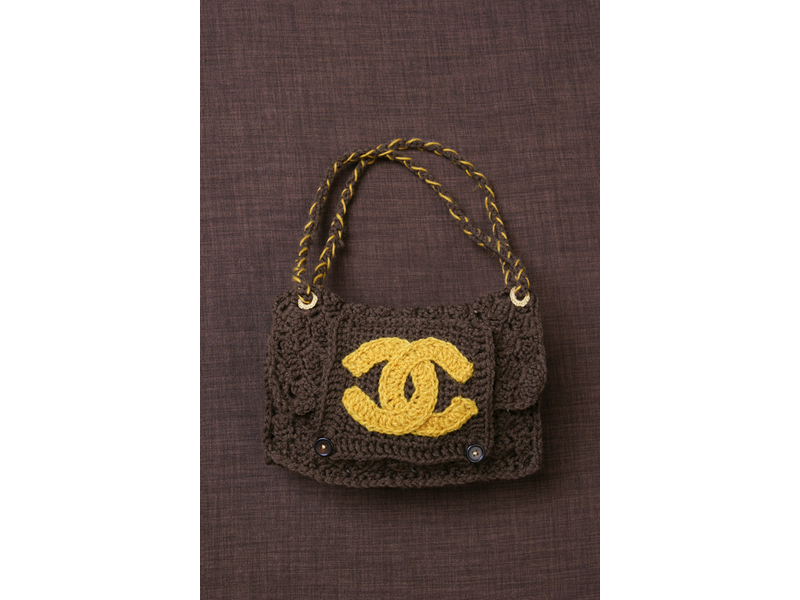
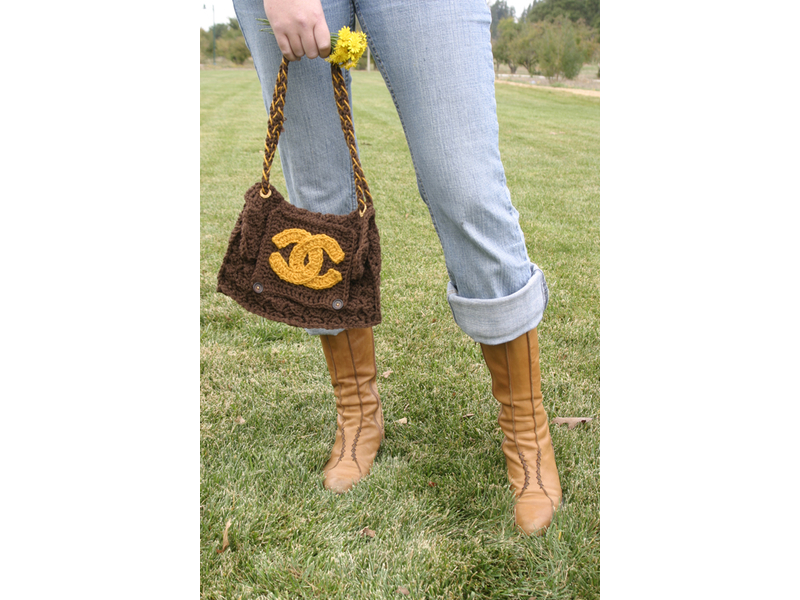
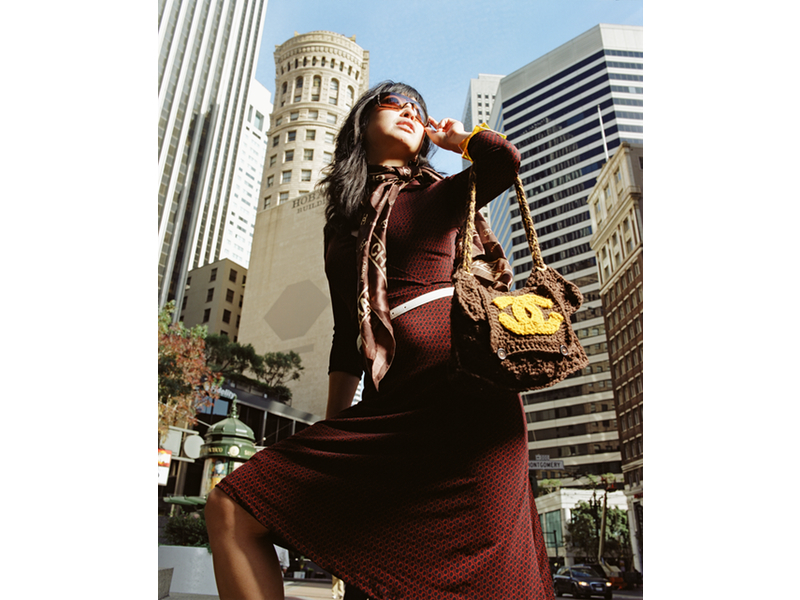
I don’t have a formal pattern for this particular handbag, but wanted to share tips on how I made it. So far, I’ve been “freeforming” it on every counterfeit handbag I’ve made, trying to be inventive on how to interpret the textures and parts. I’m hoping that folks try out their own techniques and ideas in making their bags, but it’s also useful to know what others have done, to get your creative juices flowing.

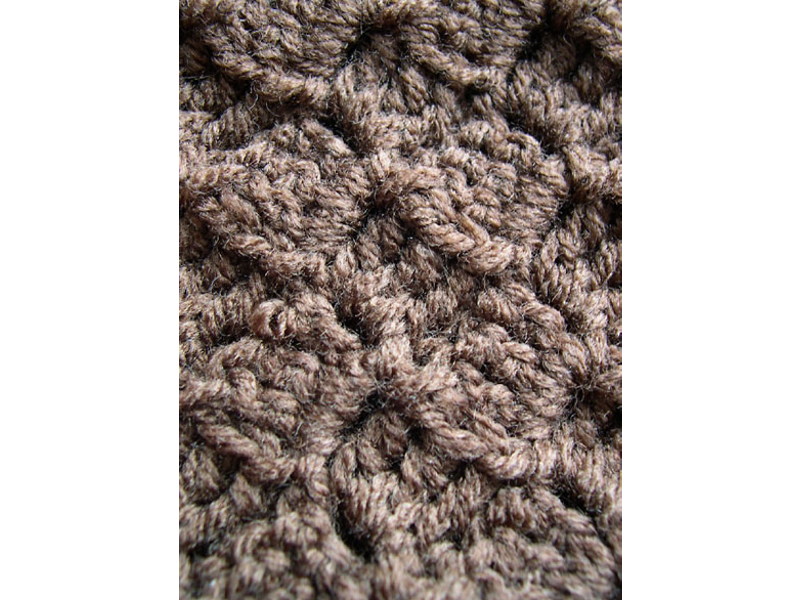
The following instructions assume a basic knowledge of crochet, and a healthy sense of experimentation on the maker’s part. I found it helpful to rummage through a few crochet books to choose from basic stitch patterns, and got inspiration from a few vintage 70s ones as well. There are great online tutorials on how to crochet that will help you build up shapes in no time at all. The body of the bag is made of worsted-weight brown and mustard acrylic yarn that I bought at my local drugstore (1 skein each is more than enough). I really like the chunky look, and it’s faster to work with a thicker yarn. Also, I make no bones about this being a “fancy” purse made out of nice or expensive yarn — for me it’s all about both “debasing” the original and using common materials to interpret the couture.

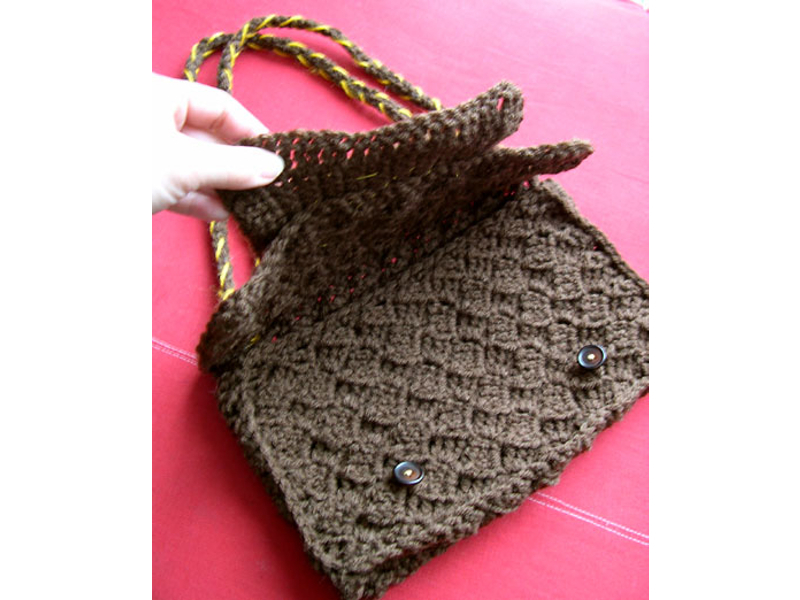
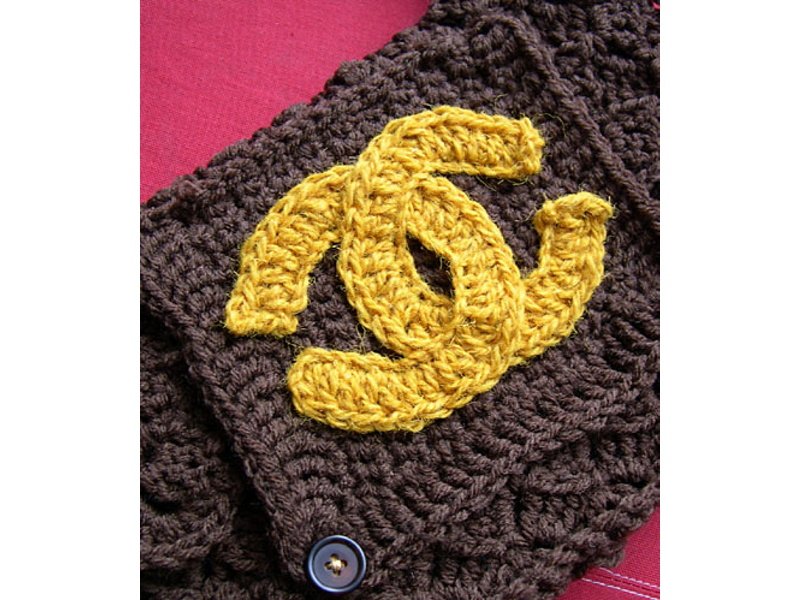
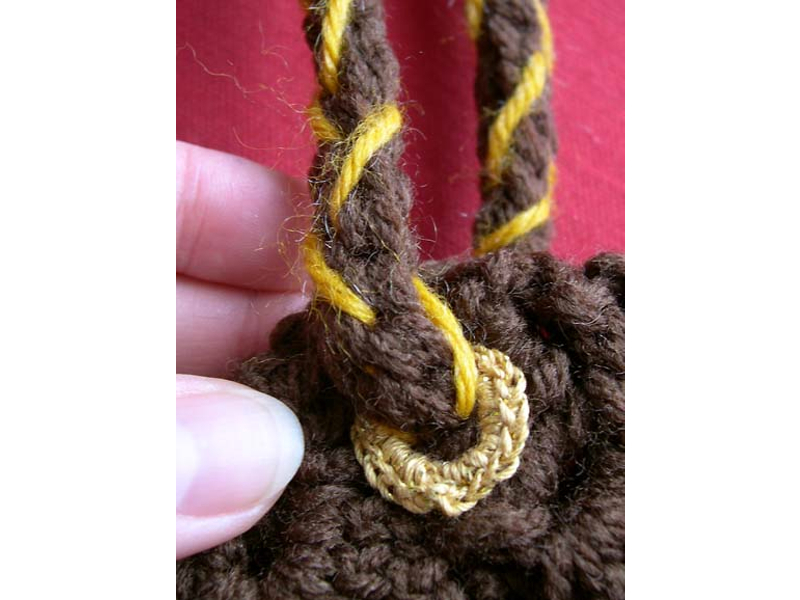
The purse has a front flap (where the logo is) that buttons down. Four little gold “grommets” (hand crocheted) are at the top corners, and a long handle is run through them to make an adjustable long single strap or 2 shorter double straps, depending on how you like to wear it.

Project Steps

Make the body in 4 separate pieces.

The front is a rectangle measuring about 11″ wide and 6″ long.

The sides/bottom are one long piece measuring about 1″ wide and 23″ long, or the length that it takes to wrap around the sides and bottom of the front.

The back/flap consists of a square measuring 11″ wide and 11″ long.

The logo panel is a smaller square measuring 6″ wide and 6″ long. This will eventually have the logo appliquéd to it, and is whipstitched to the back/flap.

The front, sides/bottom, and back/flap are joined using a slipstitch crochet, which makes it look kind of like raised piping. You could technically crochet the body of the bag “in the round” as one piece, but I liked the more structured look of having separate pieces joined together.

This faux “quilted” effect is just one way to achieve a grid pattern. It’s very textured and based on a vintage crochet bedspread I picked up from a thrift store a few years ago.

The squarish piece with the logo on it is made using a simple single crochet (sc) and then a double crochet (dc) border on the sides and bottom. I wanted something simple so that the logo would stand out better (see photo below).

Crochet and appliqué the logo.

The logo is super easy, but took a few tries to get it right. The trick is getting the C’s the right length so that when you appliqué them together it leaves the telltale gap between the curves, the letters aren’t too chunky, and it’s legible.

To make the logo: Chain a length that corresponds to the inside length of your final C, then add an extra 2 chains.

Turn and double crochet (dc) into each chain about a third of the way to the end, and dc twice into a single chain. Continue along, and about two-thirds of the way to the end, dc twice again into a single chain. Finish the length with a single dc in each chain. You’ll notice the extra dc’s help create the curve of the C.

I used thread instead of yarn to appliqué the logo because I didn’t want too much of a topstitched look. Make sure to intertwine the C’s, as opposed to just laying one on top of the other. Remember, it’s all about being a good counterfeiter!

Crochet the “grommets.”

The grommets are made using a much finer gold string. Each has about a 1⁄2″ open circle inside. I used a very tiny hook and chained 10 stitches, joined them, and did a single crochet (sc) inside the circle until it felt right.

I made 4 of them and stitched 2 sets (one in the front, one in the back) at each corner. The quilted pattern of the body uses triple crochet stitches (tc), so there’s an openness to it, and I could find a “hole” easily.

Make the strap.

Using a technique from my 70s crochet book on how to make a belt tie for a caftan (awesome!), I figured out how to make a relatively supple, solid, not too thick, and not too skinny strap. The strap is first worked in brown yarn, and then embroidered with a single mustard thread at the end.

To make the strap: Chain using 2 brown yarns at the same time (for double thickness), making it the final length of the strap. Mine is 40″ total. The strap is adjustable, and can be worn as shorter double straps or a longer single strap, depending on how you adjust them through the grommets.

Guide one end of your chain through one set of grommets on one side, and then through the second set of grommets.

Join together the chain ends in some manner so they are permanently looped through the bag.

Slip stitch through each single chain, still using 2 yarns at once, going around the loop until you come back to your start. This makes the strap thicker and less flimsy to hold.

Use a yarn needle to thread a long length of mustard yarn. I had to embroider the yarn around the strap twice to achieve the effect I wanted.

Voilà! That’s pretty much it! I added buttons at the end, but didn’t necessarily need them. I want to put in a brown lining with perhaps a zipper to really finish it off and make it functional. The laciness of the “quilted” pattern means there are lots of holes for small things to fall out of (goodbye lipstick!), which isn’t so great. Hence, a lining is needed.

I wear this purse out into the world and it never fails to either confuse or amaze people, depending on how they feel about counterfeiting, or their idea of the “proper” place of craft. I have dreams of an army of crocheters putting busy hands toward crafting their hearts’ desires, and both laughing at and paying homage to the “high-end” fashion world! Vive la révolution!

Conclusion

This project first appeared in CRAFT Volume 02, pages 54-60.