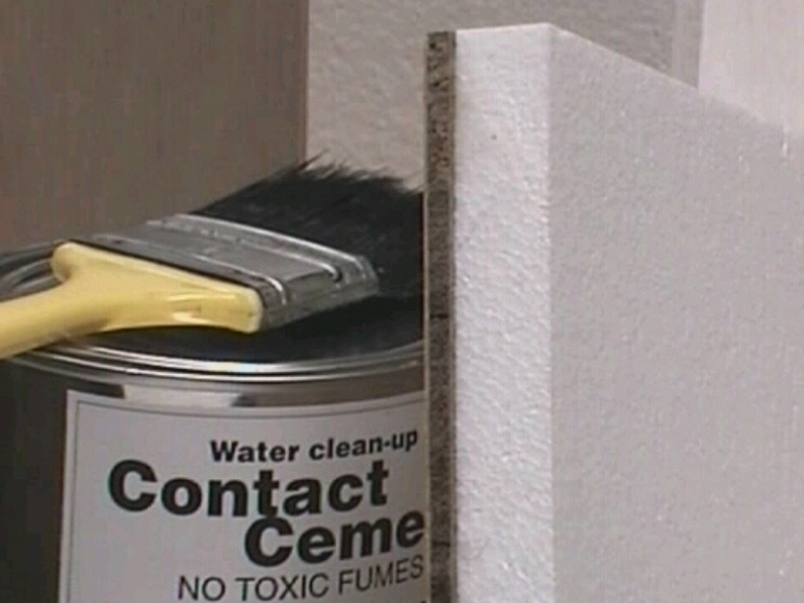
Discover how to create your own stretched-fabric decorative wall panel with the Lordéco® Method! Creative flexibility and precision. A quick way for decorating graphically with fabric and/or yarn. Quick gripping, quick results! The 10-Step Lordéco® Method is easy to learn and a small decorative panel can made in a couple of hours.

Project Steps

Here is a preview of the panel that will be made.

First choose the appropriate supporting panel: 1″ Rigid High-Density Polystyrene board (shown here) OR 1″ Rigid Fiberglass board OR Rigid mineral fiber board.

Second: For large decorative murals attach supporting panel directly to an existing wall with screws. For hanging decorative accent panels mount supporting panel to 1/4″ – 1/2″ plywood backing board with either screws or glue.

If necessary, trim the finished panel with a sharp knife, fine hand saw, band saw, circular saw or router. (Proper ventilation and the wearing of a mask and safety glasses is advisable.)

With a black pen or soft lead pencil draw the intended design on the surface of the supporting panel.

Draw a straight line on the side of the supporting panel 1/2″ below the upper edge.

Following the lines of the design just drawn, cut grooves manually with the Lordéco® 1/2″ Groove-cutting saw or with a portable jig saw set at low speed; also cut a groove on the side, 1/2″ below the upper edge. The depth of the groove must be exactly the same as the width of the Lordéco® Gripping-band, i.e., 1/2″.

Holding the Lordéco® Gripping-band in your hand, cut the gripping-band to the required length minus 1/16″ at each end (total 1/8″ shorter).

Clip off the sharp corners using a nail-clipper and use a file or sandpaper to obtain smoother rounded corners.

Cut lateral openings at intersection points (1/8″ wide, 1/2″ deep).

Where the Lordéco® Gripping-band reaches the edge of the supporting panel, cut a 1/2″ slit along the bottom fold of the gripping-band.

Using your hands, push the gripping-band into the groove until the gripping-band is flush with the supporting panel’s surface.

Complete the insertion using the flat side of the Lordéco® Pushing-blade or a small roller.

The gripping-bands now form a network of ridges on the surface of the supporting panel. With the Lordéco® Pushing-blade, break open the compressed channels of the gripping-bands then insert Lordéco® Guiding-wedge into all the compressed channels.

The network of ridges thus outlines each section exactly for easily shaping each piece of batting and fabric or for inserting yarn. Attach a block of foam (1/2″ or 1/4″ width) to the lower blade of the scissors using double-sided tape. Holding the block against the outer side of the guiding-wedge, cut around the intended section.

Use a 1/2″ cube for cutting an extra margin of fabric. Note: In Steps 12 and 13 the pieces of batting and fabric can be held temporarily in place with pins.

Proceed to insert batting into the gripping-bands. Holding the pushing-blade firmly, push the 1/4″ of excess batting smoothly and precisely against the guiding-wedge and down into the gripping-band.

Performing the same movement with the pushing-blade, insert the extra fabric or wool into the gripping-band. Repeat for each section. At intersections, trim excess batting and fabric corners or wool so that you do not overfill the intersection.

When all fabric or wool pieces are neatly inserted, with a pair of pliers gently remove all guiding-wedges. With a flat hand smooth out the surface tension in all directions. At the same time, holding the pushing-blade in the other hand, carefully run it into and along the gripping-band around each section of fabric to eliminate any wrinkles.