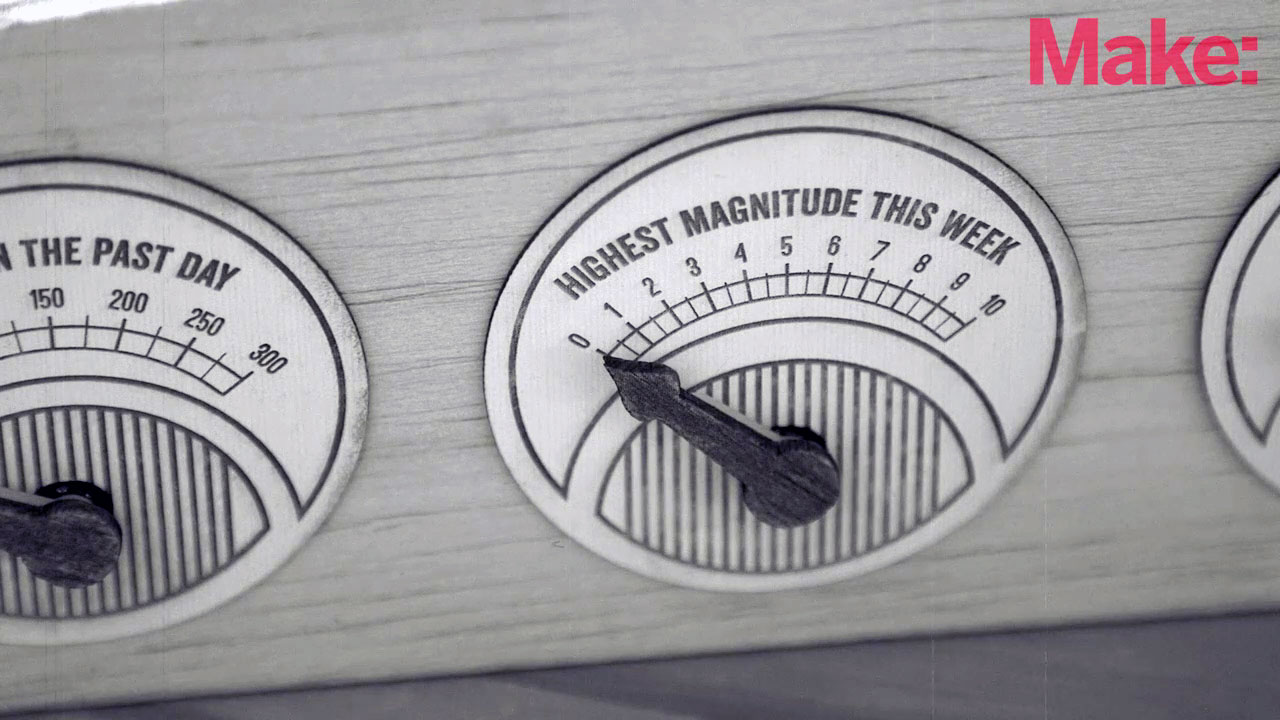
The Data Dial Dashboard brings back the fun of old-school analog dial gauges while updating them with internet connectivity. In this project we will use an Arduino, Ethernet shield, and 3 servos to create a system for tracking global earthquake activity. The data are pulled from the USGS real-time data feeds page. With a little hacking, it is easily adapted to track your unanswered e-mail count, the speed of your internet connection, the price of rice in Rhode Island, or any other data you can scrape off the ‘net!
Projects from Make: Magazine
Data Dial Dashboard
- Like
- Digg
- Del
- Tumblr
- VKontakte
- Flattr
- Buffer
- Love This
- Odnoklassniki
- Meneame
- Blogger
- Amazon
- Yahoo Mail
- Gmail
- AOL
- Newsvine
- HackerNews
- Evernote
- MySpace
- Mail.ru
- Viadeo
- Line
- Comments
- Yummly
- SMS
- Viber
- Telegram
- Subscribe
- Skype
- Facebook Messenger
- Kakao
- LiveJournal
- Yammer
- Edgar
- Fintel
- Mix
- Instapaper
- Copy Link
Steps
Advertisement
Step #1: On the case
- We'll start by building the case. You can cut the parts out of balsa wood by hand, as shown here, or, if you have access to a laser cutter, easily make them from plywood, acrylic, or some other material. Begin by downloading the templates, Arduino sketches, and other digital assets for this project from the MAKE Github repository.
- Print out the paper templates and use scissors to cut out the individual parts, sparing the lines. Tape the templates to your balsa wood and cut around them with a sharp utility knife. Make each cut in multiple passes, rather than trying to cut all the way through in one stroke.
- There are seven parts altogether: the large front bezel, the two mirror-image sidewalls, the bottom brace, and the three small spacers. Use your utility knife to clean up the rough cuts so the parts slot neatly together.
- Test-assemble the case by slotting the sidewalls into the bottom brace, then the front bezel onto the sidewalls. Make sure the holes in the spacers are the same size as the holes in the front bezel.
Conclusion
If your dials don't move into place, open the Arduino IDE's "Serial Monitor" window at 115200 baud and check the output. Here you can see status updates as the device attempts to connect to the web to download the data it needs to update the dials. Once it has made a connection, the dial output values will also report in the Serial Monitor window.
If you see the error message "Failed to configure Ethernet using DHCP," check to make sure your Ethernet cable is plugged in and your network is configured to use DCHP.
If you see "connection failed," try to visit http://earthquake.usgs.gov/ on a computer connected to the same network equipment as the Data Dial Dashboard. If you don't have any problems opening the site this way, wait a few minutes to let the device try again.