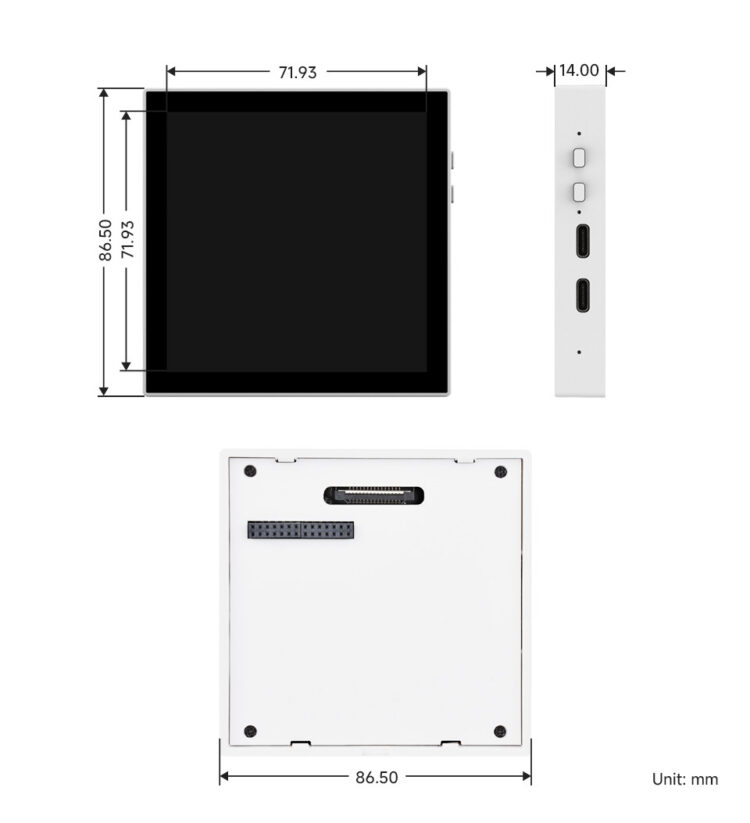
p3a is a fun desktop companion. It is a 4-inch little screen that you set up once, and it keeps going on its own, playing animated artworks (“gifs”) and periodically obtaining new ones from the internet. It connects to Giphy.com and to Makapix.Club (an open-source pixel art social network), or you can copy your own offline files.

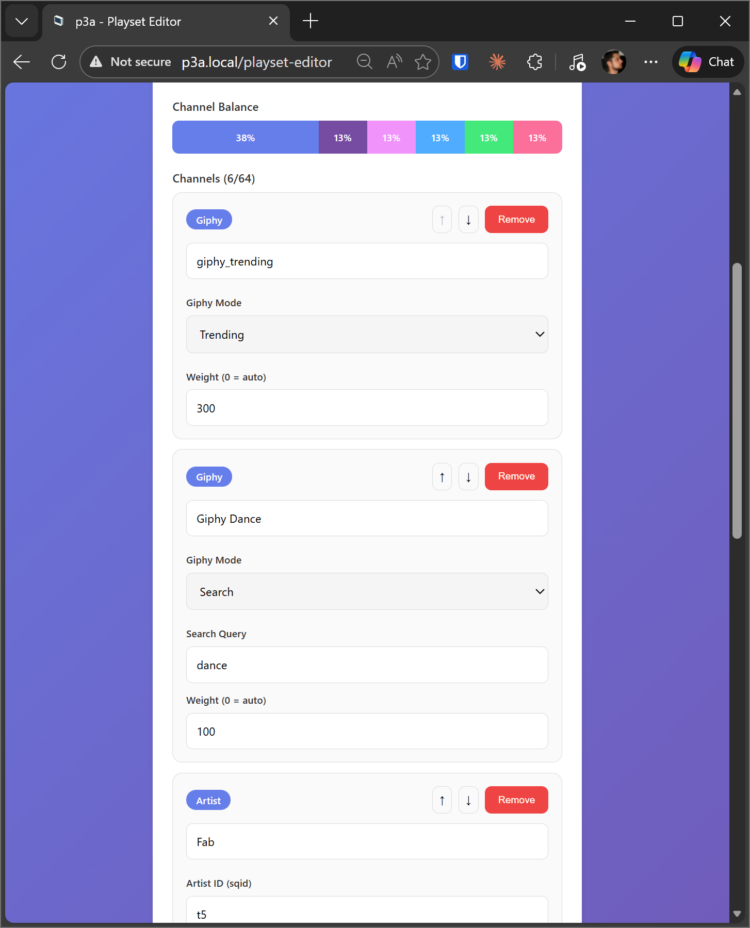
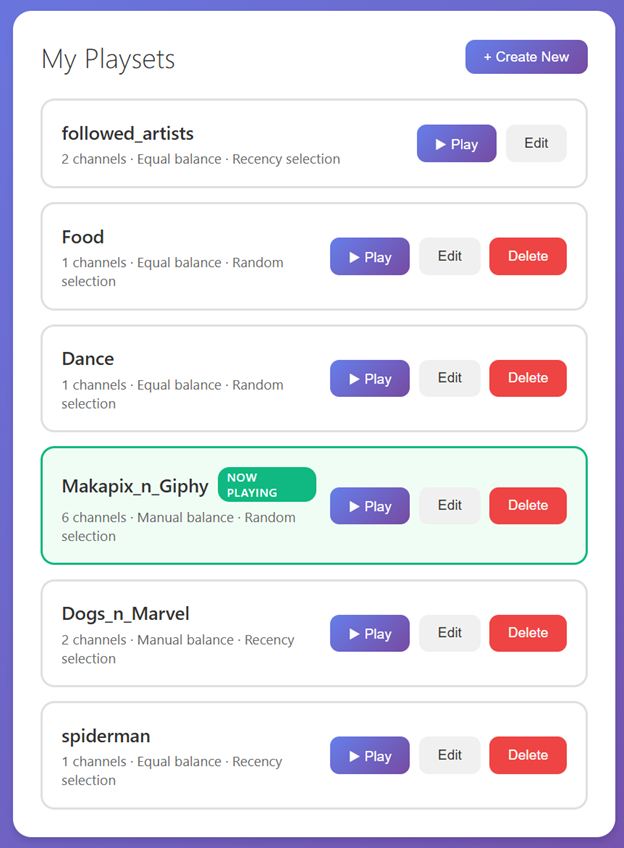
Is a party coming tonight? Set your p3a to play “party” gifs. Must work for hours? Switch to “work” gifs. You can configure different play settings (“playsets”) to fit different moments. As a bonus feature, you can also use the device as a very special 4-inch monitor for PICO-8 games.

Photography by Fabrício Kury

Under the hood, p3a is a sophisticated animated art player that leverages the powerful ESP32-P4, which is the most capable variant of ESP32 as of today. A journey through p3a’s codebase reveals techniques and technologies including:

  • Multi-buffered display pipeline for freeze-less, gapless playback
  • Full support for file formats GIF, WEBP, PNG and JPEG, including animations (GIF/WEBP) and alpha channels (WEBP/PNG)
  • Mutual TLS (Transport Layer Security): both client and server authenticate each other
  • Multicast DNS to host a local website at http://p3a.local/
  • Soft Access Point with Captive Portal for wi-fi configuration
  • Over-The-Air Updates using the GitHub Releases infrastructure
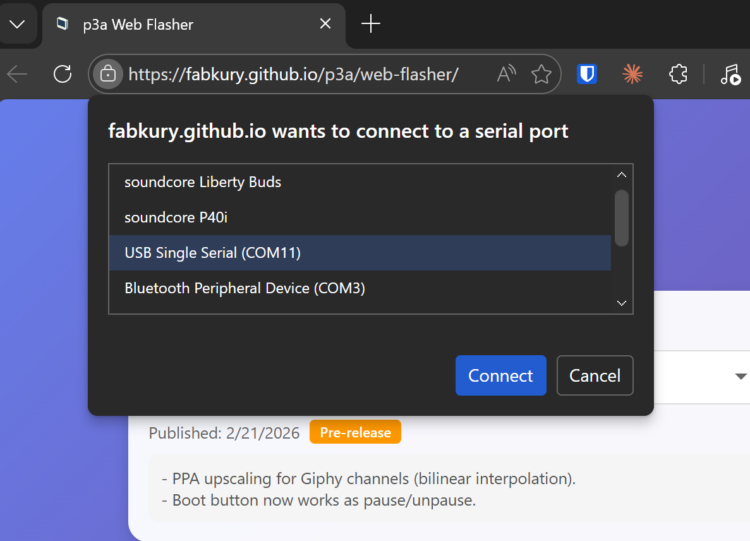
  • Firmware flashing using WebSerial on the browser
  • WebSockets to stream PICO-8 games over WiFi
  • Online APIs: Makapix.Club (MQTT) and Giphy.com (HTTPS)

Don’t be dismayed by the technicalities! As a project, p3a really is an invitation to:

  • Insert a microSD card into its slot
  • Flash the device using the web browser: no software to install, no command line
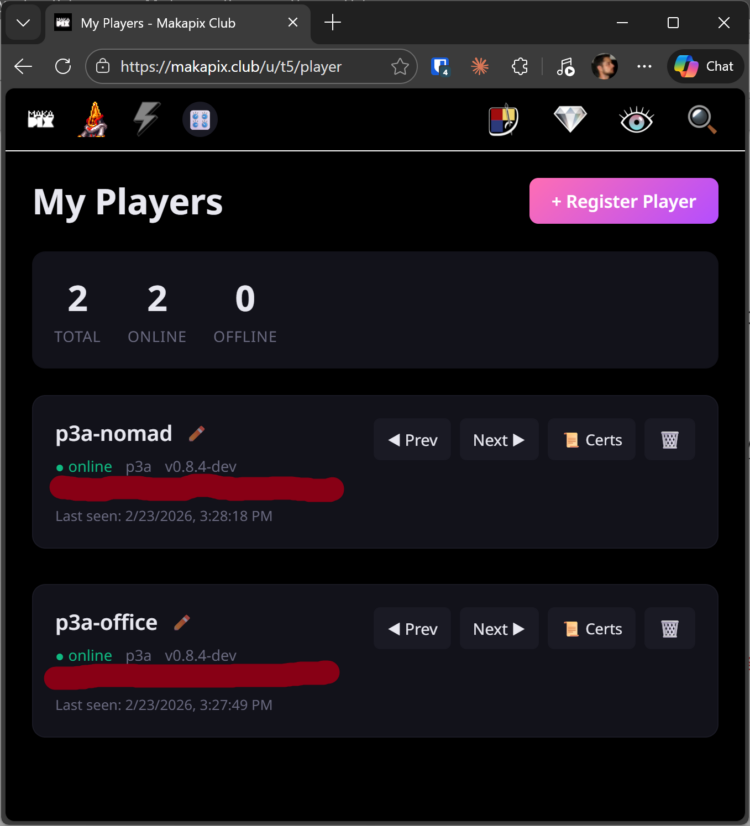
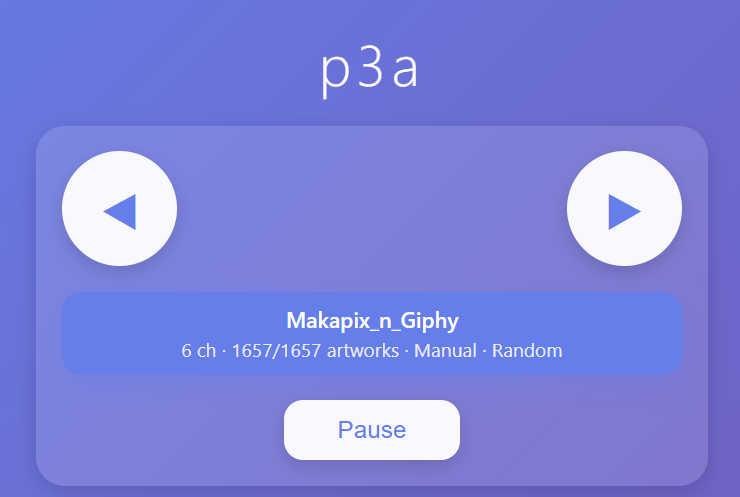
  • Control your p3a using the web browser
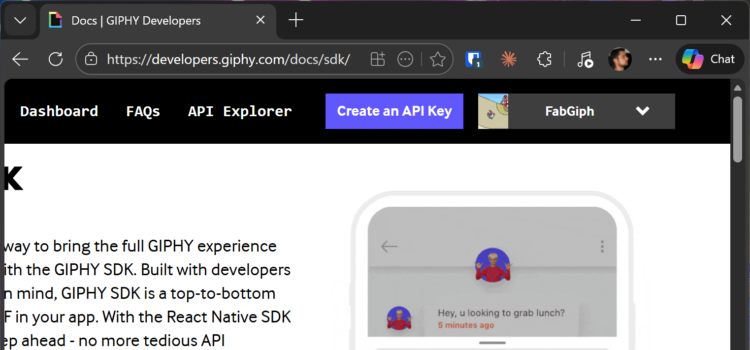
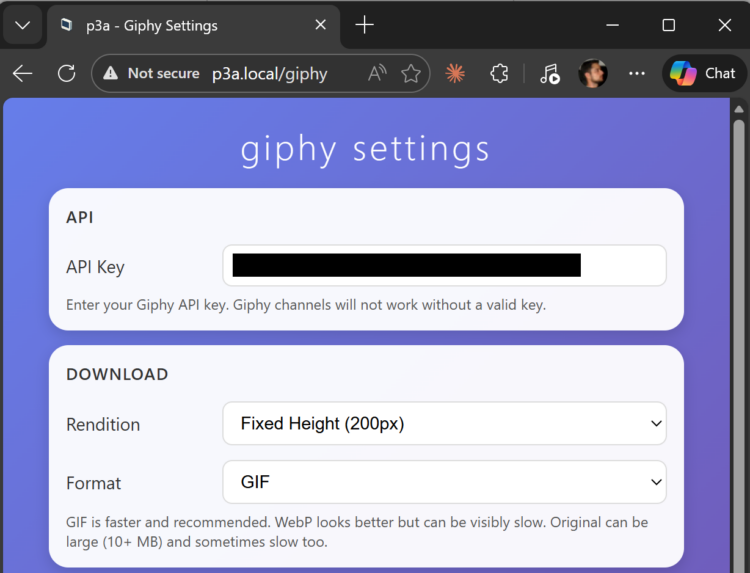
  • Configure it with a free Giphy.com API key
  • Register it for free at Makapix.Club
  • Have fun!

Project Steps

Step 1. Obtain the Hardware

p3a is based on a board called ESP32-P4-WIFI6-Touch-LCD-4B produced by a company called Waveshare. There is nothing to assemble (besides inserting the SD card)! The unit comes ready out of the box.

ESP32-P4-WIFI6-Touch-LCD-4B can be bought from Waveshare directly for the best unit price, but not the best shipping cost and speed. If you buy just one, it might be cheaper to buy from Amazon.


This is the Waveshare link:

You can also buy it from Amazon:

Amazon charges more per unit, but shipping is faster and potentially free.

Wherever you buy it, make sure to choose the “Onboard camera interface” version called ESP32-P4-WIFI6-Touch-LCD-4B, NOT the “Onboard Ethernet port + RS485 + 2-ch relay” one which is called ESP32-P4-86-Panel-ETH-2RO. Despite some similarities, those two devices are fundamentally different in their capabilities. p3a works ONLY on the ESP32-P4-WIFI6-Touch-LCD-4B.

Wherever you buy your ESP32-P4-WIFI6-Touch-LCD-4B, that is probably going to be the best place to buy your microSD card. Just include one in the order to get them together:

Step 2. Insert the MicroSD Card

Lay your ESP32-P4-WIFI6-Touch-LCD-4B screen-down on a table. See the four screws at the back. Unscrew those four screws to open the back plate.


The microSD card in the photo is next to where it goes on the board.


See the words “open” and “lock.” The metal slot has a sliding mechanism:

  • Slide it down to unlock
  • Flip it up to open
  • Lay the microSD card on the slot
  • Flip the metal back down
  • Slide it up to lock again

Once the microSD card is firmly in its place, put the back plate back on, and screw the screws back in.

Step 3. Flash the p3a Firmware

Now it’s time to connect the device to your computer. The ESP32-P4-WIFI6-Touch-LCD-4B has two USB-C ports:

  • USB-HS: This is the port closer to the buttons.
  • USB-UART: This is the port farther from the buttons.


To flash the firmware, you need to connect the ESP32-P4-WIFI6-Touch-LCD-4B to your computer using the USB-UART port.

With the device connected via USB, visit https://fabkury.github.io/p3a/web-flasher/ using browser Edge, Chrome or Opera. Firefox and Safari do not work because they don’t support WebSerial. Chrome on an Android device (e.g. a tablet) may work, but it varies a lot on the device.

Once in the page, click “Connect”. The browser will ask you to select which device is the ESP32-P4-WIFI6-Touch-LCD-4B. It should show as “USB Single Serial”, while your COMx port number will vary.

After selecting “USB Single Serial”, click “Connect”, and then click “Flash Device”. The process should take about 4 minutes. Once it’s done, congratulations, your ESP32-P4-WIFI6-Touch-LCD-4B is now a p3a!

Alternative flashing methods

Using the Web Flasher is the easiest method, but not the only one. Please refer to the flashing guide (https://github.com/fabkury/p3a/blob/main/docs/flash-p3a.md) for detailed instructions on how to flash using two other methods:

  • standalone flasher program p3a-flasher.exe (Windows only),
  • or command line (any operating system).

Step 4. Connect it to Your Wi-Fi

When it doesn’t have valid wi-fi credentials, p3a creates its own wi-fi network called p3a-setup. All you have to do is:

  • Connect your phone or laptop to the p3a-setup network.
    • If it asks if you want to remain connected despite having no internet, click “yes”.
  • Open the browser and navigate to http://p3a.local/ or to http://192.168.4.1/. Notice it’s http, not https!
  • Enter your network credentials: network SSID and password.
  • Click “Save & Reboot”.

With that, p3a will reboot and try to connect to your wi-fi. If it succeeds, it will start serving http://p3a.local/ on your wi-fi only. If it fails, it will fall back to serving p3a-setup. If the p3a-setup network still exists, that means p3a could not connect to your wi-fi using the credentials provided. As soon as it can connect, p3a-setup will cease to exist.

Once p3a is successfully connected to your wi-fi, you can go to the same address http://p3a.local/ to control the device.


Step 5. Connect Your p3a to Giphy and Makapix Club

To obtain artworks from Giphy.com, p3a needs an API key. In the case of Makapix Club, it needs to be registered.

Connect p3a to Giphy

Visit developers.giphy.com and log in (create an account if you don’t have one). While in developers.giphy.com/dashboard, create an API key. 


Then, go to p3a.local and enter your API key in the “Giphy” settings page.

Connect p3a to Makapix Club

Visit makapix.club and log in (create an account if you don’t have one). Go to your profile page (click on your profile picture) and click the  “TV” button.

In the “My Players” page, click “+ Register Player.” Then, on a separate browser tab, go to http://p3a.local/ again (or whatever you configured your web UI address to be), and go to “Settings”. On the Settings page, click “Enter Provisioning Mode.” p3a will display the registration code you must enter on the Makapix Club website to register.

Good job, your p3a is all set up! Now let’s play something.

Step 6. Using your p3a

p3a is designed to be on 24 hours a day. When told to play something, it begins downloading artworks and keeps downloading until the channel cache is complete. When you tap to change animations, you cycle through the files it has already downloaded. In other words, be a little bit patient, and new artworks will come.

In http://p3a.local/, you can see what’s currently playing, and how many artworks there are in the cache:

The “X/Y artworks” numbers mean:

  • X: How many files have already been downloaded.
  • Y: How many files are in the list.

Channels are how p3a abstracts the sources of artwork it has access to. Examples of channels include:

  • Recommended Artworks from Makapix Club
  • Recent Artworks from Makapix Club
  • Trending GIFs from Giphy
  • The results of a search at Giphy
  • The artworks containing a hashtag at Makapix Club

Within each channel, p3a can play artworks in order, or randomly – that’s called the “pick mode”. You can also mix channels using the “exposure mode” settings. The “exposure mode” determines how channels are mixed. For example, you can define manual channel weights, giving the proportion of the time should be occupied by each channel. For example:

  • “70% recommended artworks from Makapix Club, 30% Trending GIFs from Giphy”
  • “20% work GIFs, 40% office GIFs, 40% energy GIFs”
  • …and so on.

If you don’t want to set channel weights, you can set “exposure mode” to “equal”, and all channels will display the same number of artworks

A set of configurations of what to play is called a “playset”. In p3a.local/playset-editor, you can create playsets, so you can easily switch between them. Each playset may have up to 64 channels. 

After creating a playset, you can play it by pressing “Play”:

There are 4 ways to control p3a:

  • Using the browser at http://p3a.local/
  • Using the browser at makapix.club
  • Using the touchscreen
  • Using the REST API: all controls are available through the API

…learn everything about them at github.com/fabkury/p3a ;)

Bonus feature: stream PICO-8 games to p3a

p3a also has a unique feature where it can act as a monitor to PICO-8 games. This is how it works:

  1. With p3a connected to your wi-fi, open http://p3a.local/ on your laptop and click PICO-8
  2. Load any .p8 or .p8.png cart (local file or from URL)
  3. The browser runs the game using fake-08 compiled to WebAssembly
  4. Frames stream over Wi-Fi to the device via WebSocket

Performance will depend on the wi-fi conditions. The device automatically adjusts the frame rate during gameplay.

Bonus tip: power p3a with your smartphone!

Not at home? No problem! p3a’s power consumption is low enough that it can be powered by anything, including your smartphone. Just connect the cable and show off.

Conclusion

With less than 1 hour of effort you can flash your ESP32-P4-WIFI6-Touch-LCD-4B into a p3a and have a fun companion for long hours at the computer, or just for decorating a nook in your home. Once set up, you can control it easily from your phone or integrate with other systems via the REST API.

Going deeper: get involved!

Both the p3a and the Makapix Club projects welcome contributions to their open-source codebase. Check out github.com/fabkury/p3a and github.com/fabkury/makapix to learn more, or visit the Makapix Club Discord server: https://discord.gg/xk9umcujXV.