One of the most useful sensors for automating a haunted house is a motion sensor. This sensor lets you activate your special effects only when a new group of people arrives. That way the surprise won’t be ruined by people seeing or hearing the effects before they get close enough.

In this project, I am going to show you several ways that you can use a motion sensor to automate your Halloween setup.

Project Steps

How Passive Infrared (PIR) Motion Sensors Work

For a good in-depth tutorial of all things related to PIR motion sensors you can check out this page by adafruit:

http://www.ladyada.net/learn/sensors/pir.html.

I will attempt to give a brief summary here.

Passive Infrared (PIR) motion sensors work by detecting the movement of heat. They detect heat with a pair of pyroelectric elements that turn the incoming heat into a small electrical signal. The pyroelectric elements are wired in the opposite polarity to each other. So the signals normally cancel each other out. But when a heat source moves in front of the sensor, it creates a series of positive and negative pulses that are detected by the microprocessor. The PIR sensor then outputs a HIGH signal to indicate that motion was detected. This signal can then be used to trigger other circuits such as lights, alarms or cameras.

Interface a Motion Sensor with a Microcontroller

There are a number of PIR motion sensor modules available that you can easily interface with a microcontroller. For instance, I am using a Radio Shack Brand PIR sensor. It has three pins GND, VCC, and OUT. The GND pin connects to the GND pin on your microcontroller. The VCC pin can connect to the 5V pin, the 3.3V pin or a digital output pin set to HIGH. The OUT pin connects to an input pin on the microcontroller.

I am connecting it to an Arduino Uno. You can do this with jumper cables. But I decided to just plug it directly into the board. You can do this by inserting the pins so that the OUT pin connects to pin 12 on the board, the VCC pin connects to pin 13 on the board and the GND pin connects to the GND pin on the board. Pin 13 is set to output mode and outputs a HIGH signal. Pin 12 is set to input mode.

You can read the signal from the motion sensor with the digitalRead() function. Then you can use the digitalWrite() function to output a signal to activate your special effects. Here is some example code that you could use.

Use the Motion Sensor Module to Activate Low Powered Electronics

Once you have connected your motion sensor module to the microcontroller, you can use it to activate any number of electrical devices. You can use a relay shield to turn electronics on and off. You can add a motor shield and control motors. You can activate sound effects. You can even make a motion sensitive camera. The only limit is your imagination.

Make a Motion-Activated AC Outlet

If you want to control AC devices with a motion sensor, then it may be easier to just modify a motion sensor that is already designed to work with AC devices. A good example of this is motion-activated security lights. I had an old Heath Zenith motion-activated light that I was able to turn into a motion-activated AC outlet. To do this, you will also need a three prong power cord with a male end, a three prong power cord with a female end, and four insulated twist-on connectors.

Start by identifying the wires that are connected to the motion sensor unit. In this case, the green wire was ground. The white wire was neutral. The black wire was the hot input to the sensor and the red wire was the hot output from the sensor. This color code may vary depending on where you live.

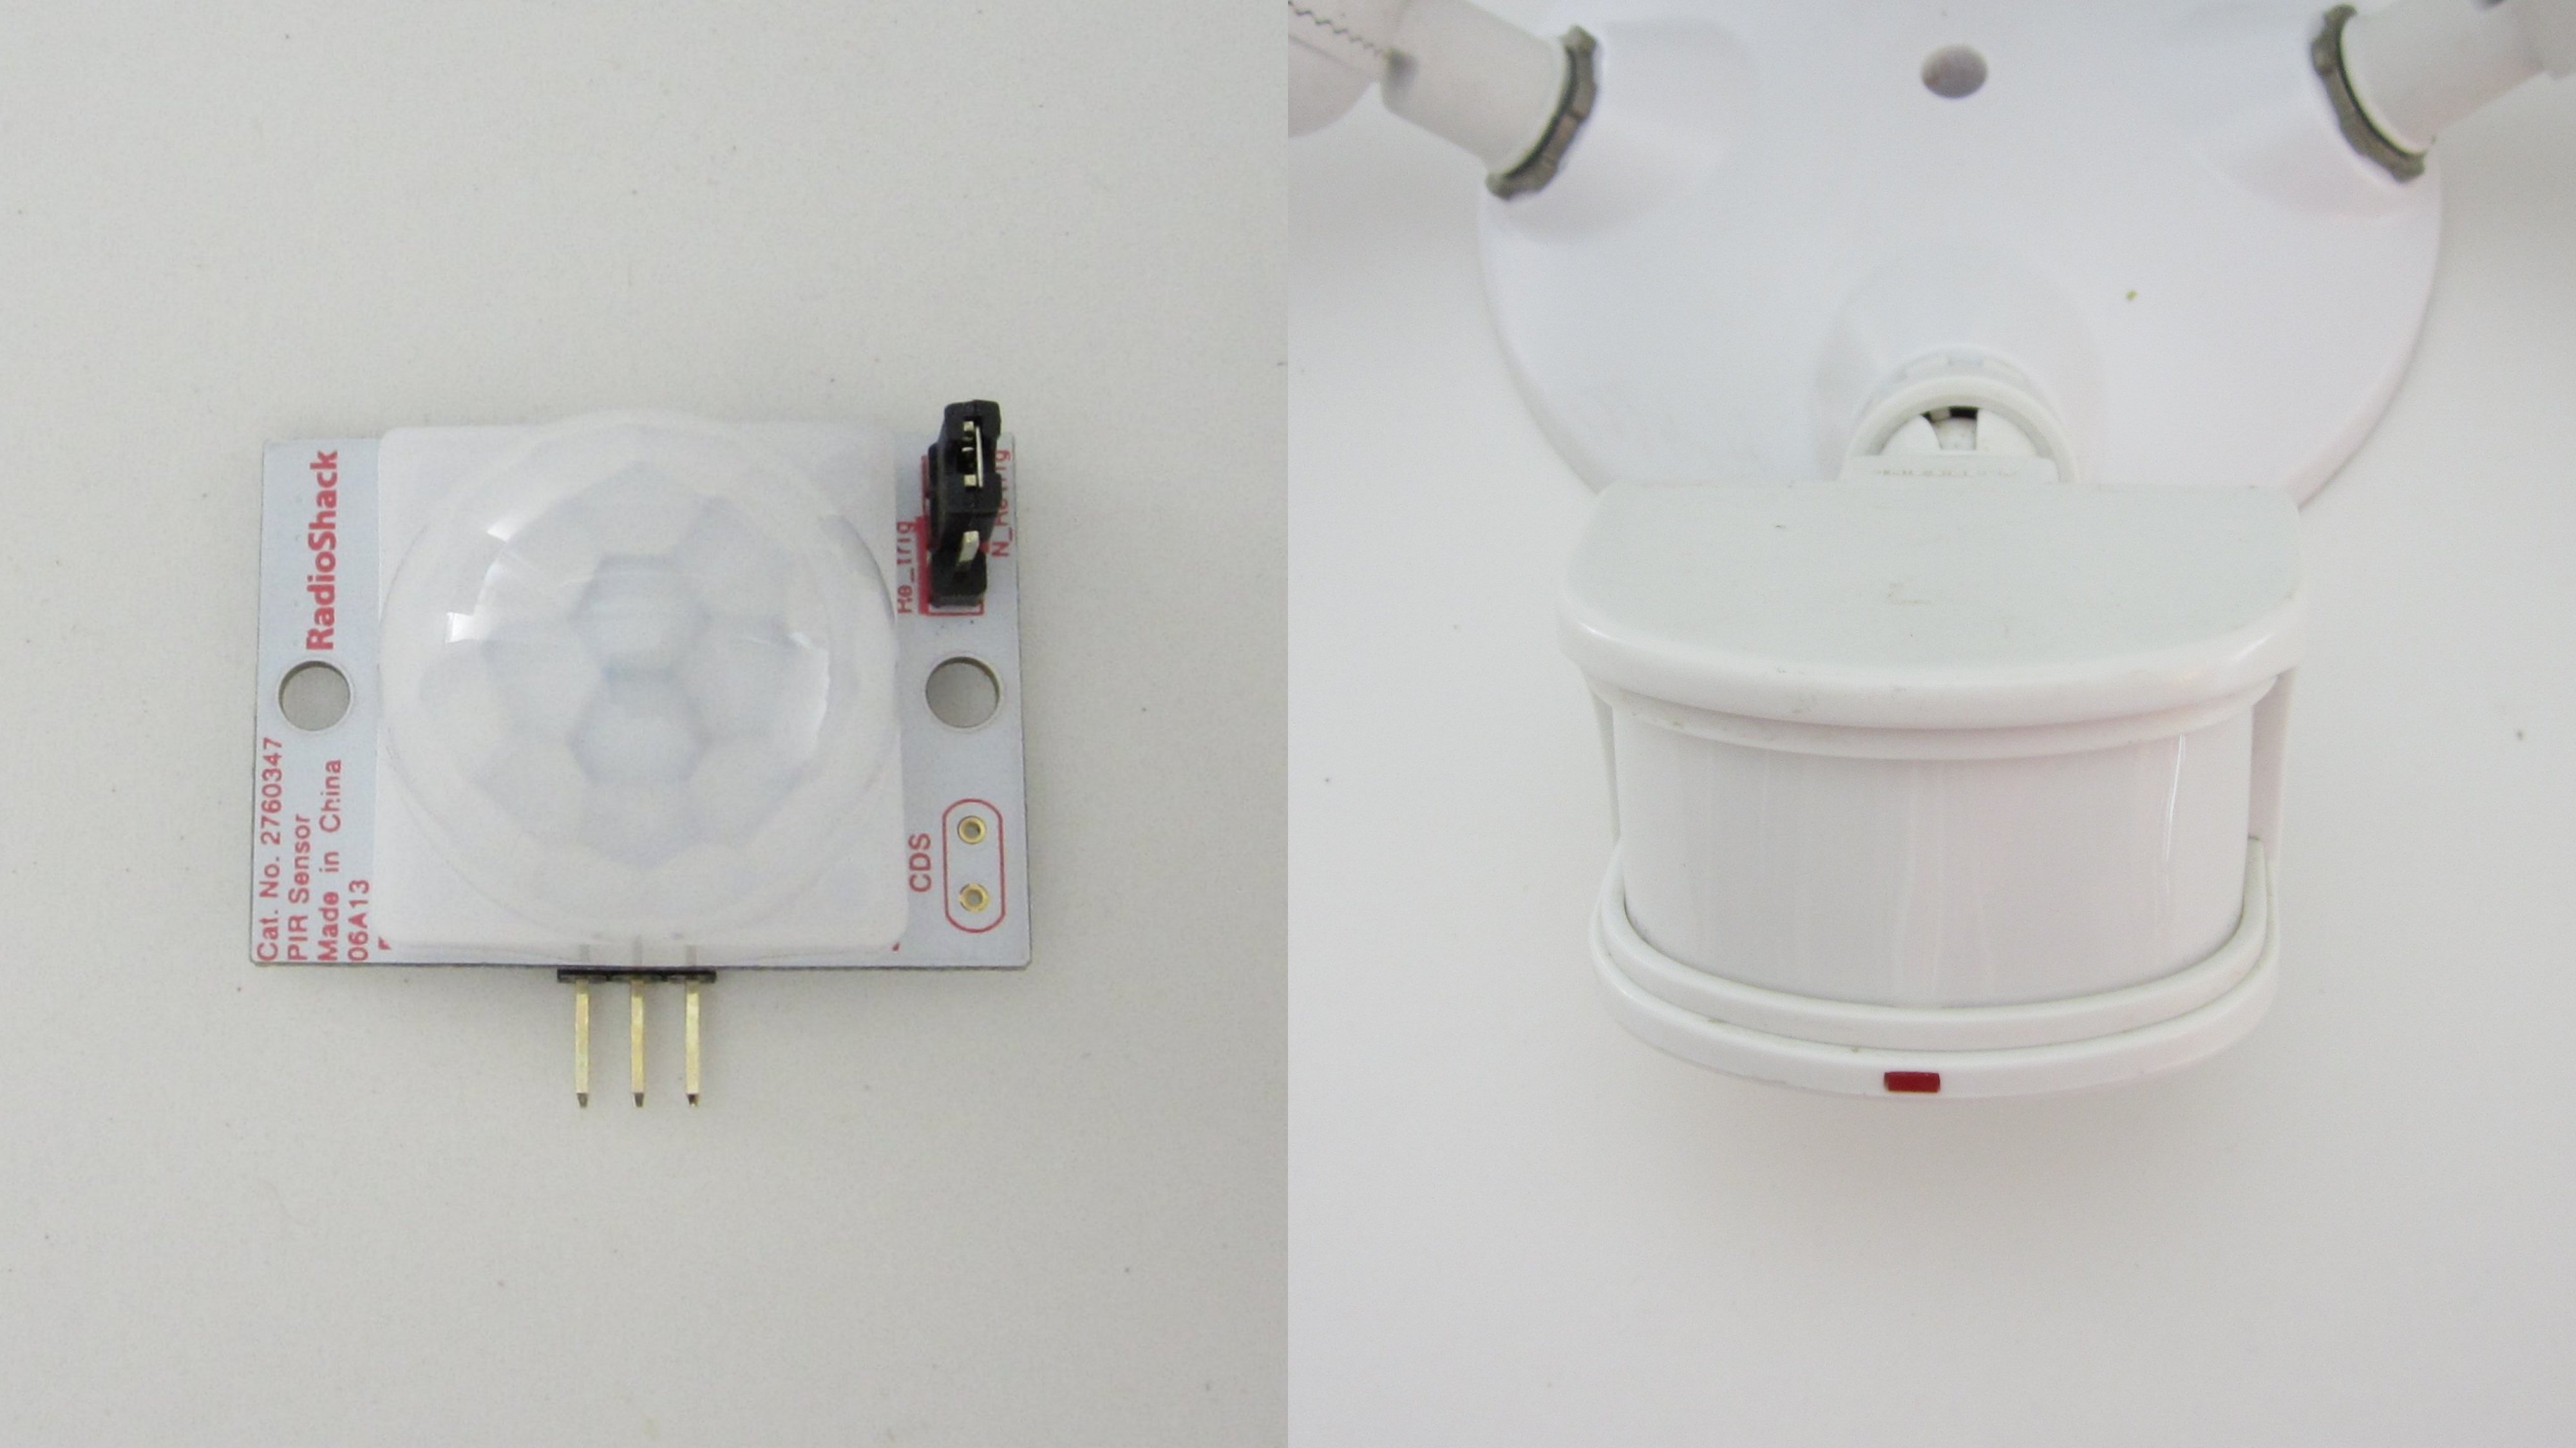
Next you need to separate the motion sensor from the attached lights. Start by disconnecting the wires. You will probably need to cut the wires at the connectors. Remove the motion sensor assembly by unscrewing it from the mounting plate.

Now you need to connect the wires from the motion sensor to the appropriate wires on the two power cords. Start by cutting the power cords and separating each of their internal wires. Then strip the insulation off the ends of each of the wires. When connecting the wires, all the connections should be made with insulated twist-on wire connectors. Start by connecting all of the green wires and any bare wires together. Next, connect one wire from the male power cord, and one wire from the female power cord to the white wire on the motion sensor. Then connect the third wire from the male power cord to the black wire on the motion sensor. Lastly, connect the third wire from the female power cord to the red wire from the motion sensor. As an extra safety precaution, I enclosed all the connections in an insulated plastic housing.

Now you have an AC outlet that can be activated by a motion sensor. Just plug the male power cord into a wall outlet and plug your appliance into the female power cord. The motion sensor should be able to power appliances that are rated as high as the original lights. In my case, the original lights where three 100 watt halogen lights. So it should be capable of driving circuits up to 300 watts.

Use the Motion-Activated AC Outlet to Trigger Special Effects

Anything that you plug into your motion sensor will turn on when someone enters the room. You can activate sounds effects. You can turn on power tools. You can activate solenoids and valves. The only limit is your imagination.

As a really simple example, I used my motion sensor to turn on lights that illuminate an actor as they jump out at your guests. When set up properly, this can be very effective. Start by connecting a lamp or work light to the motion sensor. Make sure that the room is very dimly lit with only enough light for your guests to see where they are walking. It may help to have a walkway that is lit with a black light and black light reactive paint or tape. The actor should be in almost complete darkness. When a new group walks into the room and steps in front of the motion sensor, it will turn on the lamp and suddenly reveal the actor who can yell and jump at them.

Safety Note: You don’t want to use the original halogen lights because they create a lot of heat and can be a fire hazard indoors.

Optional: Make Modifications to the Motion Sensor Module

There are several ways that you can modify a PIR motion sensor to change how it operates. On the Radio Shack PIR module there are a lot of changes that you can make to the board. There is a jumper pin that lets you select whether the sensor outputs a HIGH signal every time that it senses motion or only every four seconds. You can add a CdS photoresistor to the board so that it only activates a circuit when it is dark. You can add a connector to set the range of the sensor. You can also add a connector to set a delay.

The Heath Zennith light lets you adjust its setting with a series of switches. I have the “On Time” set to Test mode. This turns the output off after five seconds. I have the “Lamp Mode” set to normal. I have the “Dual Bright” option turned off.

You can also make external modifications to the motion sensor. For instance, if you want to reduce the area where the sensor will detect motion, you can cover up part of the lens with tape. You can also make the sensor more directional by using material such as pipe to block part of the field of view of the sensor.