ghostinaction1

This article appeared in the Make: Halloween issue.
This article appeared in the Make: Halloween special issue.

This ghost prop was pioneered by Doug Ferguson of Phantasmechanics, who made it public domain in 1997. It uses a slow motor and a simple system of pulleys to create an eerie, ghostly motion that literally stops cars in front of homes. Open source and cheap to make, it’s become a haunting classic.

CAUTION! This project uses enough electricity to kill you. Please be careful. Electricity can be fun and safe if kept inside its insulating containers.

More on the FCG: phantasmechanics.com

YouTube player

Project Steps

Plan your crank mechanism.

The frame consists of 5 lengths of angle aluminum. The long (48″) crosspiece at the right of the diagram spans the arms of the ghost. The two 36″ lengths of angle extending back from the crosspiece are the main supports of the frame. Their spacing depends on the width of your motor. The other two 9″ crosspieces are used to mount the frame in its final environment; I tend to hang my ghost from the ceiling using the holes in the ends of these pieces. A hole in the center of the middle crosspiece provides the mounting point for the head of the ghost.

The crank is a separate 9″ section that drives the ghost. Its length determines how far the ghost moves. I drill several holes in my crank so I can adjust the ghost’s motion.

The torque rating of your motor divided by the length of the crank, less friction, gives the weight allowance for your ghost. A typical inexpensive motor will allow you a 2-or 3-pound ghost. If you want a fancier, heavier prop, you will need to counterweight it at the head connection. A system of pulleys lets you dangle a weight off to one side of the prop to reduce the effective weight of your ghost.

Measure the spacing of the mounting holes on your motor. Also measure its shaft diameter. You may also want to brainstorm where you’ll place your ghost and how big it can be. Use these values to determine the size and hole placement on your metal parts. Draw up a detailed plan, based on the diagram.

Fasten the crank arm to the motor.

Cut and drill the crank arm.

Using an appropriately sized U-bolt, fasten the crank to the motor’s shaft.

Put the flat of the crank against the flat of the shaft. Tighten firmly.

The crank should sit on the end of the shaft, and stick out at a right angle from it. Be sure the crank is level so it doesn’t strike the framework. I drill my U-bolt holes large, to provide some slop during assembly.

Once the bolts are tight, the slop shouldn’t matter much (in this low-strain environment).

An alternate mounting scheme uses a shaft arbor or shaft extender. This part slips over the motor’s shaft and locks in place with a setscrew. The crank then bolts on the end of the arbor.

Assemble the motor into the framework.

Measure, cut, and drill the 5 framework pieces.

Fit the motor into the main support pieces and place the 9″ end crosspiece into place.

Loosely screw the motor’s 4 bolts into place.

Loosely fit the 9″ center and 48″ end crosspieces into place.

Fasten them gently with 4 short bols.

With the entire framework fitted loosely together, tighten all the screws and bolts. Make sure the crank doesn’t hit anything.

Assemble the crank.

Drill 3 equally spaced holes around the giant washer.

Smooth the edges of the holes so they don’t fray your cord.

Assemble the pivot on the end of the crank. Either the washer at the tip of the bolt, or the entire bolt itself, must turn freely on the crank, or the cords will tangle.

Add washers, use lock nuts, and/or grease liberally until friction is at a minimum.

The crank assembly is the heart of the ghost mechanism. Be sure it works smoothly, and has been tightened thoroughly, before moving on.

Assemble the pulleys.

The ghost is suspended from 3 pulleys, by cords that pass through the pulleys and tie to the crank pivot washer.

Fasten your eyebolts and pulleys together using S-hooks, crimping the hooks with pliers.

Then, using 2 nuts per eye bolt, fasten one pulley assembly at each tip of the long crosspiece, and a third pulley assembly in the center of the middle crosspiece.

Hook up the electrical system.

Cut off the socket end of the extension cord. Split and strip the ends that are attached to the plug.

Set the junction box next to the motor on the framework. Run the motor’s leads into the box, as well as the stripped ends of your power cord.

Twist the return wire of the power cord (the wire attached to the wide blade of the polarized plug, for American plugs) to one of the motor wires.

Secure the join with a wire nut.

Screw the hot wire to one side of the light switch and the other motor wire to the other side.

Screw the switch to the junction box, mount the switch plate to the switch, and zip-tie the entire assembly to the framework.

Loosely zip-tie the power cord to the framework if needed, taking card that the cord won’t rub against a sharp edge or tangle in the mechanism during operation.

Attach pulley cords to the pivot.

For each of the 3 pulleys, tie one end of the cord to the center pivot and run the other end through the pulley.

Tie a loop into the end of the cord on the far side of the pulley.

Make sure the loop doesn’t enter the pulley when the crank is pointing away from the pulley (when the cord is at its shortest).

Fasten a quick-link to the loop in the cord.

Make the ghost.

Cut a length of wire to fit through your foam ball, and bend a small loop in one end. Poke the head wire through the foam ball. Create a shoulder wire with a deep loop in the center and little loops at the ends. Then bend a crimp in the head wire at the bottom of the ball, so the ball is trapped between the loop and the crimp.

For optional hands, bend 2 lengths of wire to make fingers that fit inside the vinyl gloves. Other hand options include cardboard cutouts, or using masking or duct tape to build up wire fingers. Your goal is to make the hands as light as possible, keeping in mind our weight limits. You really don’t want to add counterweights to the hands.

Cut out 2 upper arm wires and 2 forearm wires, making loops in the ends and fastening all the wires together. You are making a marionette of a ghost with a wire skeleton. The hands then fasten onto the ends of the arms, which fasten to the shoulders.

Using expanding foam, glue the mask to the ball. Poke the foam’s nozzle/tube into each finger and give them a little squirt. The hands shown in Step 9 have way too much foam in them. You may want to make several sets of hands (perhaps a few without wires) to get a feel for how much to use. The foam expands a lot as it sets.

Mount the ghost.

This photo shows the completed ghost marionette. Note the shading on the mask, crudely applied with a rattle-can of black paint; the cheesecloth will soften these lines in the final ghost. I decided I didn’t like the hands and cut them off after this picture.

Drape your cheesecloth over, around, and through your marionette, making a ghostly visage. You can take the minimalist approach that I tend to use, or you can take more care in your draping, outlining the face in a hood of fabric, and making the sleeves dangle artfully around the hands. You can even create a complete gown for the ghost (taking care with your weight limit).

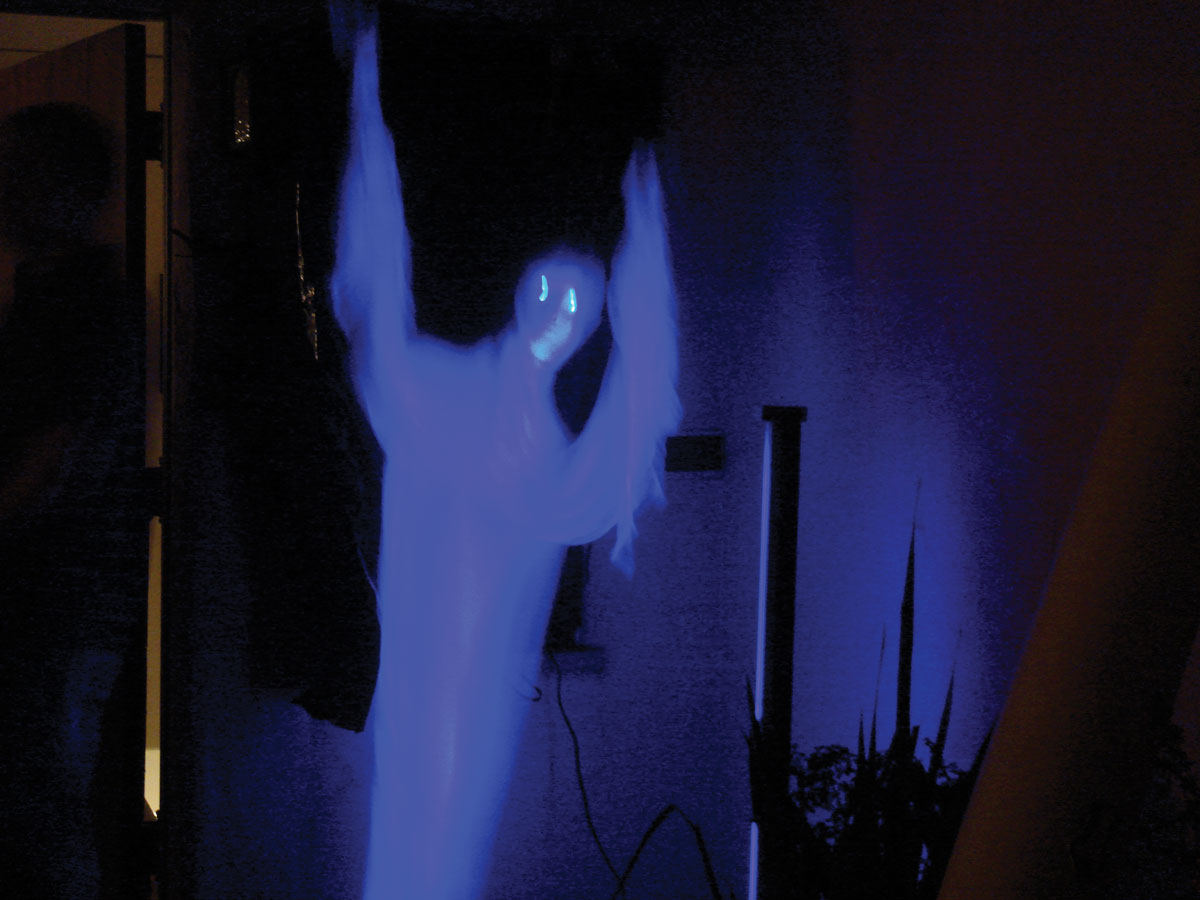
Light up the ghost with a UV black light. If your fabric doesn’t shine enough under black light, soak it in laundry bluing or brightening agent. These are UV-reactive and do wonders for your glow.

Another optional addition would be LED lights in the eye sockets of the mask. Set them deep into the foam ball and glue some additional fabric to the inside of the eyeholes to diffuse the light.

The opening photo shows the ghost, in a minimalist shroud, illuminated by black light, as it steps through its motion cycle.

Conclusion

This project first appeared in Make: Halloween Special Edition, page 104.