You’ll hear me say it not once or twice, but perhaps a couple of hundred times: “Gourds are Nature’s Pottery, with nearly endless possibilities.”

I am a professional gourd crafter from Michigan where I grow my own gourds and craft with them for individuals, shops, and galleries. I love sharing my art with others, and I hope bringing my gourds to Make:Projects will start a gourd crafting movement here on Make.

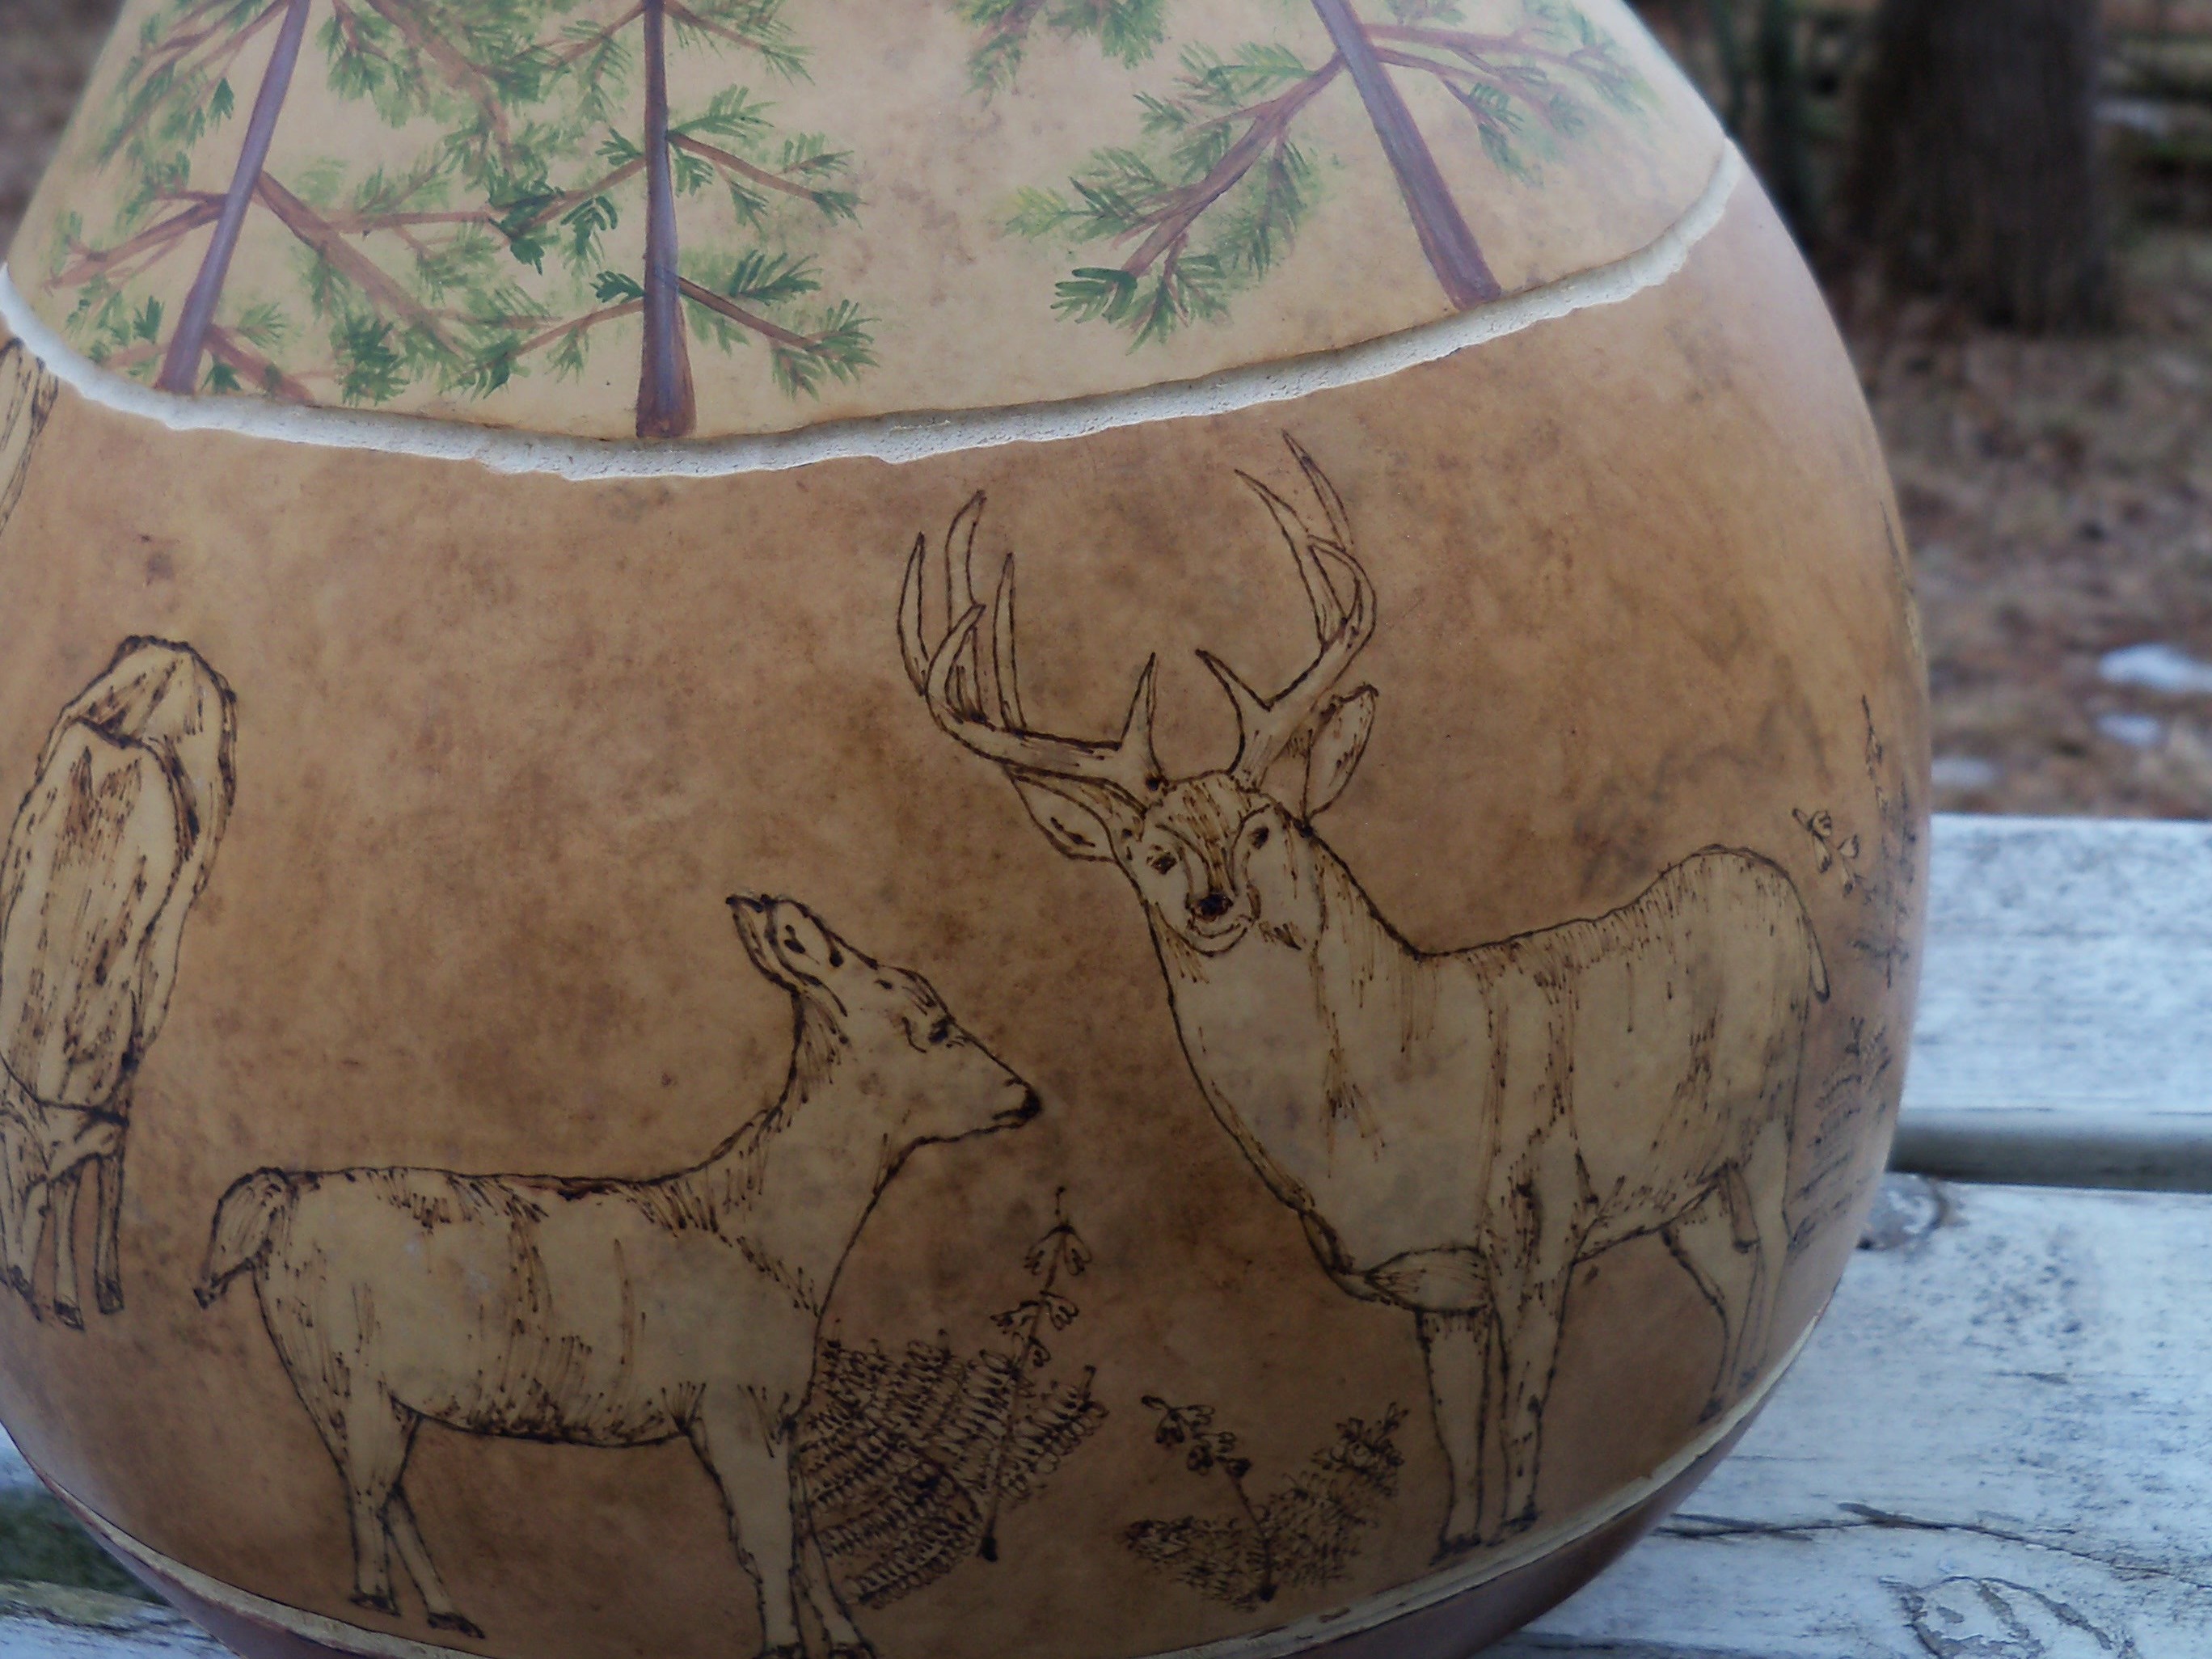
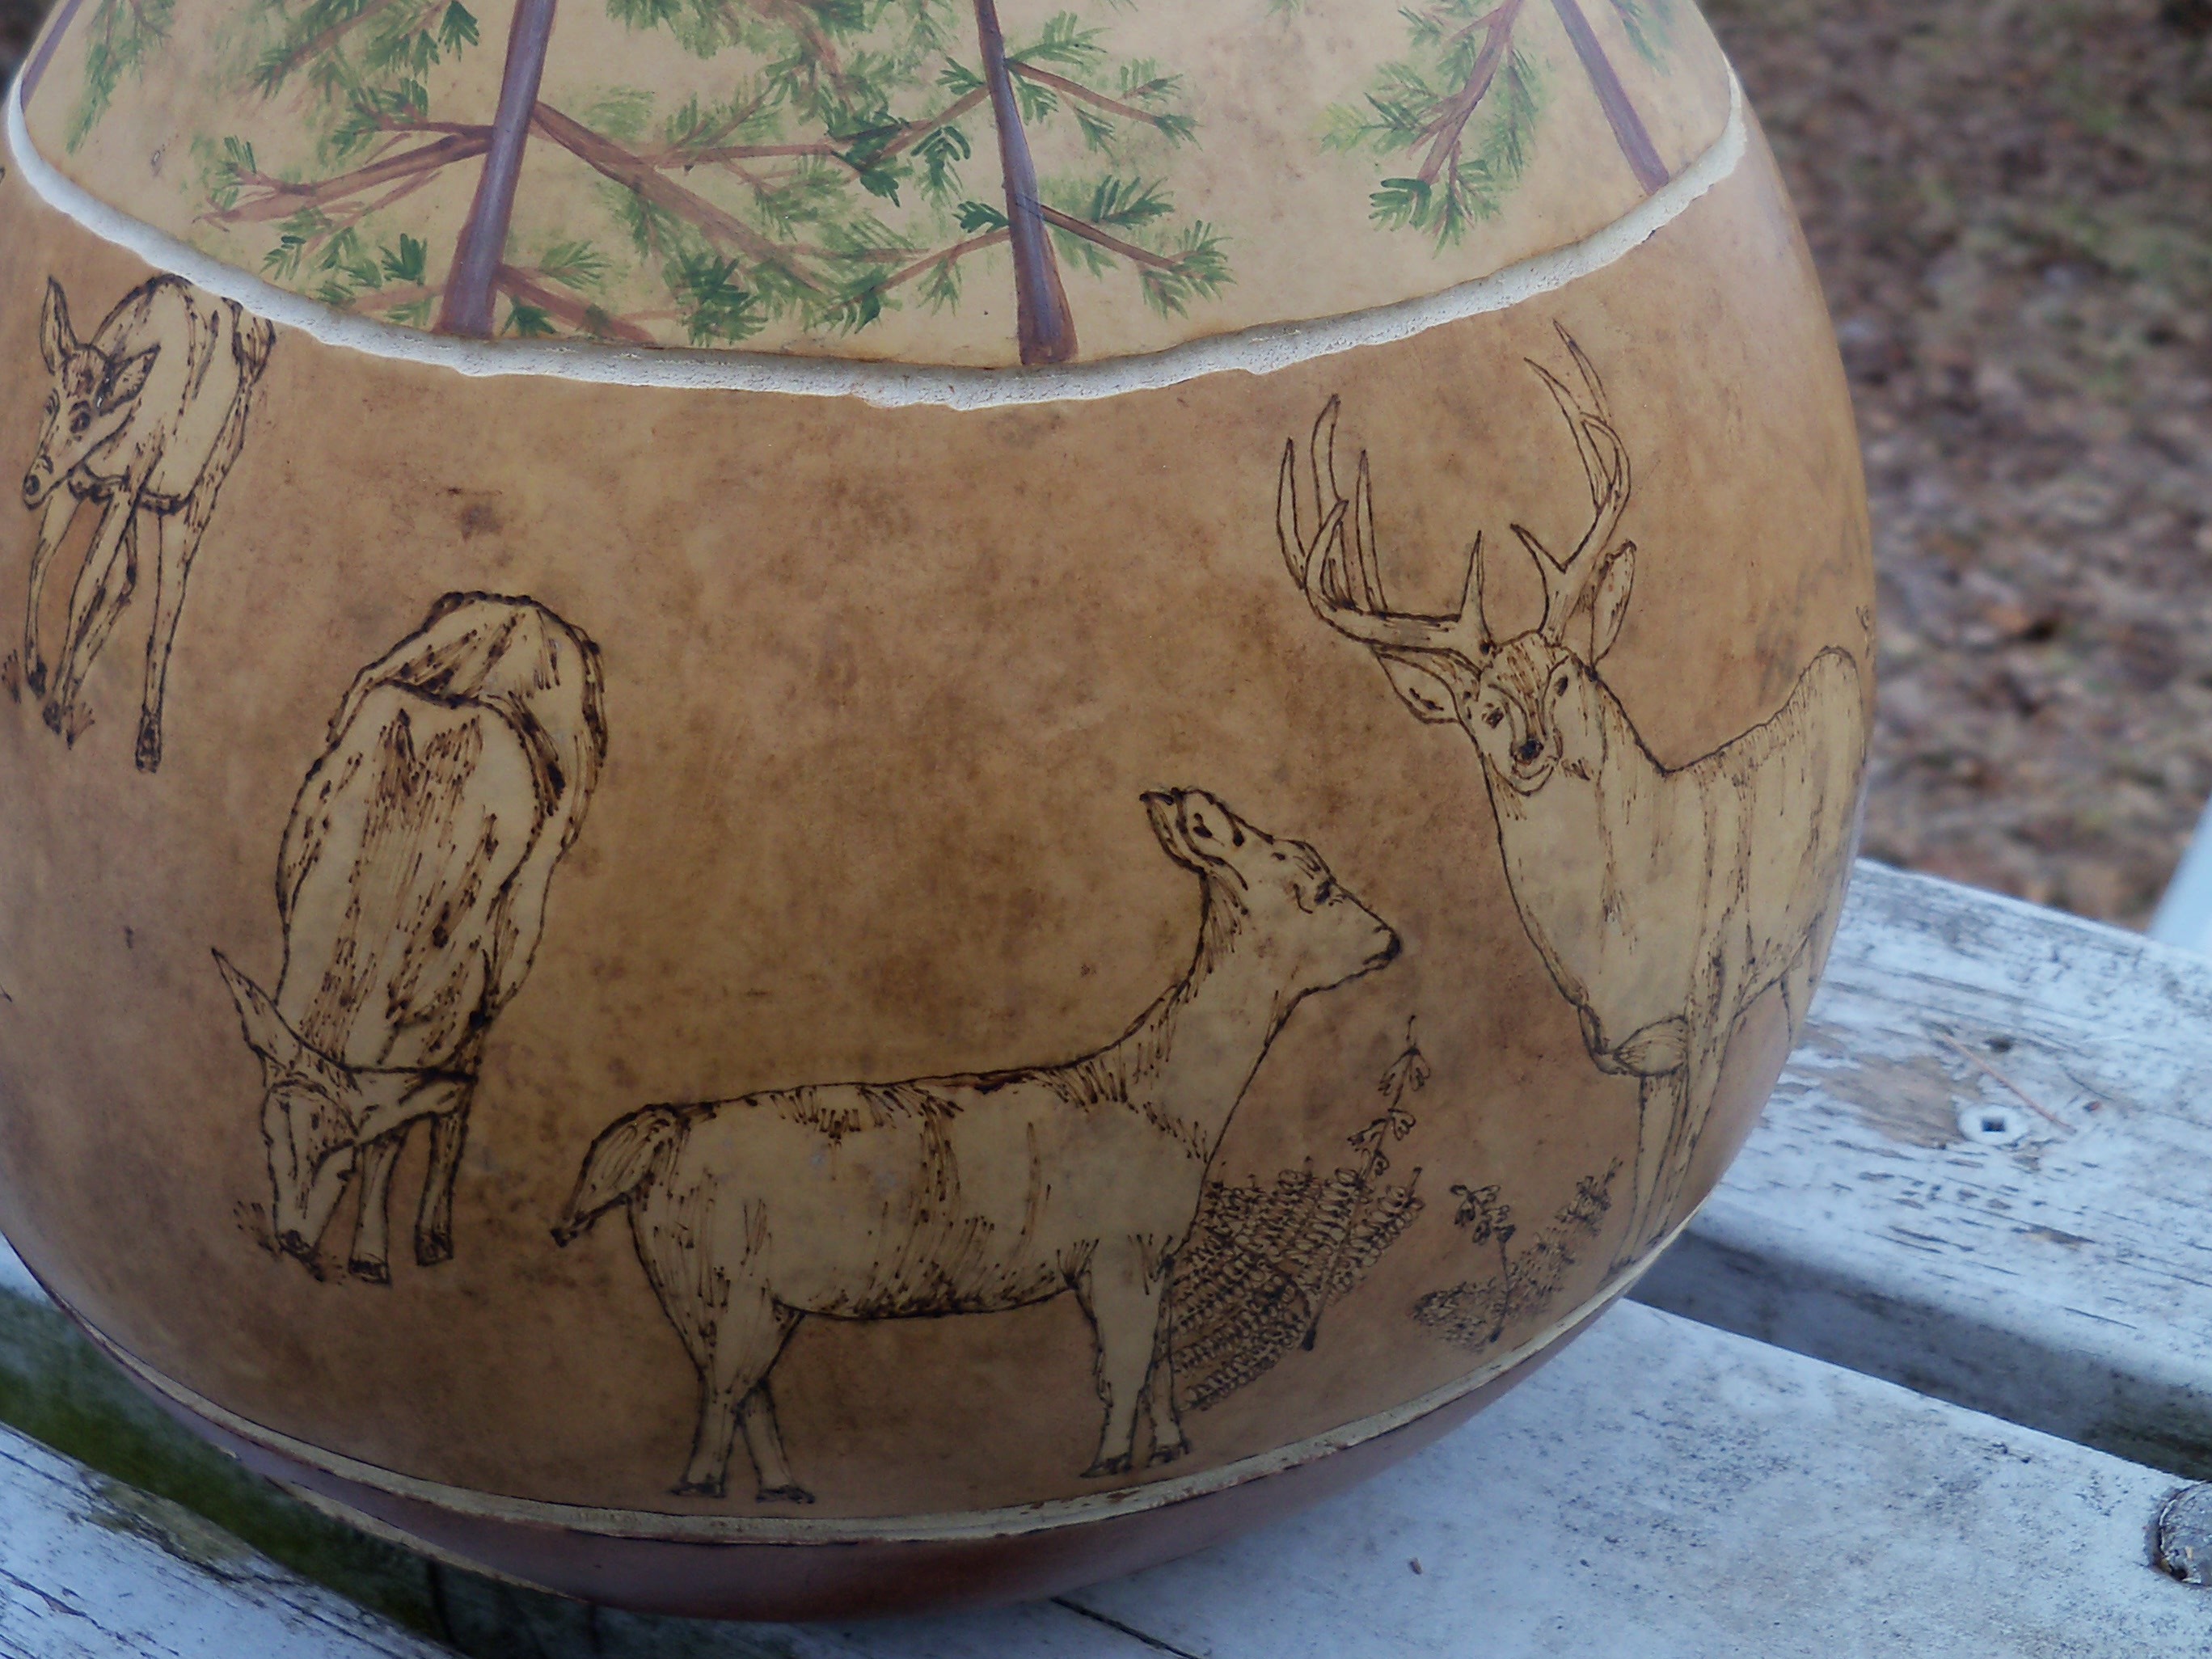
I aptly entitle this gourd I crafted: “White Tailed Pine Gourd Pitcher.” I had lots of fun with this particular gourd and decided to take photos of the process. I’ll take you from painting to woodburning, and from carving to the finishing touches.

This particular project is not an extensive or detailed DIY, but rather I want to just scratch the surface of how I take a simple dried gourd and transform it into a piece of art. Of course, I can’t help but tell you how I did it all with lots of tips sprinkled throughout.

I show how to clean gourds on my YouTube channel. Watch how to clean the outside of a gourd here:

Project Steps

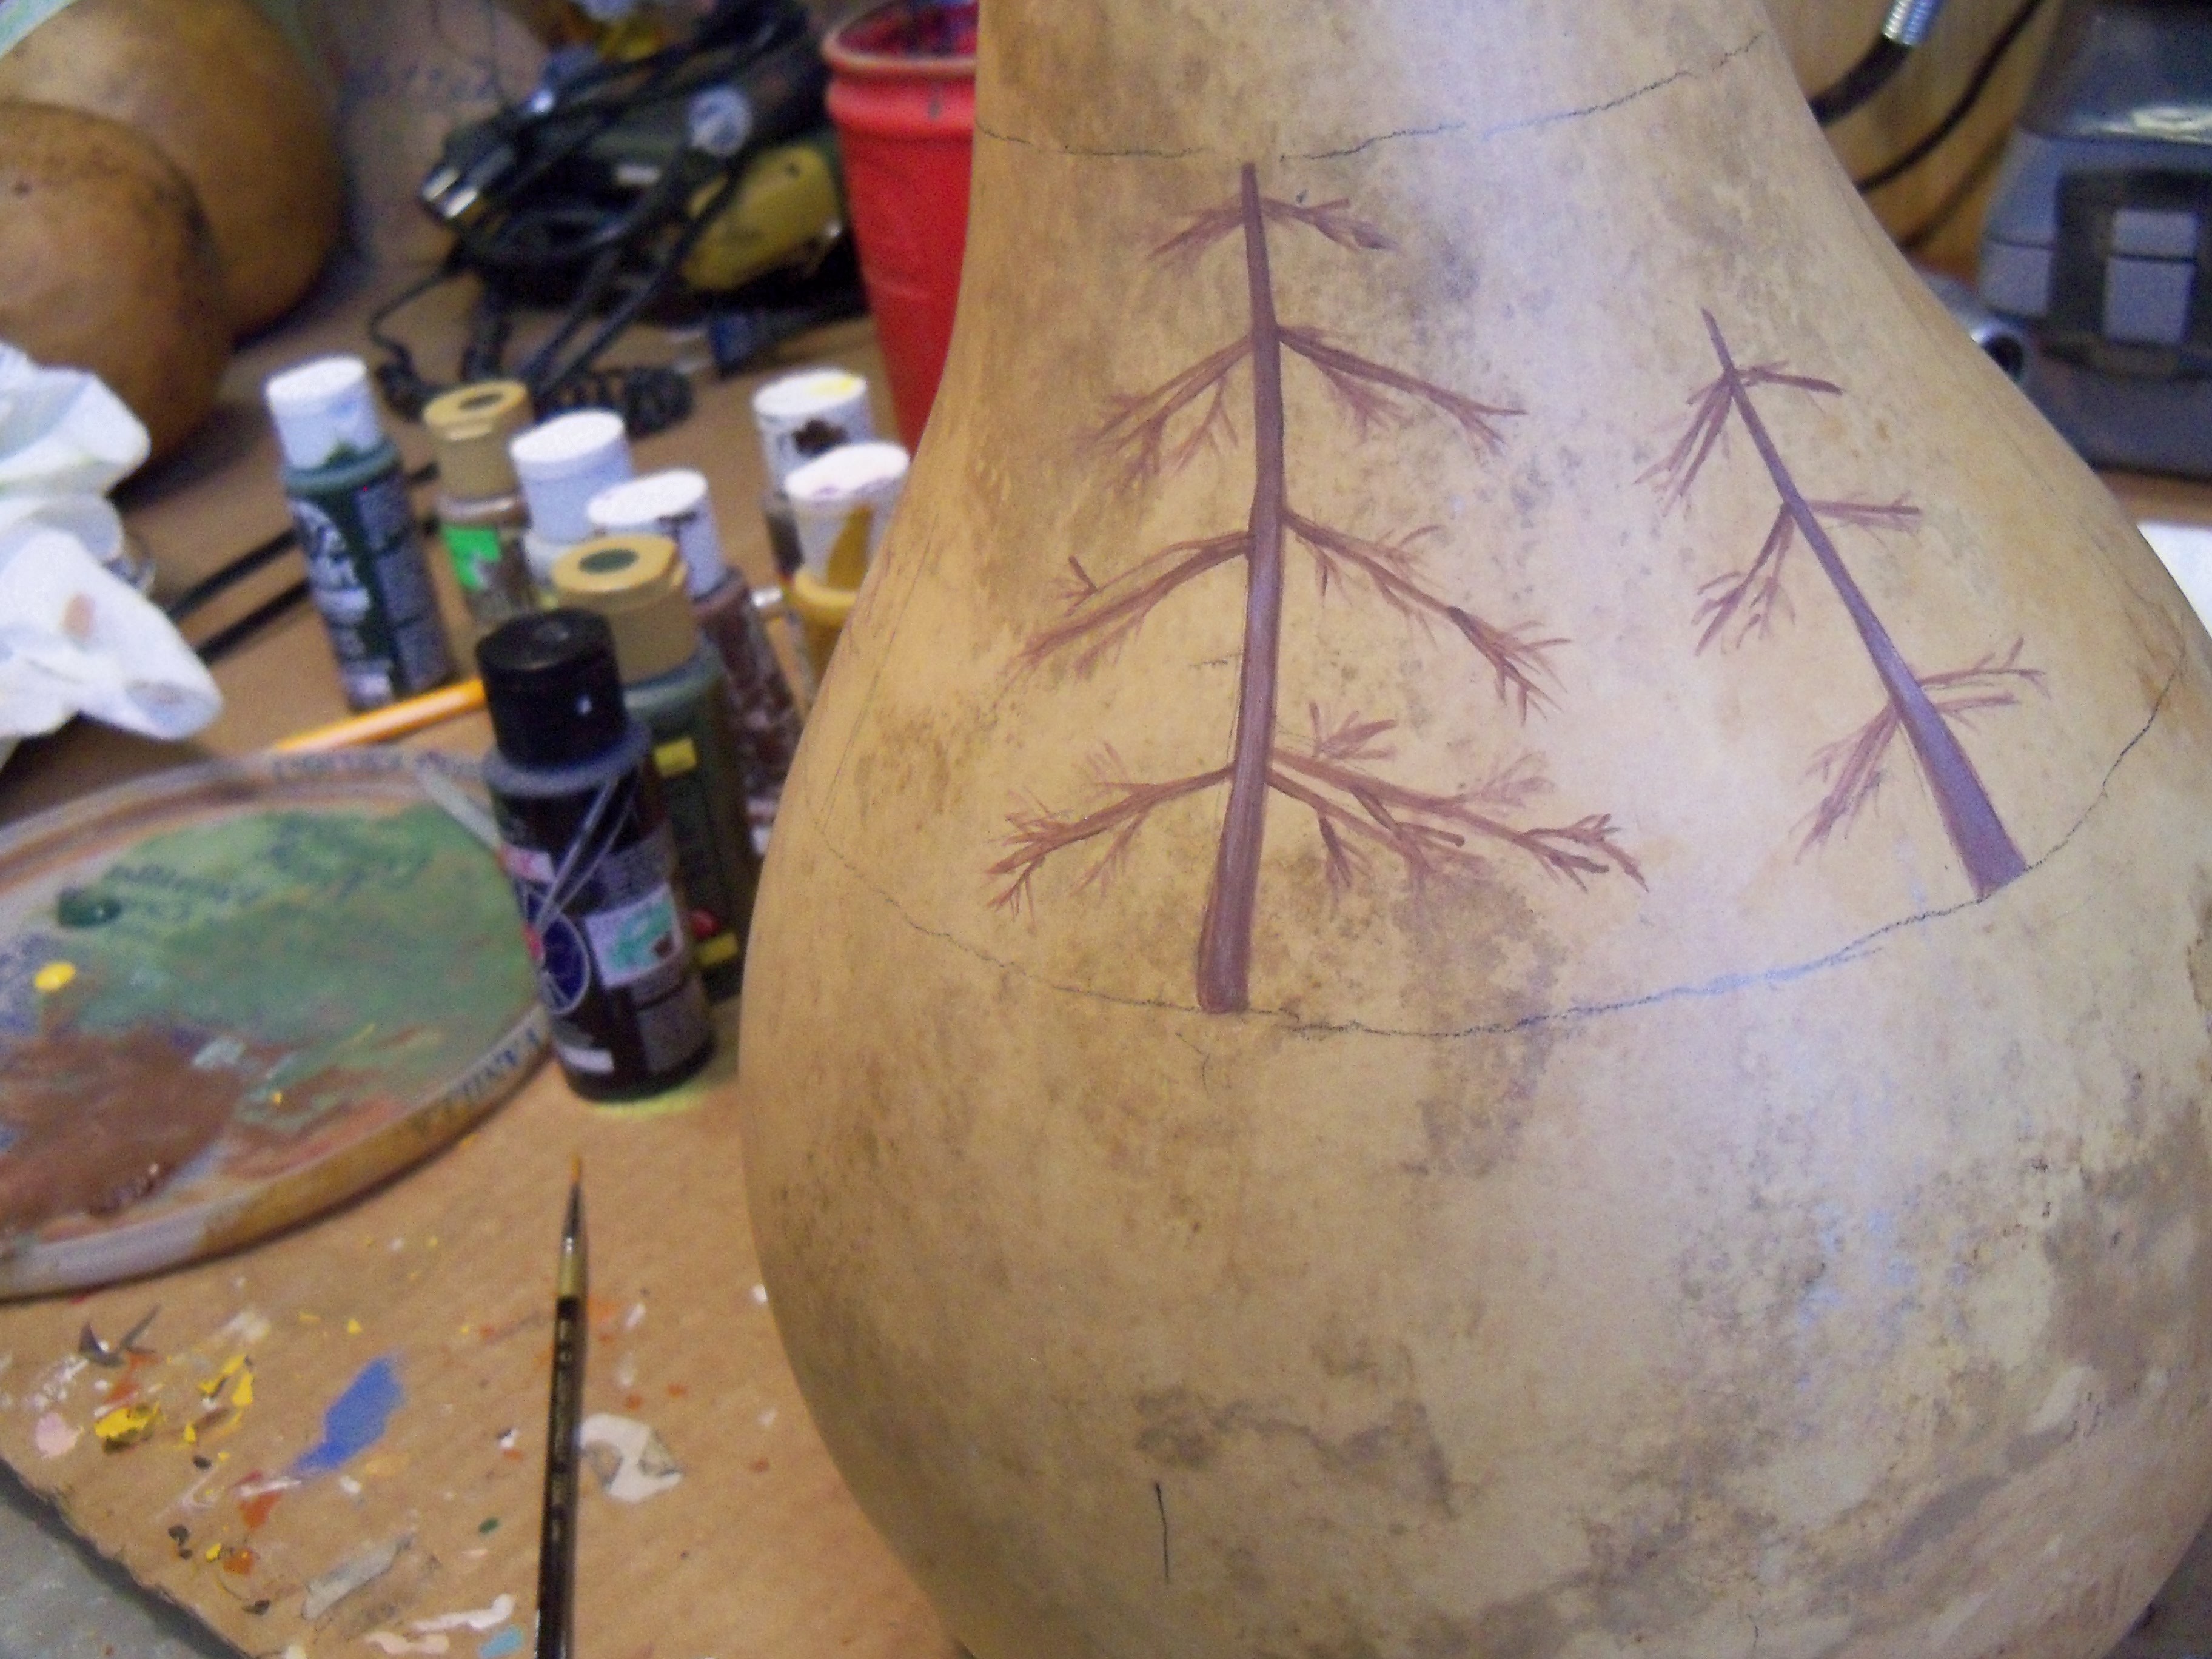
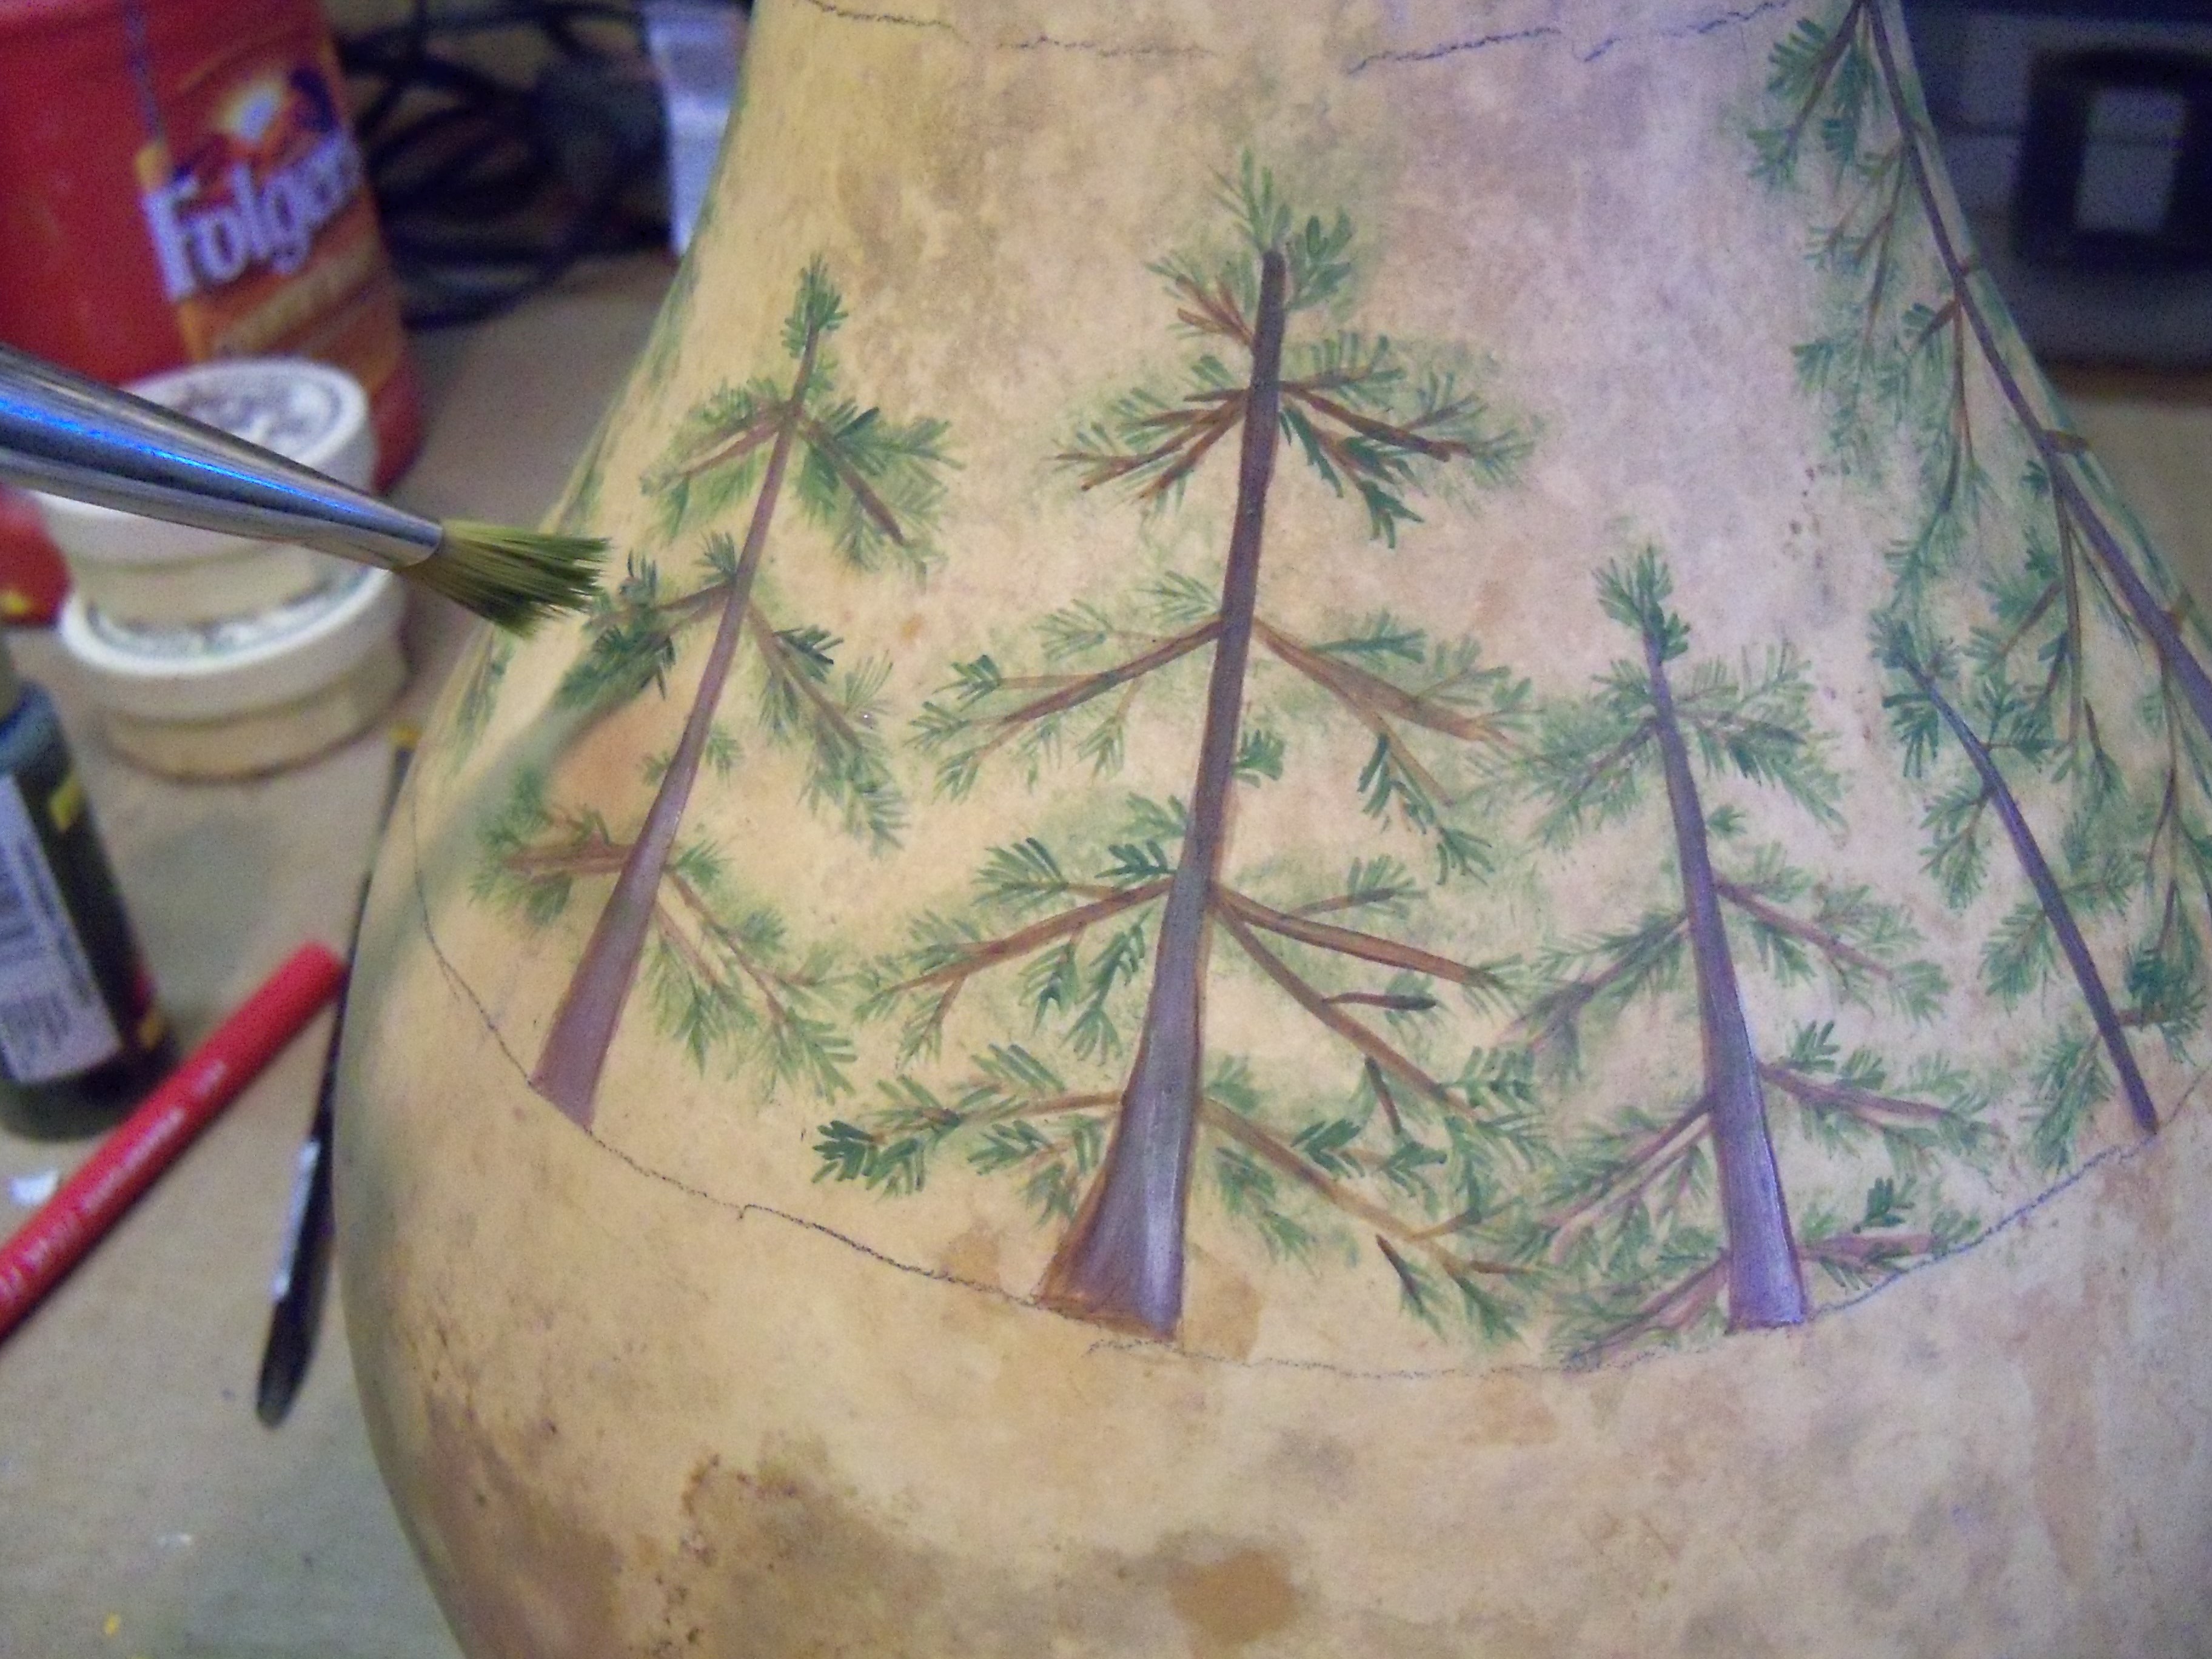
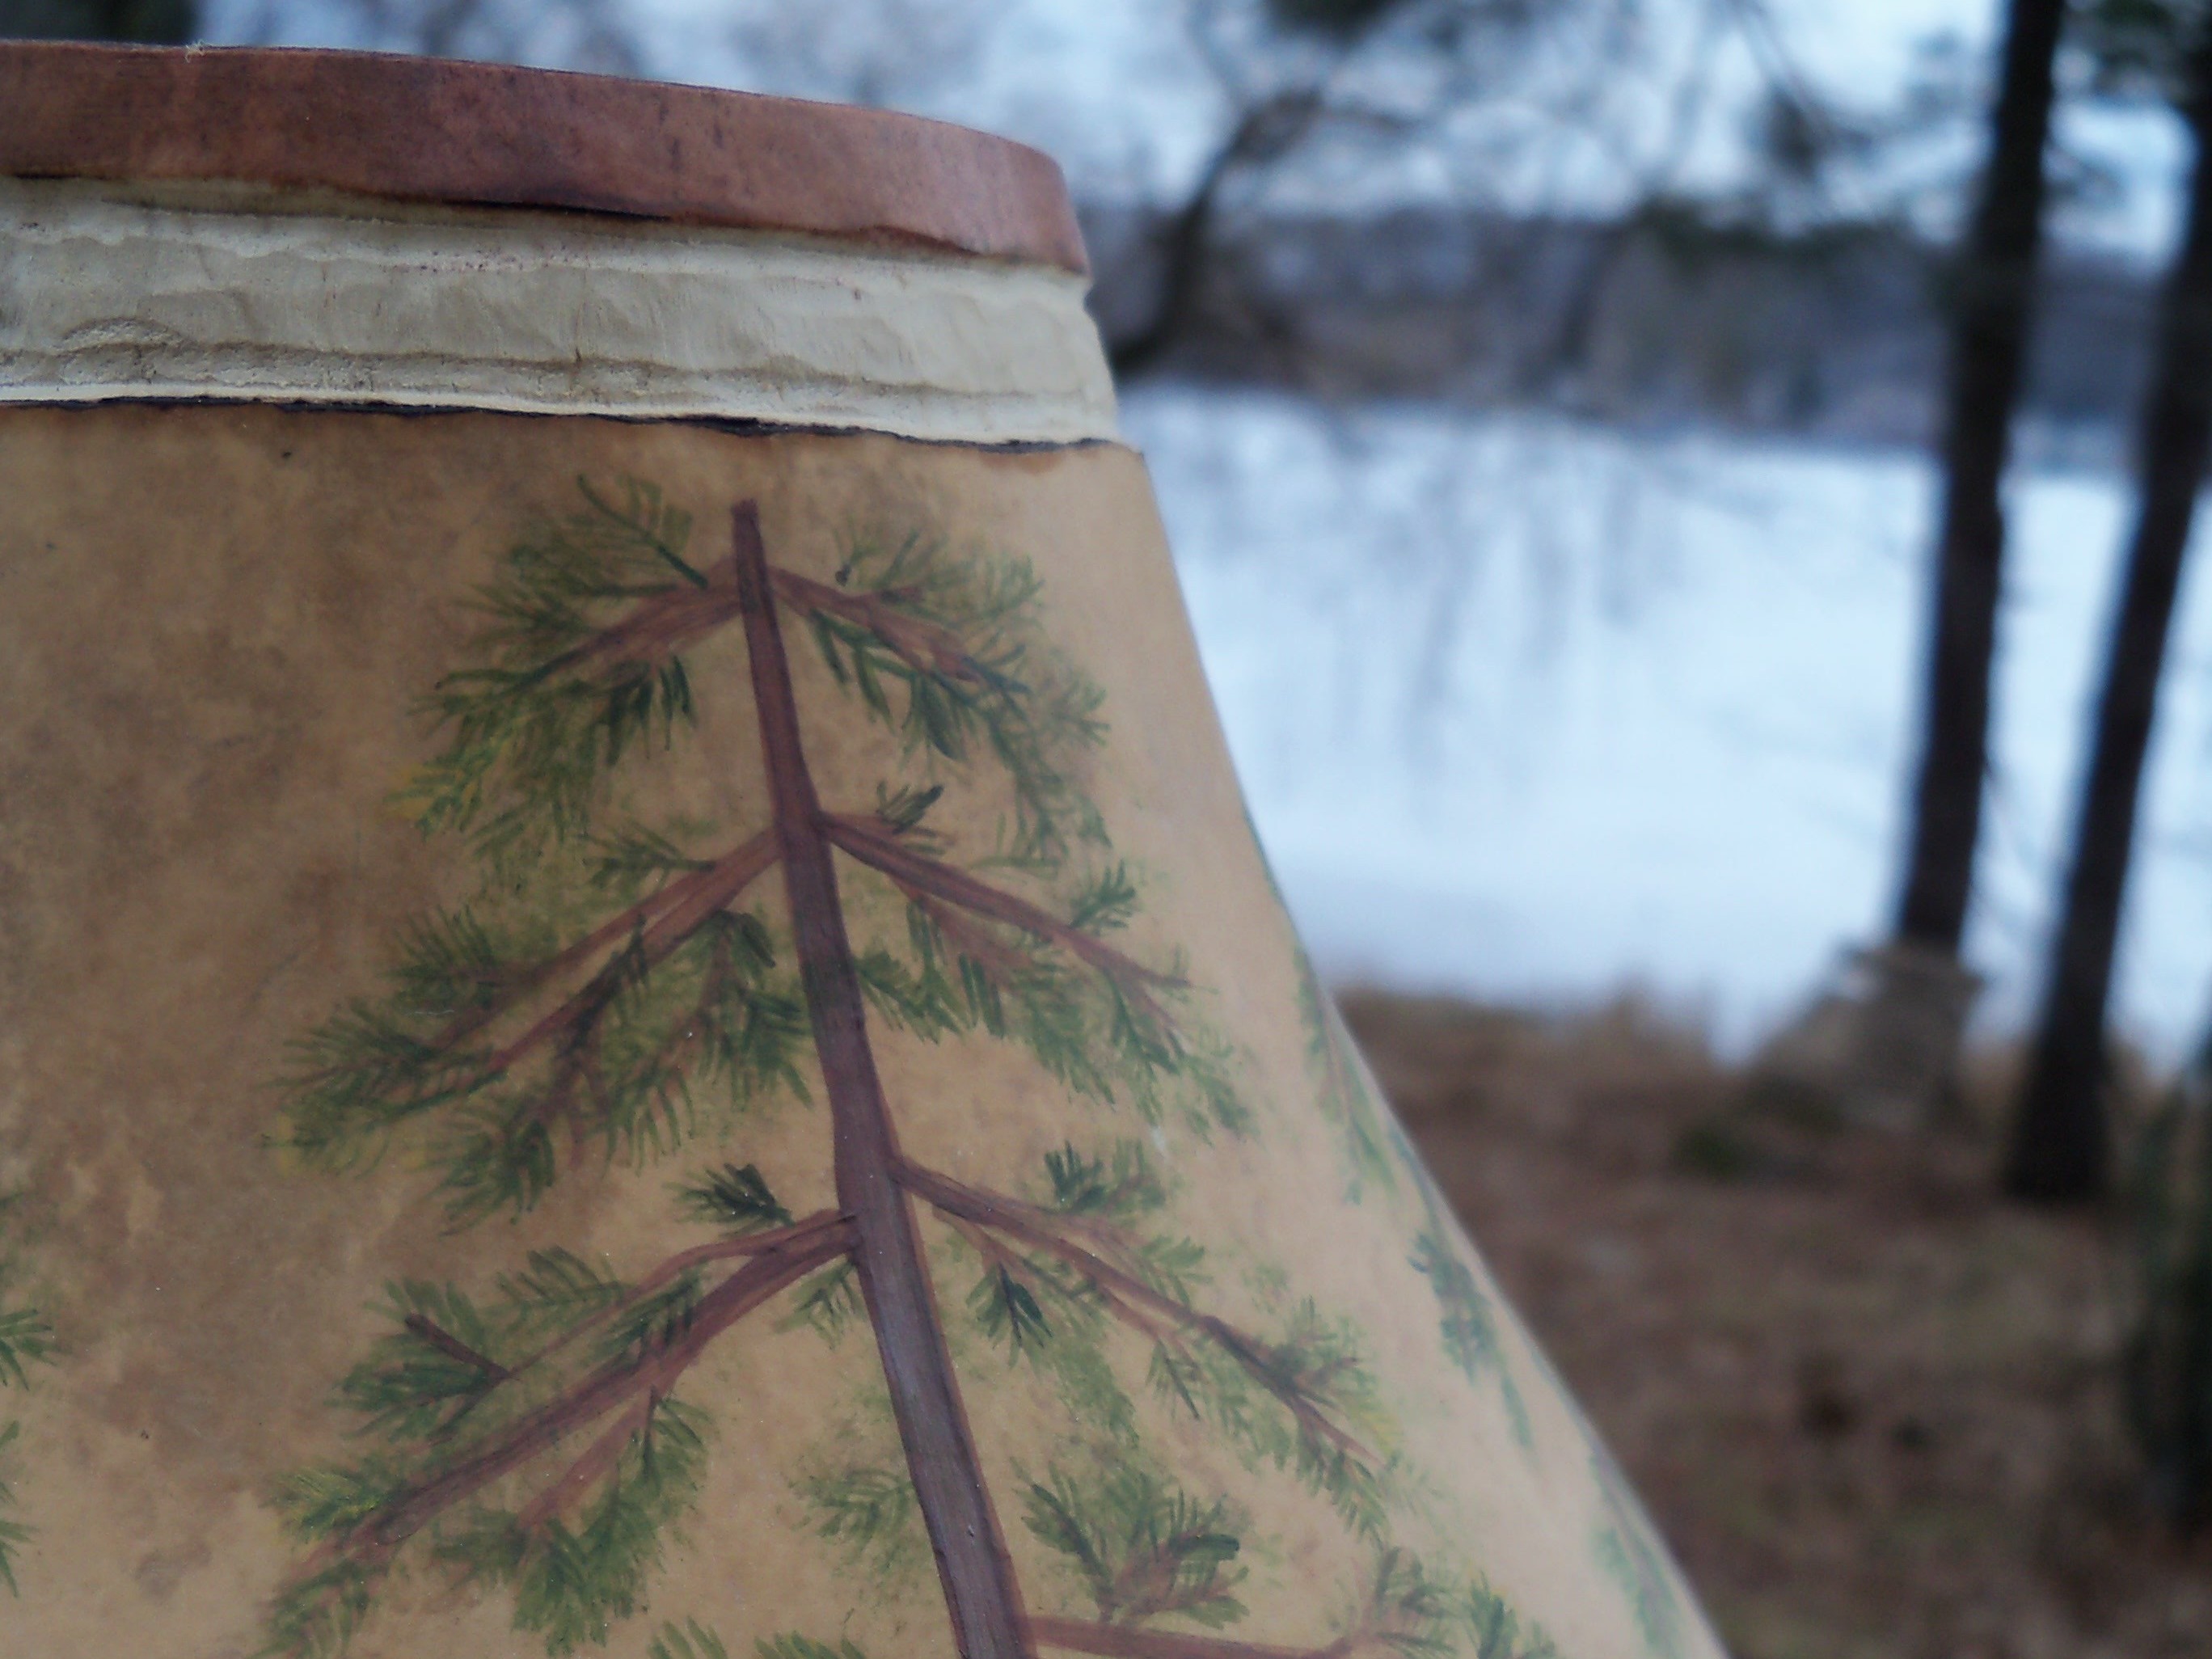
After cleaning and sanding the shell of the gourd I painted pine trees around the top half. I first made leafless trees and then with a liner brush I painted on the needles.

TIP: Liner = Thin Paint. Whenever you are painting with acrylic paint, and you want a thin line, (such as pine needles) you need to thin the paint to an ink consistency.

After making the pine needles I filled in the branches with a bit more green. I applied this with a minimal amount of paint on a stencil brush and pounced it on the tree branches.

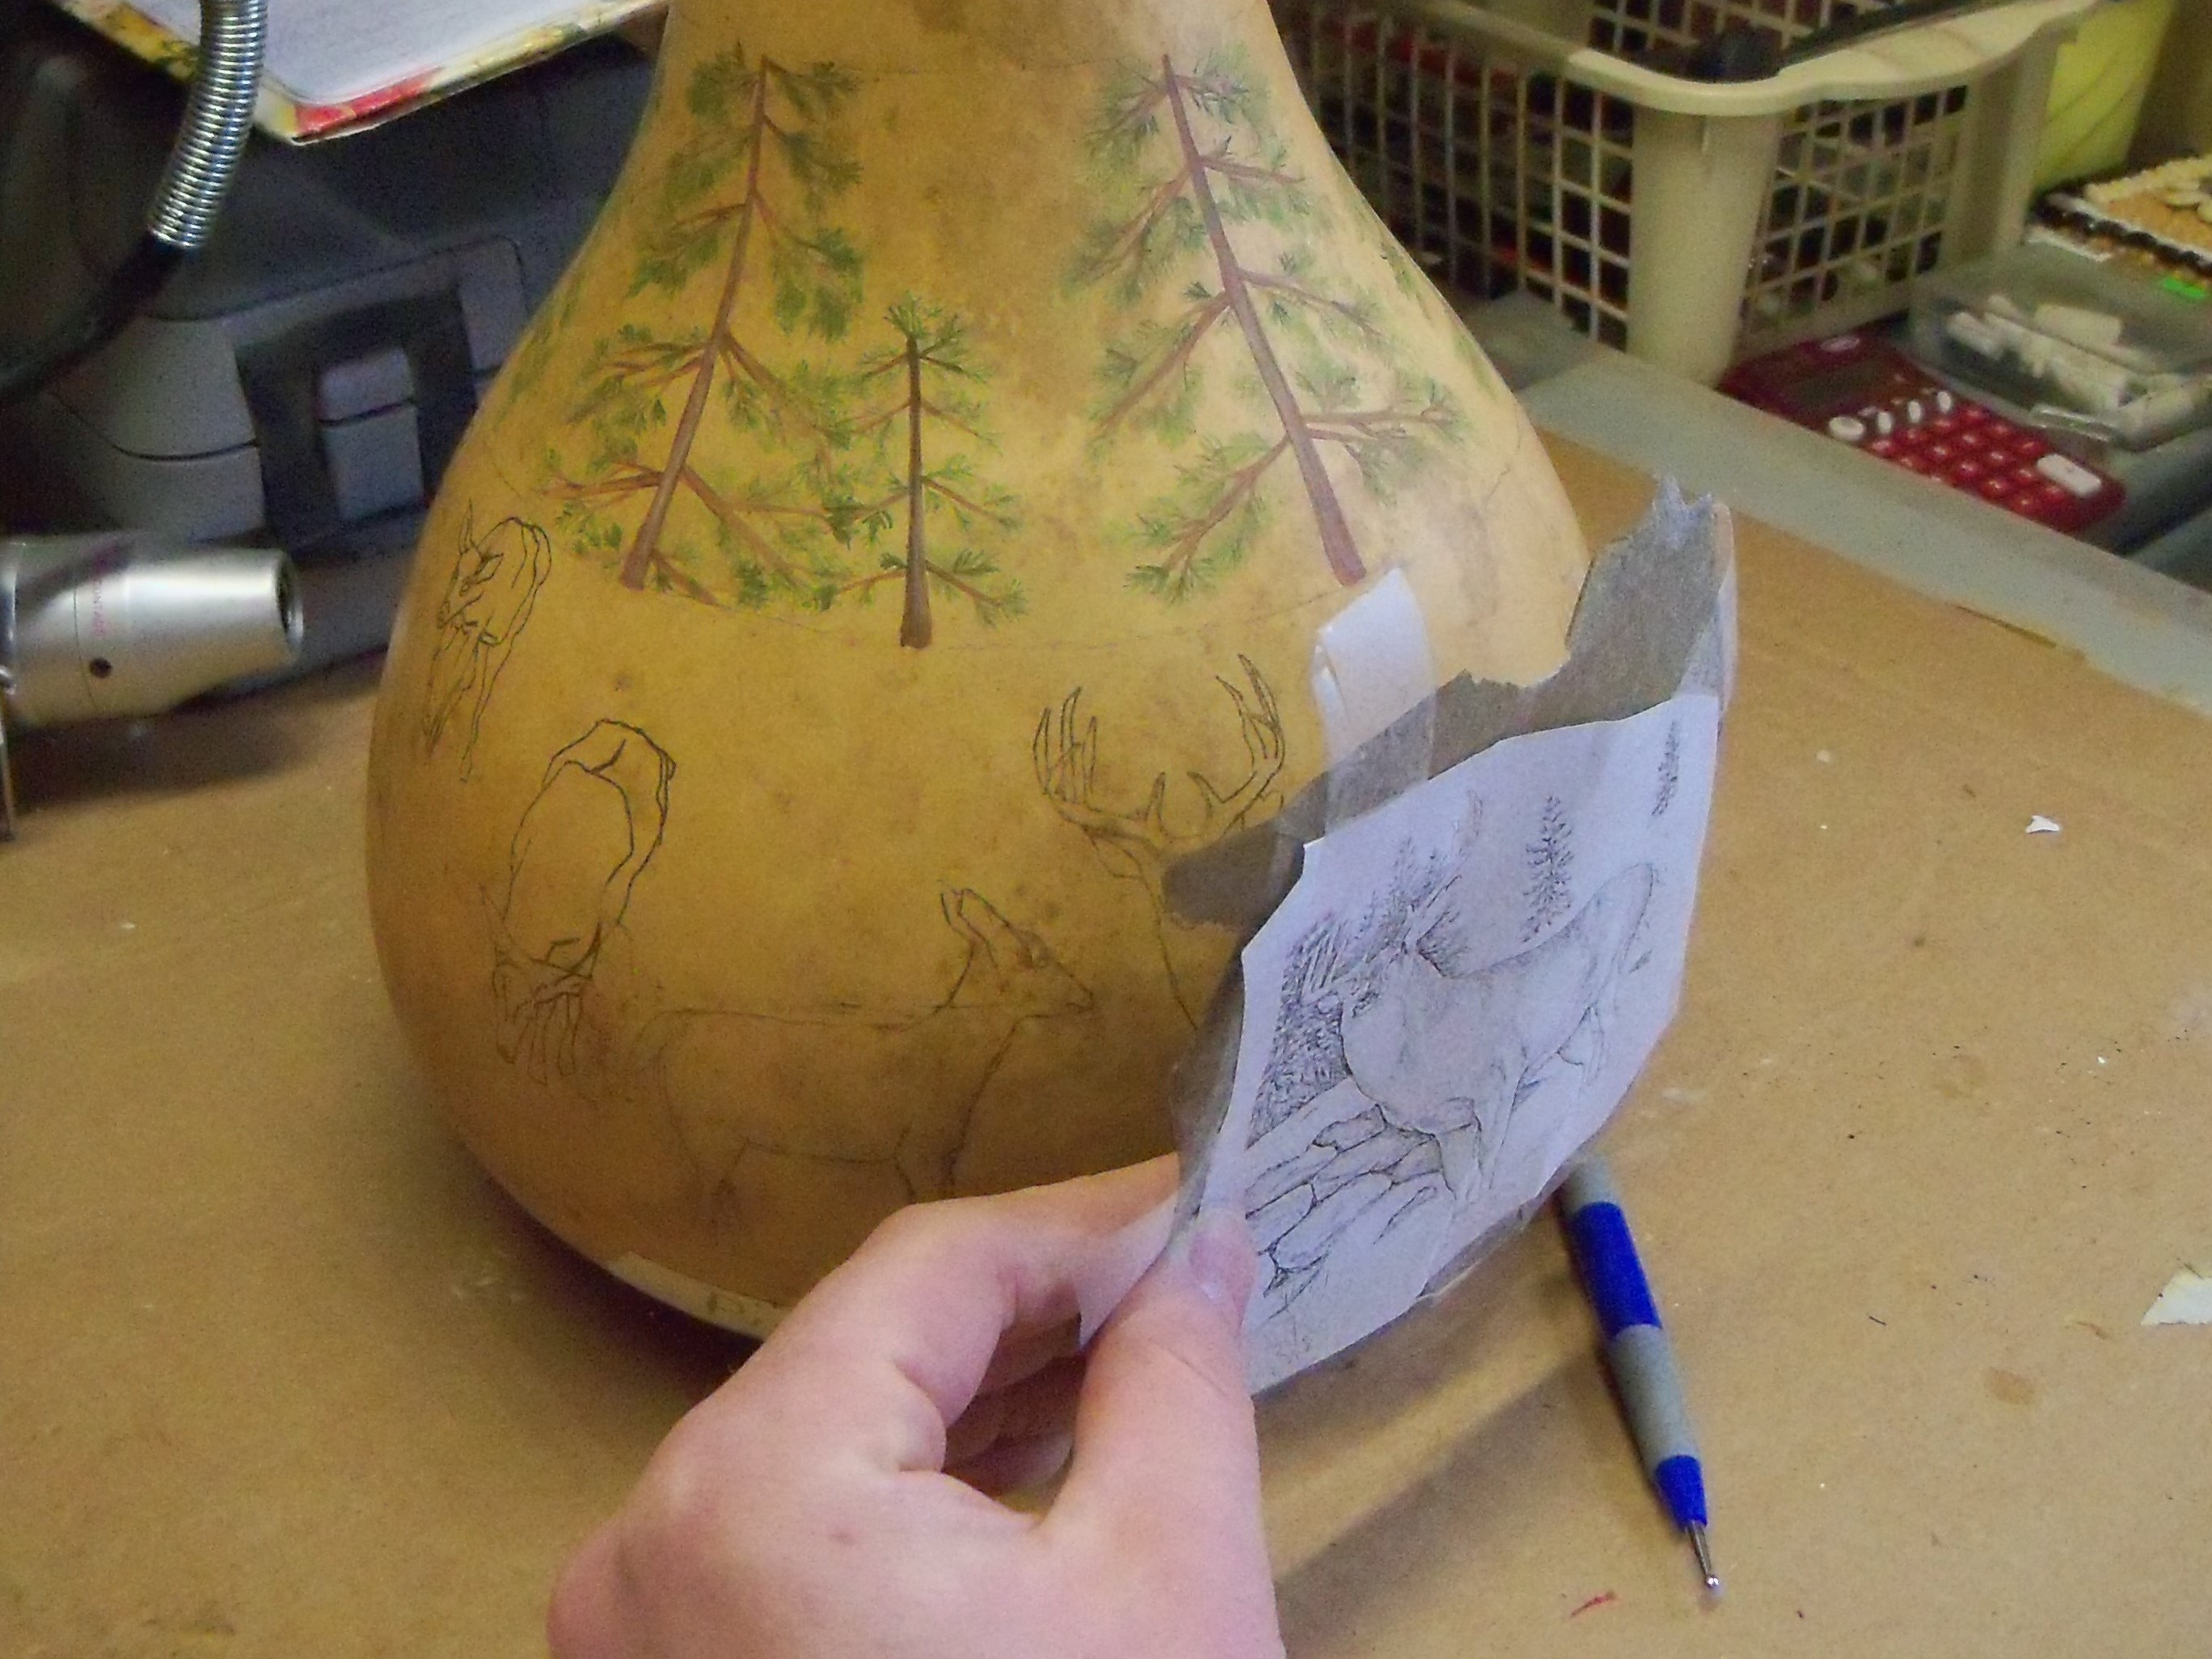
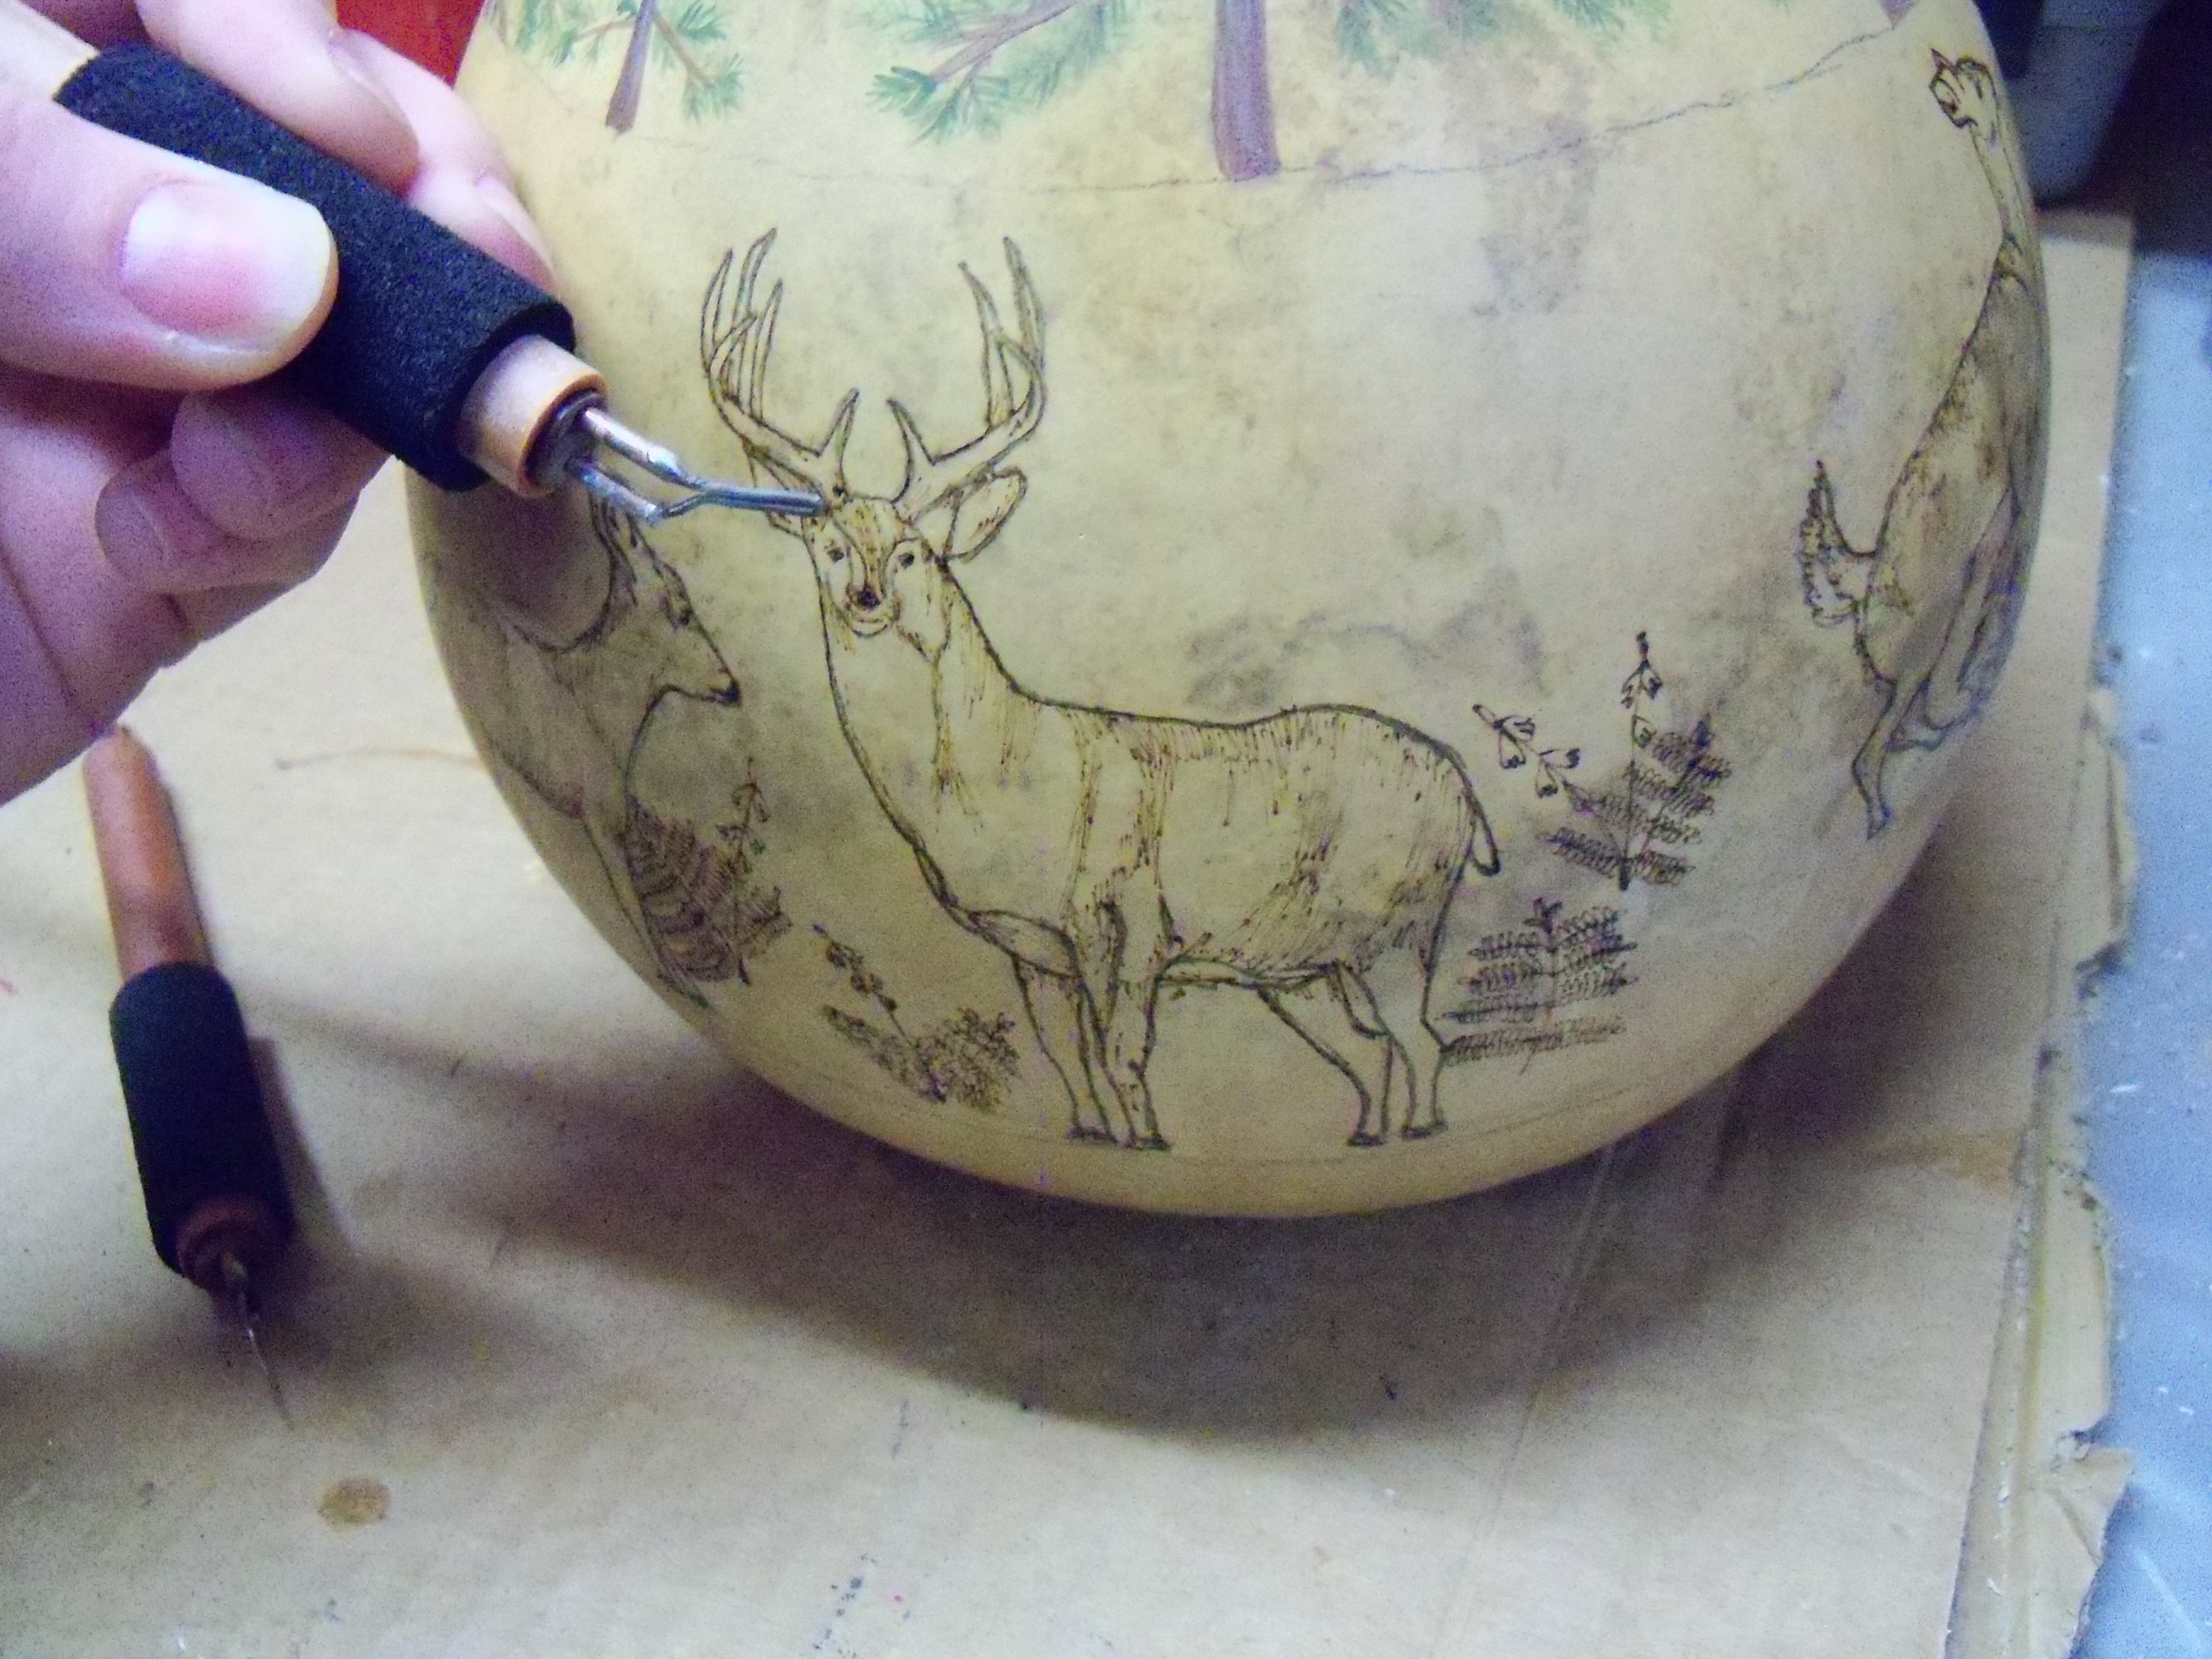
Using a stylus and graphite paper I transferred my drawings of various deer onto the gourd without any of the details. Just a simple trace over the main lines. (BTW, always make sure that you can easily erase the graphite. Some brands are easier to erase than others.)

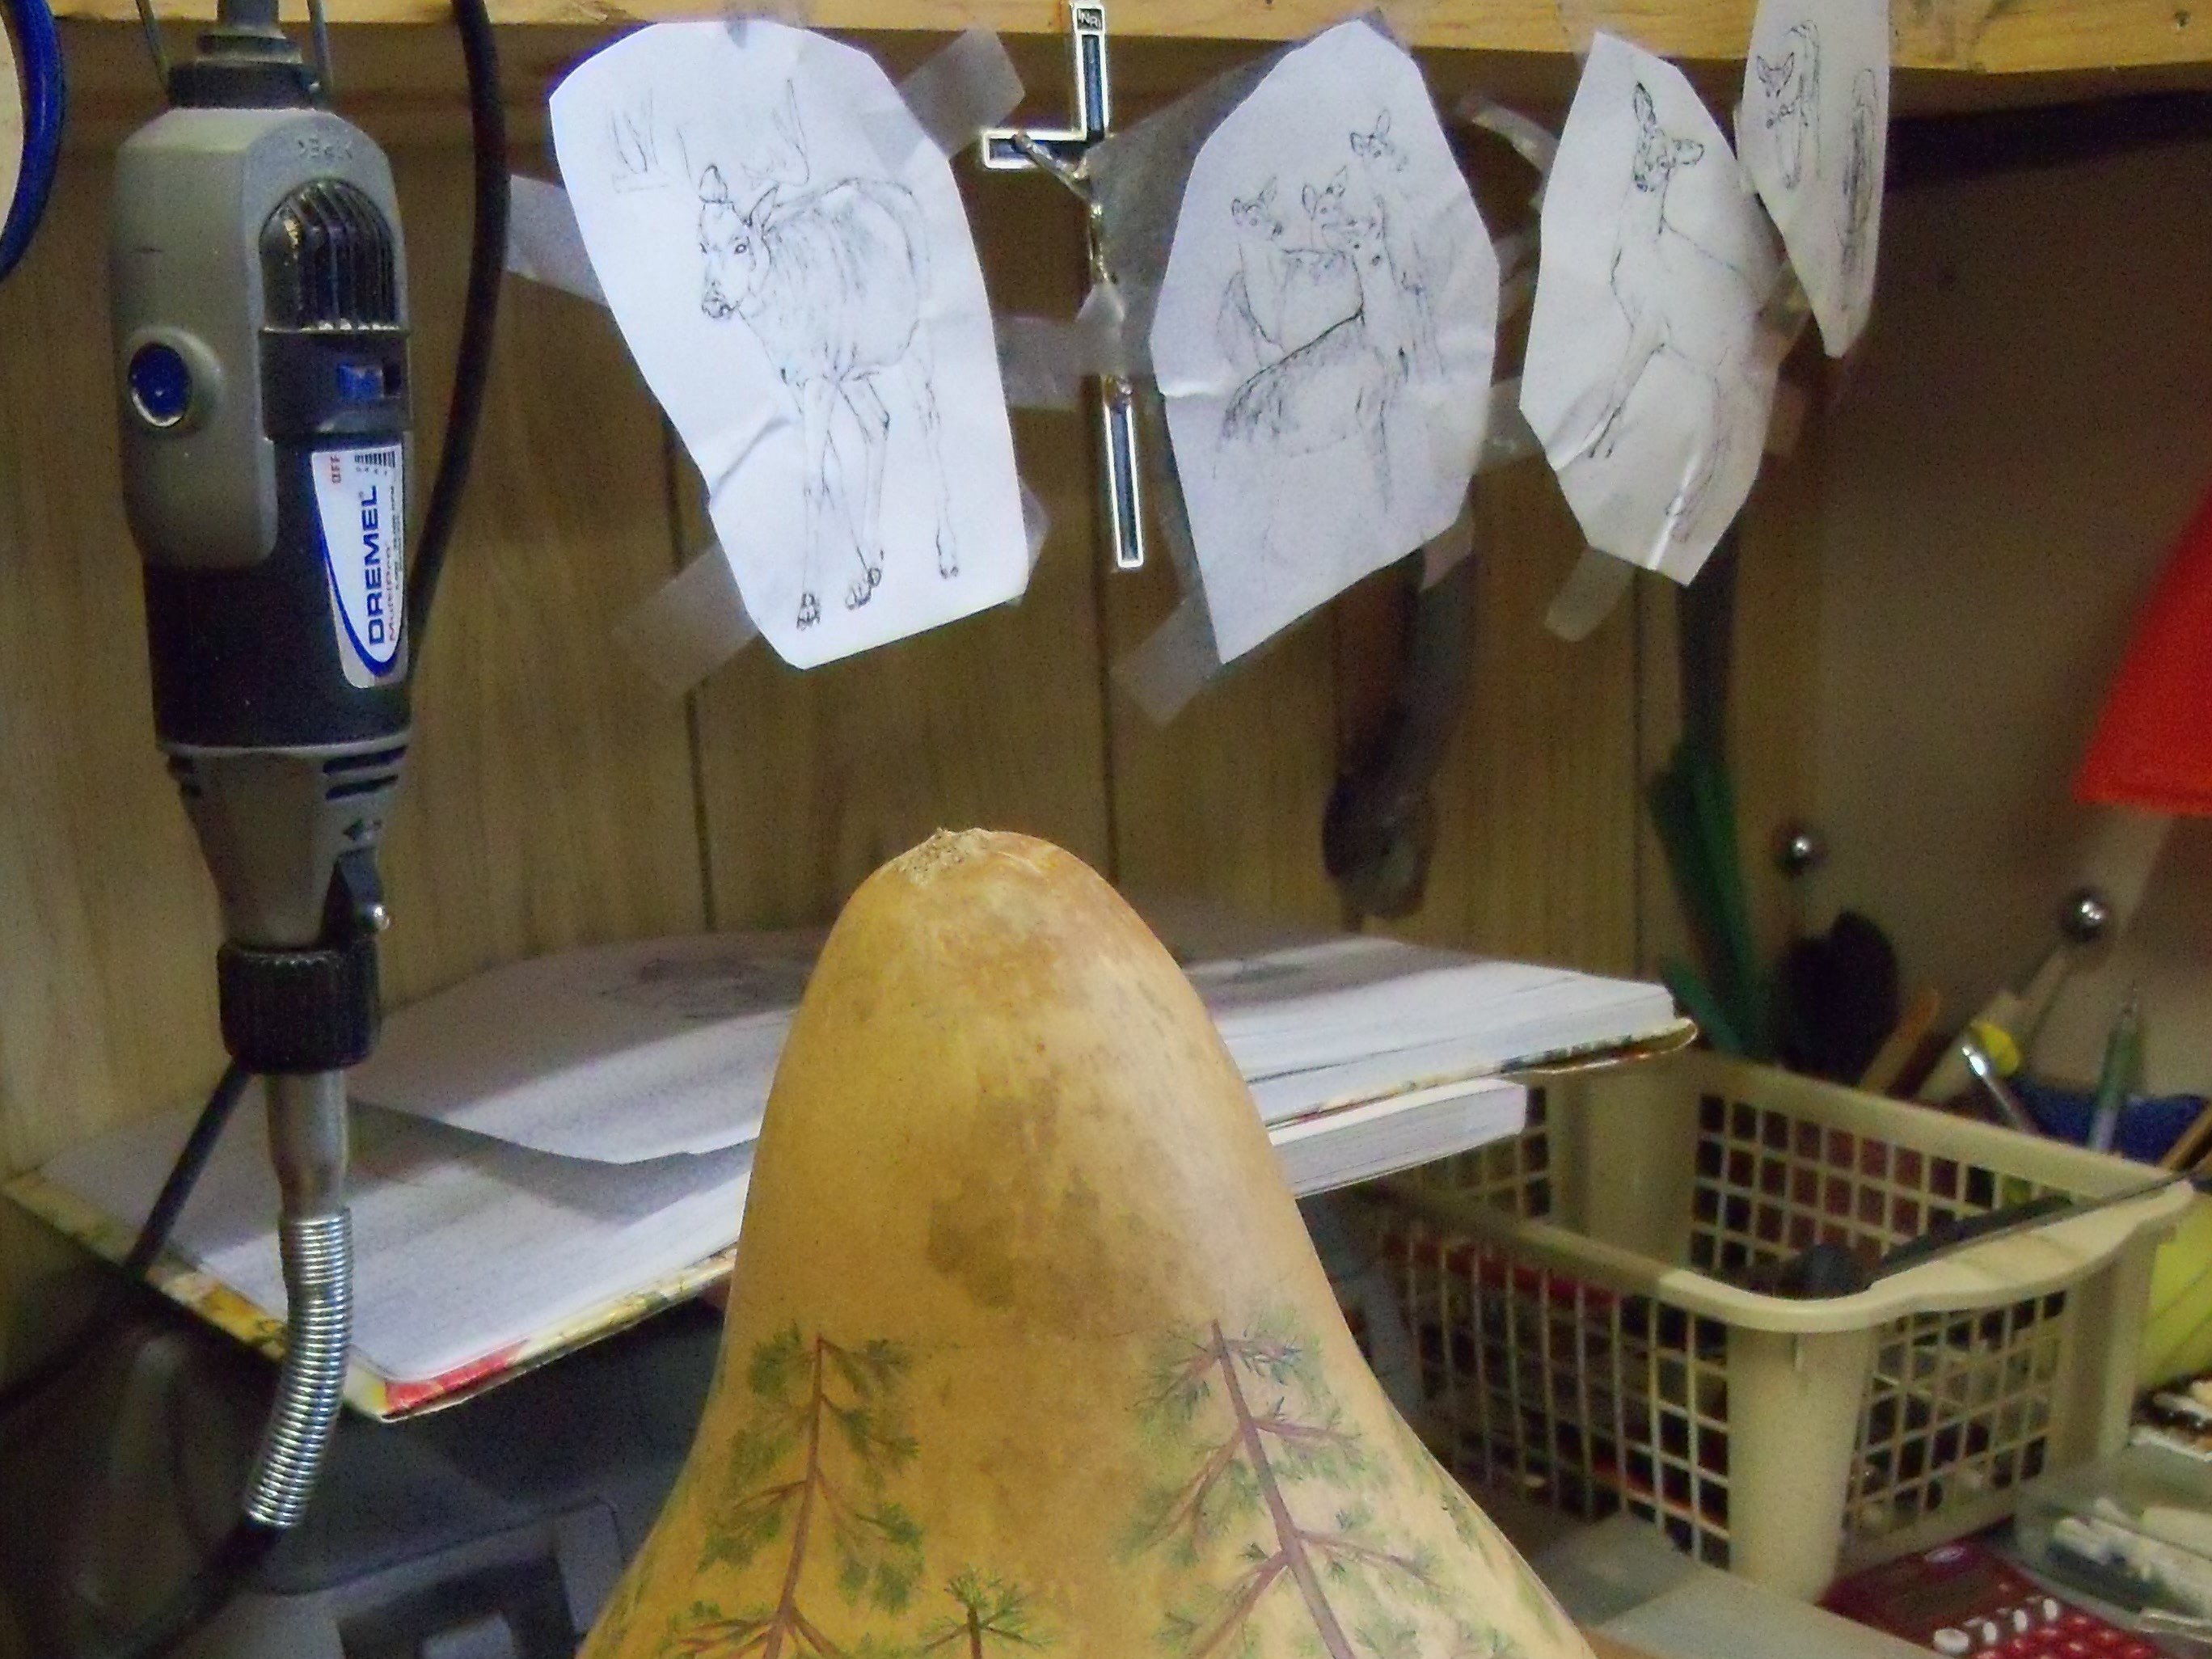
You can see the other half of the cropped photo showing that I keep all the drawings handy by taping them to my shelf at eye level. This helps me when it comes time to woodburn the deer. I’ll be able to see all the details that I need to woodburn.

I use the Everglades Patriot 1000 Wood Burning System for most of my woodburning although I still sometimes go back to the hobby woodburner with interchangeable tips. My hobby woodburner is the Walnut Hollow brand and has been a very reliable one for me compared to the others I’ve used. I’d check that one out first if you’re new to woodburning.

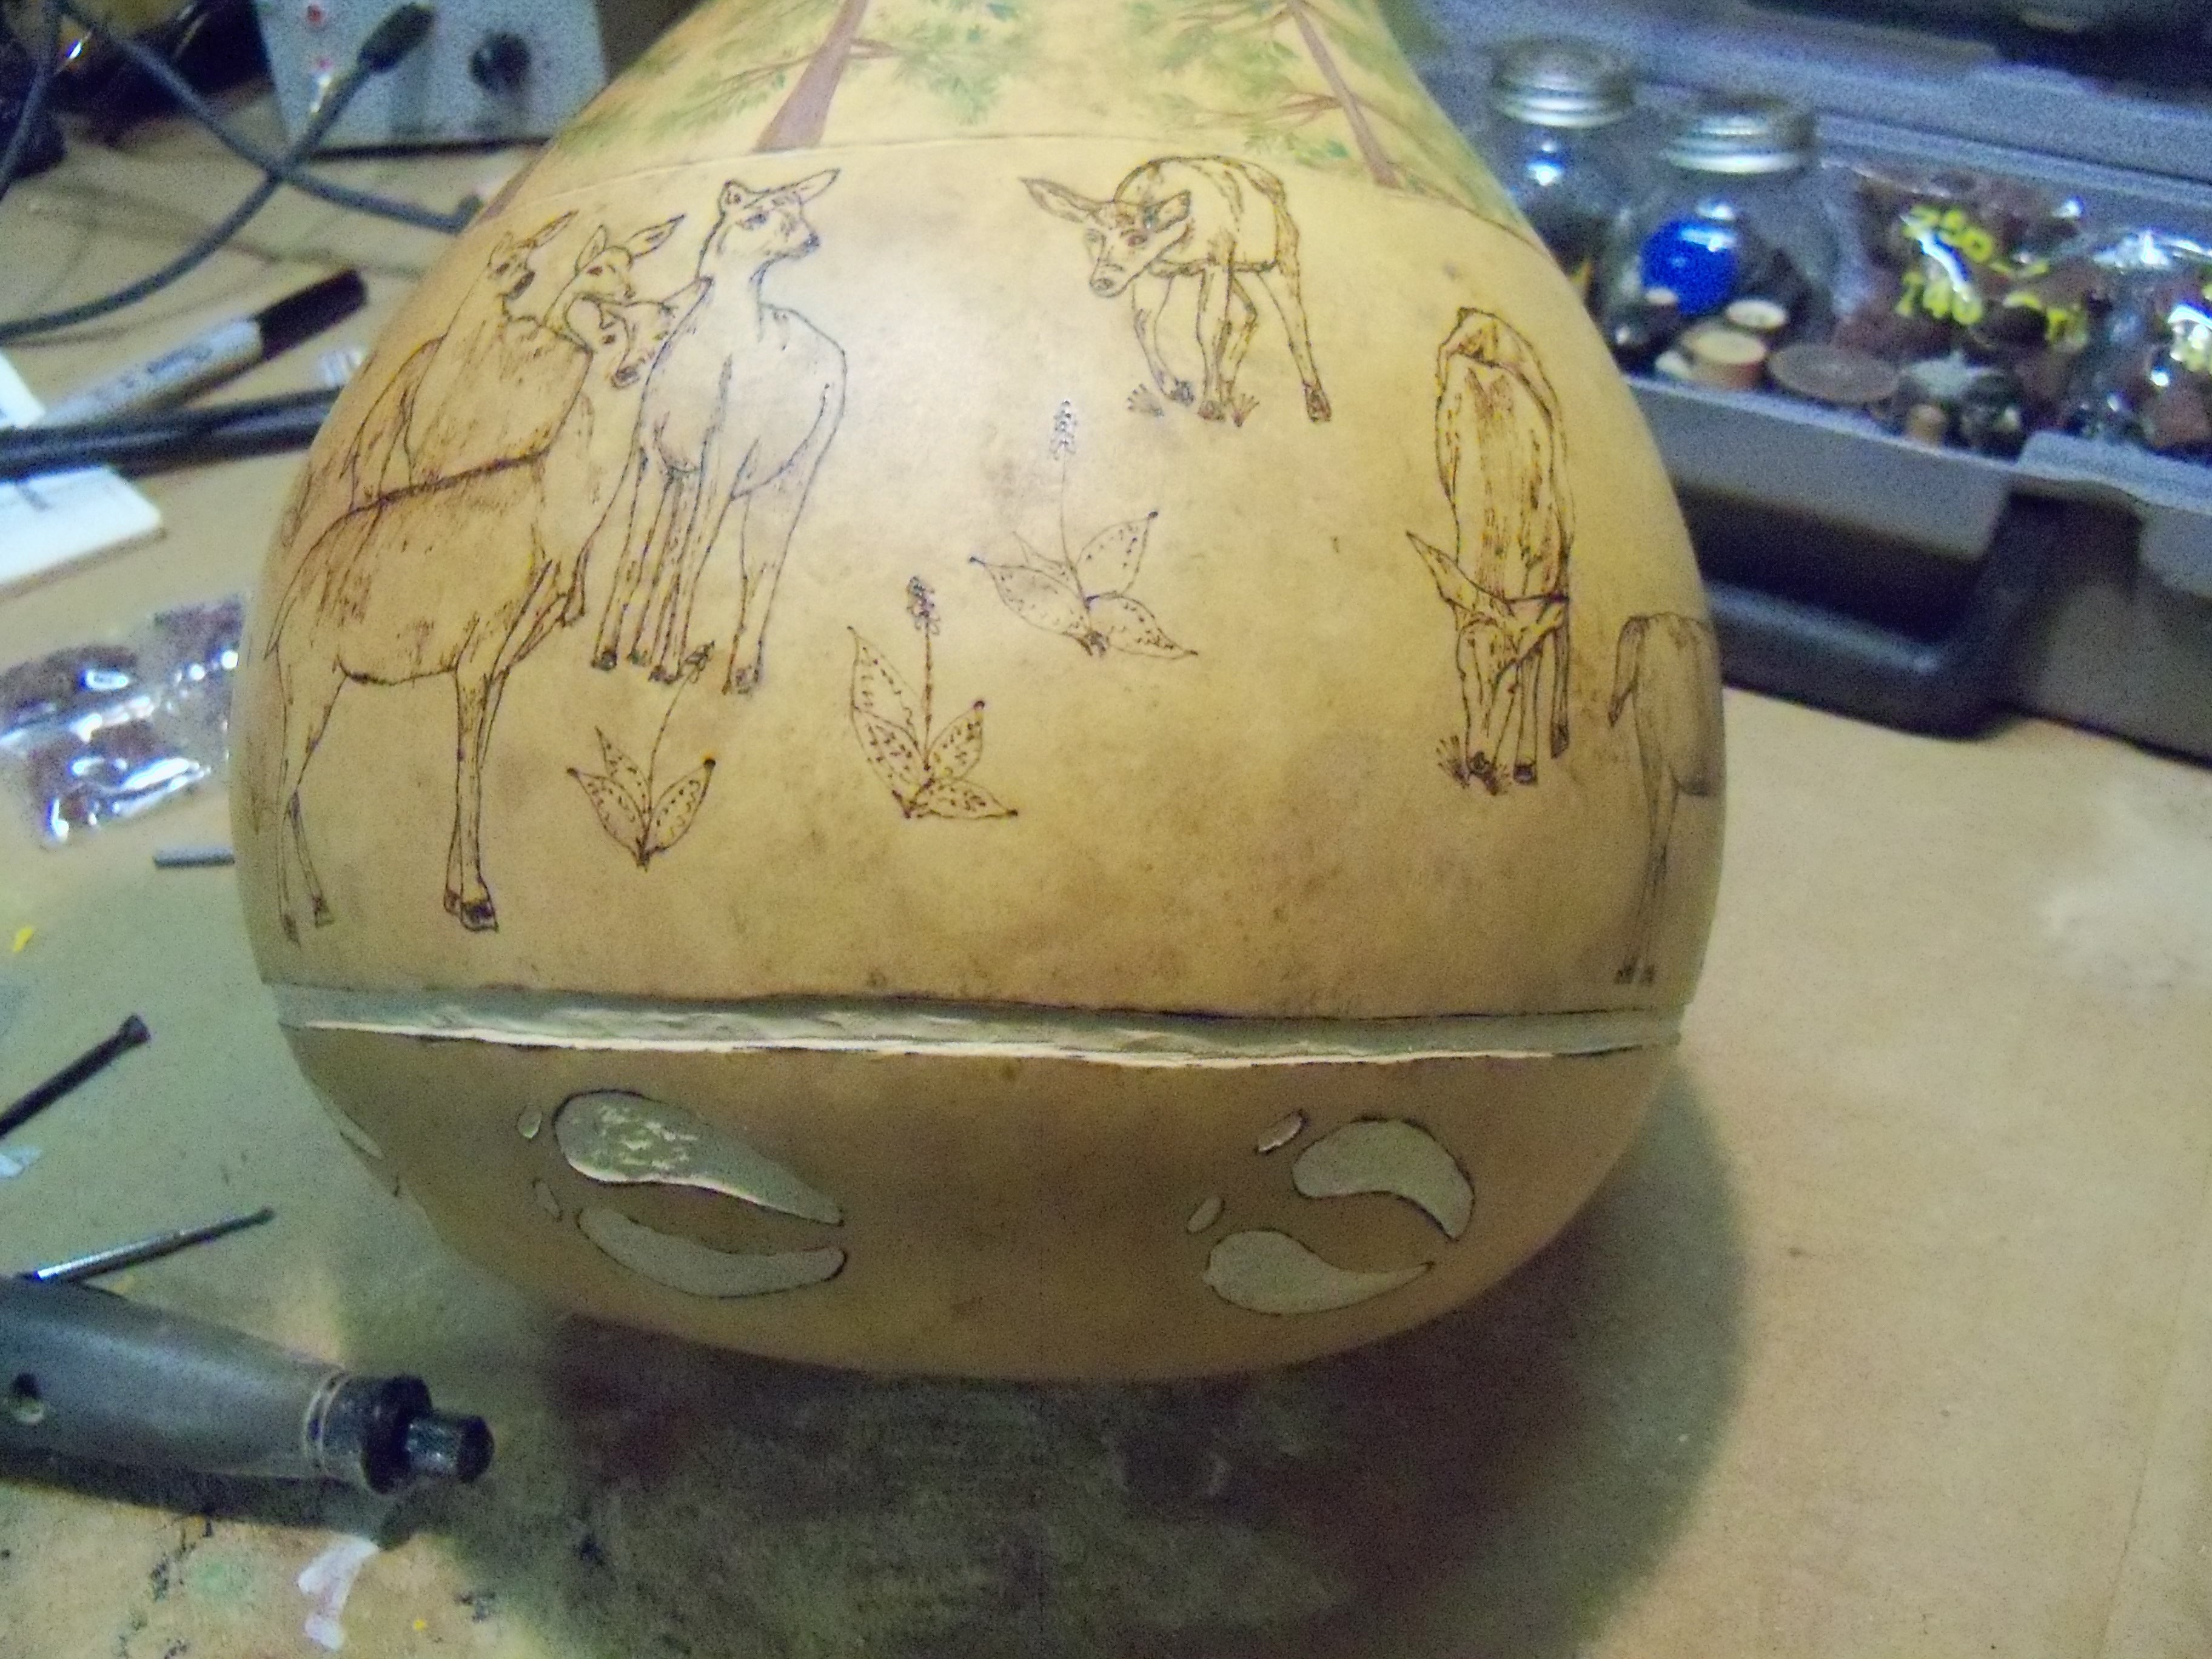
The fixed tip pen I am using in the first photo is the “Writing Tip.” At just the right temp I can use this pen like a real pen. If using a variable temperature woodburner first experiment on a scrap piece of gourd to find the right temp for the job at hand.

For light shading I scrape the gourd back and forth pretty quickly with the tip to leave slight marks in the gourd. This is called directional shading. Remember to follow the contours of the object you are woodburning when doing directional shading.

Other methods of shading I like to use are dots (the closer the dots the darker the shading) and gradient shading, which I do with the flat side of a tip, darkening the gourd in varying degrees without leaving a pattern.

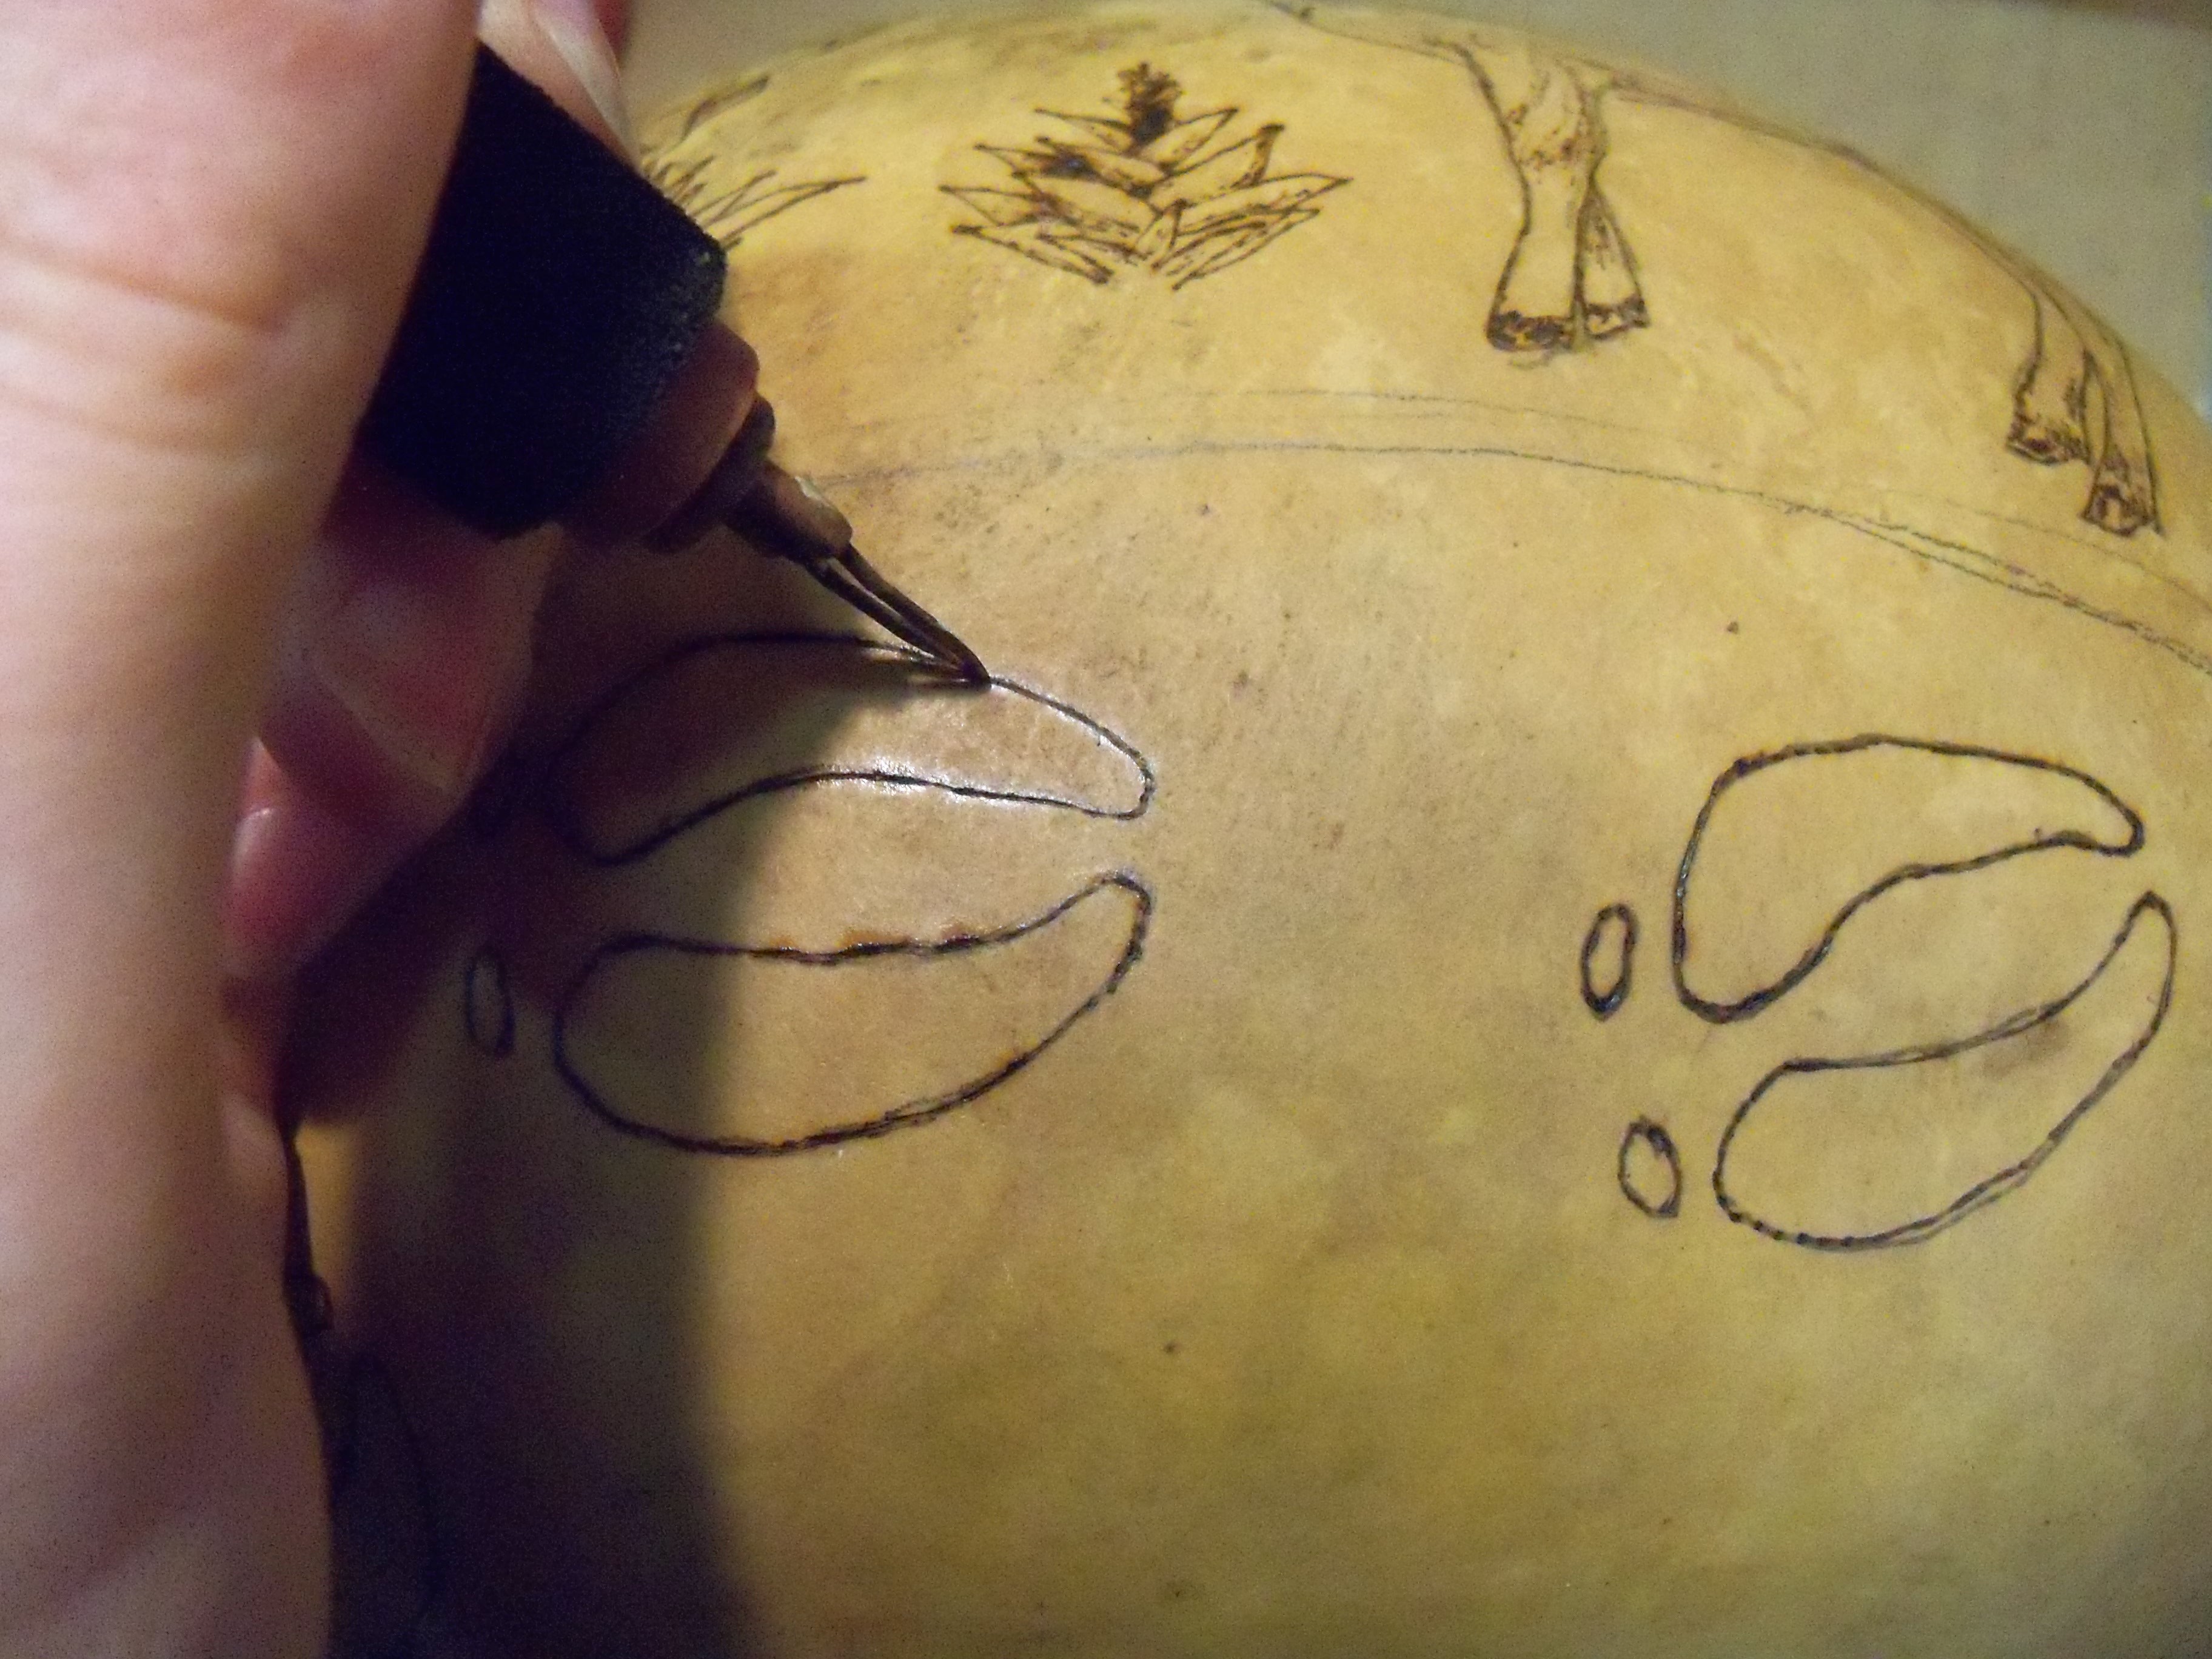
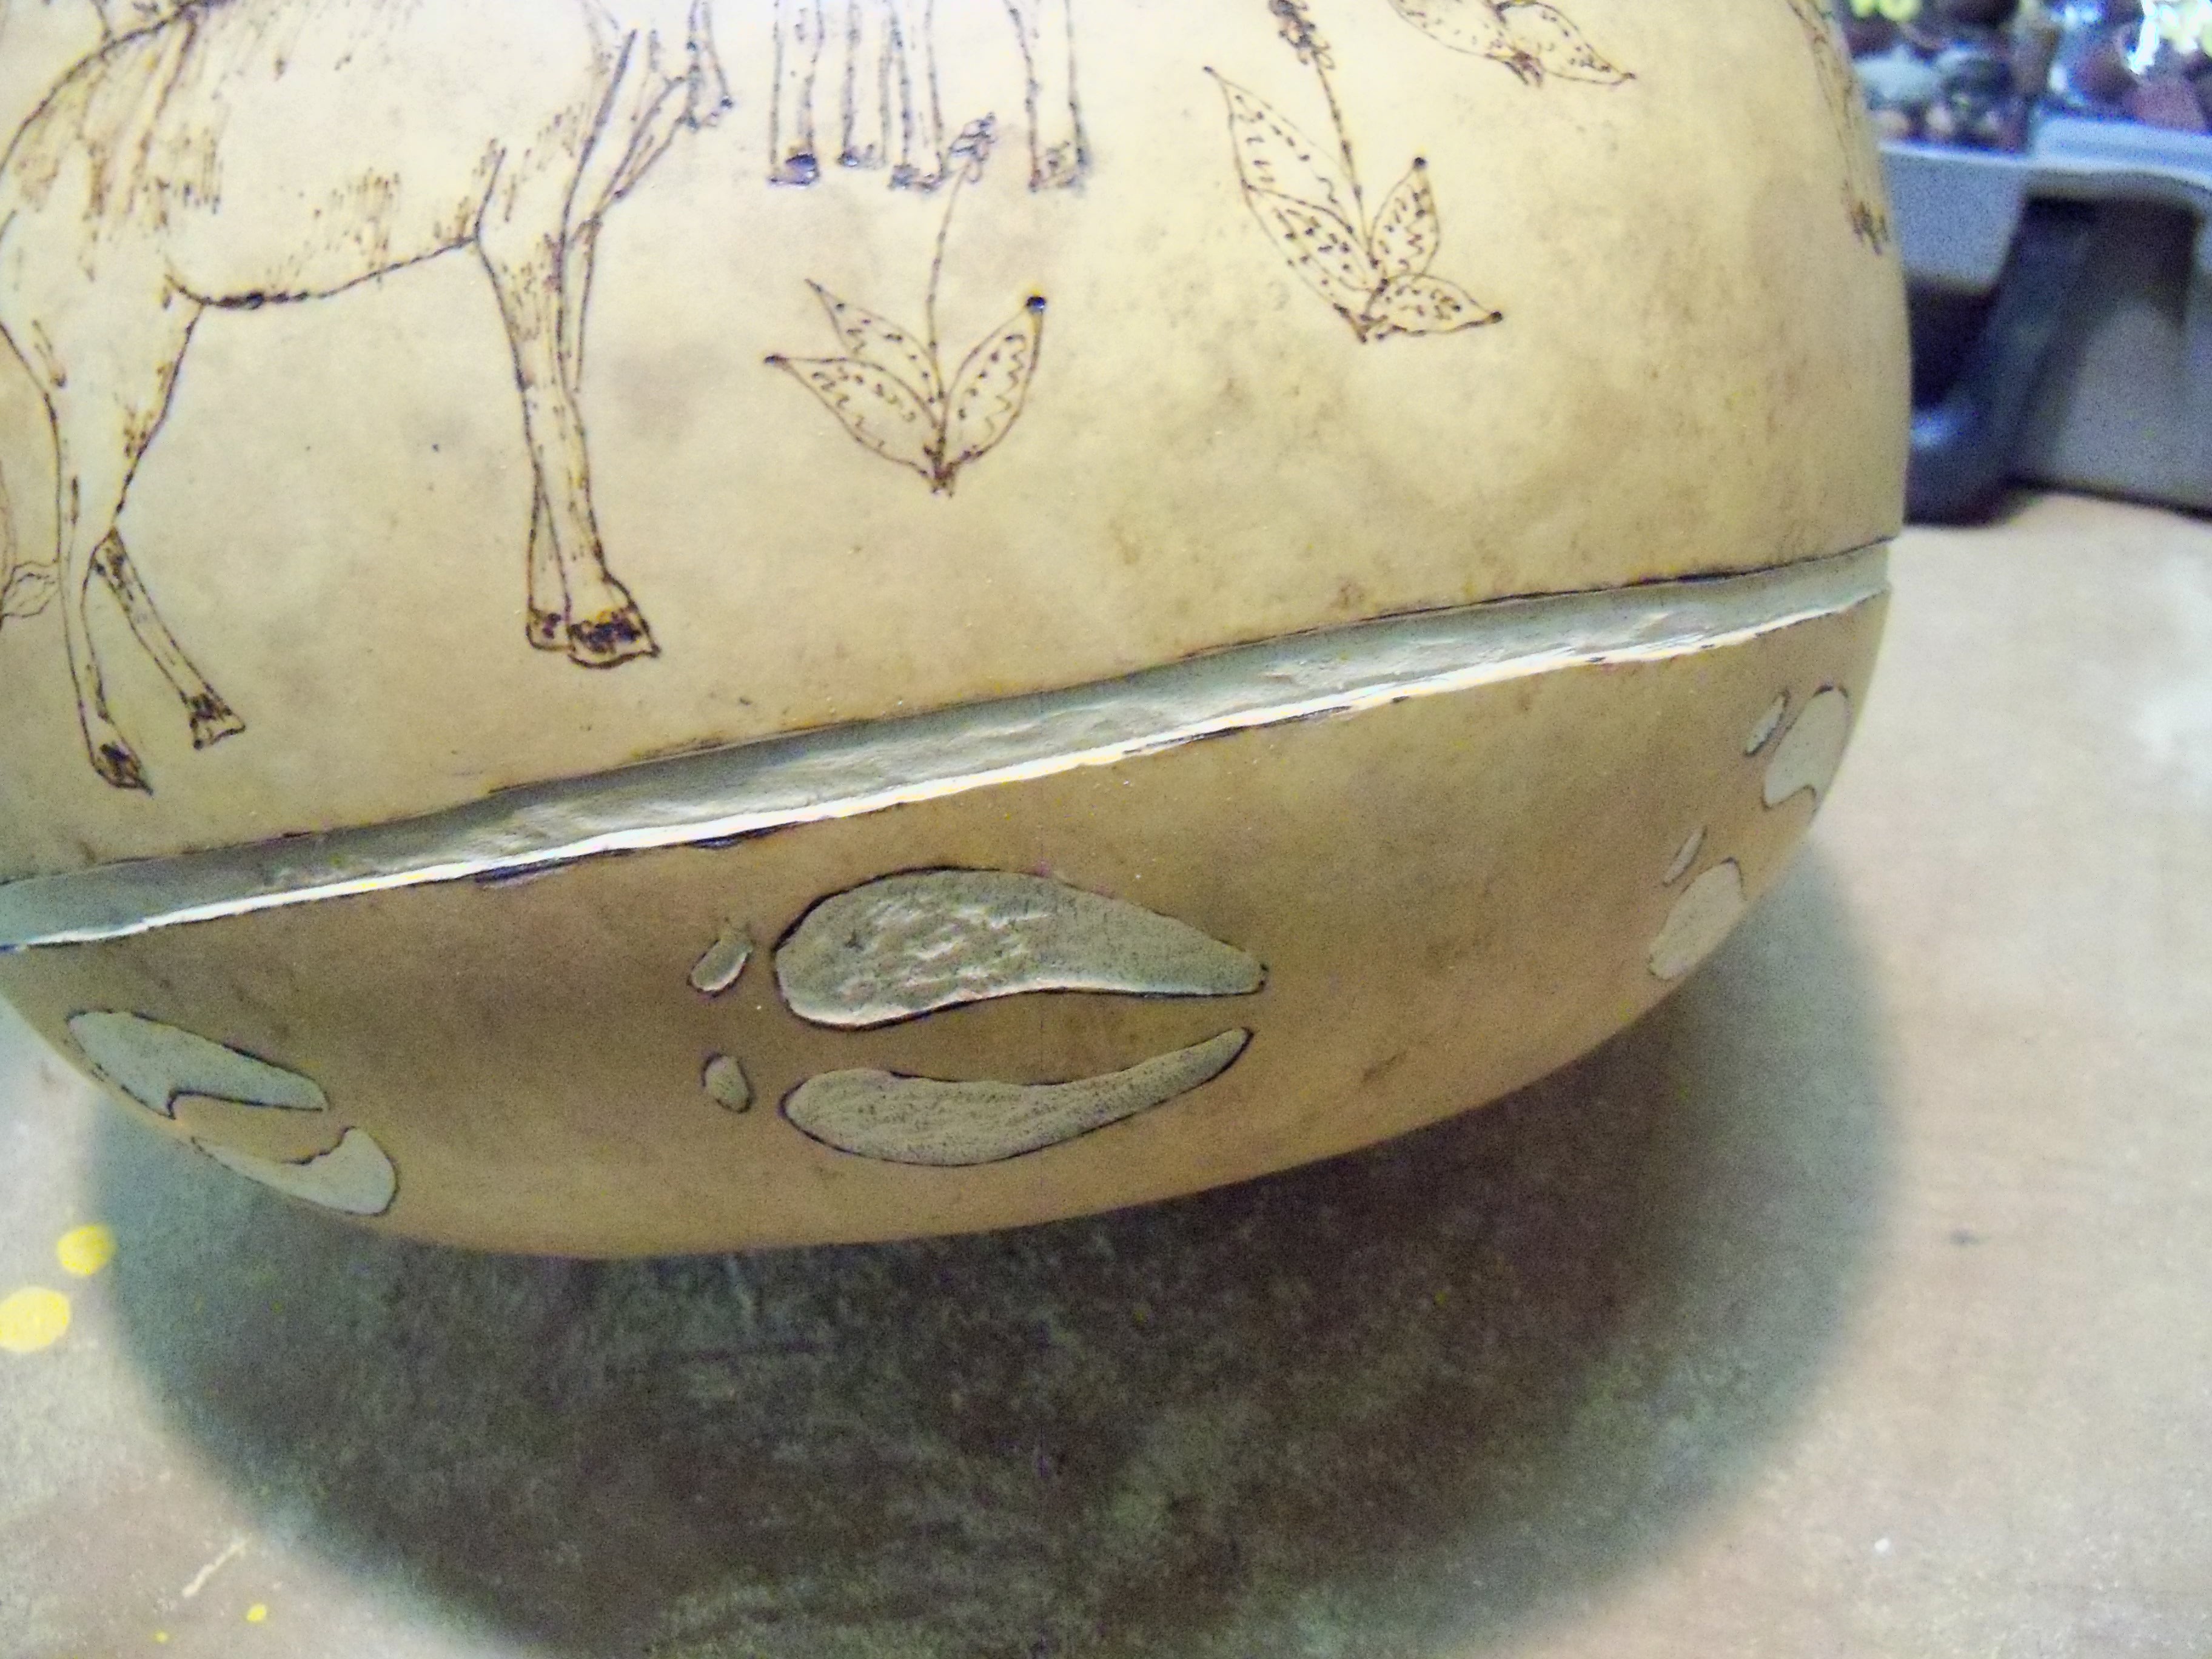
To cut deep grooves in the gourd like I did for the hoof prints in the second photo I used the knife tip.

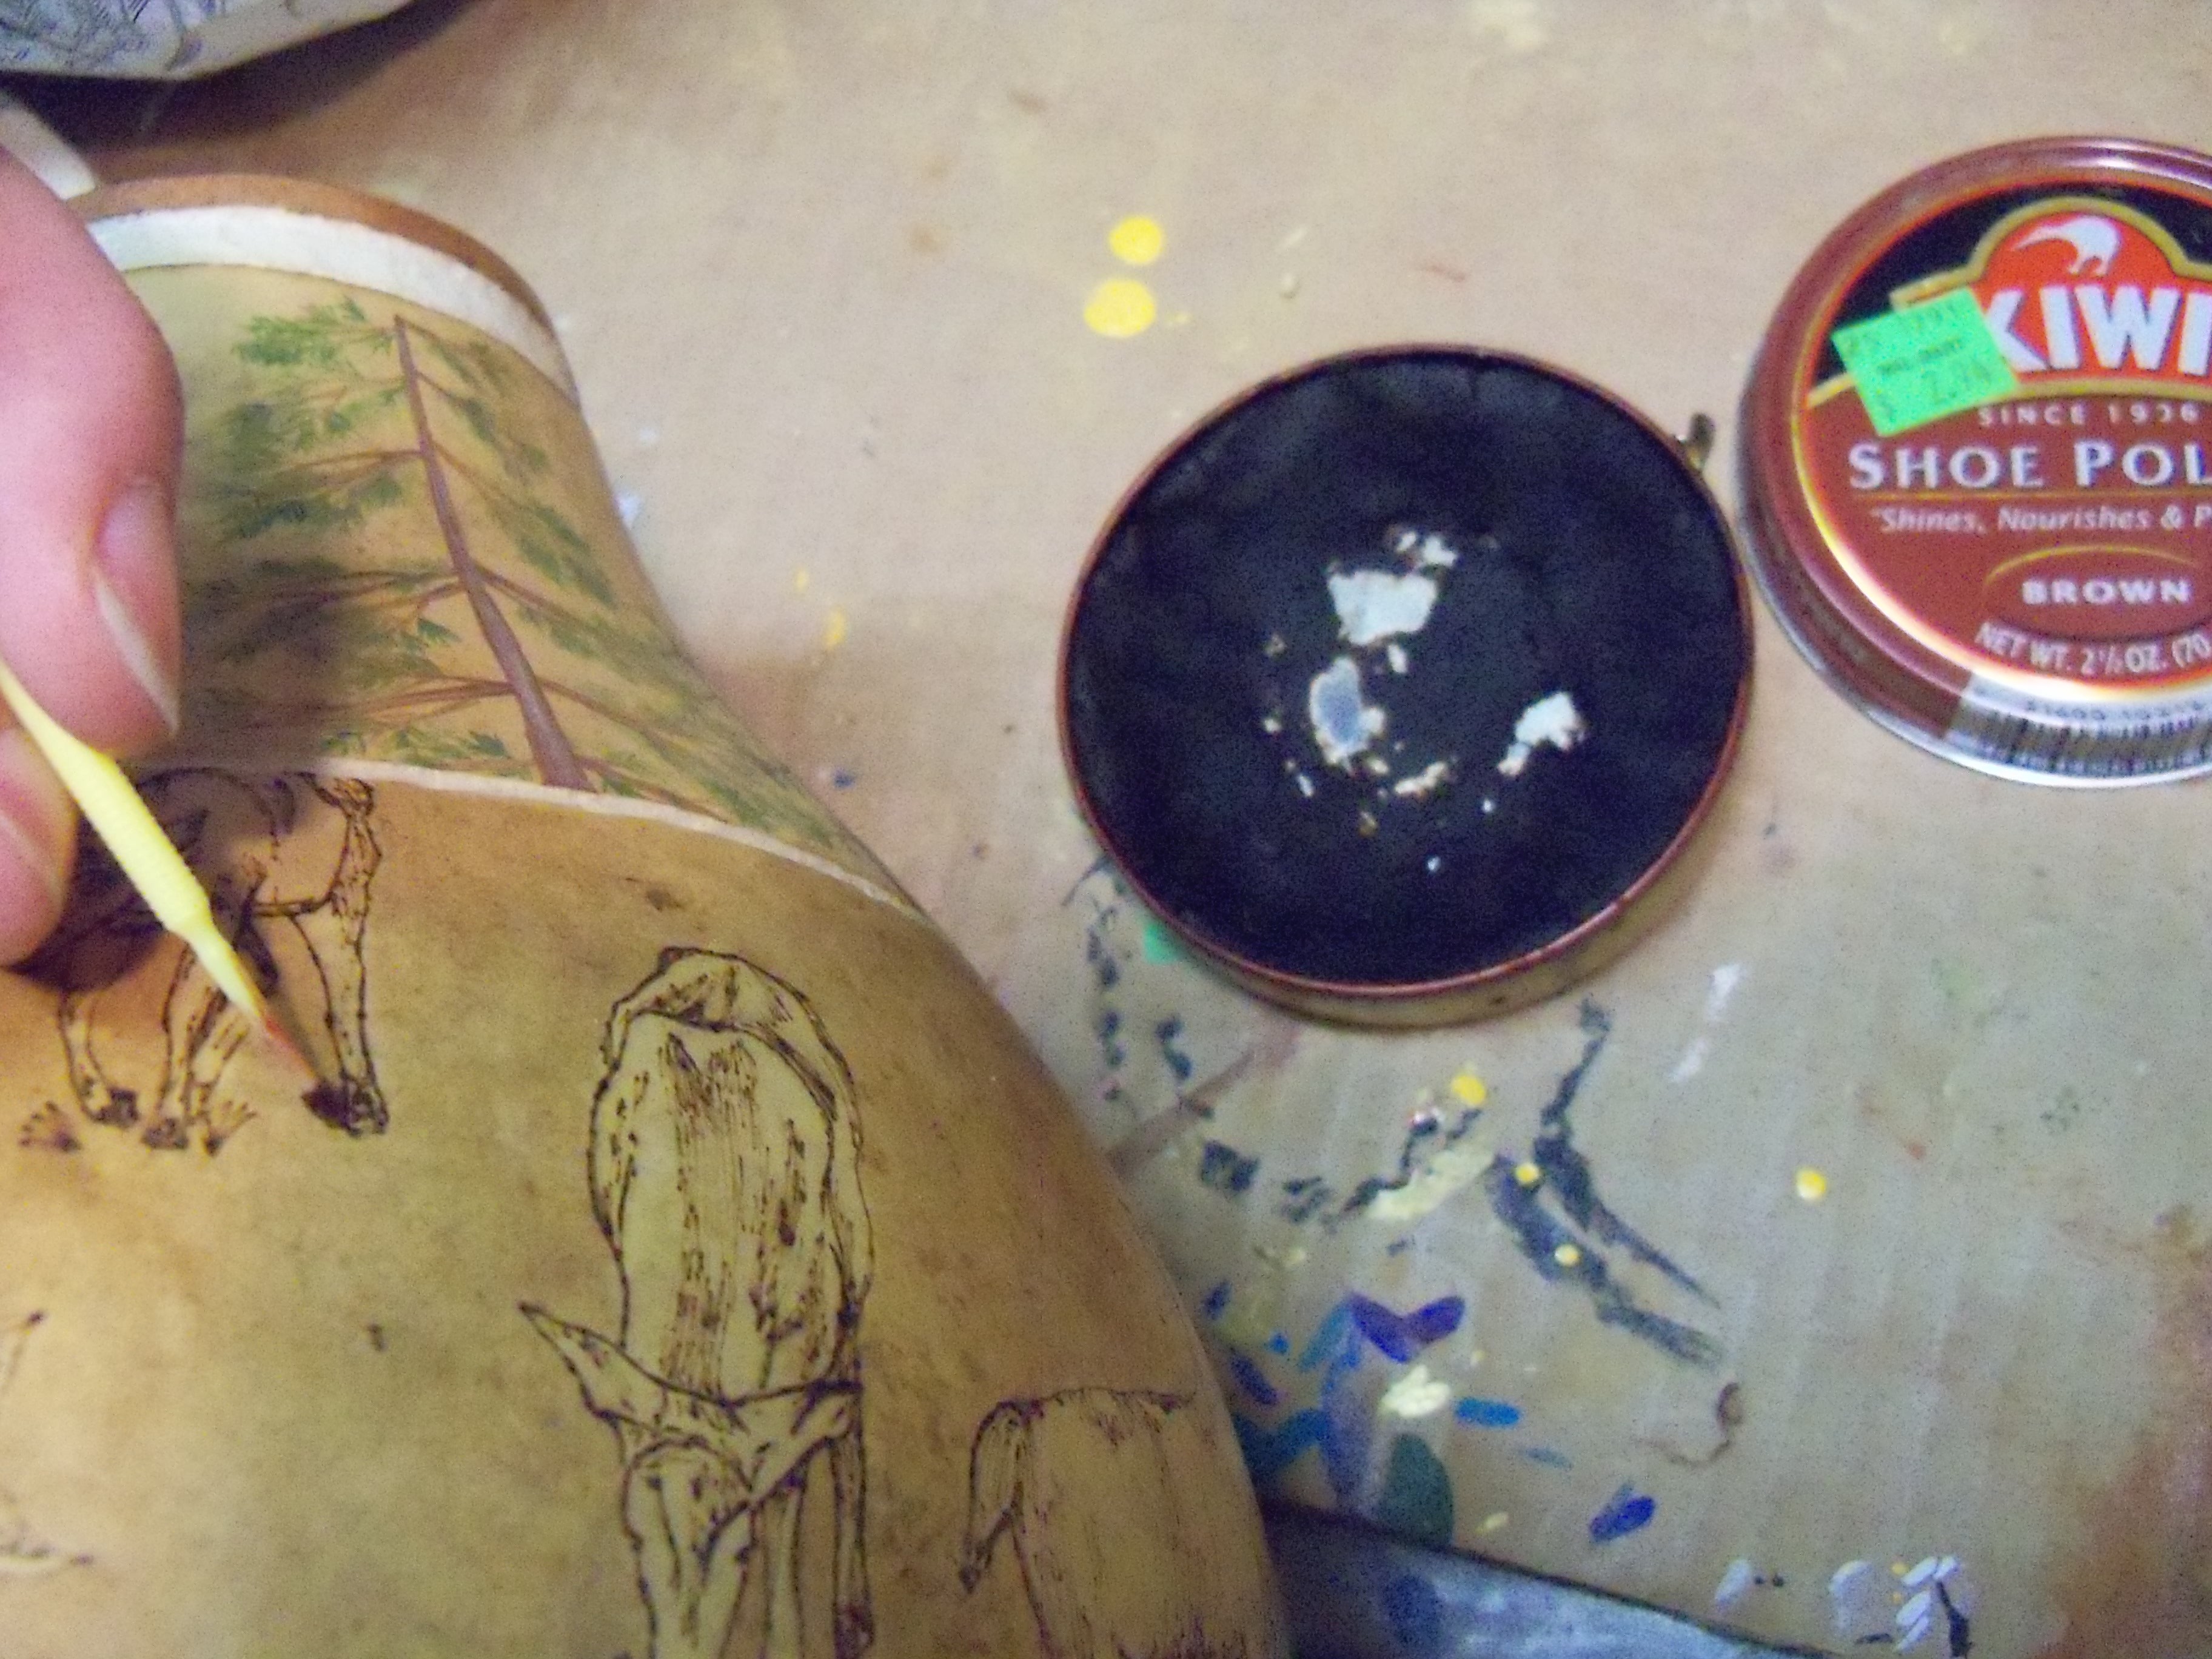
After woodburning the deer I used brown shoe polish to darken the surrounding area to make the deer stand out.

I use microbrushes (very similar to a super tiny pipe cleaner with a plastic handle) to get into the very tiny places.

I use cotton swabs to do the larger areas, but when I have really large places to cover with shoe polish I use a paper towel. Yes, it can get messy, but that’s part of the fun. :)

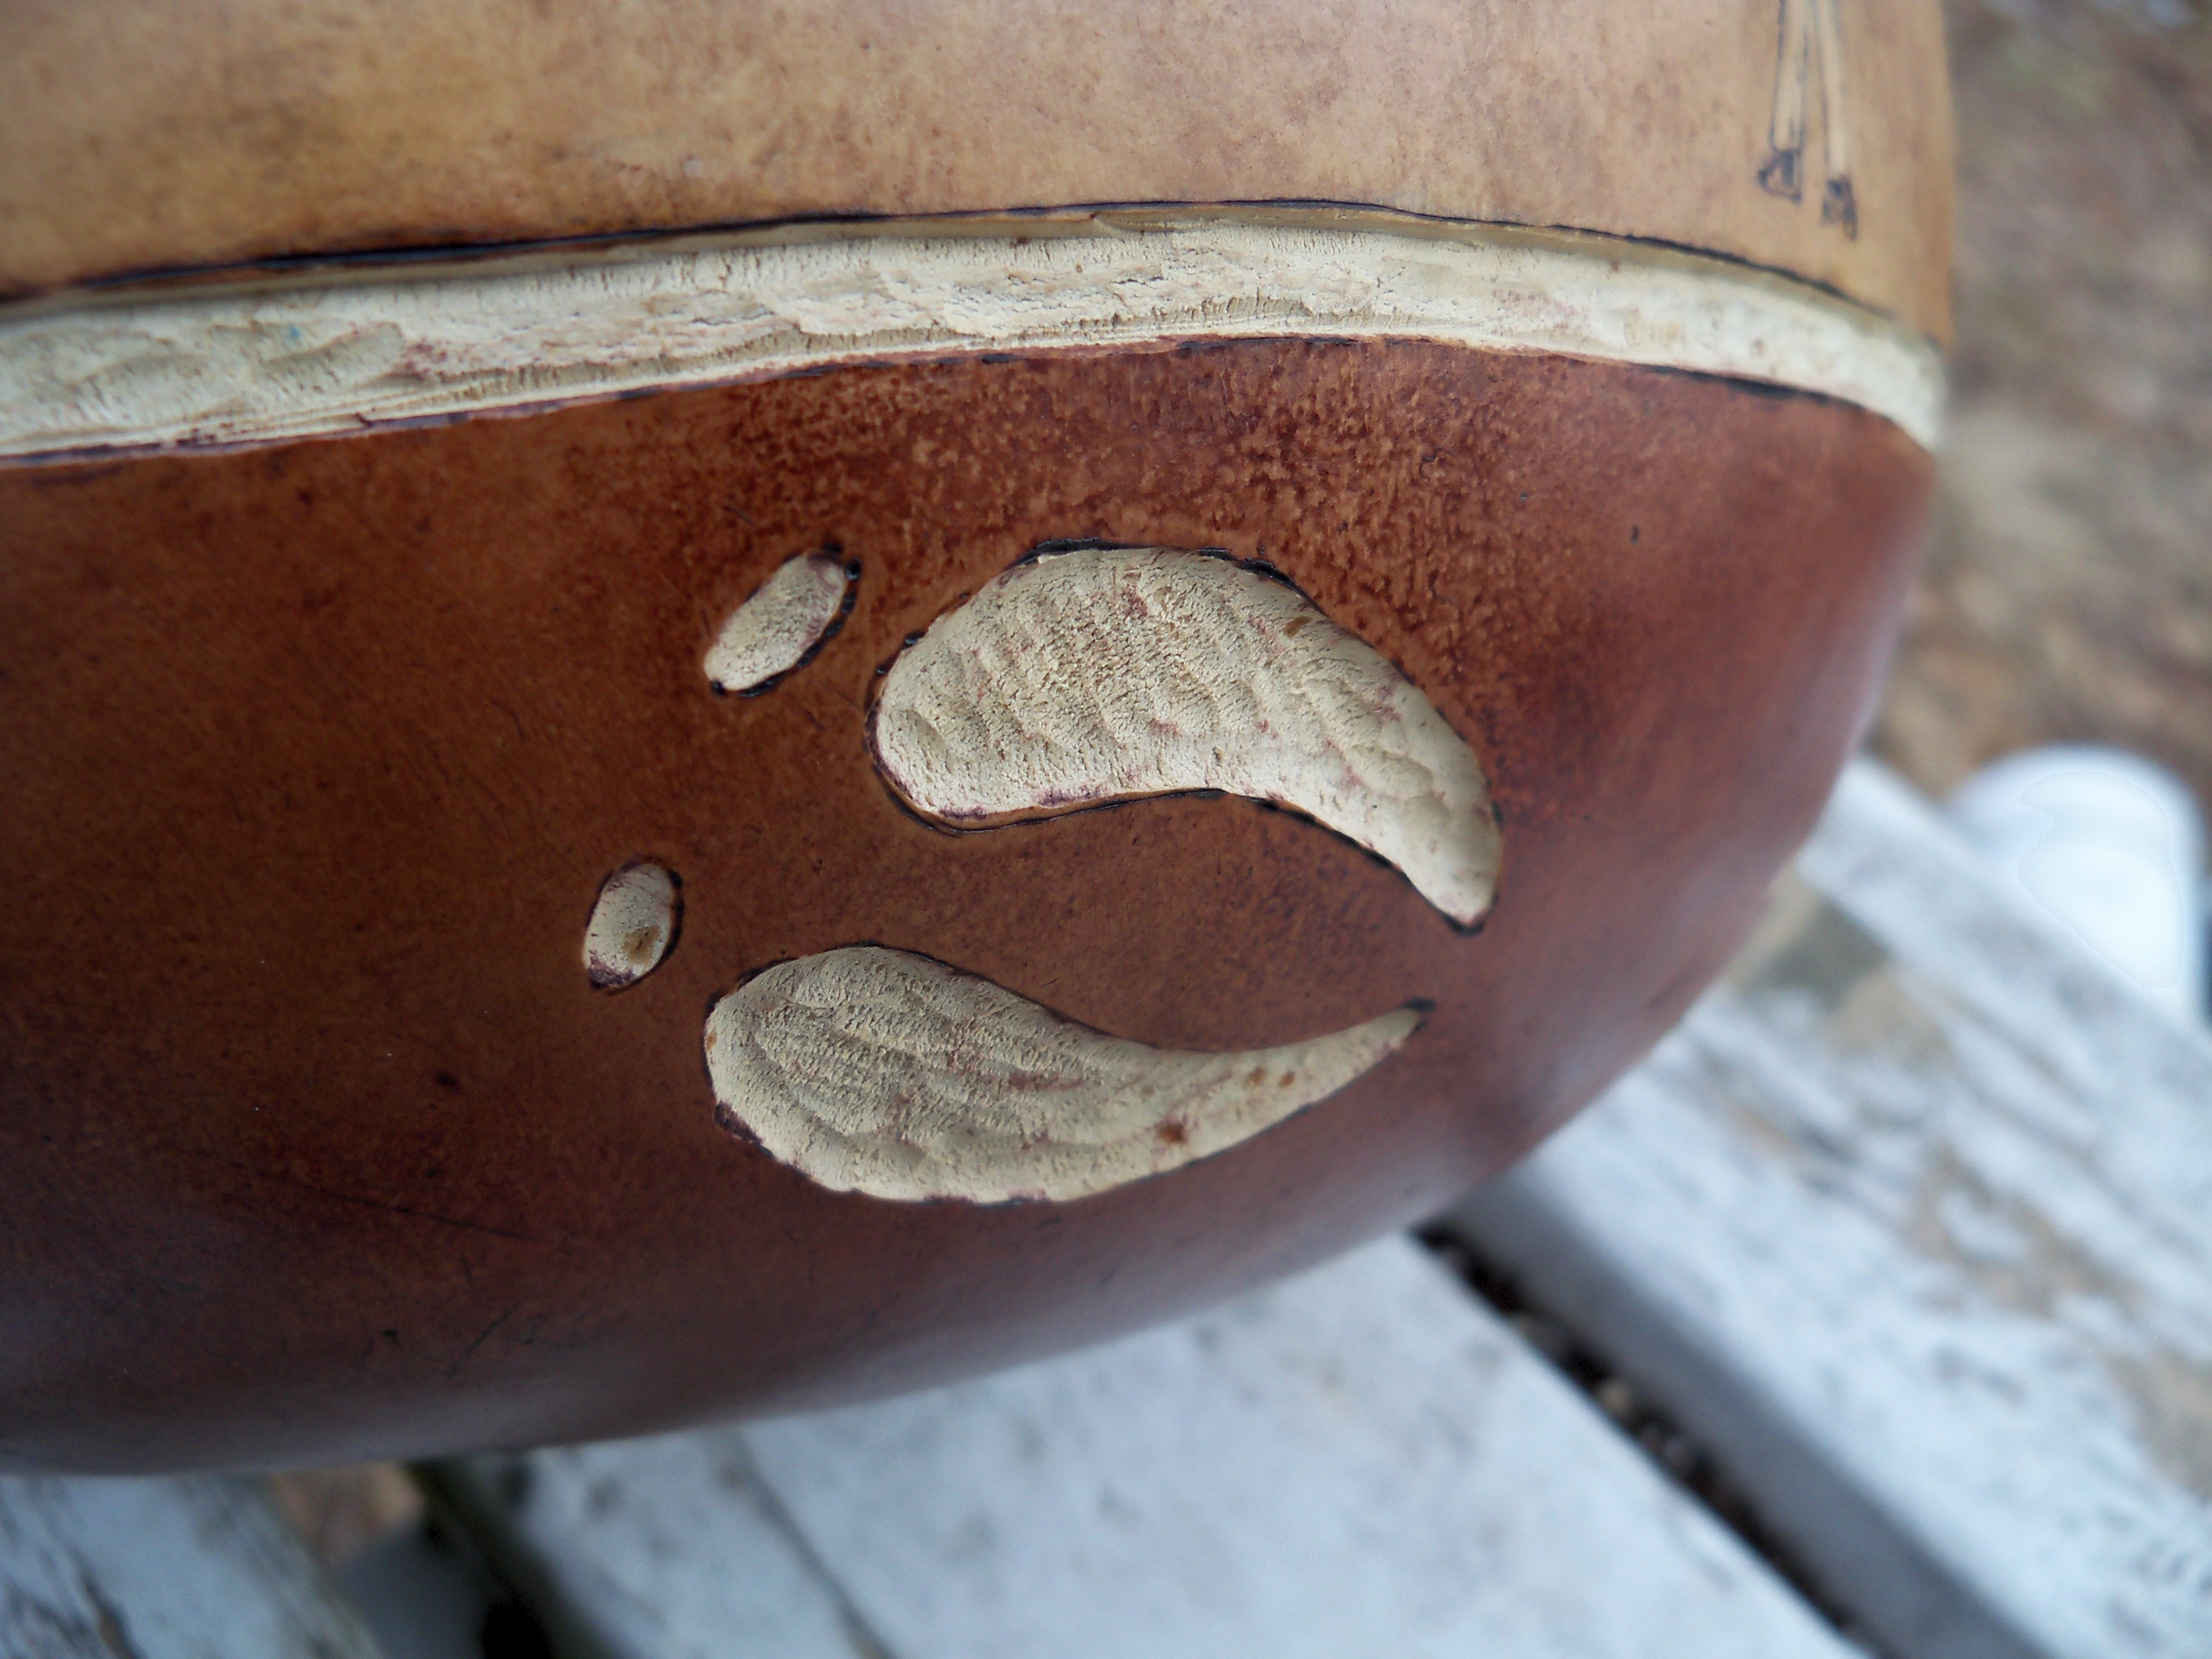
I carved the hoof prints out with my rotary tool using a carbide ball bur. I also carved three deep lines on the gourd with an inverted carbide cone bur. My rotary tool is a variable speed Dremel with a flex-shaft attachment.

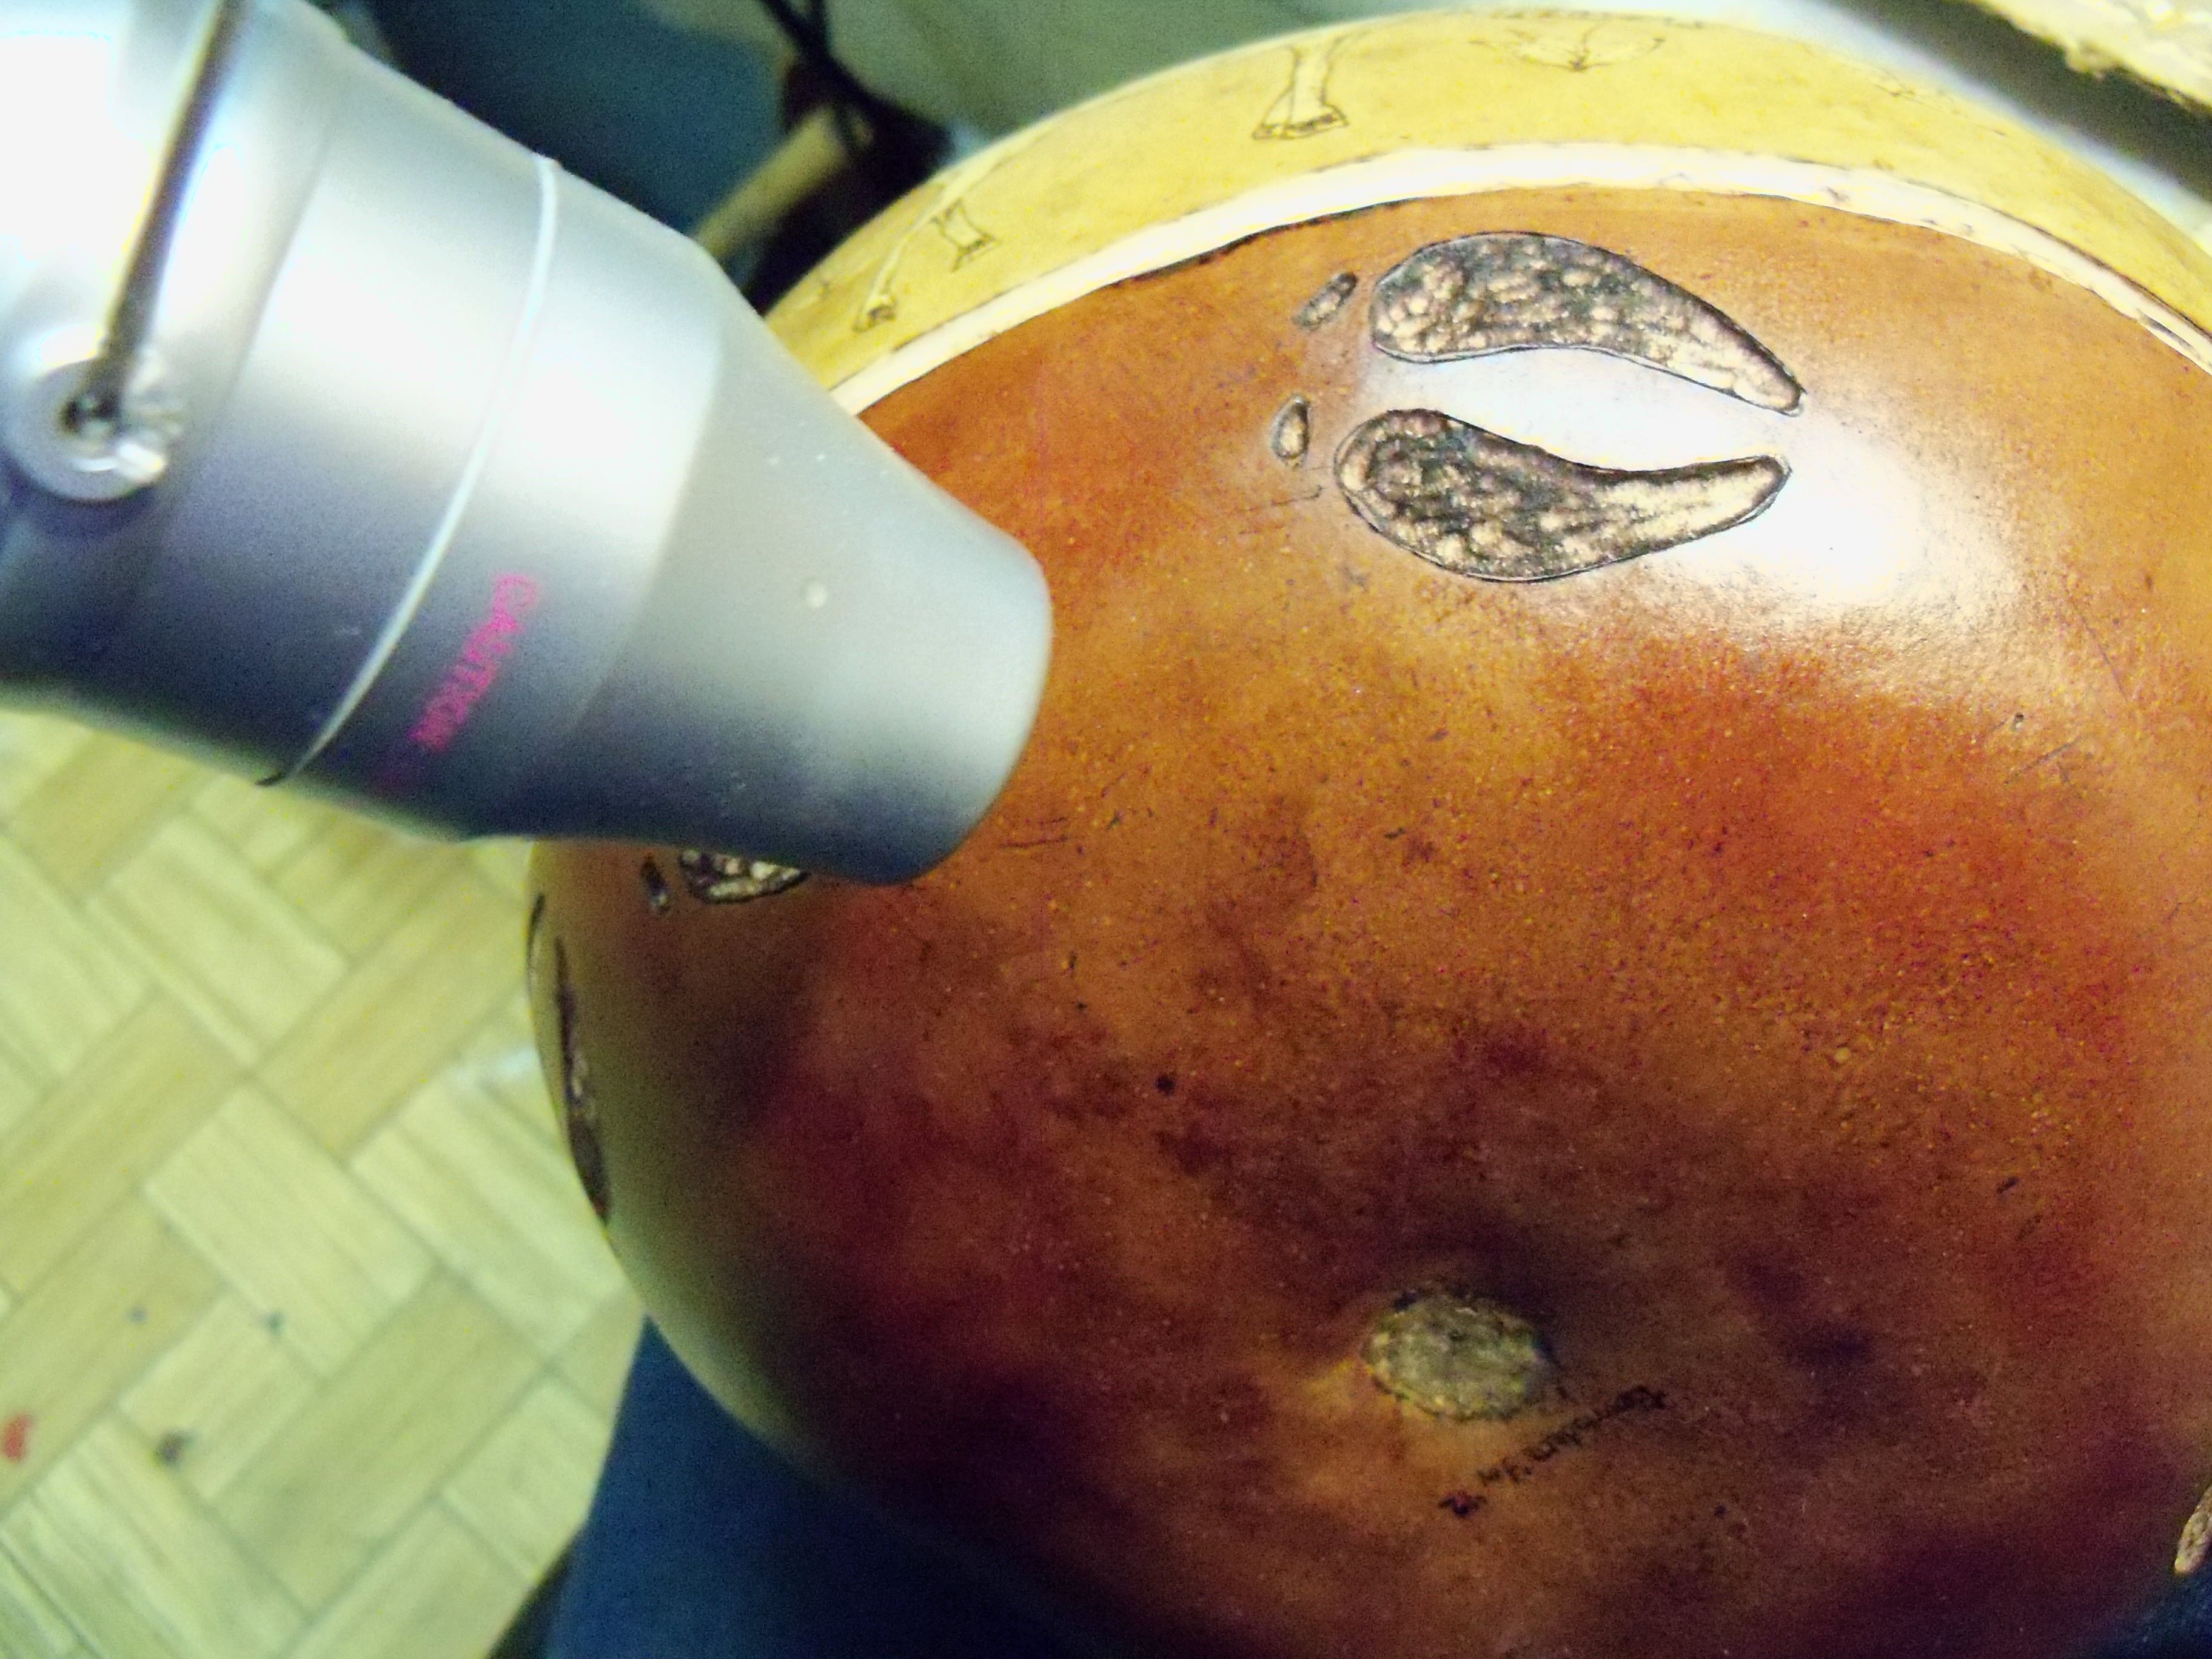
And as a finishing touch I dyed the bottom of the gourd a deep chestnut color with Memories Ink water-based dye. I used a heat tool to speed up the drying process.

Your finished gourd must be varnished or sealed after all your dyes and inks have been cured. This may take up to a week. Polyurethane is my go-to sealer, but acrylic spray will work, too.

Coming from Michigan as I do, I found my inspiration in white pines and white-tailed deer. Deer grow like trees around here! Coincidentally, both are Michigan official state symbols.

Conclusion

This is not a DIY project, but I do list most of the tools and supplies I used for this gourd. I want this project to be a source of inspiration for you to go ahead and and start creating your own gourd masterpiece!