intro1

Intro/Materials

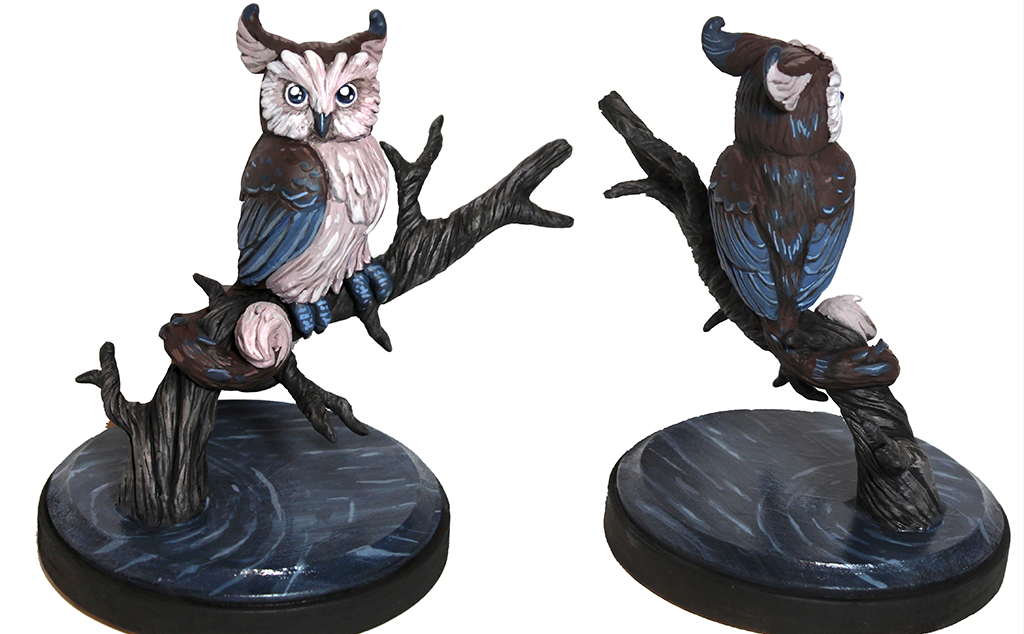
In this tutorial, I will demonstrate some basic sculpting techniques that can be used to produce your very own sculpture of a fantasy-style owl. Even if you have never sculpted before, this a fairly easy project to complete, using rather basic tools and supplies.

intro2

The clay I am using in this tutorial is Sculpey Medium, a polymer clay. You can bake this clay in your home oven and paint the finished piece afterwards. To read more about this clay, check out my review.

I have pictured here my favorite sculpting tools. They come in all shapes and sizes, and range greatly in price. If you are just starting out, I recommend finding a cheap starter set of tools. You can even use things from around the house like knitting needles, pins, and chopsticks. Several gauges of aluminum wire are used for the armature, a thick (9g) and a thin (14g). This wire can be purchased in spools for fairly cheap.

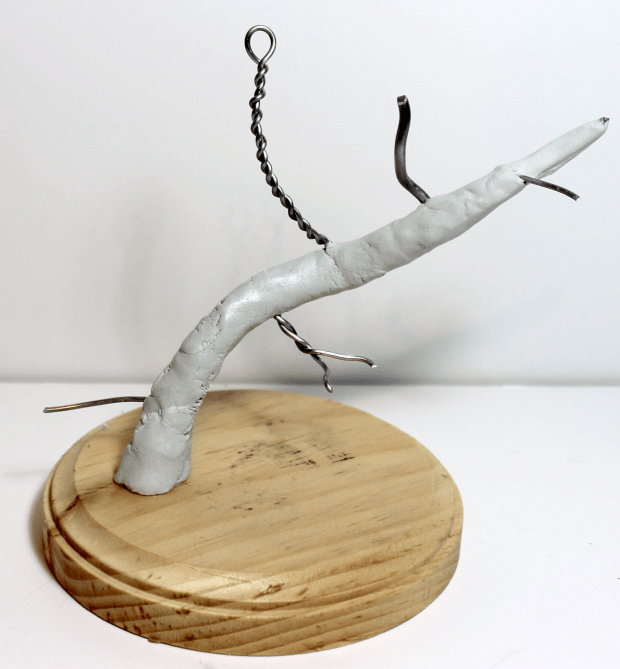
Apoxie Sculpt is used to reinforce the armature. Any 2-part epoxy putty will work in place of this if needed. Just be certain to read ALL safety precautions on the product label and ALWAYS wear gloves when mixing epoxy. A wood base will anchor your sculpture and provide an environment. These are just a few dollars at your local craft store.

You will also need wire clippers, pliers, a drill, sandpaper (around 200 grit) and isopropyl rubbing alcohol. If you want to paint your sculpture, I recommend Cel Vinyl paints, produced by Cartoon Colour. However, any acrylic paint will do.

Project Steps

ARMATURE

The main purpose of an armature is to provide structure and support for a sculpture. Additionally, it establishes proportion for the entire piece. Take your time when building the armature, making sure everything is correct before moving onto clay.

armature1

The armature here begins at the branch as it needs to be very sturdy to support our little owl. I cut two equal lengths of the thick wire and twist them together tightly. Pliers can help when twisting thick wire. I drill a hole in the wood base, just large enough to fit the diameter of my twisted wires. The armature is inserted into the base and then bent into shape.

armature2

I wrap several lengths of thin wire around this main structure to create smaller branches, making sure the armature looks interesting from all angles. Another length of thin wire is twisted together to create the armature for the owl. This is then twisted in place around the branch.

armature3

Once I am happy with the armature, I use Apoxie Sculpt for reinforcement. I never go too thick with the Apoxie as I still need to apply clay over the top. I allow the Apoxie to cure for 24 hours before moving on.

SCULPTING THE BRANCH

branch1

I use thin strips of clay and press them into place on the branch armature. I get the whole thing covered, adding some smaller stubby branches as I go.

branch2

I then texture the branch with varying grooves. I start with the deeper crevices and work my way to smaller, thinner lines.

branch3

I brush rubbing alcohol over the branch to smooth it out. I bake this and then lightly sand once it has cooled. I now have a nice sturdy branch on which to sculpt my owl.

SCULPTING THE OWL

owl1

I apply some Apoxie Sculpt to the owl armature and allow it to cure. On top of this, I apply rough shapes for the owl’s head and body. The main body tapers from the fluffy chest to narrow tail and the head is dome shaped.

owl2

I smooth this out with my hands and then add shaped, flat pieces of clay for the wings.

owl3

Center lines are then established to help keep the details symmetrical.

DETAILING THE FACE

head1

I sketch in a basic layout for the face first. Eye sockets are pressed in using a round tool. Here, I have used wooden beads for the eyes, but you can also simply use balls of clay. A small pyramid is used for the nose.

head2

Using small strips of clay, I build up the eye ridges, bridge of the nose, cheeks, and brow.

head3

The shapes are smoothed in and then textured using a small metal tool. Ears are created with long, flat triangles, smoothed into the back of the head

TEXTURING

texture1

Feathers are similar to fur and can be created through the use of hatching. Small strips of clay can be used to define long or fluffy feathers. This is a great way to break up an otherwise monotonous texture like this. I like to establish the main texture, add the strips over top, and then go back to add texture to the strips, blending them in with the rest of the feathers.

texture2

Wing feathers are drawn in, with the use of a reference. I then scrape away clay to give the appearance of overlapping, starting at the bottom of the stacking order and moving my way up to the top.

FINAL FEATURES

final1b

Toes are added using cone-shaped pieces of clay. They are wrapped around the branch and smoothed into the body. I add some fluffy feathers around where the feet meet up with the body. I also decide to add in a long fluffy tail to add to the fantasy feel of this piece.

final2

Everything is textured and then brushed with rubbing alcohol before baking. The whole thing is lightly sanded before applying primer.

final3

PAINTING AND FINISHING

painted1b

I start with flat base colors first, slowly building up secondary colors on top.

painted2b

Colors are applied in thin layers to help everything stay even and smooth.

painted3

Highlights and shadows are painted in last and gloss is added over the eyes and base for a “wet” look.

Feel free to change this up a bit and create your own original character! Want to learn more? Check out my book, Fantasy Creatures in Clay.