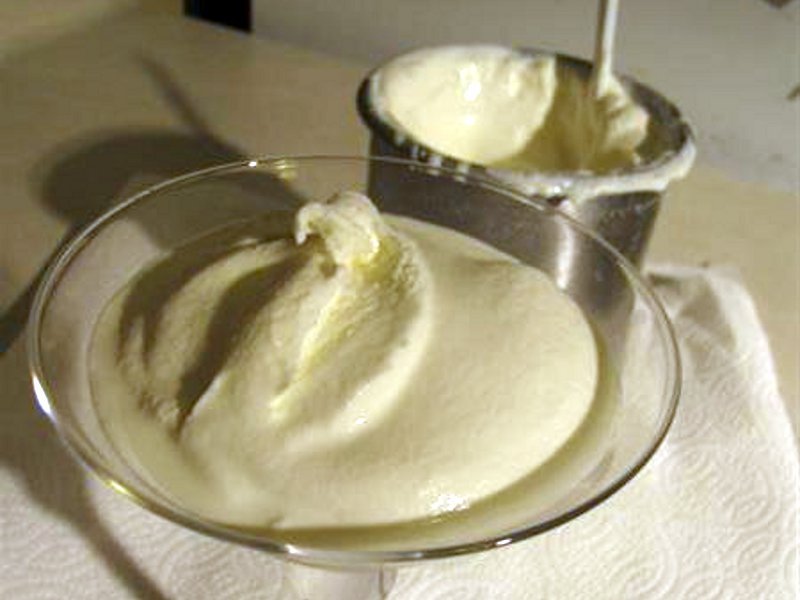
Making ice cream with cryogens stronger than water ice is a fairly common chemistry demonstration stunt. The ideal way to do it is with liquid nitrogen, which is poured directly into the ice cream mixture, with stirring, and causes it to set up in about 10 minutes. Liquid nitrogen, however, can be rather difficult to get your hands on. Most major cities have a supplier that will sell it to you, but very often they have large minimum orders and/or require that you own an expensive dewar flask into which they may safely dispense the liquid nitrogen. At -196 C, liquid nitrogen is also fairly dangerous to handle.

Dry ice is a much more accessible cryogen; it’s available at several major grocery stores in the Austin area, for instance, and I imagine the same is true in other parts of the United States. It sublimes at -78 C, and is thus vastly more effective at freezing stuff than water ice at 0 C. You can make ice cream, just as with liquid nitrogen, by adding dry ice directly to the ice cream mixture. However, because dry ice is frozen carbon dioxide, this procedure results in carbonated ice cream. Which can be quite delicious. But say you don’t want carbonated ice cream?

This procedure borrows from a common technique in the organic chemistry laboratory for cooling reactions to sub-zero temperatures. Instead of using ice water to cool to 0 C, you make a bath of dry ice in some volatile solvent that will not freeze at dry ice’s sublimation temperature of -78 C. Obviously, you can’t use dry ice in water because the water will freeze solid. In the laboratory, acetone and isopropyl alcohol are common coolants. Acetone, however, can be dangerous if handled improperly, and isopropyl alcohol in sufficient quantities to make a large bath can be rather expensive.

I have discovered, however, that denatured ethanol, which is available in hardware stores everywhere, is reasonably priced and makes a good bath with dry ice. Denatured alcohol is also much safer to handle than acetone. Depending on the denaturant, it is also the least toxic of the various hardware-store solvents. In any case, done with reasonable care, this procedure involves no significant risk of contact between the ice cream itself and the coolant. And although denatured alcohol is quite flammable, the dry ice temperature of -78 C is well below its flash point at 13 C, which means that, once the bath is cool, there is no danger of the alcohol vapor igniting from a stray spark. To err on the safe side, however, you should be sure to work in a well-ventilated area.

Project Steps

Add ingredients to flask

Measure out your ice cream ingredients and add them to the stainless steel flask in the following order:

3/8 cup sugar

1 cup half-and-half

1 cup heavy whipping cream

1 teaspoon vanilla extract

This recipe gives a basic (but tasty) vanilla. You should feel free to add alternate flavorings, colorings, and/or mix-ins to your own taste.

The recipe given here is actually half of what I used. As written above, the recipe gives slightly more than a pint of ice cream. I tried to make two pints, which proved to be slightly beyond the capacity of my stainless steel flask and led to some overspill, which is undesirable because it contaminates the bath. If you follow the given recipe, the level of the mixture in your flask will be well below that shown in the photographs.

Break up dry ice

The dry ice will probably come frozen into a solid brick in a plastic bag.

Put the bag into a brown paper bag, rest the bag on a solid work surface, and whack it with a hammer for 30 seconds or so to break up the brick of dry ice inside.

You don’t want any chunks larger than an average lime.

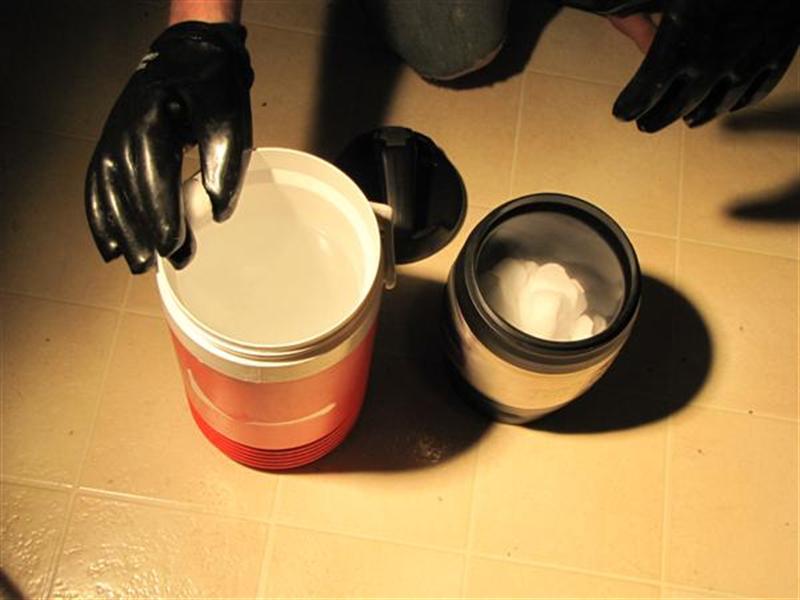
Transfer dry ice to cooler

Although the container shown in this photograph has a screw-on lid, you should in no case store dry ice in a container with an airtight lid. In a closed container, warming dry ice will rapidly build up very high gas pressures as it sublimes into gaseous carbon dioxide. An airtight container of dry ice is, in effect, a bomb. If you must use a container with an airtight lid, DO NOT IN ANY CASE SEAL THE LID WITH DRY ICE INSIDE. A stryrofoam beverage cooler is really a much better choice.

Remove the plastic bag full of crushed dry ice from the brown paper bag.

Cut or tear off a corner of the bag, and dump the dry ice out into an insulated container for temporary storage.

Storing the dry ice in a cooler will prevent it subliming away too rapidly, which it will tend to do if you just leave it in the bag.

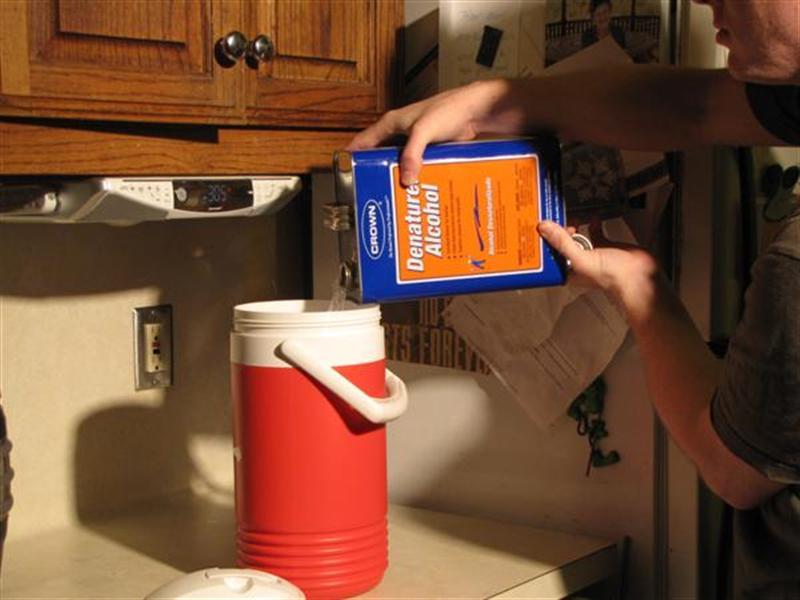
Pour coolant into bath

If you use the proportions given here, your flask will be about halfway full of ice cream makings.

You want to make sure the level of your bath is slightly higher than the level of the ice cream in the flask, when the flask is in place.

If you use the same model flask and bath containers that I did, a total bath volume of 10 cups is ideal.

Making an allowance of 10% for solid dry ice in the bottom, you should add 9 cups of alcohol to the bath.

If you are using other containers, use the following method to determine the volume of alcohol to use for the bath:

Suspend your flask in place over the bath using the wire triangle, then pour water into the bath until its halfway up the side of the flask.

Remove the flask, measure out how much water is inside the bath, subtract 10% to account for solid dry ice volume, and use the resulting volume of alcohol.

Slowly add dry ice to bath

Although dry ice can be safely handled with bare hands if you hot-potato it, good technique calls for the use of gloves. So please use them.

If you just dump the dry ice in all at once, the bath will boil over violently and you’ll get alcohol everywhere. So you have to add the dry ice a little bit at a time.

Starting with a grape-sized chunk, drop pieces of dry ice into the bath, and observe the effervescence that results. Then add another piece. Go slowly, and gradually you will get a feel for how much dry ice you can add, and how fast.

As the bath cools, each piece will react less violently. Once the bath has equilibrated at -78 C, additional pieces of dry ice will plunk into it without any appreciable reaction.

At this point, add additional dry ice until the bath is about 10% solid dry ice by volume.

The chilled dry ice/alcohol bath is very cold. If the chilled coolant contacts your skin it can cause almost instant frostbite. Use due care in handling the cold bath.

Suspend flask in bath

While it is not difficult to carry out this process without getting coolant in the ice cream mixture, you should be very careful to make sure this does not happen. If the ice cream mixture is contaminated with any amount of coolant, however slight, you should err on the side of caution and discard it without eating it.

A simple wire triangle improvised from a coat hanger serves well to hold the flask in place in the bath. Just slip the hanger over the lip of the flask and squeeze the two sides of the hanger in to secure it in place.

If you want, you can make a proper wire triangle by twisting together three lengths of coat hanger wire at their ends, in a triangular arrangement, using pliers.

Now slowly lower the flask into the cooling bath until it is resting with the three legs of the wire triangle on the rim of the bath.

The bath will likely boil up during this operation, so lower the flask slowly and carefully to keep it from spilling over.

Stir

Insert the beaters of your hand mixer into the flask and blend on the lowest speed. You’ll be able to feel the ice cream thickening after about five minutes.

Continue until the ice cream is the consistency you want.

Ten minutes of blending gave me a nice thick smooth-serve type ice cream. If you use the smaller recipe given above, yours will probably take less time to thicken.

Conclusion

Once you're finished with the cooling bath, cover it loosely with something (NOT airtight, see warning above) and set it aside overnight to return to room temperature. Then pour the alcohol back into its original container. It can be reused as a coolant indefinitely.

If your ice cream spills over into the cooling bath, you can remove some of the contaminants from the alcohol, before storing it, by pouring it through a coffee filter. Many of the ingredients in the ice cream mixture are insoluble in denatured alcohol, and will settle out at the bottom of the bath as white solids. Filtration removes these easily.

The heavyweight of all cryogens is liquid helium. At -269C, it is only a couple of degrees above absolute zero. It is very dangerous to handle and very expensive, so I've never known anyone to use it on something as trivial as making ice-cream. Still, it would be quite a stunt...