MAKE_WP04_InternetKillSwitch_finished

The advent of the always-on internet connection has transformed modern computing. While you’re away from the keyboard, your software can automatically update itself, fixing bugs and patching security flaws. Or automatically back up data from your hard drive to a remote server so that, in the event of disaster, you still have a record of even your most recent work. Distributed computing applications like SETI@home and Folding@home allow you to contribute your computer’s processing power, while you’re not using it, to solving computation-intensive problems like identifying extraterrestrial transmissions and understanding complex biomolecules.  There’s all kinds of good stuff your computer can do with that internet connection, while you’re away.

It can also, of course, get into lots of trouble. Backdoors, bot-nets, spyware—the list goes on. And while the good guys may allow you to configure their off-hours internet usage in software, and will probably respect your choices, the bad guys won’t.

If you want to be double-dog sure, here’s a simple, fool-proof answer: a hardware kill switch. Put one on the wired connection between your computer and router and use it to unambiguously isolate that computer from the internet whenever you want. Or put it between your router (wireless or otherwise) and your ISP hardware to control the connection for the entire house. Sure, you could just unplug the cable, but that’s hard on the connectors, and the switch is faster to use and neater-looking, to boot.

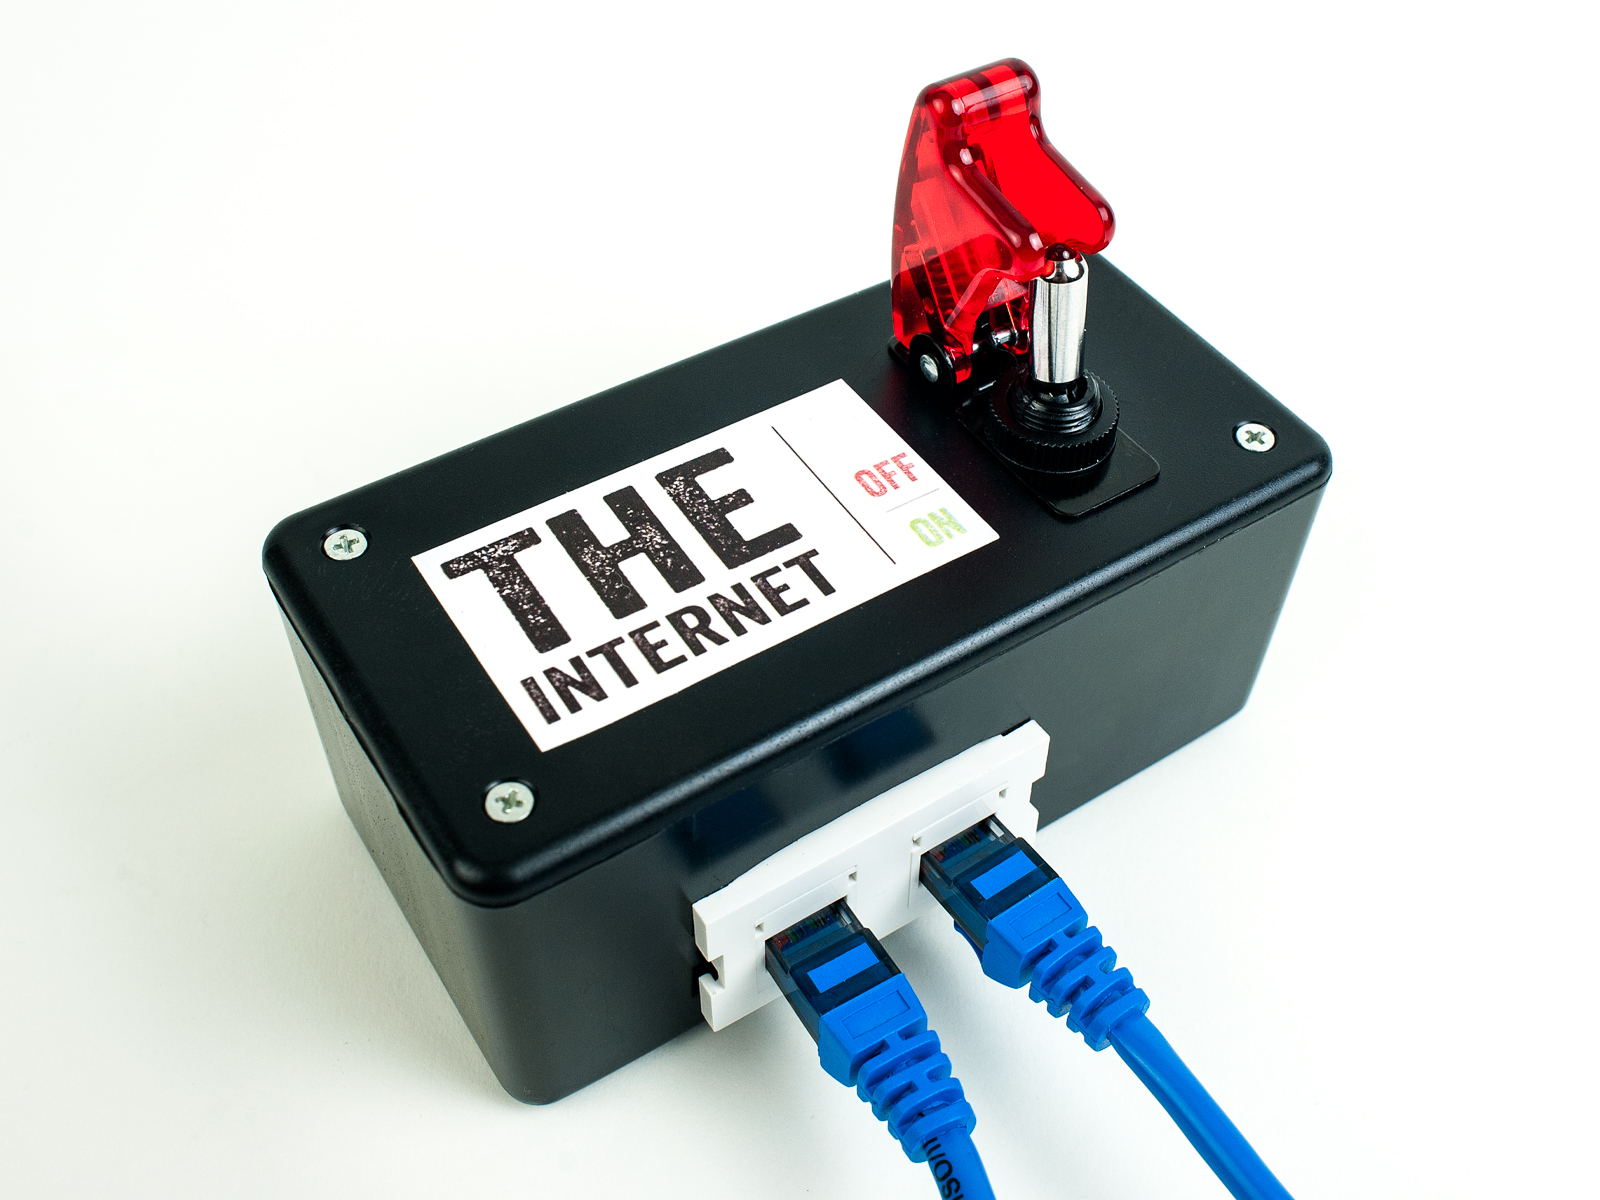
And it couldn’t be much easier to build. We’ll show you how to build an unobtrusive basic Internet Kill Switch, and then an over-the-top “dramatic version” that’s a bit more fun to make and use.

YouTube player

Project Steps

Install the jacks.

Using a small screwdriver, snap the cover off the surface mount box.

Snap the first RJ-45 jack into place on the surface mount box front panel.

Snap the second jack into place.

Make the first connection.

Separate the jacks / front panel assembly from the surface mount box baseplate.

Separate the 4 twisted pairs from the network cable scrap. Discard the outer cable sheath and any reinforcing fibers within. Untwist the pairs.

Use the punchdown tool bundled with one jack to connect the wires from the “green” pair to the color-coded terminals indicated by the “A” coded jack labels.

Finish the jack wiring.

Run the other end of the wires to the matching color-coded “A” terminals on the other jack, and connect as before with the punchdown tool.

Repeat for blue and brown pairs.

Connect the wires from the orange pair, as before, but route the solid orange wire up and away from the others, as shown.

Drill switch mount.

Use a pencil and ruler to locate the center of the surface mount box cover with intersecting tick marks.

Drill a small 1/16″ diameter pilot hole at the intersecting pencil marks.

Drill out the pilot hole to the diameter of your switch’s mounting barrel.

Wire the switch.

Clip the orange wire, right in the middle, between the 2 jacks. Strip about 1/4″ of the insulation from each cut end.

The switch will be ON, and the orange leads connected, when the switch handle leans away from the 2 soldered contacts. As shown, the switch is in the ON position.

Solder one of the cut, stripped leads to the switch’s center terminal. Solder the remaining lead to one of the other switch terminals.

Assemble.

Snap the box front panel back into the baseplate, and lower the cover into place. Direct the switch barrel through the mounting hole you drilled earlier. Secure with the switch’s bundled hardware.

Snap the surface mount box cover back into place on the baseplate.

Test the project by inserting it between your computer and your computer’s internet connection, and trying the switch. Make a label to indicate OFF and ON positions. Fix the label in place using the box’s bundled label cover.

Give it some drama (optional).

Killing the internet is not to be taken lightly! So we popped out the jacks and front panel and mounted them in this serious-looking black RadioShack enclosure, #270-1803. Part #270-135 is also a good fit. Cut a hole to accept the panel, using a strong utility knife or a high-speed rotary tool with cutoff wheel. Then snap the panel in.

TIP: Enclosure #270-1803 has internal ribs that help the panel snap in tightly, if you line up the hole just right.

Then we swapped the switch for this awesome toggle with a big red safety cover, RadioShack #275-601, to prevent any disastrously untimely switchings-off of the internet. Drill a mounting hole to match your switch’s barrel, and mount it with its included hardware. With the cover closed and the switch in the down position, the switch should be closed (and the internet connected). If your switch is open in this position, just loosen the hardware and rotate the switch 180°.

Finally, we added a big dramatic label to clearly announce the importance of our Internet Kill Switch.

Grab this PDF and print it at 100%. Trim with scissors and affix it to the enclosure with your adhesive of choice.

Conclusion

Internet Kill Switch - John Edgar ParkTo use, mount the switch box using the bundled screws or double-sided adhesive foam. Connect your computer (or router) to one side of the switch, and your router (or ISP equipment) to the other. Click! Goodnight.