Japan is known for its street fashion (popularized in the United States by Fruits magazine and Gwen Stefani’s entourage of Harajuku Girls). Street style is more than just a cute outfit, it’s a whole look, mentality, and way of acting. Kogals emulate the California Valley Girl, with bleached hair, dark tans, light-colored lips, and their own slang. Gothic Lolitas dress like Victorian dolls, complete with cute poses.

Tokyo’s Harajuku district is world-famous, where young people dress up and gather by the Harajuku station to hang out with friends and hope to be photographed by passersby.

This shirt is created with some of the same techniques used by Japanese youths to personalize their street style.

Project Steps

Choose a fabric, print out the pattern and assemble the pattern.

We are creating a “cut and sew” shirt. Cut and sew means that the garment is made out of a knit fabric that can be cut and sewn together (unlike a sweater knit, which if cut will unravel). Knit fabrics have different amounts of stretch. We need to use a fabric that has at least a 40% stretch. Follow these 2 steps to see if your fabric is right for this project.

Fold the cut edge of the fabric.

Hold the fabric beside a ruler with 2 fingers at 0″ and 2 at 10″. Stretch the fabric. If the fabric stretches an extra 4″ (if it becomes 14″ long) then the fabric has a 40% stretch. (Don’t stretch the fabric too hard. If you do, it won’t recover and go back to its original size). You’ll need 1½–2 yards of fabric, or 2 T-shirts’ worth of material.

Print out the 3-page pattern. Then cut out the pattern from each page.

Match the “a” line of the top piece to the “A” line of the middle; match the “b” line of the middle piece to the “B” line of the bottom piece. Then connect the pages of the pattern together with tape.

Size the pattern.

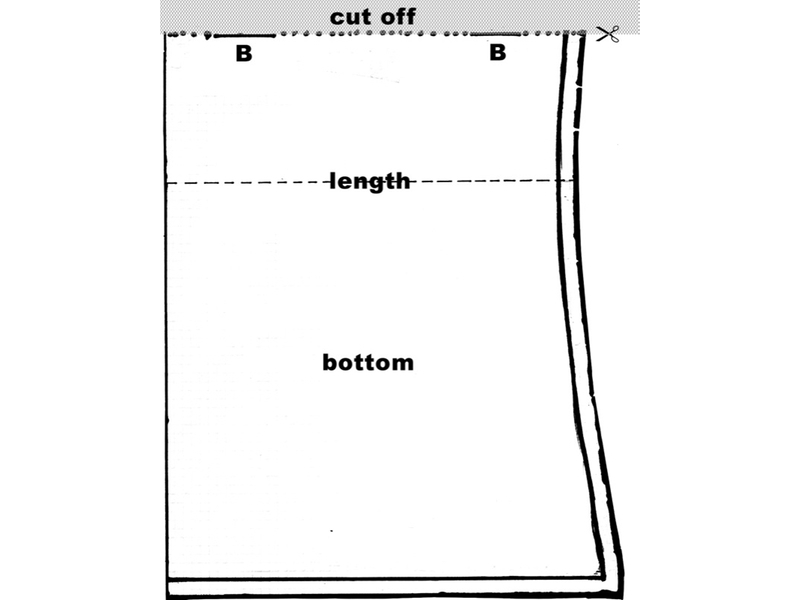
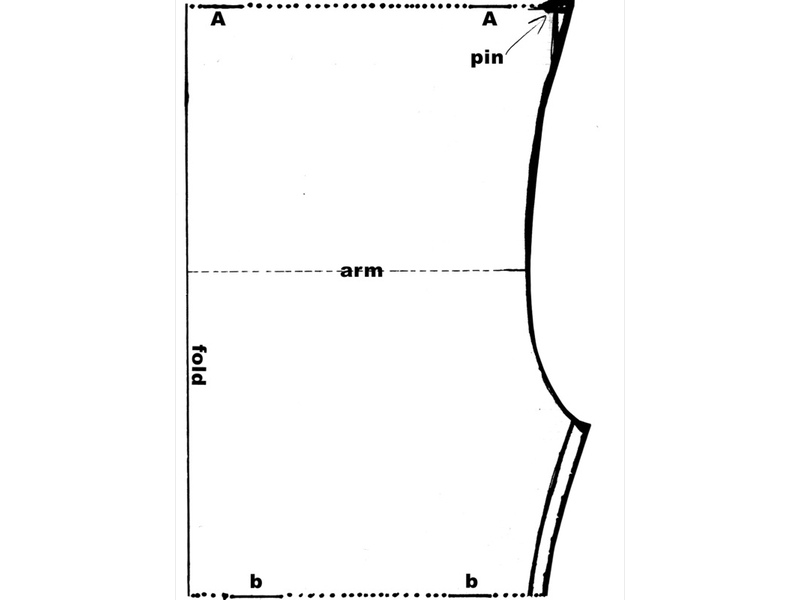
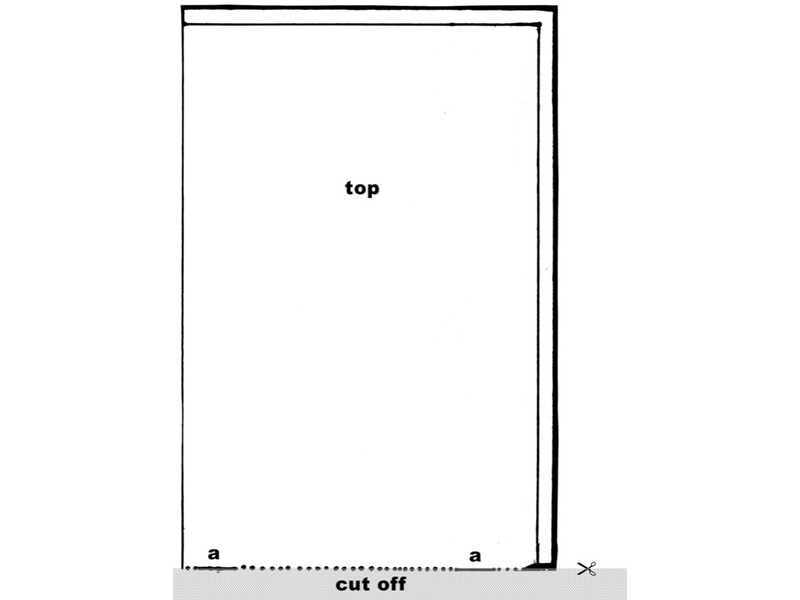
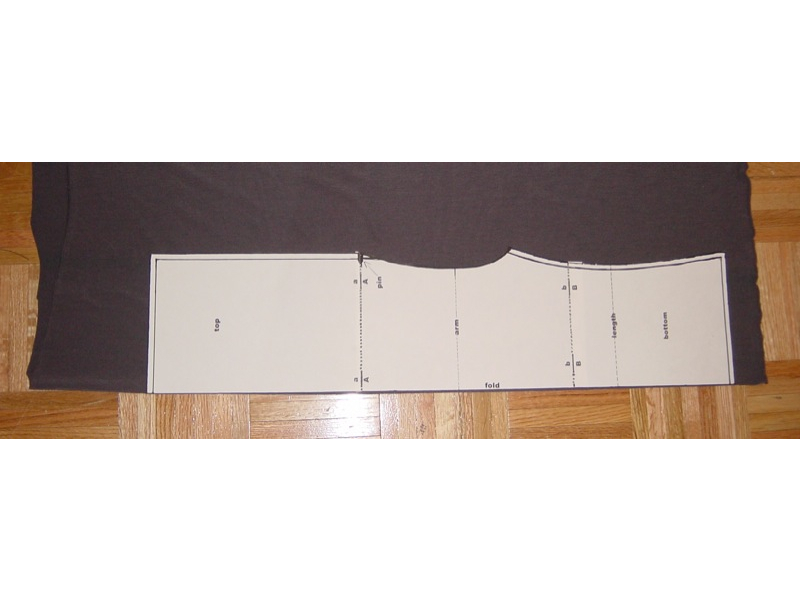
Measure your arm, bust, waist, and shirt length. Then use the formulas here to calculate any size changes. If the width needs to be increased, add to the width beside the fold line. If the arm size needs to be increased, cut the pattern at the arm line and add the increase. If the length of the shirt needs to be increased, cut the pattern at the length line and add the increase.

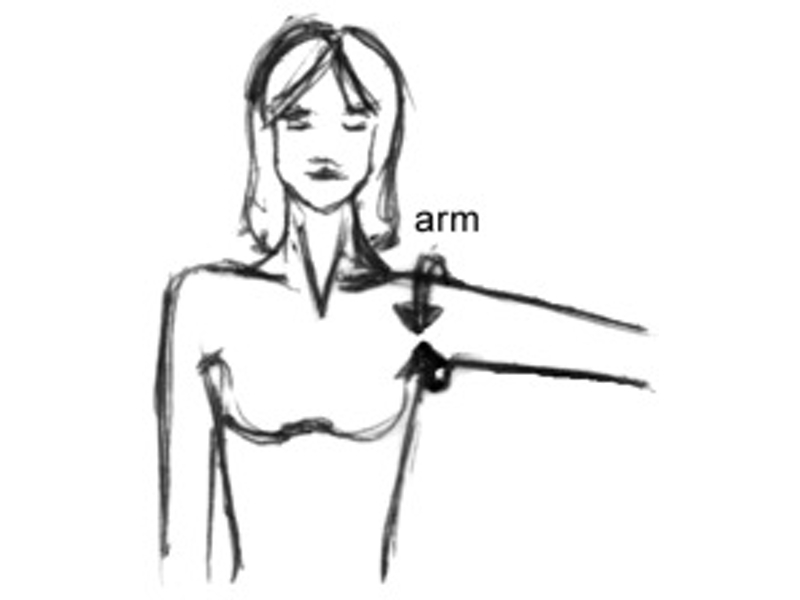
Arm size increase. Measure around your arm at the shoulder. If the measurement is 13 1⁄2″ or less, then do not increase the arm size and leave as is. If measurement is greater than 13″ you will need to increase the arm size: divide your measurement by 2, then subtract 6 1⁄2″.

(arm size measurement/2) – 6 1⁄2 = arm size increase

Example: Arm size measurement is 16″, (16/2) – 6 1⁄2″ = 1 1⁄2″, Arm size increase = 1 1⁄2″

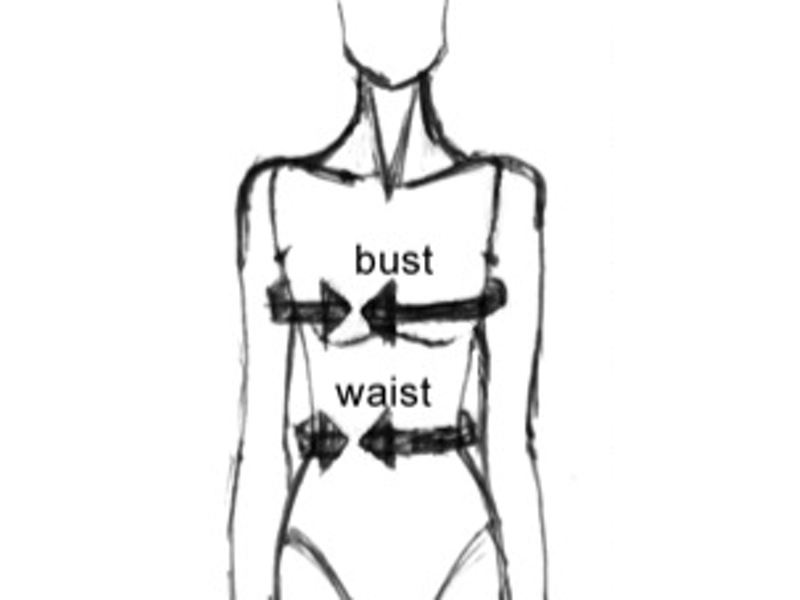
Width increase. Measure around your bust (at apex) and waist (at high waist, the narrowest part). Add measurements together. If measurements are 64″ or less, then do not increase width and leave as is. If measurement is greater than 64″ then divide measurements by 8 and subtract 8″.

[(bust + waist measurement)/ 8] – 8″ = width increase

Example: Bust measurement is 38″, waist measurement is 30″, [(38 + 30)/ 8] – 8″ = 1⁄2″ Waist increase = 1⁄2″

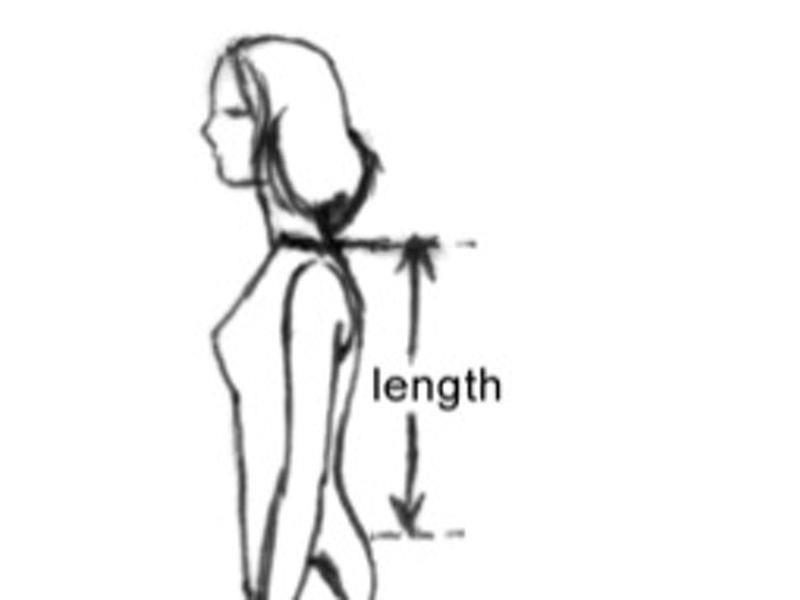
Length increase. Measure the length from your neck base to upper hip. If the length measurement is 19″ or less, do not increase and leave length size as is. If the length measurement is less than (18″ + arm size increase), then do not increase and leave the length size as is.

Example: Length measurement is 19″, arm size increase = 3″ 19″ < (18" + 3")

If the length measurement is greater than 19″, then subtract (18″ + arm size increase) from length measurement. If there was no arm size increase, then arm size increase is 0.

Length measurement – (18″ + arm size increase) = length increase

Example: Length measurement is 21″, arm increase is 1 1⁄2″, 21 – (18″ + 1 1⁄2″) = 1 1⁄2″, Length increase = 1 1⁄2″

Cut out the pattern.

Fold the fabric along the grain so that the uncut edges match up. Make your fold as straight as possible.

Line up the pattern edge marked “fold” with the folded edge of the fabric and lay the pattern on the fabric.

Optional: Pin an X at the top and bottom of the armhole to mark it (pin on both sides of the fabric, not through it).

Pin the pattern in place. Then cut out the pattern piece. This is the front.

Take a second piece of fabric and repeat Steps 4a–4c for a second pattern piece (the back of your shirt). Don’t try to cut out both at once. Since the fabric is folded, cutting both pieces at the same time will not be accurate.

Sew your shirt.

Overlap the side seams of the front and back pieces 1⁄2″ and pin them together (be sure not to pin the armhole closed on both sides!). You will be forming a tube out of the 2 pieces of fabric.

Sew with a 1⁄4″ zigzag stitch (sewing with a zigzag stitch allows knit fabrics to stretch) directly in the center of the 1⁄2″ overlap. You can line up the overlap with the sewing foot to make sure that the stitch stays in the center.

Leave a raw edge at the neck, bottom, and armholes. Finish the shirt with a 1″ zigzag stitch, 1⁄4″ away from the edge.

Customize your graphics, iron on.

Choose one of the T-shirt graphics designed by Thomas Moon from http://craftzine.com/03/punk and print it out on an iron-on T-shirt transfer.

Note: Use “light T-shirt transfers” for light-colored shirts and “dark T-shirt transfers” for dark-colored shirts. (Transfers for dark shirts have a white background.) We suggest Avery T-shirt transfers.

Cut out the graphic, leaving a bit of extra transfer at the edges of the image.

Follow the package instructions to iron the transfer onto the shirt. For a more distressed/worn look, iron the image for less than the recommended time; i.e., if the recommended ironing time is 3 minutes, try 2½ minutes. Test this method first to see what effect you like.

Customize your graphics, continued, embroidery and screen printing.

Using your sewing machine, embellish the transfer with freehand stitch lines. Play with the zigzag stitch and stitch spacing. Leave loose threads.

To add further decoration, stretch the shirt over a piece of corrugated cardboard (stick the cardboard inside the shirt). Paint a bit of acrylic paint with a brush, sponge, fingers, etc. Make sure to use a thin layer, because screen prints are not usually bumpy or textured. Scrape or blot off any excess paint, and let dry. Before washing the shirt, throw it in the dryer to set the paint.

Note: For the first wash, you may want to wash the shirt separately to make sure the colors don’t bleed onto other clothing.

Customize your graphics, continued, label.

On a separate piece of woven fabric, iron on a label from http://craftzine.com/03/punk, or paint your own label. Leave a fabric edge, or stitch the edge for a patch effect. It’s all about placement, so attach it to a unique spot.

These graphic customization techniques can also be used to personalize your own jeans, pants, skirts, button-down shirts, sweaters, jackets, and hoodies. So take a look at your wardrobe and see what needs to be modified — Harajuku style.

Conclusion

This project first appeared in CRAFT Volume 03, pages 82-89.