AGNIESZKA GOLDA PH.D.
and JO LAW PH.D. combine their expertise in textiles, design, visual and media arts, and bring together art, science, and technology to develop creative strategies for improving people’s and the planet’s well-being. Their eco-making workshops for the Global Challenges: Future Makers Project at University of Wollongong explore how creativity and science can contribute to building environmentally sustainable and healthy living futures.
The outbreak of Covid-19 is having an enormous and diverse impact on people globally. Many people feel isolated, frustrated, and overwhelmed. To manage our well-being, crisis support organizations emphasize a “calm approach” that incorporates creative, mindful practices in our daily routines. Creative activities can help us to express our feelings and to connect with family, friends, and communities. Today, the connection between well-being and engagement with “slow” approaches to making is more meaningful than ever.
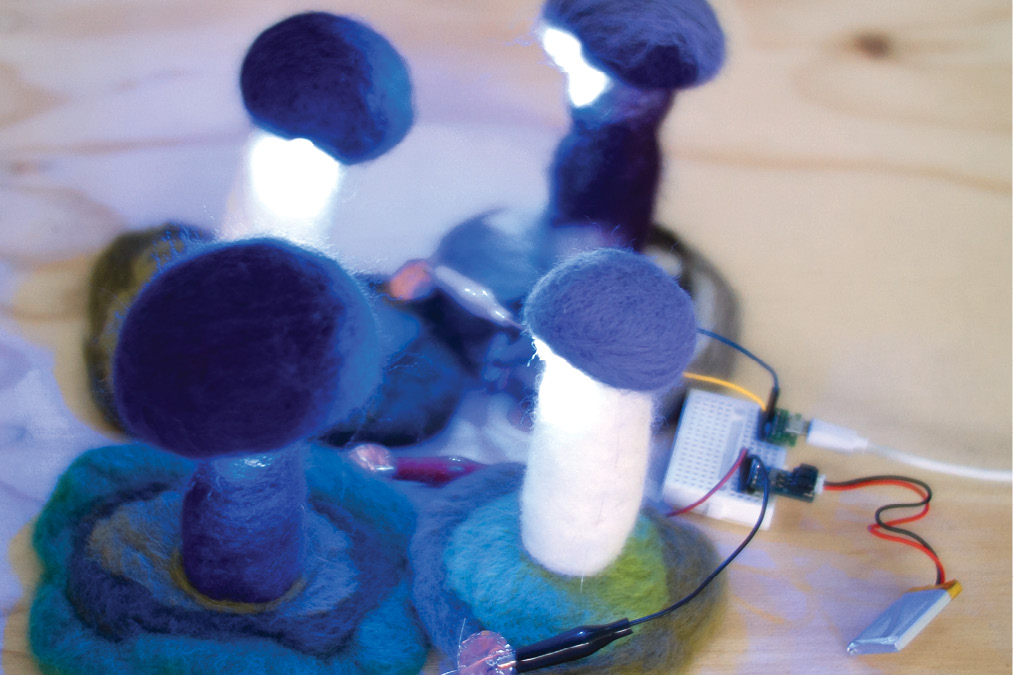
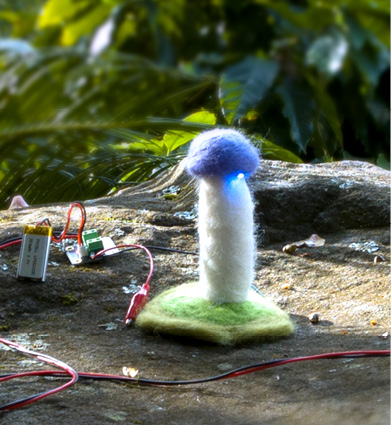
In this project, we show you how to create an E-Felted Fantastical Mushroom — an e-textile sculpture that involves needle-felting and electronics. The project deliberately explores a slow and contemplative approach to creating that takes into account the life-cycle and sustainability of materials. By felting soft wool to create a fantastical form that lights up, we can calm the mind, encourage mindfulness, and express feelings of affection and connectivity with our communities and the natural environment.
TIME REQUIRED:
2 Hours
DIFFICULTY:
Easy
COST:
$40–$50: $25 and up for needle felting
kits, and $17 for electronic components
Project Steps
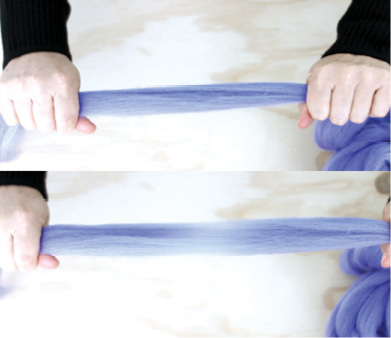
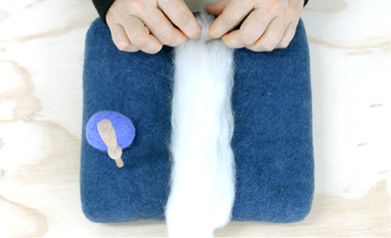
Separate the fibers
ers
To divide a length of roving or sliver, hold your hands apart about 6″ (15cm) and gently pull. The fibers will separate easily without breaking. If your hands are too close together the fibers will not separate, and they are likely to break.
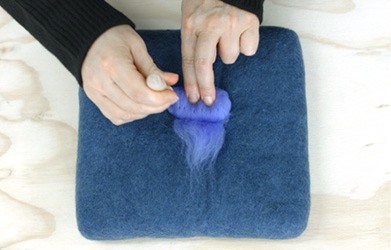
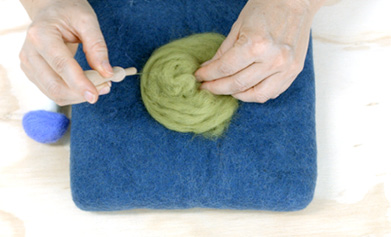
Felt the mushroom cap
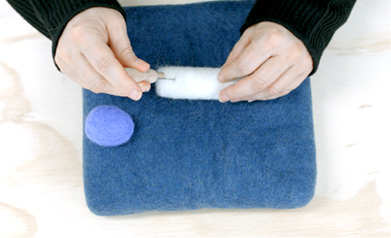
2. Felt the mushroom cap
Place your sliver on the felting mat. Roll the sliver tightly (above). As you roll, tuck in both ends (below ).
Before you reach the end, about 2″ (5cm) away, poke across the surface with your needle several times to secure the fibers (below).
Felt gently through the fiber, just touching the surface of the mat, to prevent the cap from felting into the mat.
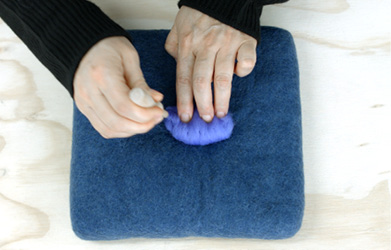
Roll and fold the end of the sliver. Felt the surface a few times to secure the fibers.
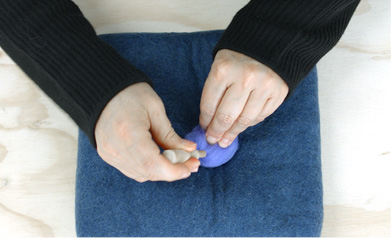
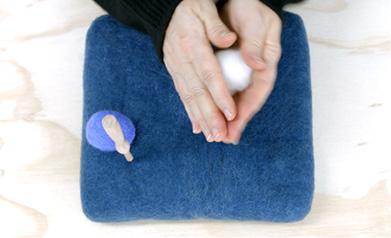
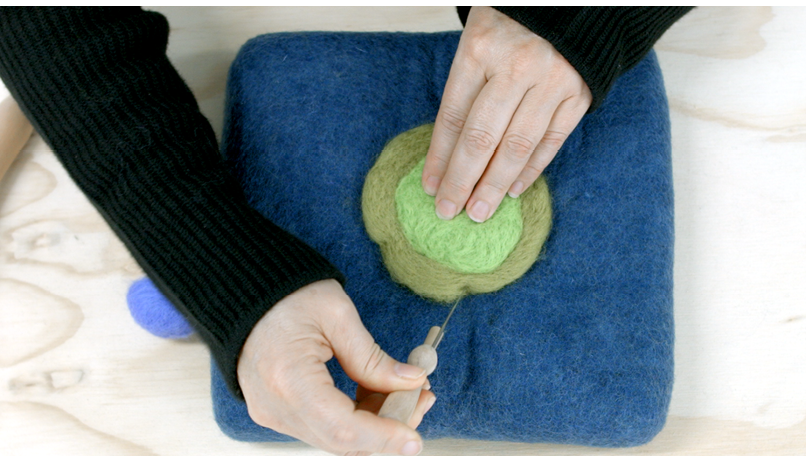
Fold in half to form a round form (above ).
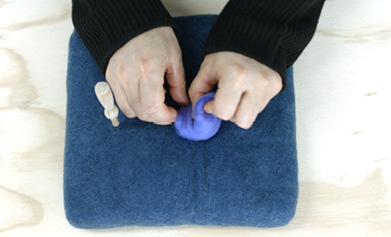
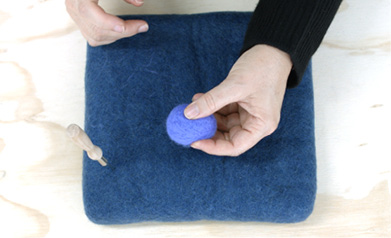
Poke the surface from all directions by rotating the form (on the top, horizontally around the edges, and underneath). The cap will become denser and smaller.
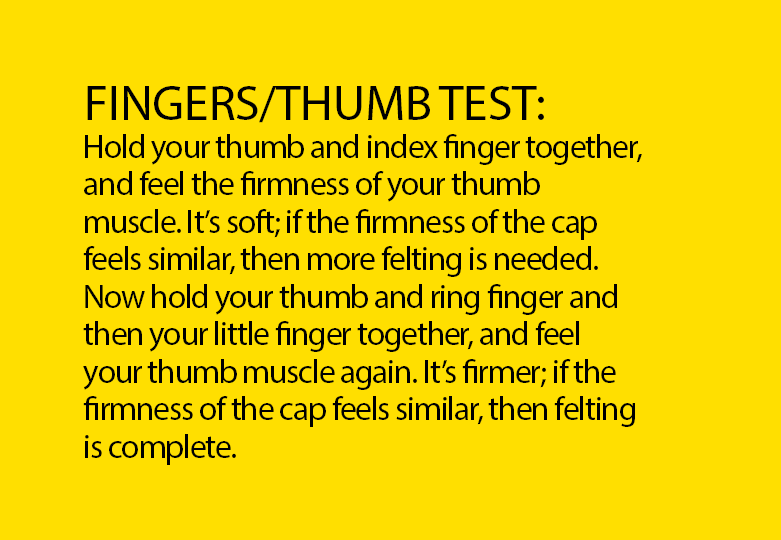
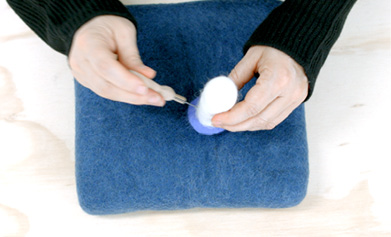
Continue the process to form a cap shape. You can vary the size of the cap by wrapping more wool and felting it around the cap . To measure for appropriate compression and firmness, gently pinch the surface to make sure that the fibers do not come away easily. Then, squeeze the form and compare its firmness using the “fingers/thumb test.”
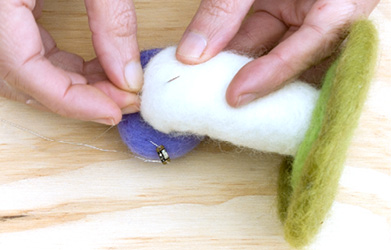
Felt the mushroom stem
hroom stem
Arrange some sliver into a four-finger width.
Roll the sliver tightly into a log. As you roll, tuck in the ends.
Poke across the surface of the stem with your needle to secure the fibers.
You can roll the stem gently between your fingers to tangle the fibers further. Continue to felt around the stem. Leave one end a little bit softer. When ready, apply the fingers/thumb test to the rest of the stem.
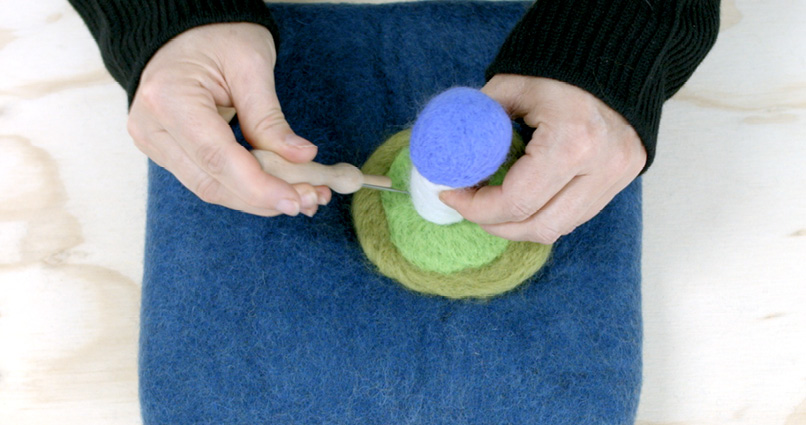
Attach the softer end of the stem to the mushroom cap. Poke underneath the cap, around the stem, and from the top to secure the cap. Tug gently to make sure the cap is firmly attached.
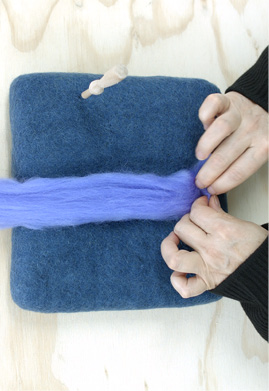
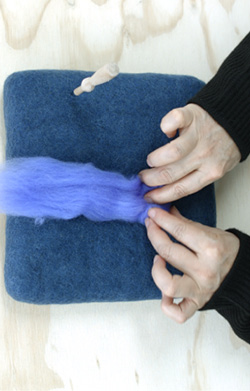
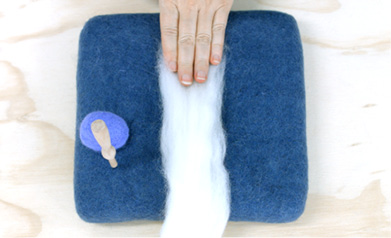
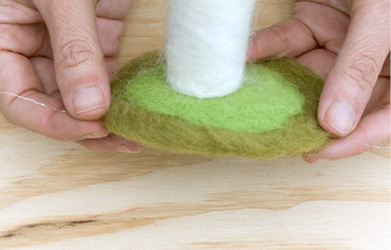
Felt the moss ground
oss ground
Arrange the fibers into an organic shape. Poke on top with your needle to secure the fibers. Turn the shape and work on the back.
Add a second color. Felt the layers together and make the base firm. Firm up the edges to a desired shape.
Attach the mushroom stem to the moss. Work around the sides and from underneath to secure the mushroom. Tug gently to ensure that the mushroom is firmly attached.
Sew on the electronics
onics
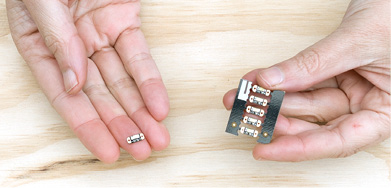
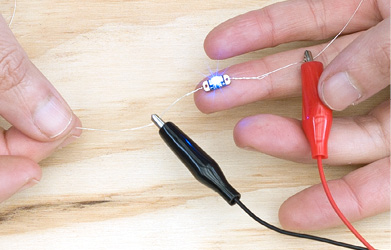
Start by wiring up your LED sequin. These LEDs are designed to be sewn onto soft fabric. They come with two holes for sewing. One is the positive (+) terminal and the other is the negative (–) terminal.
For this project, we will sew with uncoated wire — don’t use beading wire or magnet wire for this. Cut two lengths of wire, each about 4″ (10–12cm) long. Thread a wire about ¾” (2cm) through one hole, bring the end back around and twist it around the standing part of the wire, and wrap tightly.
Repeat with the wire in the other hole.
At this point, you can check your connections. The LED sequin has a positive (+) mark and a negative (–) mark next to the holes. Connect your wires to the battery using your alligator clips: positive to positive, negative to negative. The LED will light up. If not, check your connections.
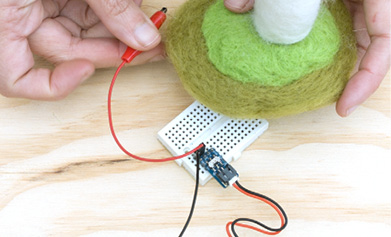
Now decide where you’d like to put the LED on your felted mushroom. Thread your wire through a sewing needle and sew the wire onto the mushroom. Make sure the wires don’t touch each other. Sew the negative and positive wires at opposite sides of the mushroom stem.
Sew the wires through to the base, with each end poking out at opposite sides.
Connect the wires to your battery. You can create a more secure connection by sewing your wires directly to a battery holder and attaching the holder to the base of the mushroom.
A Shroom in Your Room
ur Room
Place your e-felted mushroom in your workspace or your living room, or take it with you to a special spot in your garden at night to create a magical space for contemplation and mindfulness. Make one for a friend to express your affection and connection at this time of physical distancing.
Add sensors, switches, or an Arduino to the circuit and turn your e-felted mushroom into a sensor-triggered nightlight or a programmable porch light. Add a small 3V solar panel to recharge your battery to make this project even more eco-friendly.
AGNIESZKA GOLDA PH.D.
and JO LAW PH.D. combine their expertise in textiles, design, visual and media arts, and bring together art, science, and technology to develop creative strategies for improving people’s and the planet’s well-being. Their eco-making workshops for the Global Challenges: Future Makers Project at University of Wollongong explore how creativity and science can contribute to building environmentally sustainable and healthy living futures.
The outbreak of Covid-19 is having an enormous and diverse impact on people globally. Many people feel isolated, frustrated, and overwhelmed. To manage our well-being, crisis support organizations emphasize a “calm approach” that incorporates creative, mindful practices in our daily routines. Creative activities can help us to express our feelings and to connect with family, friends, and communities. Today, the connection between well-being and engagement with “slow” approaches to making is more meaningful than ever.