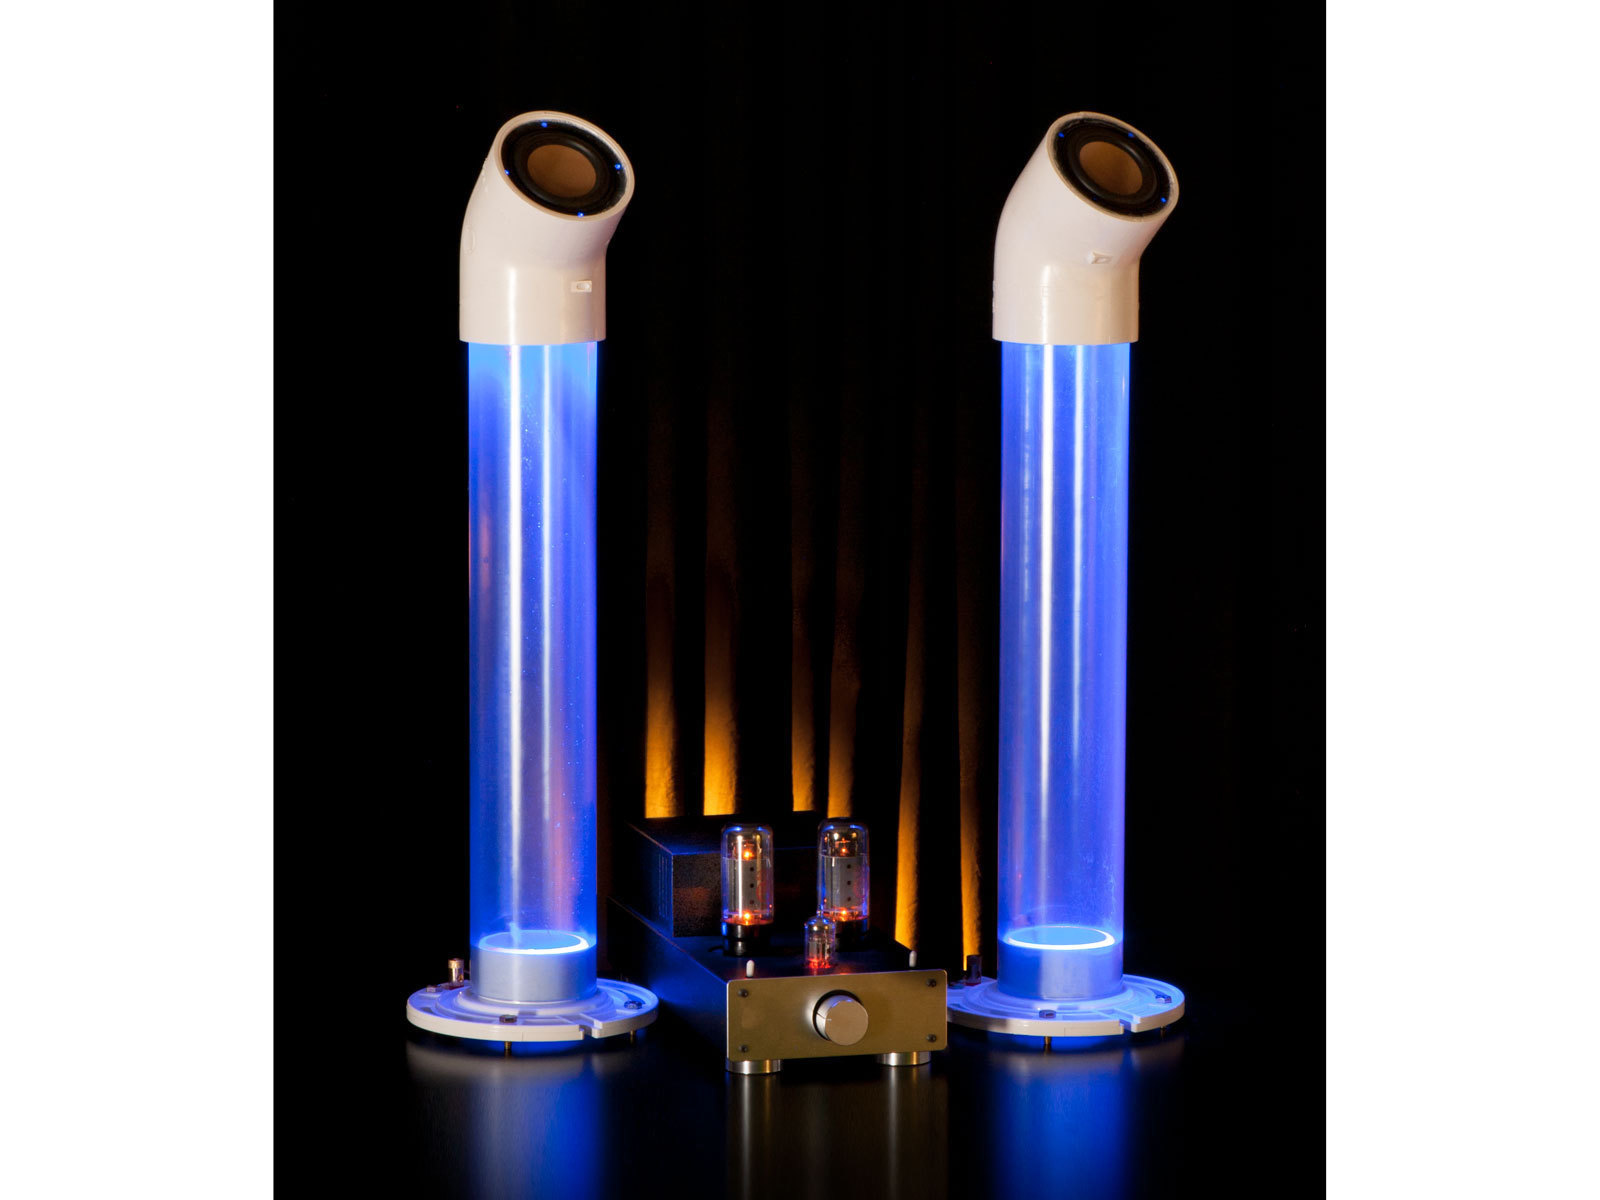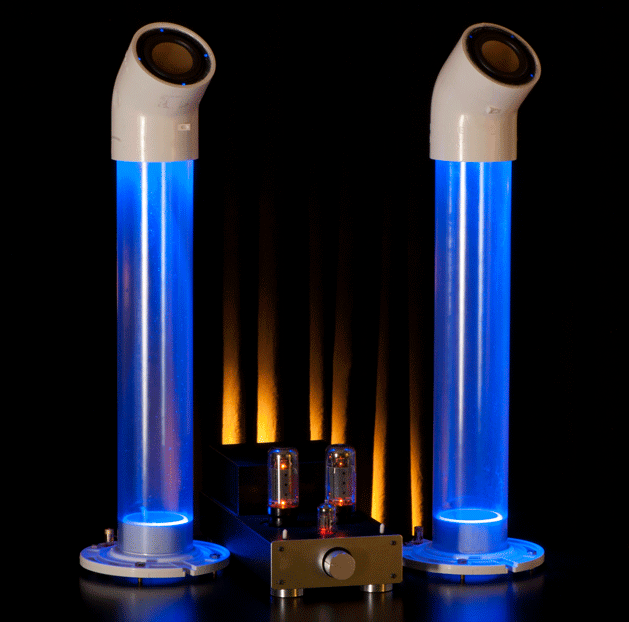
While tidying up my workshop, I found some clear 3" PVC pipe left over from a spud gun project (the Nightlighter 36 taser-powered potato cannon in MAKE Volume 03). Clear PVC is one of my favorite building materials, but it’s expensive, and since the last thing I need is another potato cannon, I wanted to come up with a project that would make good use of its unique qualities.
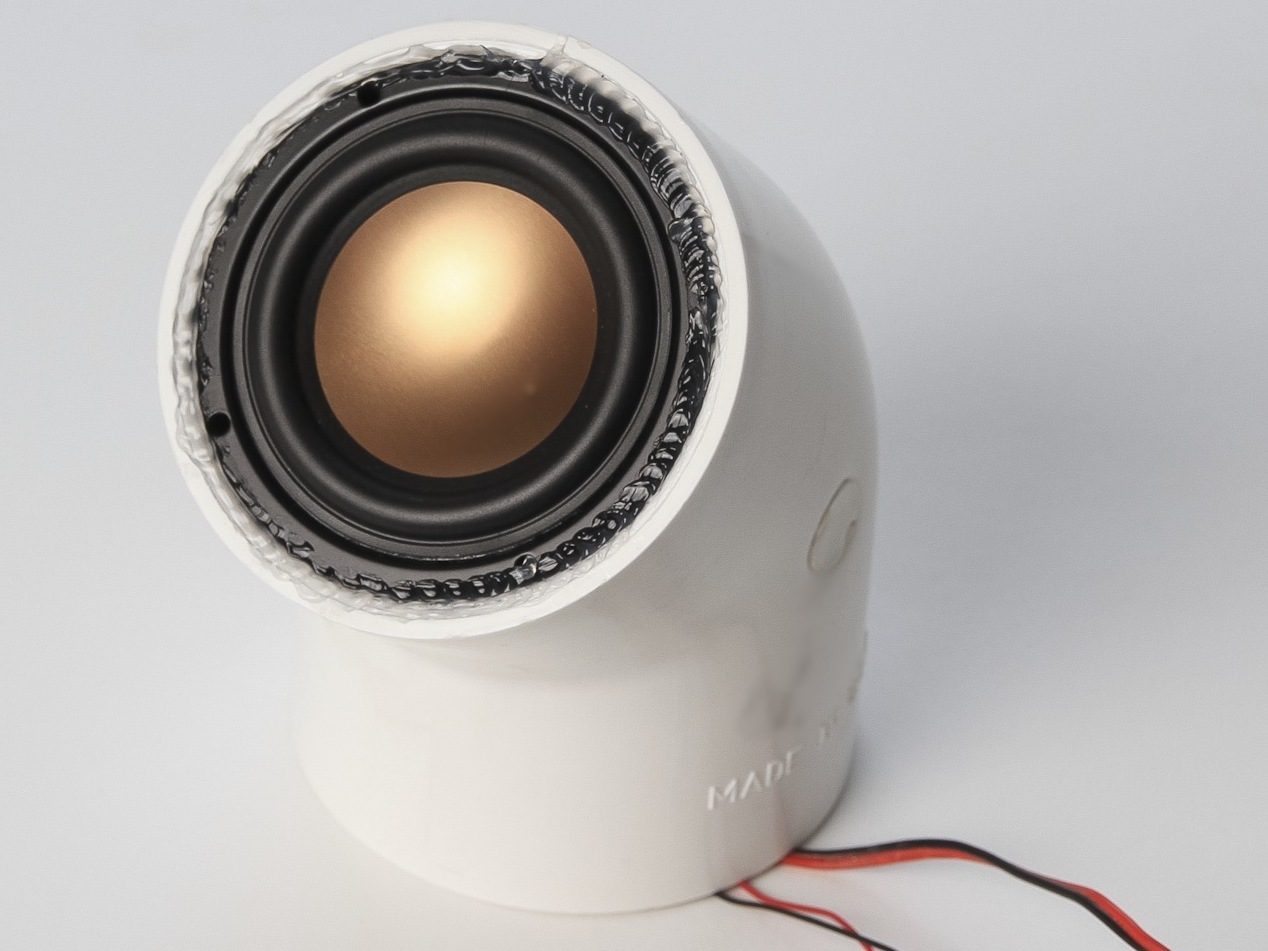
Clear PVC is stiff and dense, which makes it excellent material for audio speaker cabinets. I had seen uniquely shaped speakers made from regular white PVC, so I wondered if clear tubing could make decent-sounding cabinets that also generate lighting effects.
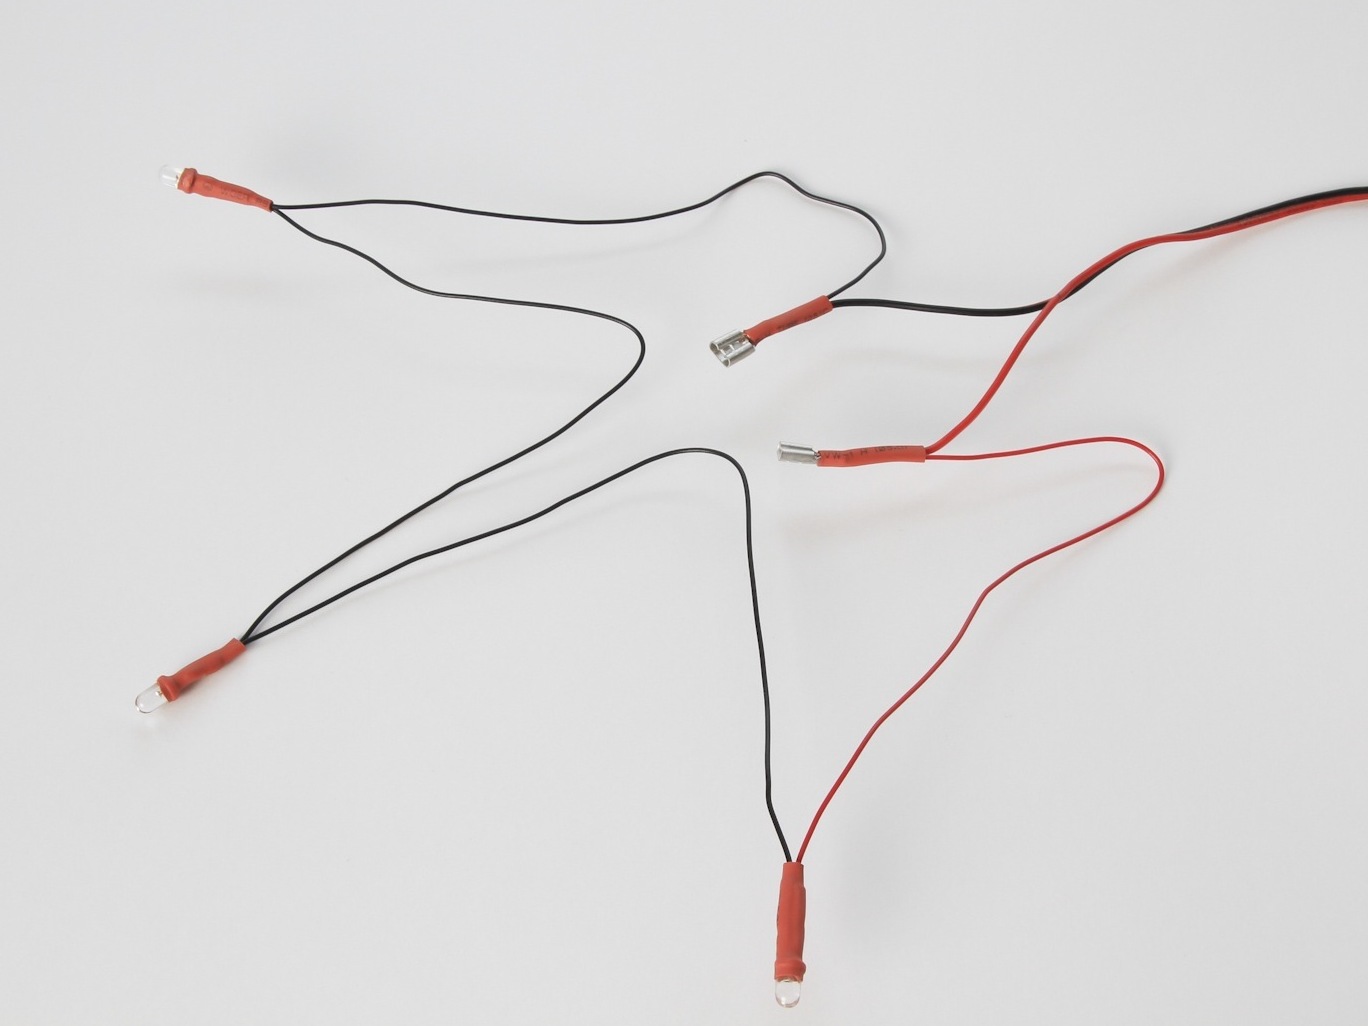
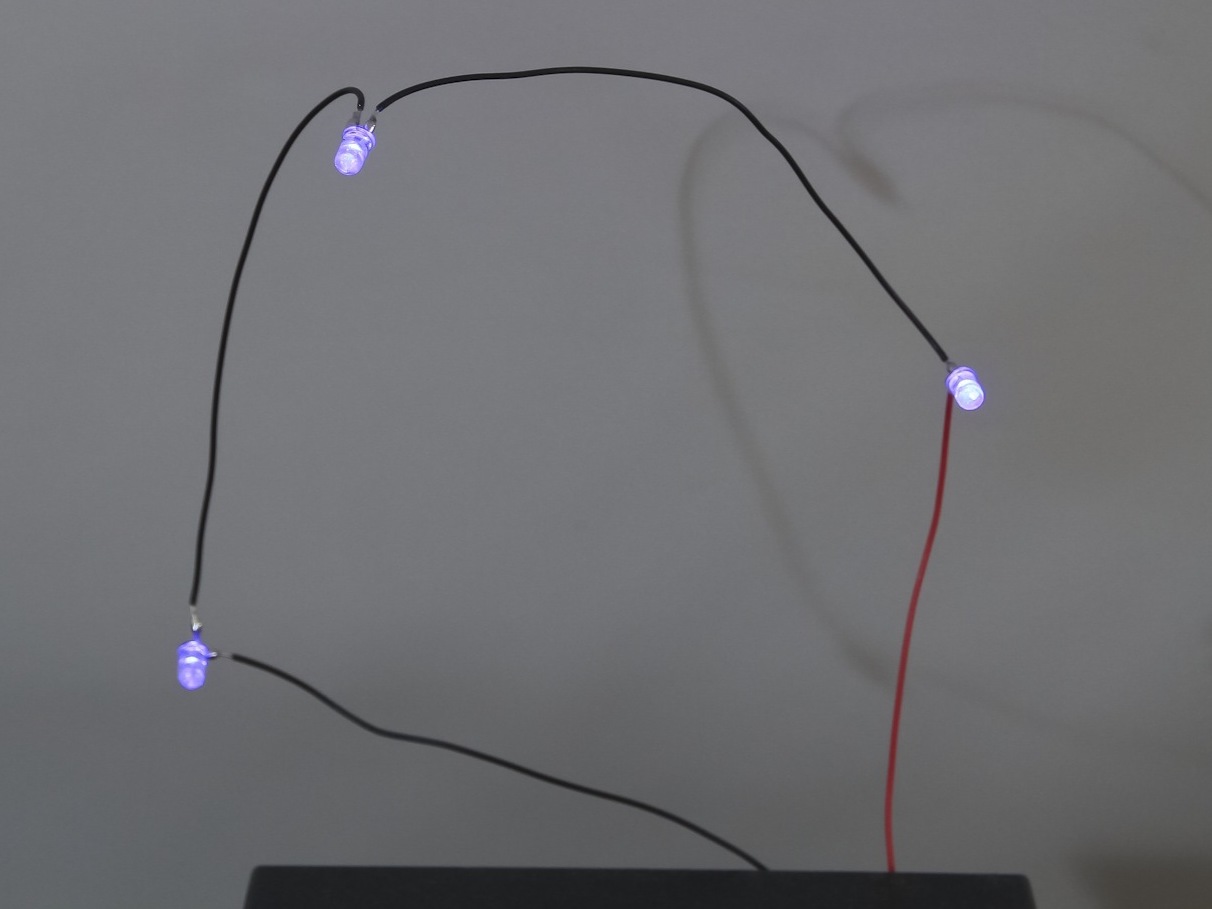
I connected an iPod (playing ZZ Top’s “La Grange”) to a 20-watt amplifier and a small speaker, and played around with different configurations of LEDs on the speaker wire. The best visuals, I found, came from simply connecting 3 ultra-bright LEDs in series, in parallel with each speaker. Voilà! At moderate volume and above, the same audio signal both drove the speaker and pulsed the LEDs in time with the music — and I discerned no difference in the speakers’ sound with or without the LED load.
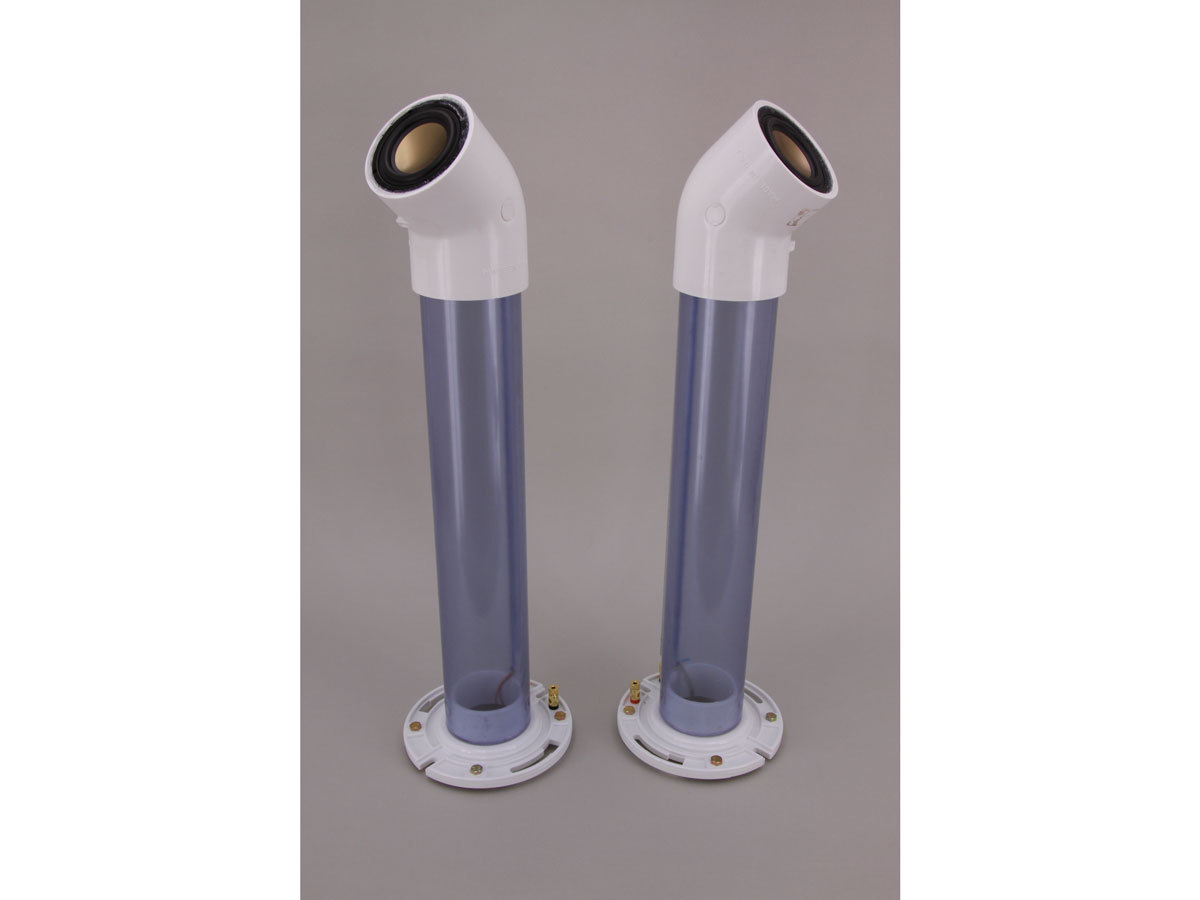
Introducing the Sound-O-Light Speakers. They’re easy to build, they get surprisingly good sound out of their single 3" drivers, and they look hella cool.
Materials
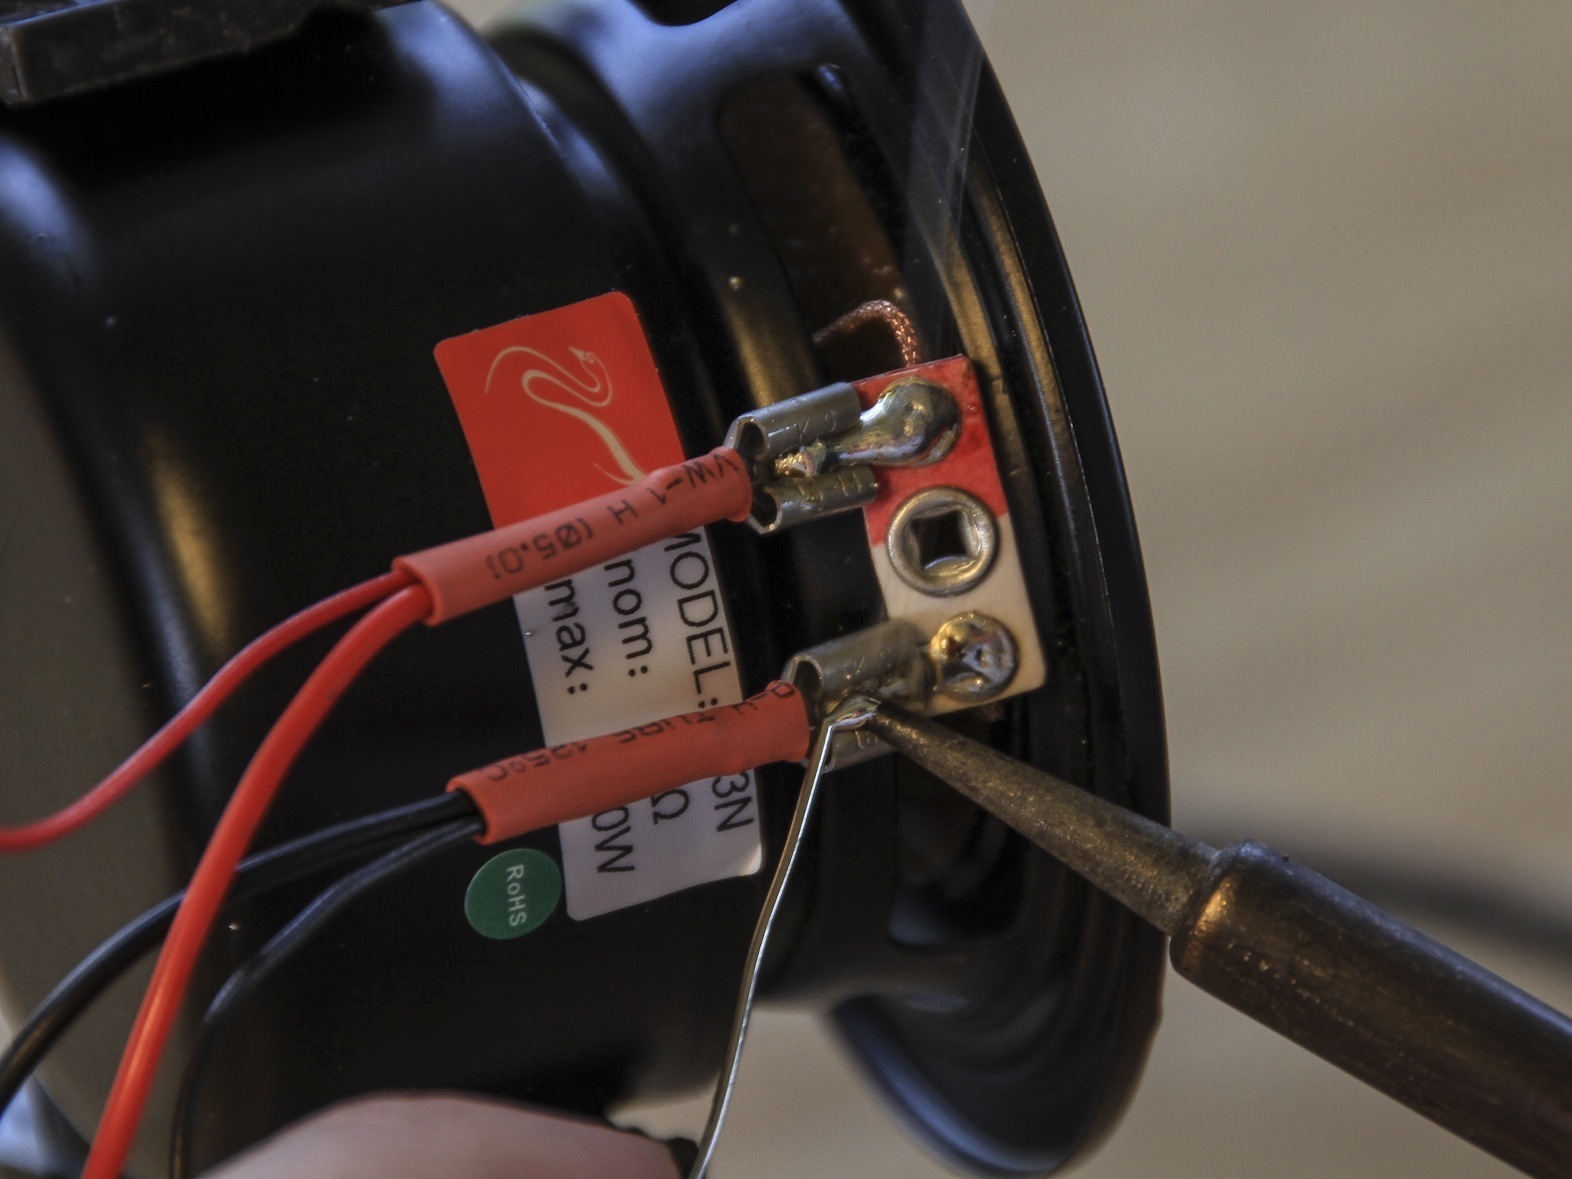
- Speaker drivers, 3" diameter, round (2) I used HiVi B3N drivers, which are popular, cost about $10 each, and use standard car-audio spade connectors. If you have a different 3" driver in mind, by all means give it a try.
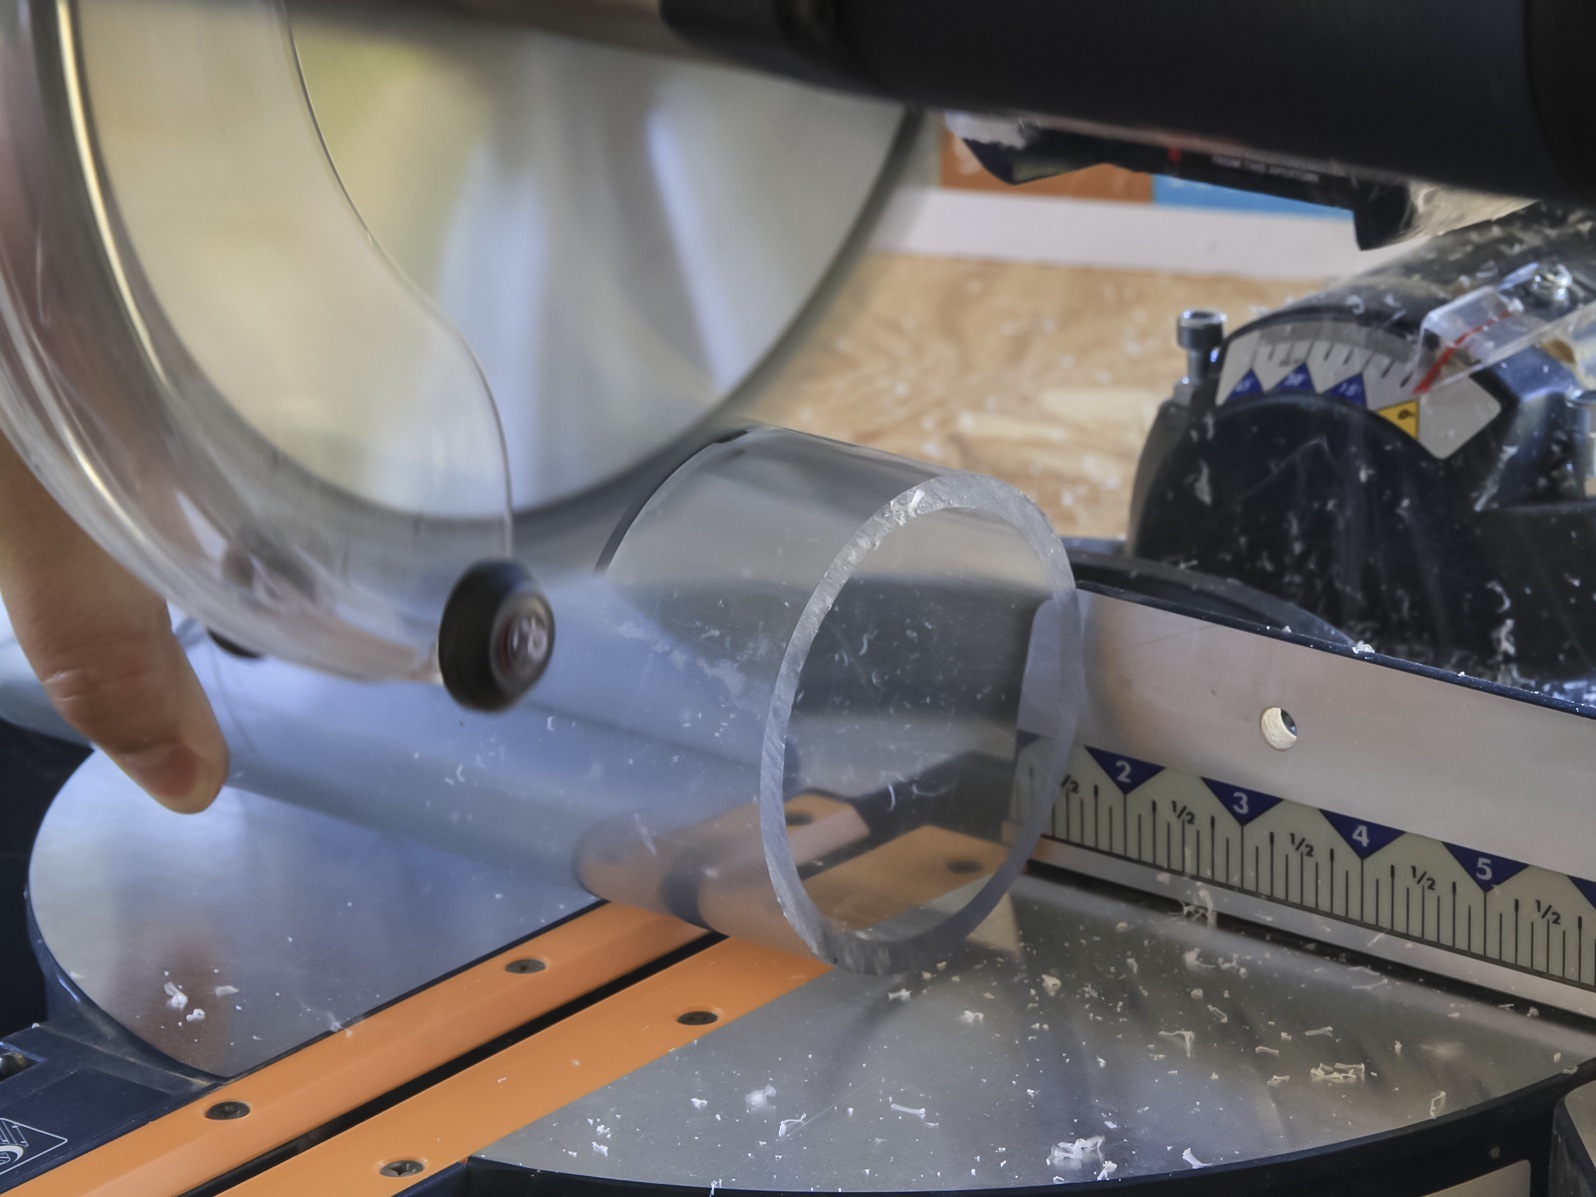
- PVC pipe, clear, 3"×20" lengths (2) Some sources sell this by the foot while others only sell 10′ lengths. Since this pipe costs roughly $15/foot, it makes sense to find a supplier that can sell the exact 40" quantity required. Check local industrial plastics suppliers first, but there are also several online sources.
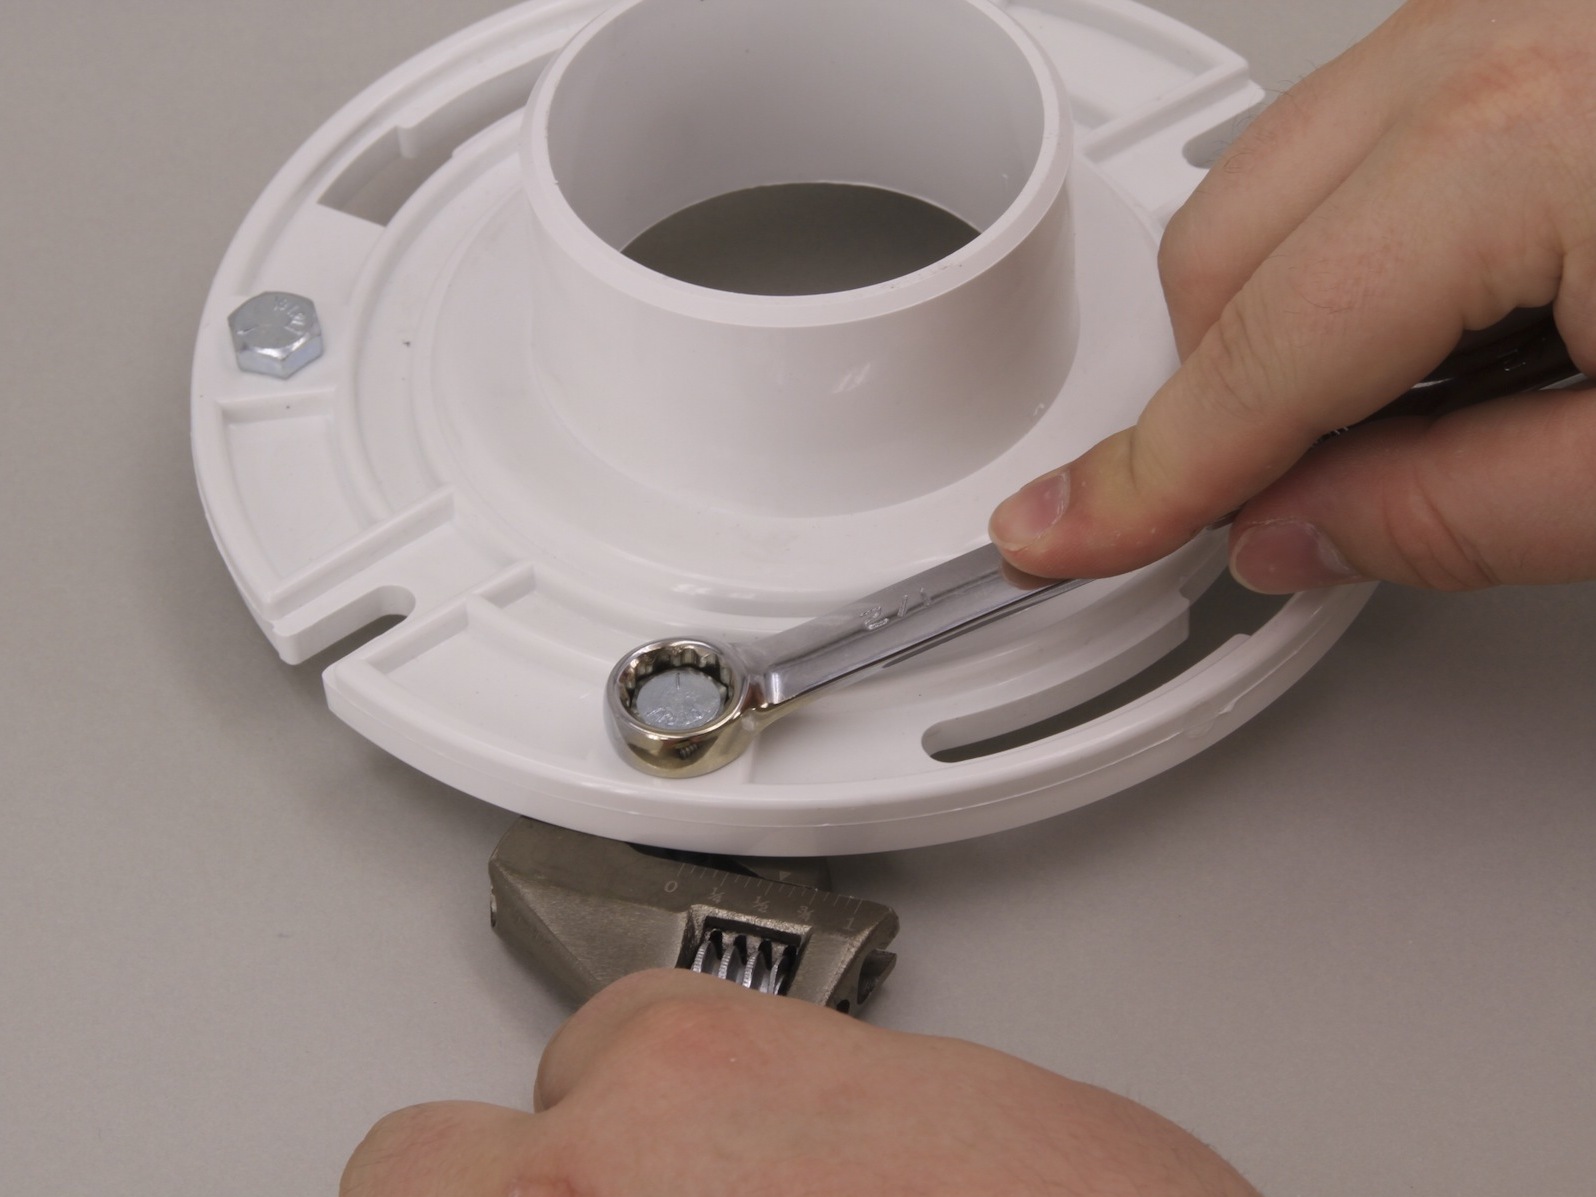
- PVC pipe flange fittings, 3", white (2) ABS fittings may also work, but ABS is not as stiff or dense as PVC, which may affect audio quality.
- PVC pipe elbow fitting, 45°, 3", white
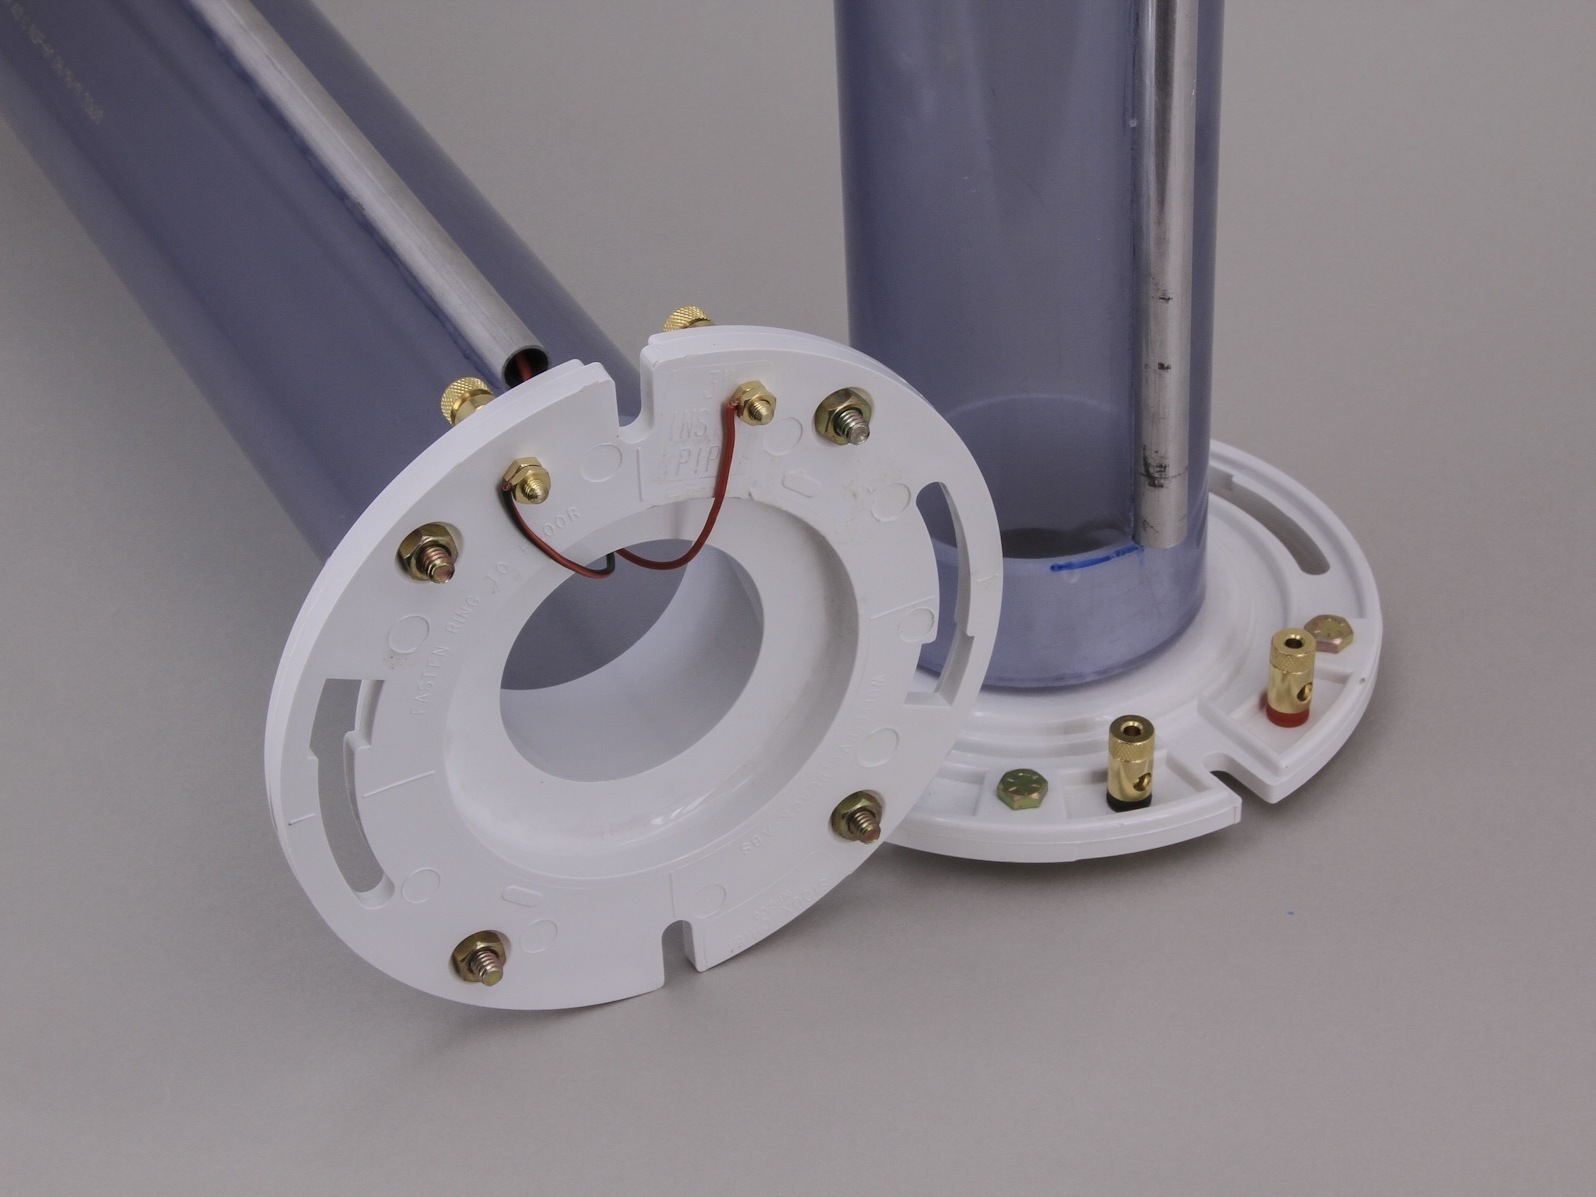
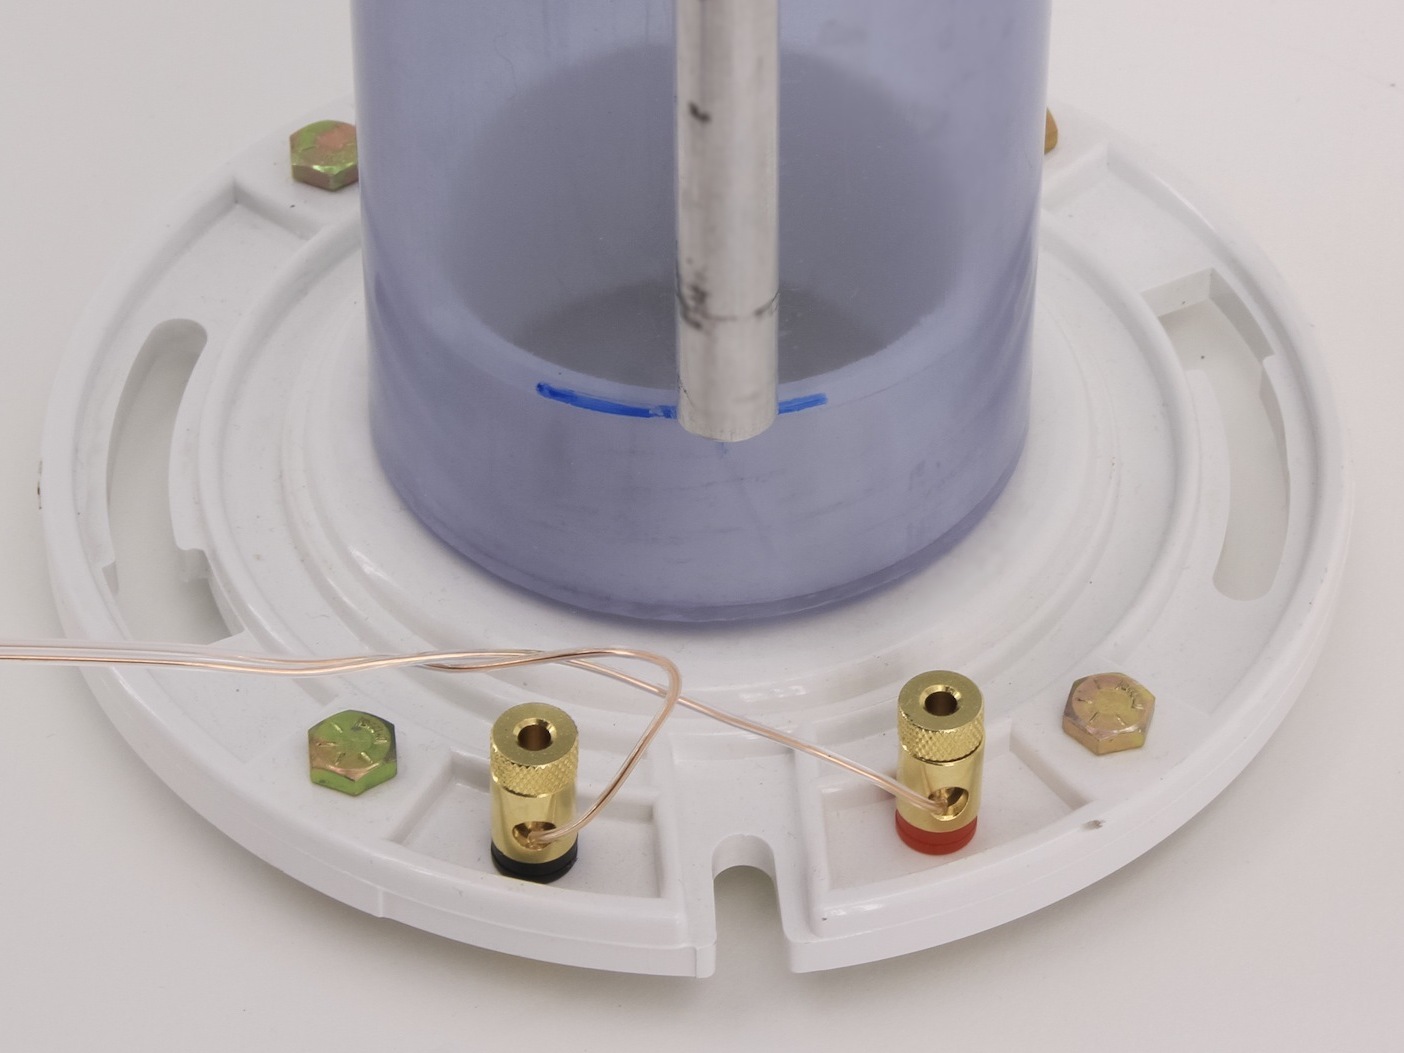
- Audio binding posts (4) typically sold in pairs
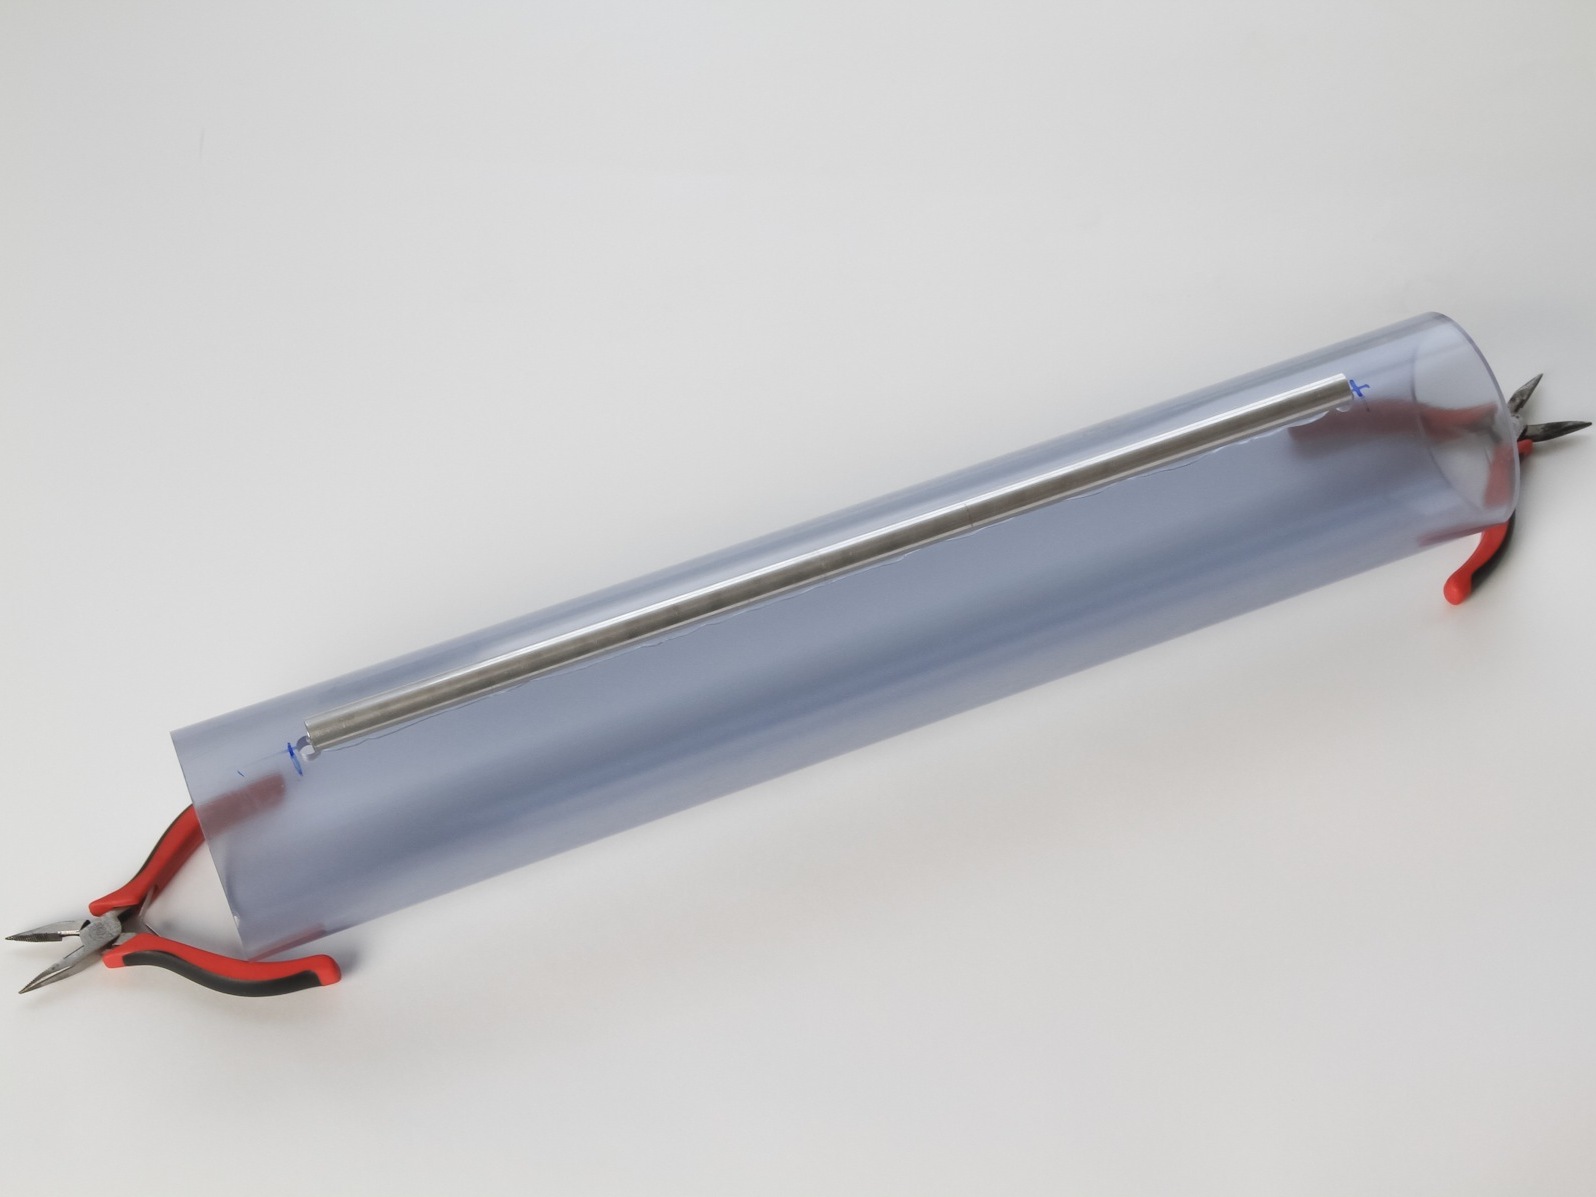
- Aluminum tubing, 1/2" outside diameter (OD) × 17-1/2" long (2)
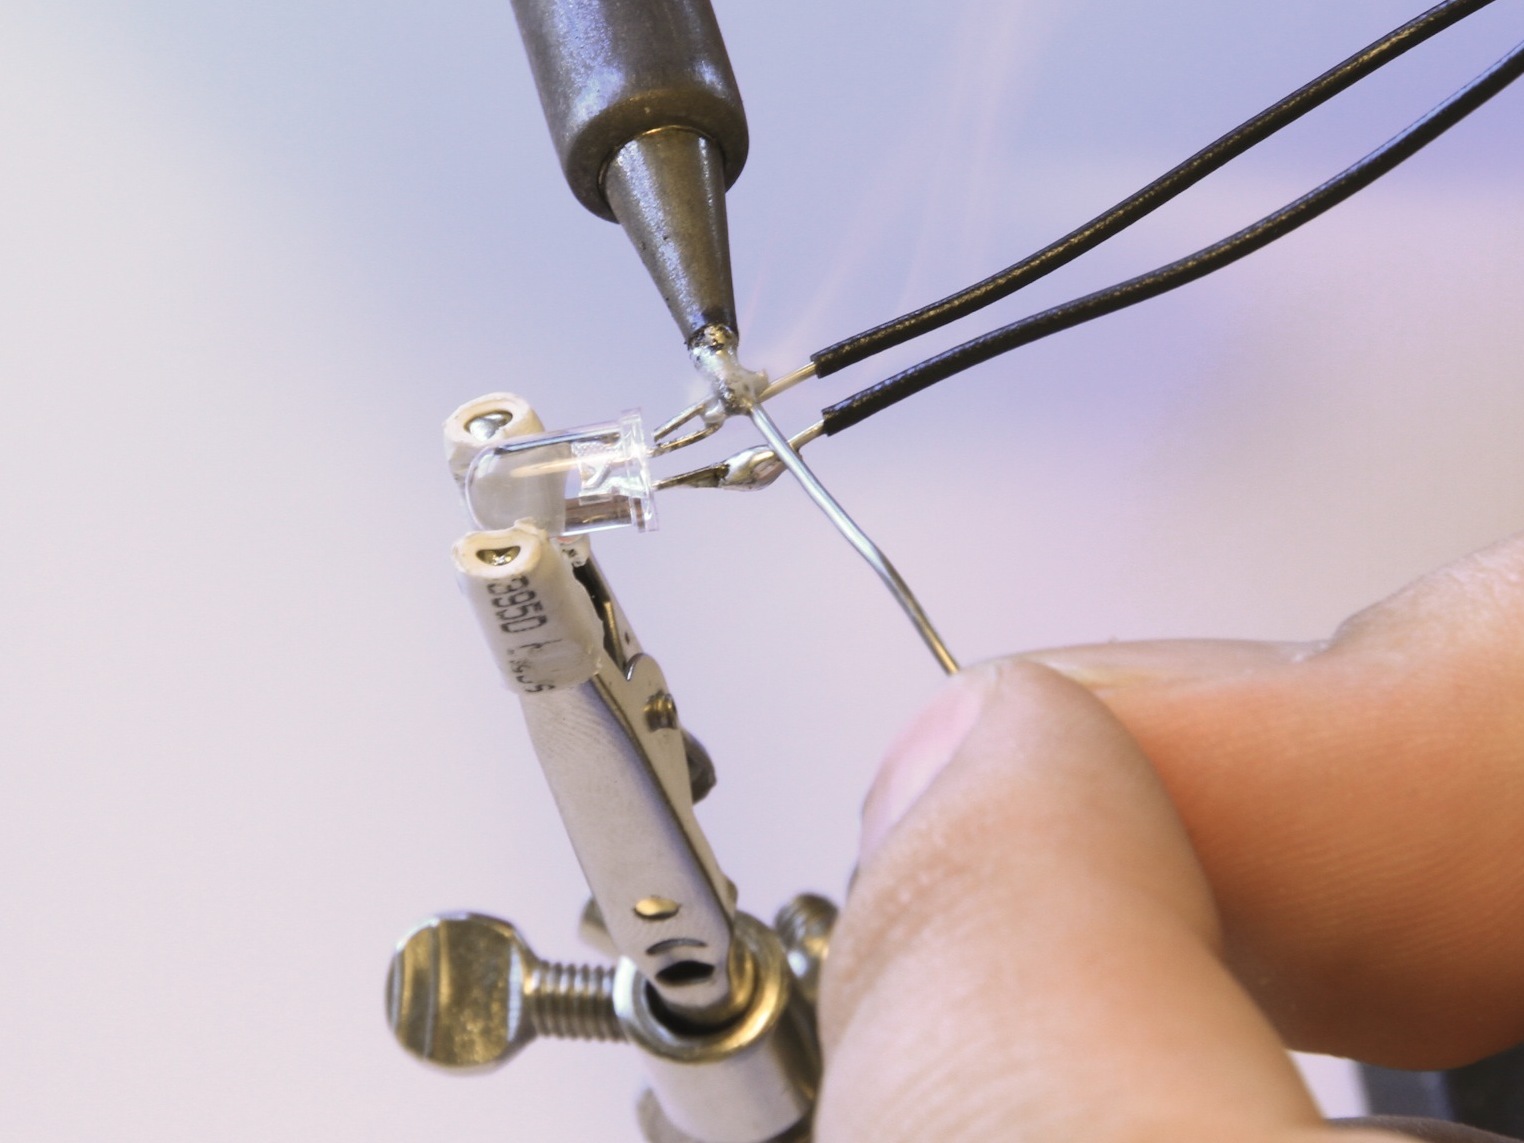
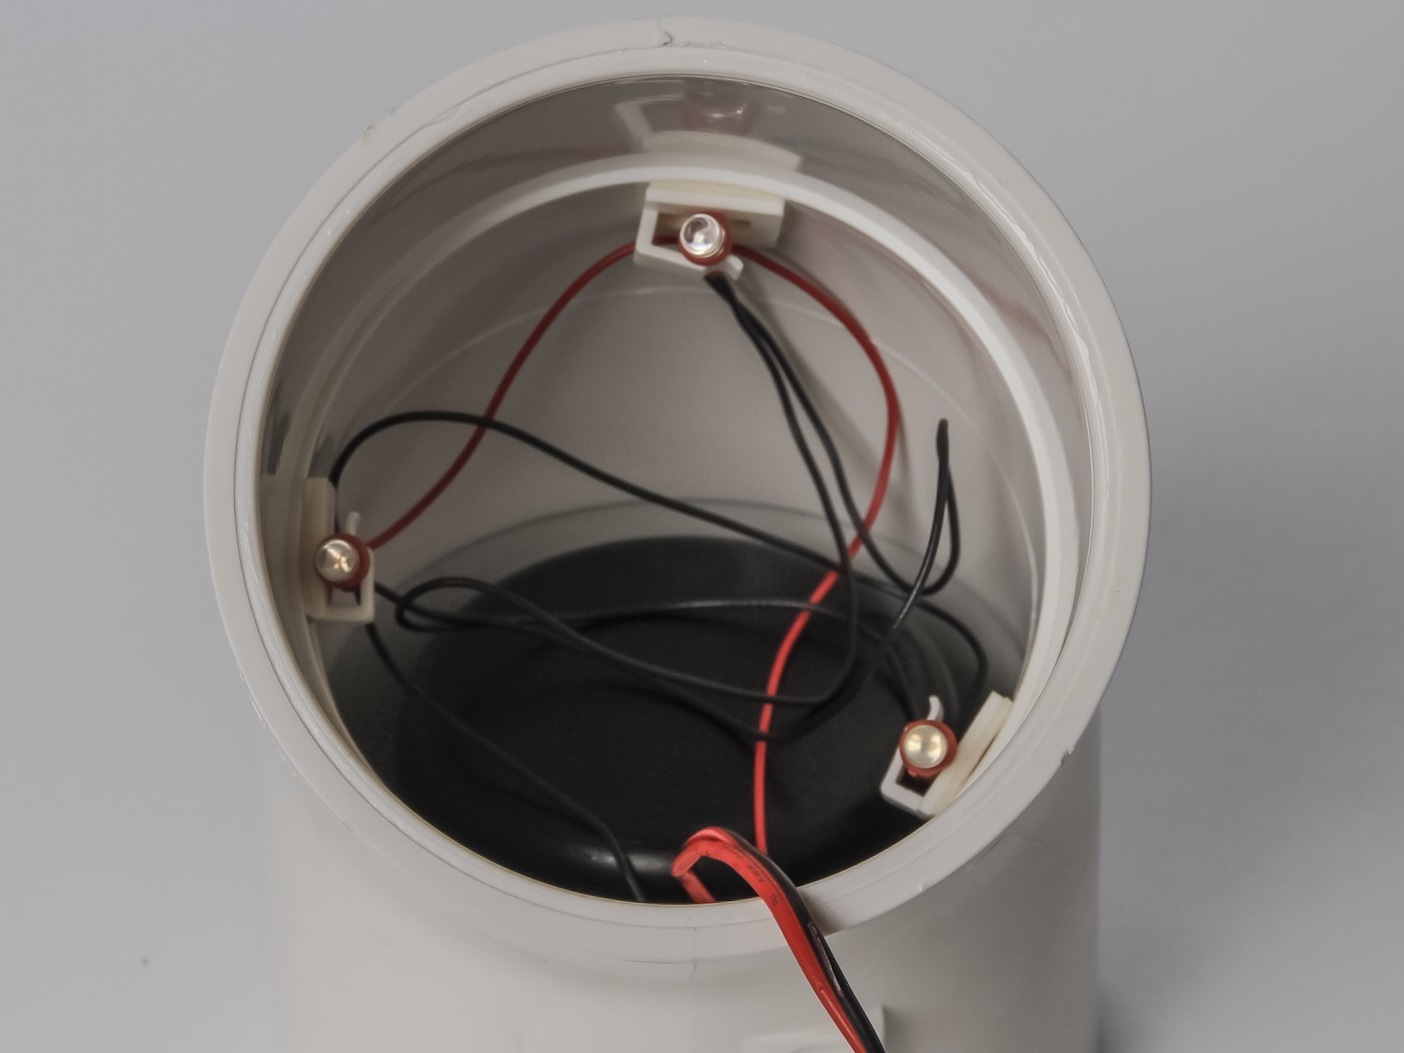
- LEDs, 5mm, ultra-bright (6) your choice of color(s); they can be different for each speaker.
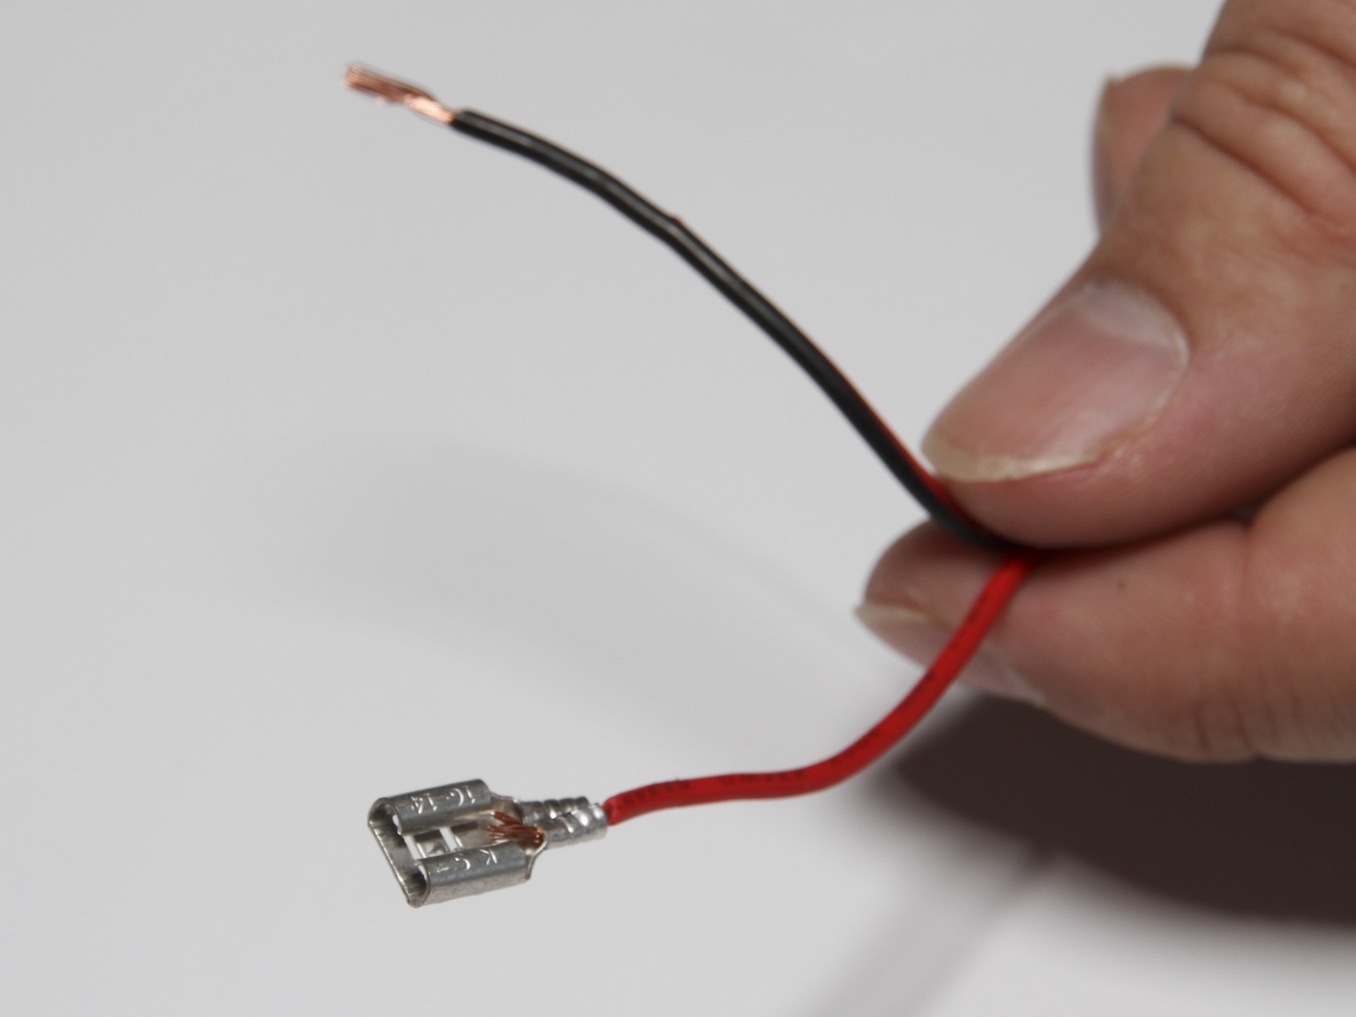
- Spade connectors, female, .110" (4) standard car audio connector
- Cable clips, adhesive-backed, plastic, sized to hold coaxial cable (6) for holding LEDs. You can also use hot glue.
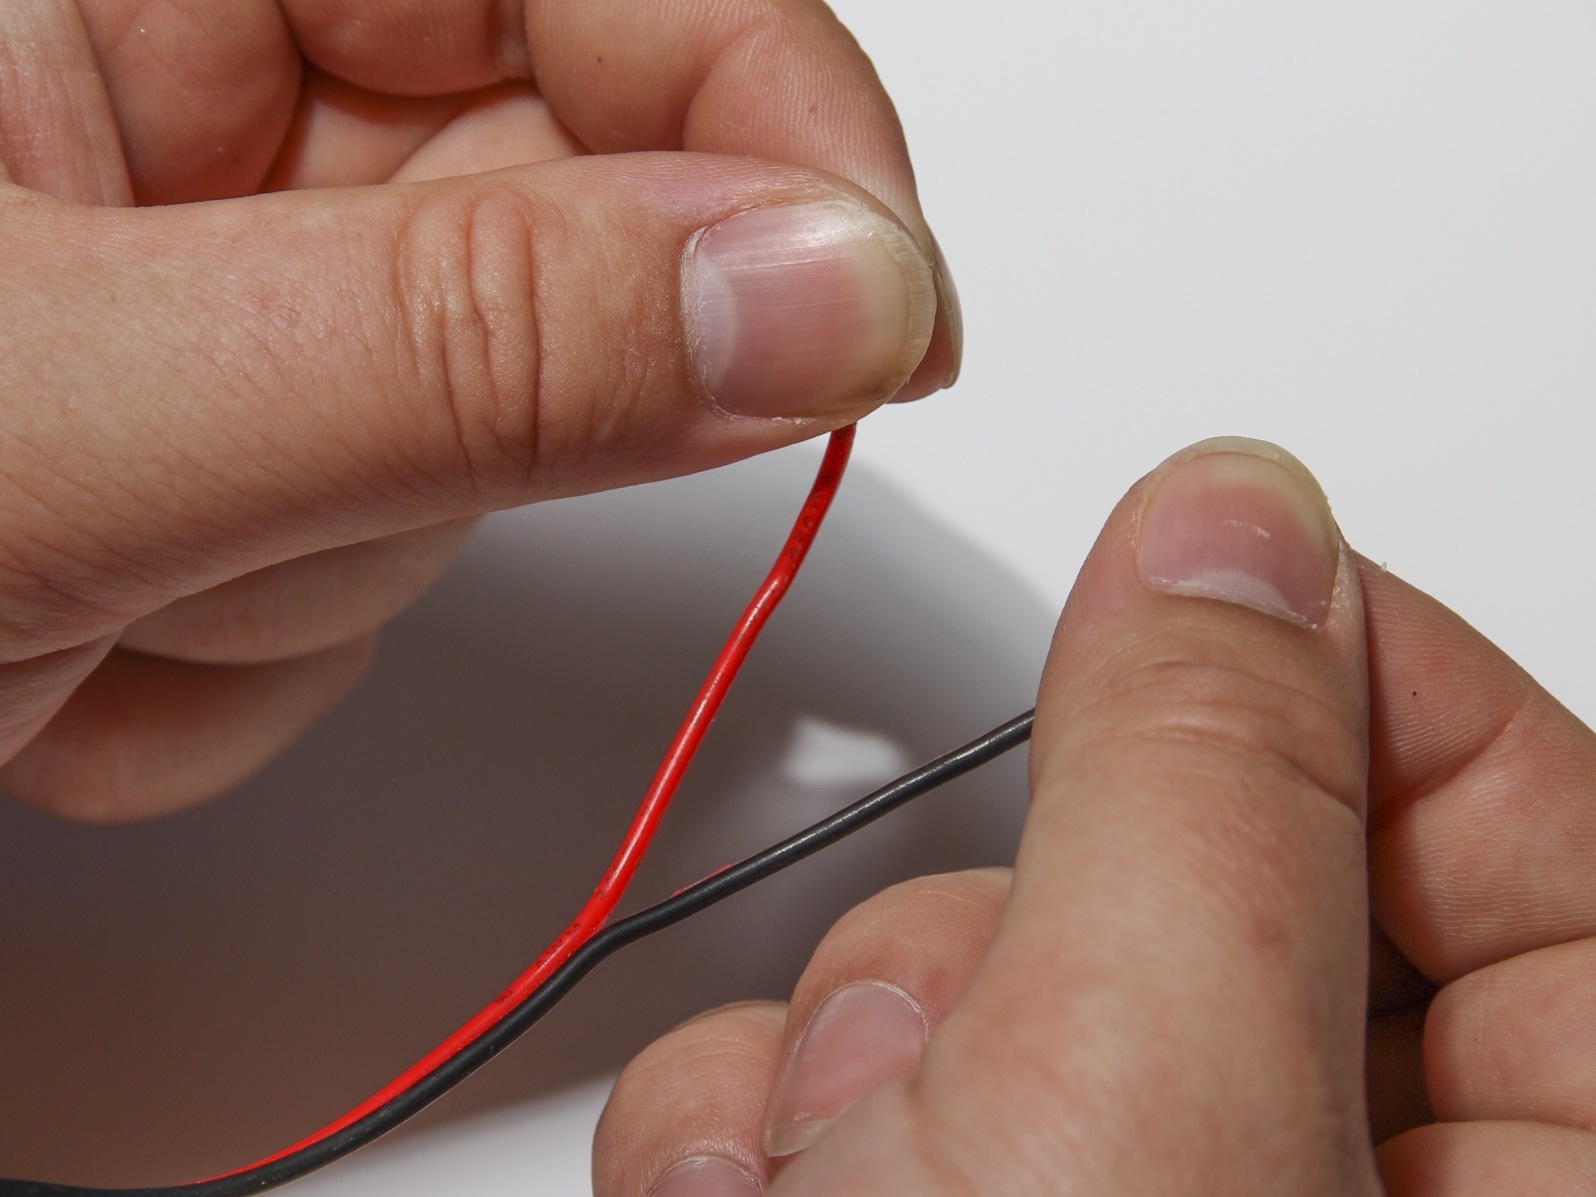
- Speaker cable, 2-conductor, 6′ or other paired wire. We used a red/black pair to help identify the polarity for the LED circuit.
- Hookup wire, insulated, 18–22 gauge, 4′
- Silicone adhesive in squeeze tube
For bass reflex speakers:
- Bolts, #12 round head, 3/4" long, with matching nuts (8)
- PlastiDip or 6" hardwood square (optional) to prevent bolts from scratching floors or furniture
For acoustic suspension speakers:
- PVC or other plastic sheet, 1/4" thick, 1′ square minimum Look in the window and door aisle at your home improvement store.
- PVC cement
- Silicone caulk
For powered/transistorized option:
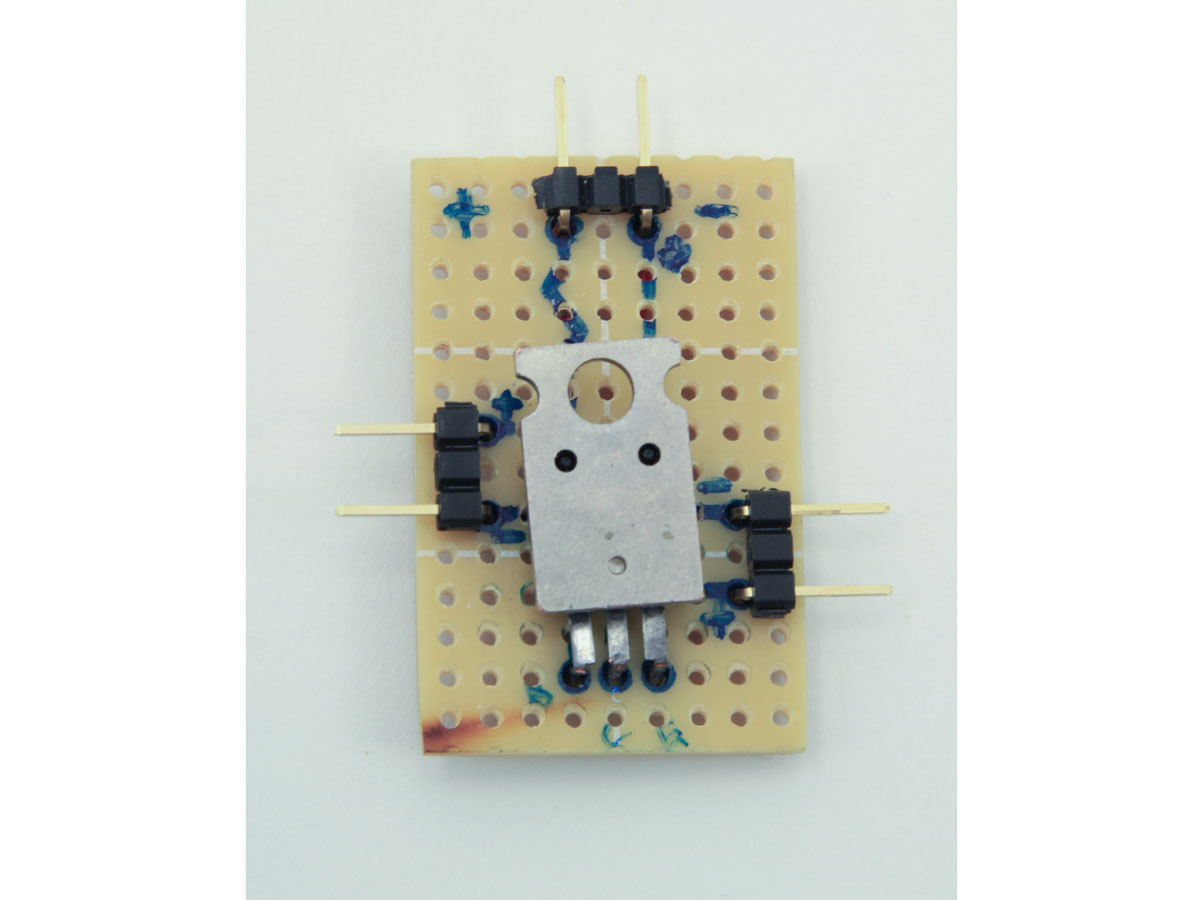
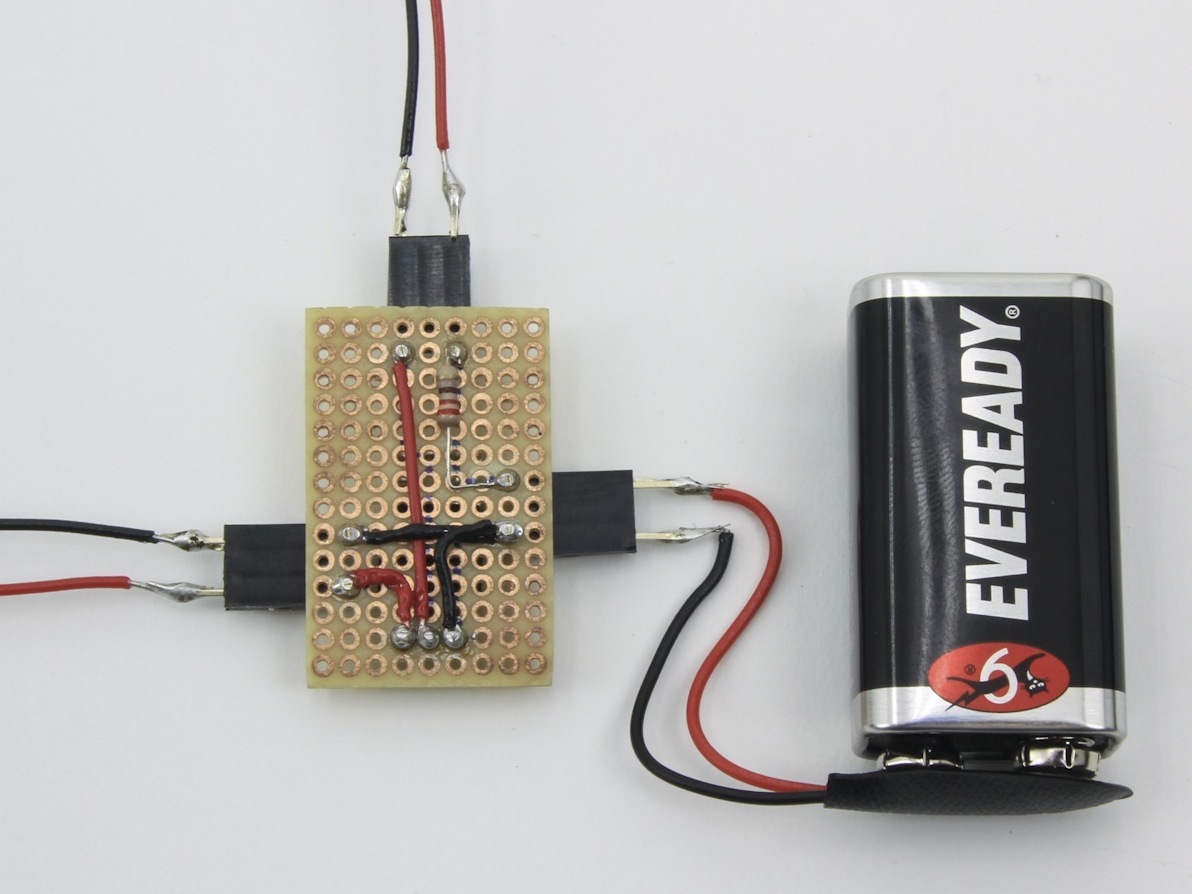
- Snaps for 9V battery (2)
- 9V batteries (2)
- Transistors, NPN, TIP31 type (2)
- Resistors, 220 (2)
- Switch, on-off toggle
- Perf board
Make Amends
In Volume 31’s “Sound-O-Light Speakers,” the vented build option is not a true bass reflex design (see reader Louis Lung’s letter, here). Also, author Bill Gurstelle’s Night Lighter 36 spud gun project is from MAKE Volume 03, not 04.