This article appeared in Make: Vol. 86. Subscribe for more maker projects and articles!
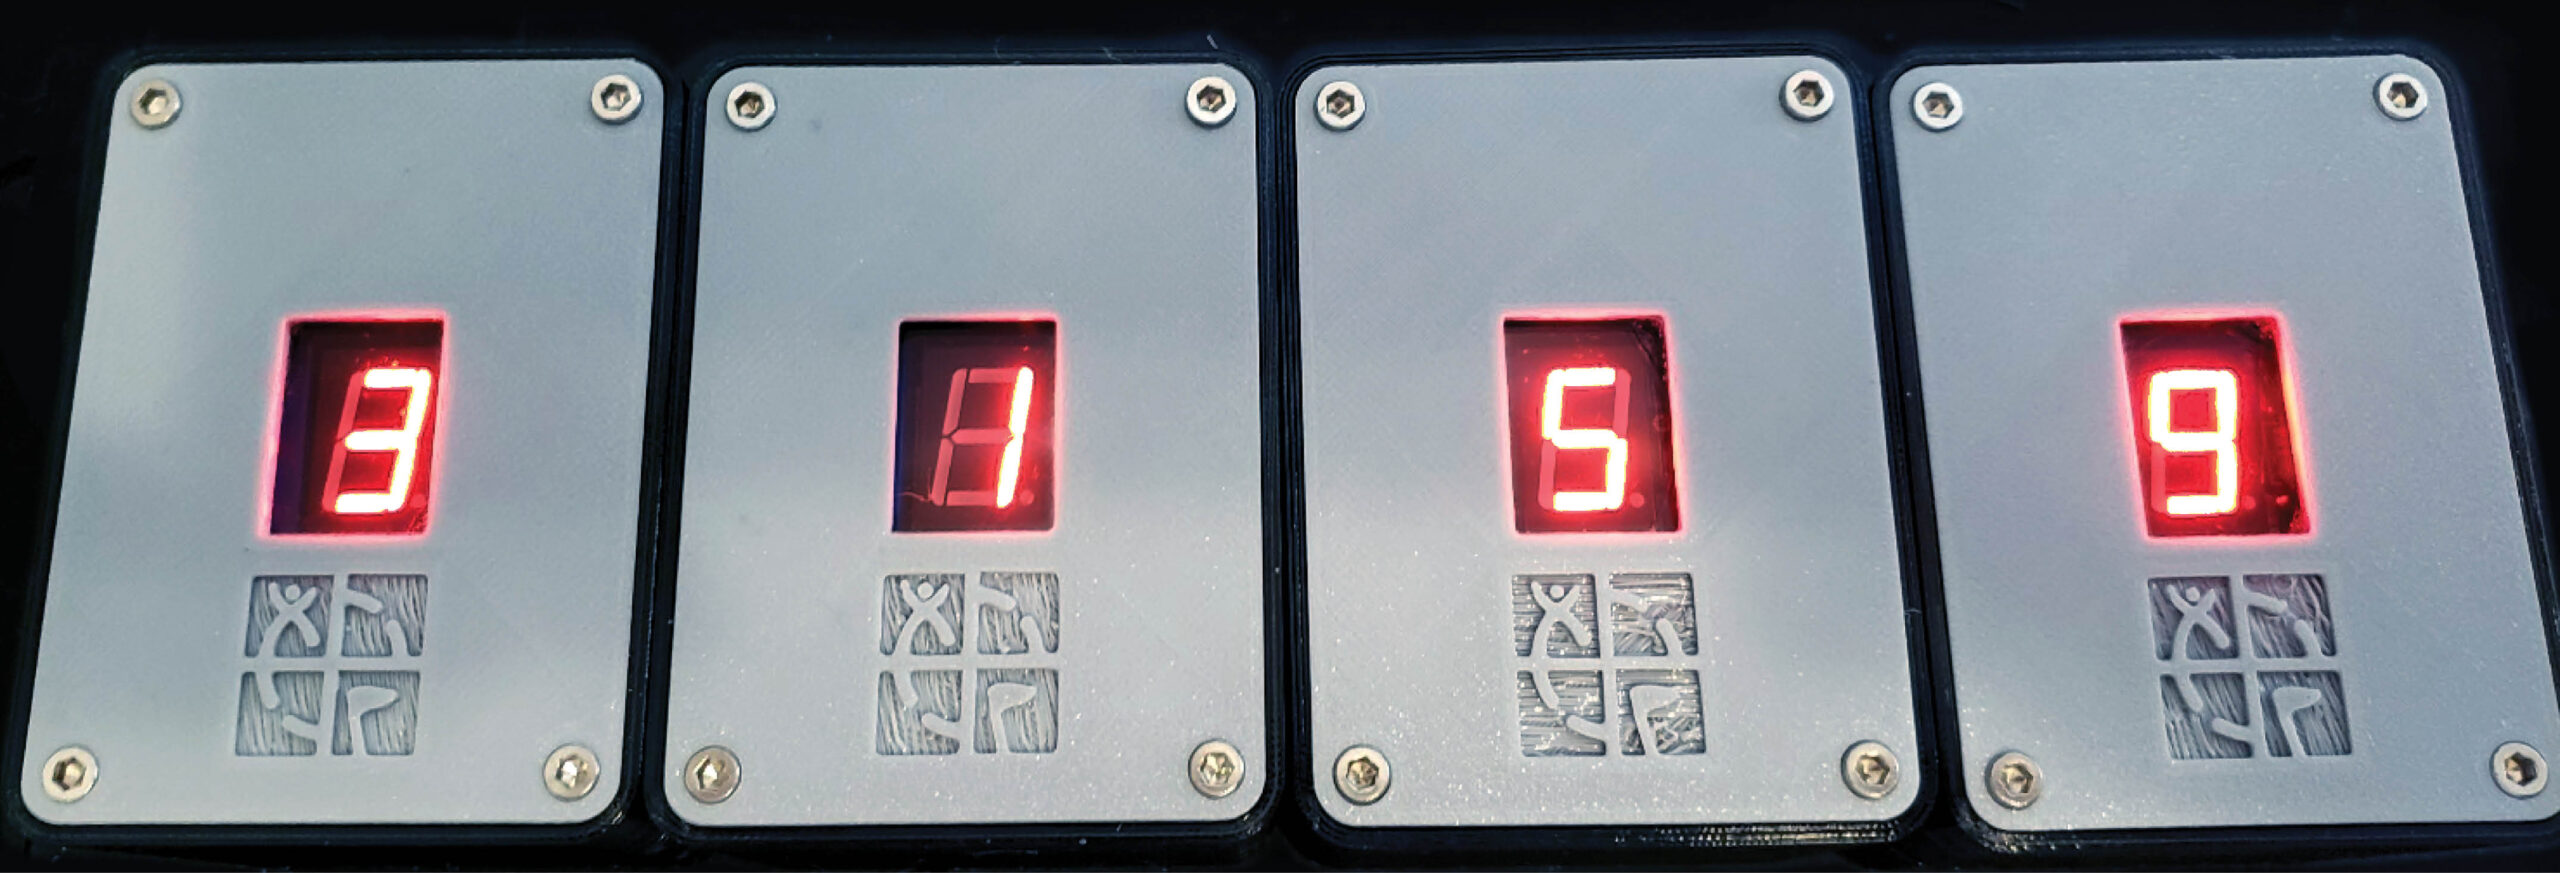
The Magic Blocks gadget cache is a fun and simple “proximity and order” puzzle. It consists of four gadget blocks. Each will illuminate a single digit that you program into it — but only when all four blocks are placed side by side, in the correct order! Strategically located magnets and magnetic switches are used to sense the proximity of each block.
The four digits can be used as a code, or a combination to a lock, or for any other purpose you like in your geocache. You program each magic block with the digit of your choice. Our kit is fairly easy to assemble, requiring only basic skill in soldering. We’ve designed a circuit board and a custom 3D-printed case to make it quick and easy. Or you can source your own parts and DIY it!
Each magic block requires two AA batteries, which provide for a very long operating life. When not in play, the magic blocks must be stored in a manner that keeps their sides separated by 1½” or more, or they may activate while hiding in your cache, and drain the batteries.
Special thanks to Trycacheus, for the Magic Blocks idea and his blessing to share it with you!
Project Steps
Build Your Magic Blocks
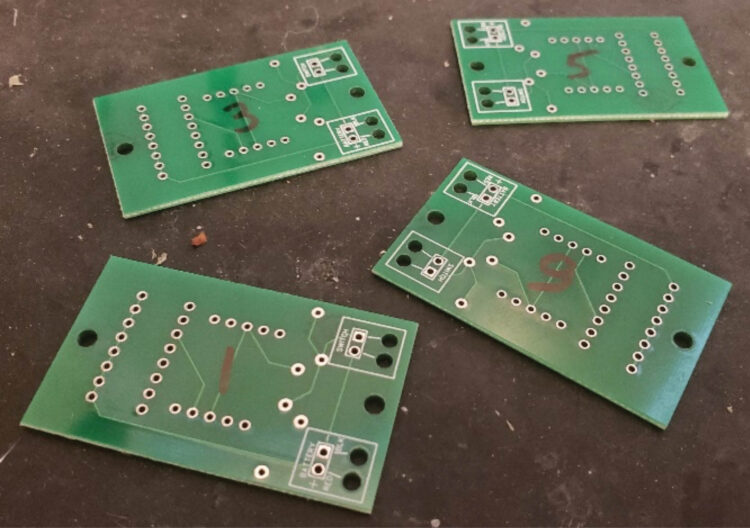
We suggest you assemble all four PCBs at the same time, unless you’re not very familiar with soldering — in which case you might want to fully assemble one magic block and make sure it’s all working before building the other three.
1. Decide on the four digits you wish to use (e.g., 3 1 5 9). Write each digit on the back of one board, to help you keep track as you assemble them.
Photography by Chad Champion / Gadget Academy
2. You will solder either one, two, or three 220Ω current-limiting resistors on each PCB, depending on the digit you selected for that block. That way, all the digits will have the same brightness. Following Table 1, pick the correct quantity of resistors for your blocks.
Table 1
3. Bend the leads on the resistors, then insert them in the PCB in position R1, as well as R2 and R3 if needed. Polarity (which lead goes in which hole) does not matter for resistors.
Flip the PCB over and solder the resistor leads, then trim them just above the solder joint with your side cutters.
Repeat for the remaining three PCBs, each with their chosen digit and adjusted number of resistors.
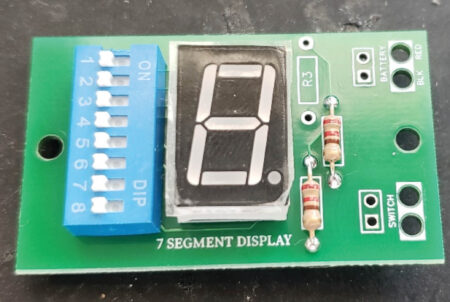
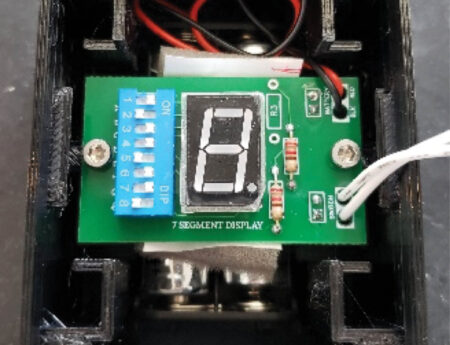
4. Insert the DIP switch, with the ON label toward the center of the PCB.
Flip the PCB and prop the other end so the DIP switch stays flat against the board. Solder any one pin on the switch and confirm it still sits flat. If needed, reflow the connection to make sure it’s flat. Then solder the remaining leads and trim.
5. Insert the 7-segment display with its decimal point at the bottom (when the DIP switch is on the left). As before, flip the PCB, keep the display flat, solder leads, and trim.
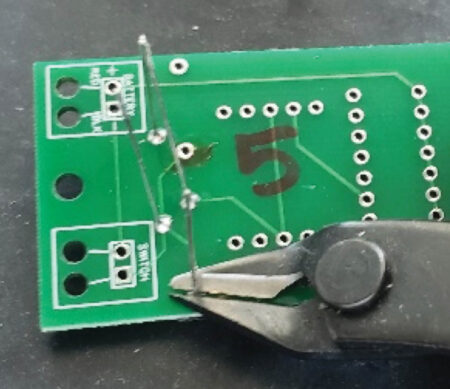
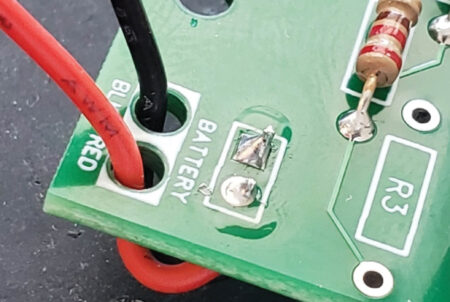
6. Insert the red and black battery leads from the top of the PCB in the holes indicated. Loop them on the back side, poke the tips through the other holes indicated, then solder on the top, and trim.
7. Do the same for the magnetic sensing switch wires: Insert from the top, loop in the back, solder on top, and trim. This switch has no polarity, so use either wire in either position.
Tighten the wire loops on the backside. Looking good! The electronic portion of the build is complete.
Program and Test
It’s time to set your digits and turn them on! You’ll program your selected digits in each magic block using the 8-position DIP switch. These tiny switches are moved to the ON position using a fingernail, pen tip, or small tool.
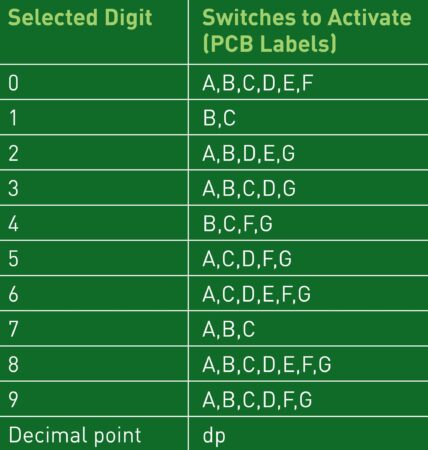
1. Following Table 2 and the letter labels printed on the PCB, set your DIP switches to the ON position for the digit you selected on each magic block.
Table 2
2. Insert two AA batteries in each battery holder, ensuring correct polarity.
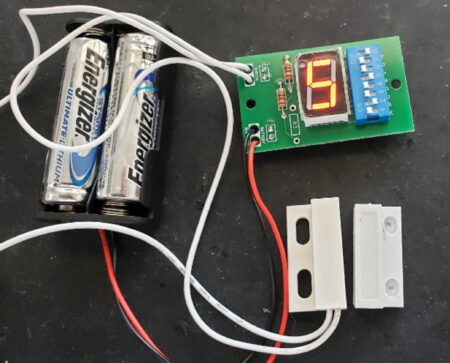
3. Place a magnet close to each reed switch. The digit you selected for that magic block should illuminate, and then extinguish as you move the magnet away. Make sure all four assemblies are illuminating the correct segments (and digits).
That was (hopefully) quick and easy! Let’s get all these assemblies mounted into their cases and let the magic begin.
Final Assembly
Time to put it all together! Note the direction arrow on the inside bottom of each case. For the following steps, orient all the cases with the arrow pointing up.
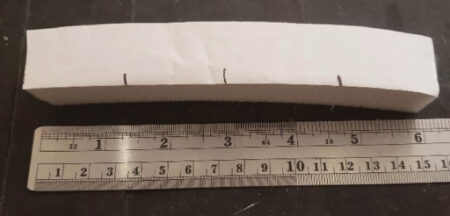
1. Mark the 6″ (15cm) length of foam every 1½” (3.8cm) and cut it with scissors into four equal pieces.
2. Select one of the PCB assemblies and center the battery pack in the bottom of the case, with the battery wires on the “up” side of the case. Add a piece of foam on top of the battery, paper side up. Then set the PCB on top as shown — DIP switch left, decimal point down — and affix in place with two screws.
Repeat on the other three cases, and tuck the battery wires into the top of the case.
Encode the Magic Block Order
Now you can place the switches and activating magnets in such a way that all the blocks must be placed in order, side by side, to illuminate all the numbers simultaneously. This provides the geocache finder with your numbers in the correct order.
We’ll show you one way to link the blocks, though other switch and magnet positions are possible.
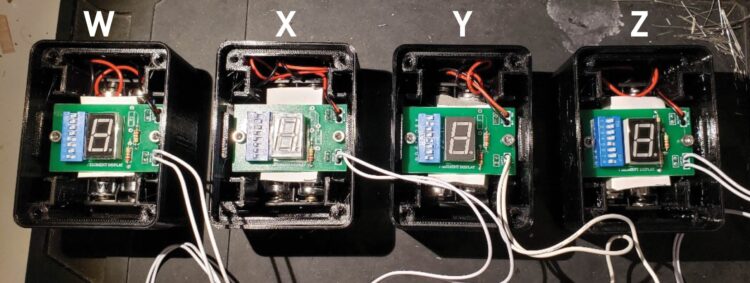
1. Place all four blocks in a row, in the order you want to display the digits. (Check again with the magnet if you’re unsure which is which.) For clarity, we’ll call the blocks W, X, Y, and Z, from left to right. As each block is set up, you’ll move it off to the side, so pay careful attention to the W, X, Y, and Z designations at each step.
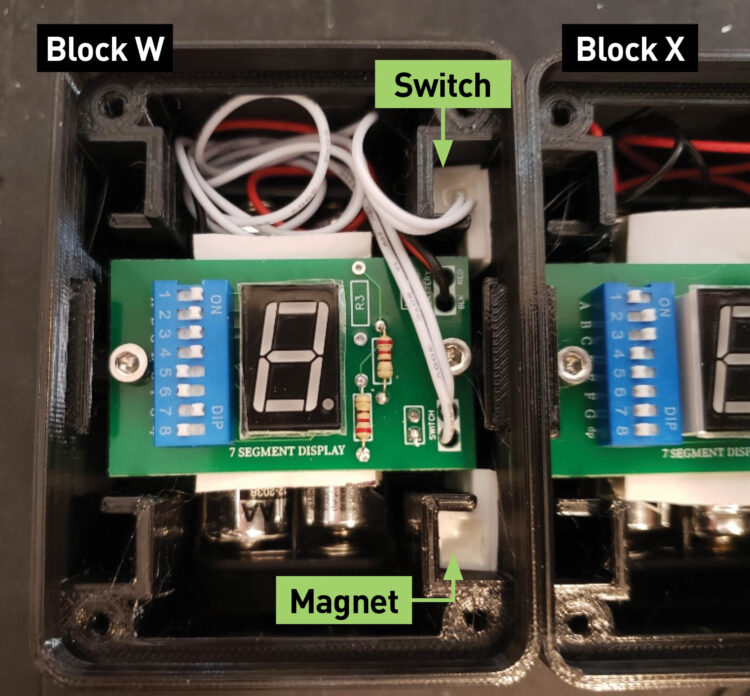
2. Block W — Slide the sensing switch from block W into either of the two positions on the right side of the block. Place a magnet in the remaining position on the right side of block W. Tuck in the switch wires in the top or bottom of the block.
NOTE: Depending which position you’re using, the sensing switches may be placed wire side up, or they may need to placed wire side down, in which case you need to feed in the wire first. Don’t force them down in the slot, but do insert the magnets and switches as low in the block as possible.
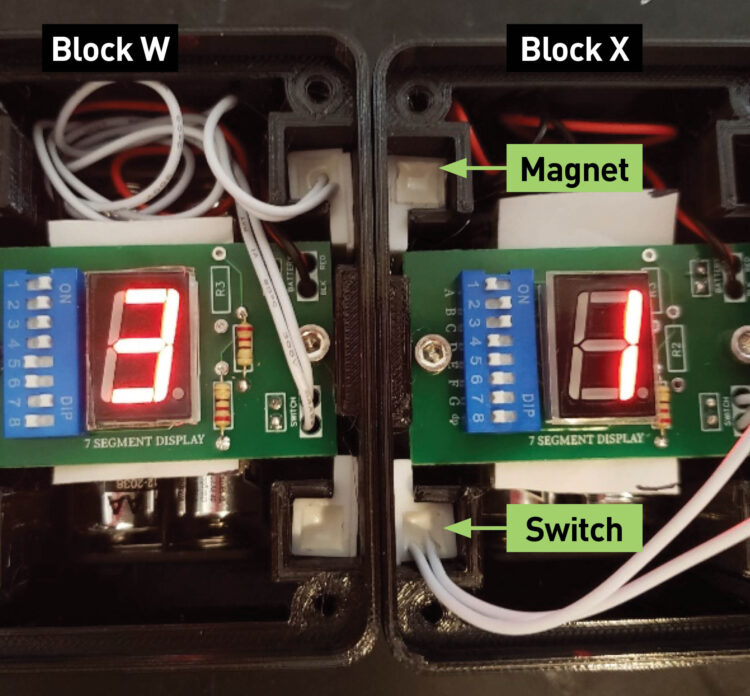
3. Block X — Slide the sensing switch from block X into the position (on the left side) that’s opposite the magnet in block W. Also slide a magnet into block X, opposite the sensing switch in block W. Both blocks should now have their numbers illuminate when next to each other.
Set block W aside (no sense wasting your batteries). Add a second magnet to block X, in either position on the right side. Tuck in the switch wires in the top or bottom of the block.
4. Block Y — Slide the block Y sensing switch into the slot opposite the magnet in block X. Block Y will now illuminate when next to block X. Set block X aside.
Slide a magnet into the right side of block Y, in either position. Tuck in the switch wires.
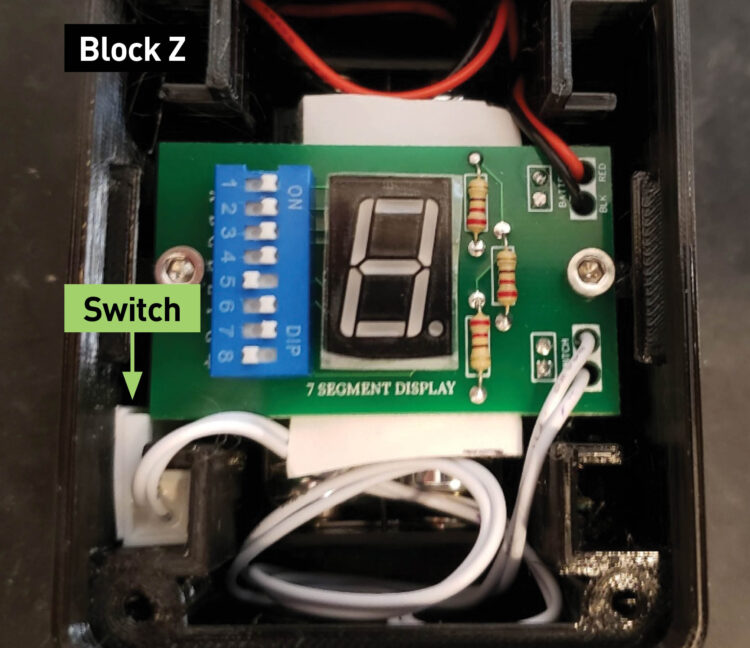
5. Block Z — Slide the sensing switch from block Z into the position opposite the magnet in block Y. Block Z will illuminate its number when next to block Y. Move block Y away to extinguish the digit. Tuck in the switch wires.
6. Confirm that when all four blocks are next to each other, in the correct order, they will all illuminate!
Remove the protective film over the 7-segment displays (if present) and make sure the wires are tucked in so they won’t block the view.
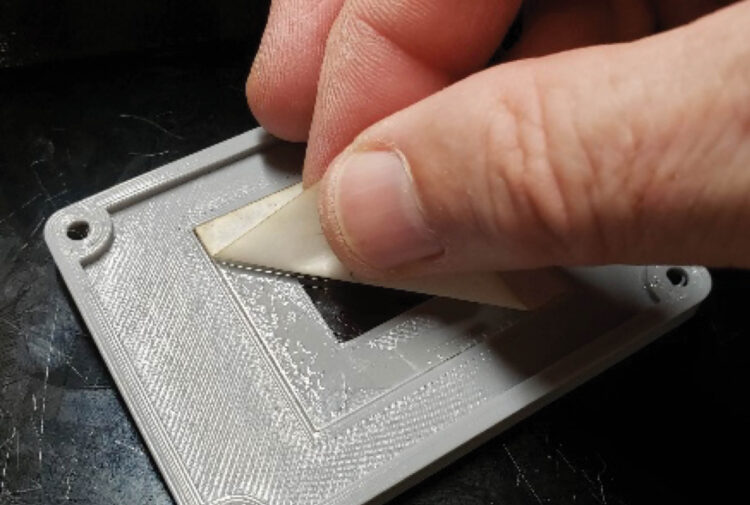
7. Remove the protective paper from the acrylic lens window inside of all four custom block covers.
Place the cover on all blocks, logo side down, making sure no wires are pinched under them, and attach each with four T9 Torx screws on each block.
The build is complete!
Conclusion
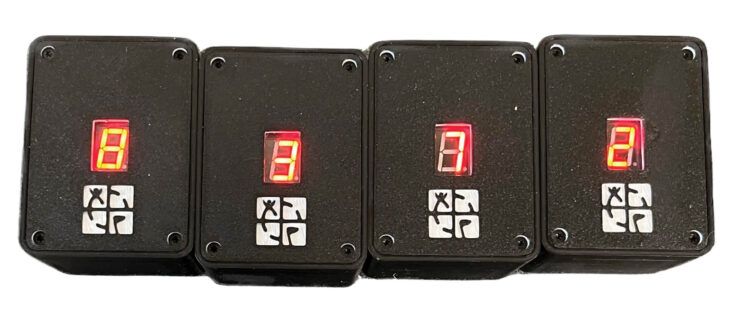
Put the blocks next to each other in the correct order and confirm all digits are right side up and all the cover logos are aligned. Now you can put your Magic Blocks into your own geocache to mystify all who find it.
Don’t forget, your cache design needs to keep the four Magic Blocks separated, until the cacher is ready to solve the puzzle!