Since the first LilyPad Arduino that Leah Buechley made in 2007, wearable electronics boards have evolved so much. Fifteen years on, most wearables boards are now made in the LilyPad style — round with large contacts around the edges, with lots of surface area to solder, clip, or sew onto. This style of board has no corners, and generally has a very slim profile so it doesn’t get caught on clothing.
These days, there are a variety of new products — an entire ecosystem — that make wearables much more manageable, whether you’re just learning or setting out to produce advanced products. And today we’ve also got online access to purchasing large quantities of specialty products, often not originally intended for wearables at all!


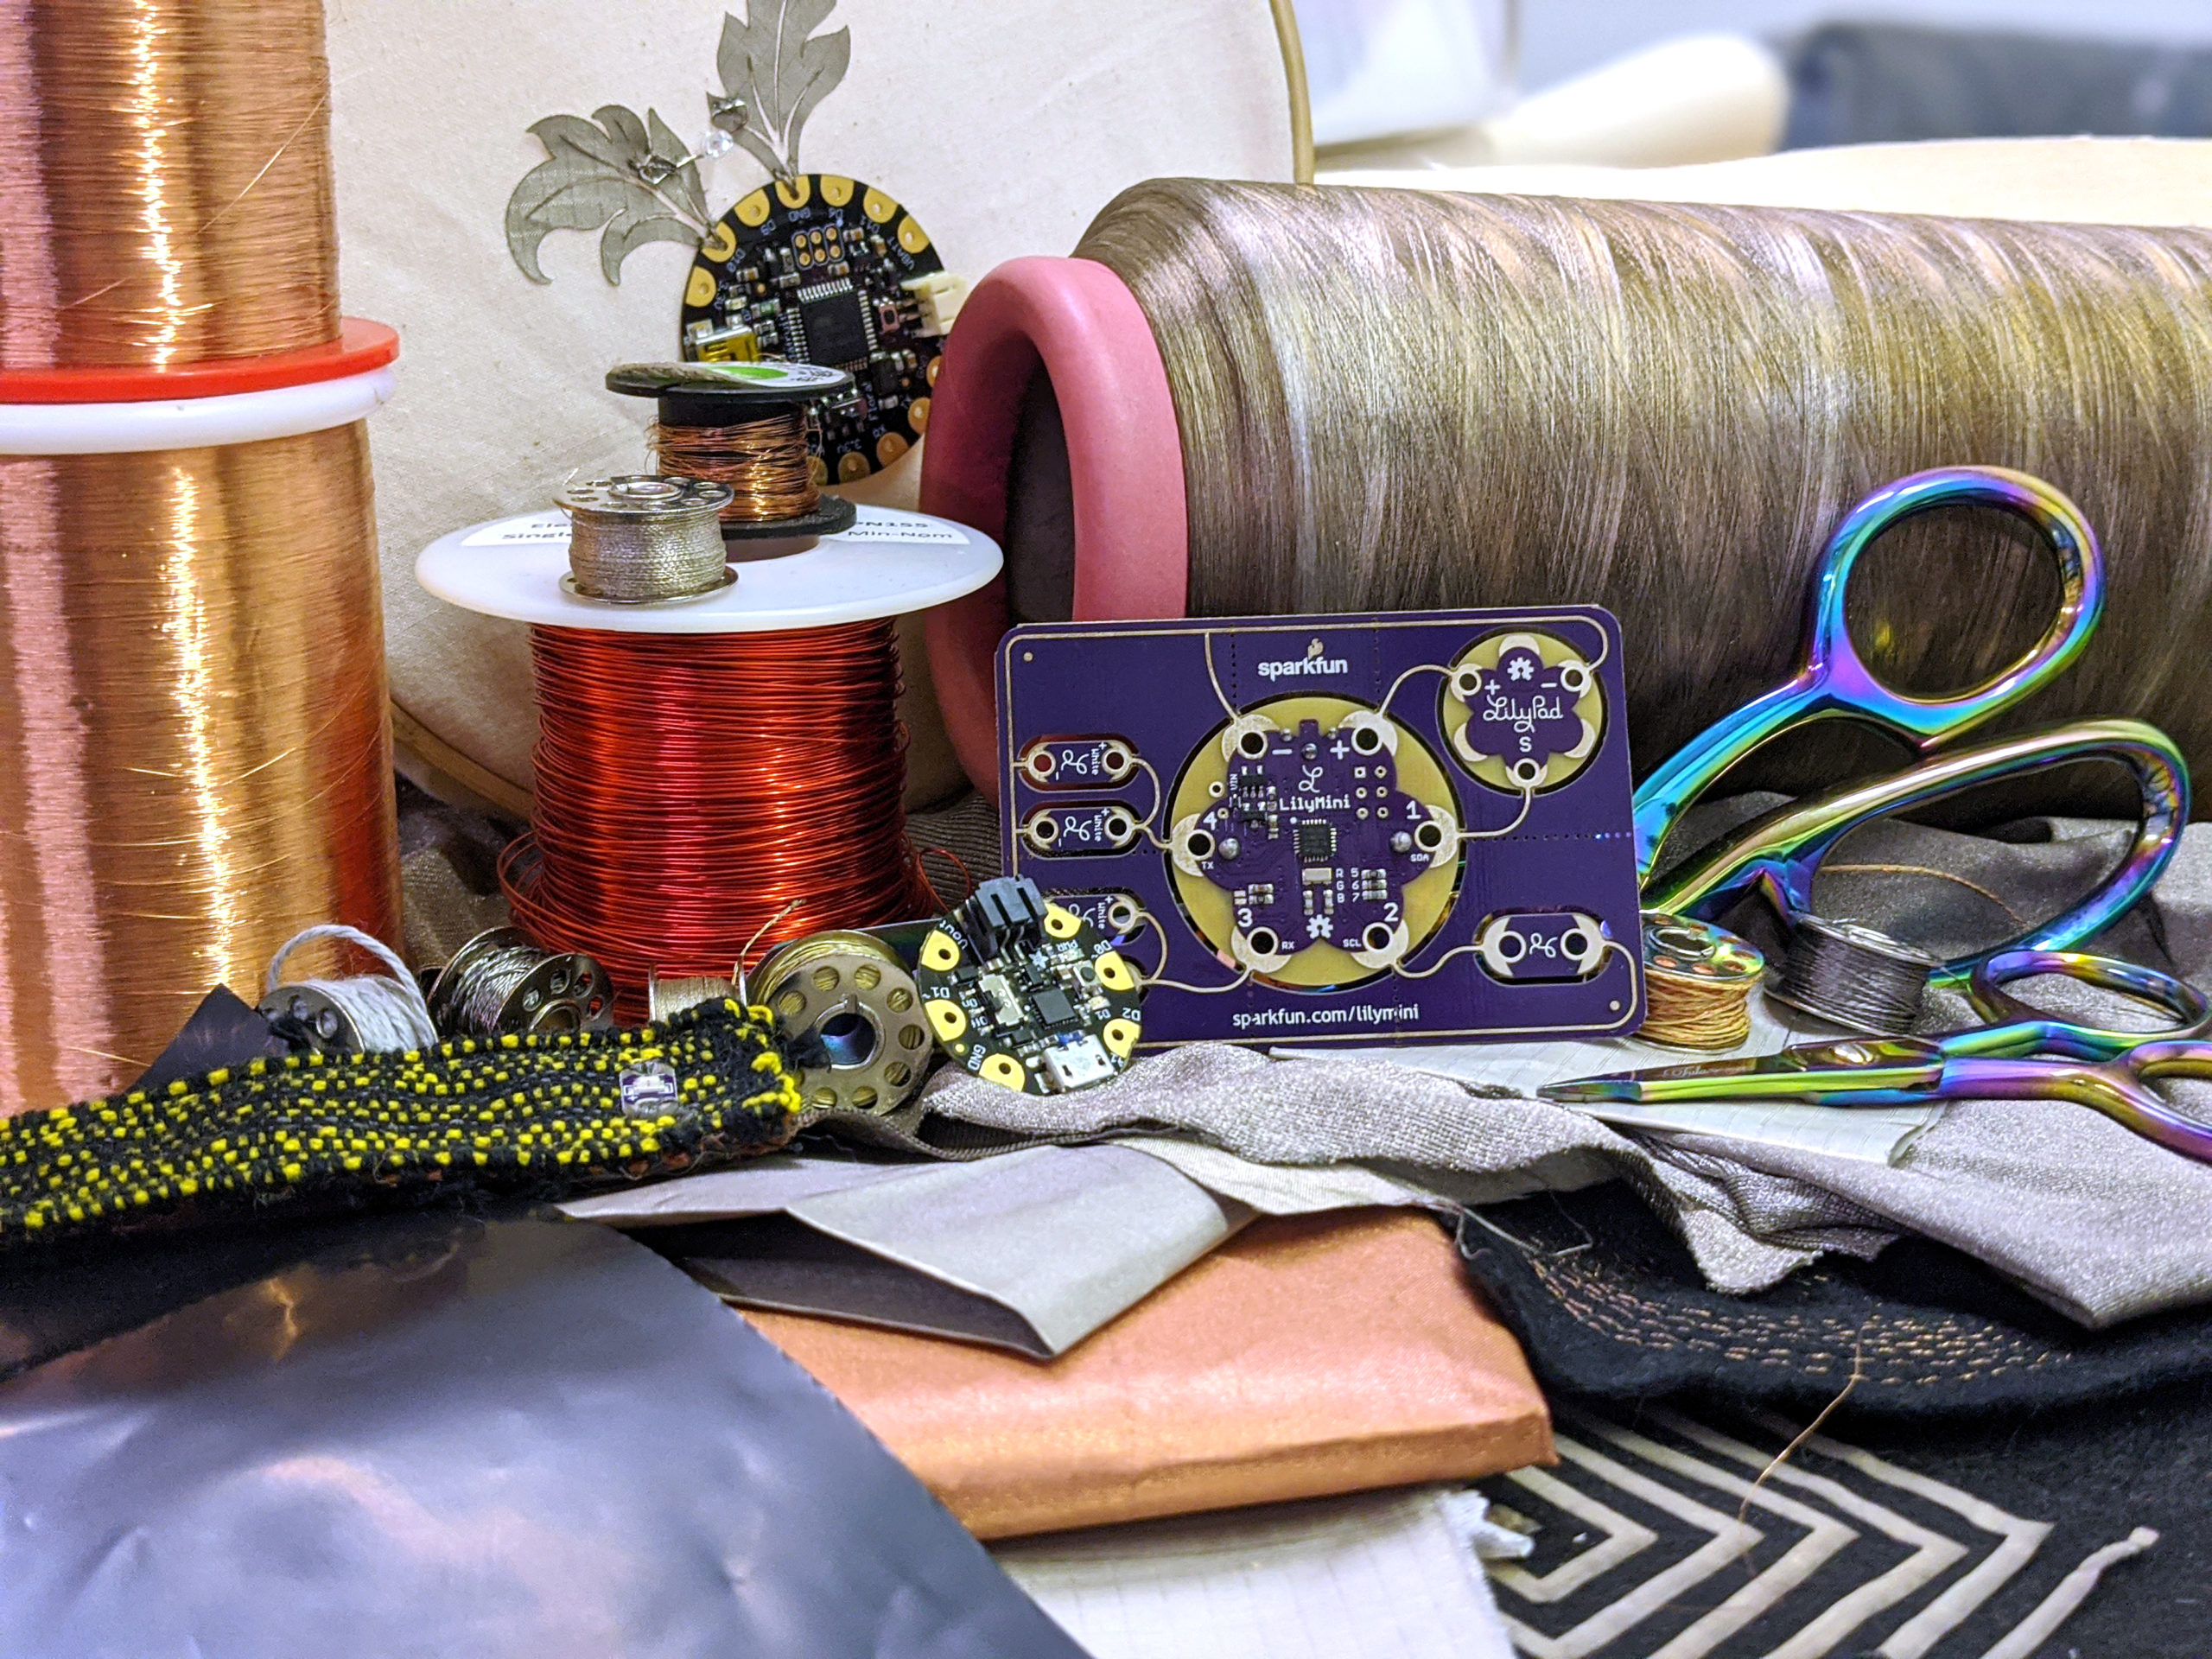
This guide is an overview of products and materials you might find useful on your wearables journey in 2022. Learn a bit about the latest gear, and then we’ll build an iron-on wearable circuit!
Microcontroller Boards
Flora

The Adafruit Flora is my go-to board for beginners in wearables. It’s got a thin, round profile lots of accessible pins, and is completely Arduino compatible. Because of the large contact pads around the edge, I even use the Flora for non-wearable projects because it can be soldered to easily, or clipped onto with multiple test leads. The Flora has both a USB plug and a JST socket for your LiPo or CR2032 battery attachments and runs on an ATmega32u4 chipset. There are multiple indicator lights for power and testing, even an onboard NeoPixel. The ICSP connectors are broken out for any advanced users if you want to dig deep. The Flora isn’t the cheapest option, but it will definitely do what you need!
Gemma M0


The Gemma is a smaller, more compact version of the Flora. While I had some gripes with the old version being sometimes difficult for beginners, the new Gemma M0 uses an ATSAMD21E18 chipset instead of the ATtiny85, making it a whole lot more friendly and powerful. Unlike its predecessor, it can communicate with the Serial Monitor with no issues. This small board can also be programmed through the Arduino IDE, or it can be a great introduction to CircuitPython. The Gemma is a bit small, so attaching lots of jumpers or making complex circuits with it can be tricky. I’d recommend the Gemma M0 if you’re looking to finalize a project that you’ve already prototyped. If you previously tried a Gemma and had trouble uploading or getting reliable results, it’s time to try the M0.
LilyTwinkle

The LilyTwinkle from SparkFun Electronics is the smallest and cheapest wearables board currently on the market. It’s a minimal ATtiny85 board that comes with pre-programmed patterns on each of its pins. You can take it right out of the box and add it directly to your project! However, what makes the LilyTwinkle special for me is that you can also reprogram the board for your own uses using an AVR programmer and an ISP pogo pin adapter — then you have a super-tiny wearables board for your advanced projects! This makes the board good for both beginners and more advanced users. The contact pads on the LilyTwinkle are a bit smaller and don’t go right to the edge of the board, so they’re better suited to sewing than to alligator clips or soldering. This board also doesn’t have a JST or USB connector, so you’ll need to either sew, solder, or clip a power supply to the board.

A few honorable mentions here are Adafruit’s Circuit Playground series and the BBC micro:bit. Both are great boards for beginners and are loaded with features of their own, but are in my opinion, simply overshadowed by the Flora and the Gemma for most wearables projects.
Materials
Conductive Threads

For me, one of the biggest pains about wearables was always the conductive thread, but I’m happy to share that is no longer the case! It used to get tangled and be difficult to use, which was tricky both for skilled sewers who were already frustrated with the electronics, and for people new to sewing who struggled with the material itself. I’m very pleased with all the new conductive thread options that have appeared in the last few years. I’ll go over the broad categories of thread currently available. Each supplier might have variations, but knowing the broad strokes can help you identify a thread that will be helpful in your project.
Stainless steel thread was an early, tried-and-true conductive thread. It has pretty low resistance, and comes in 2- or 4-ply types. The 4-ply is much more conductive, but it’s a bit harder to work with and might get tangled easily. You won’t get this thread in a sewing machine without trouble, but it will never oxidize like some other threads. There are many brands, and they all vary somewhat. Stainless steel thread can also be difficult to thread a needle with, so if you use it I recommend getting a needle threader.
Silver- and nickel-coated threads can offer a more workable solution. These can often go inside sewing machine bobbins, and feel much like regular thread. I’ve even used silver-plated thread in a digital embroidery machine. Depending on the thread, there are different bases, often nylon, which have super-thin nanoparticle coatings. Some of these coatings can wear off or oxidize over time, and all have very different resistances, so make sure to check the specs and test the materials too.
38AWG copper magnet wire is my personal favorite. You can get this at many hobby shops or hardware stores. It’s a very fine-gauge copper wire coated with a clear enamel, which makes it head and shoulders above all other conductive threads for usability. Unlike the others, you can let your traces touch and they won’t create a short circuit, because of the enamel. You’ll have to use a flame or sandpaper to remove the enamel at your connections. Some gauges can even go into the sewing machine bobbin. Copper is extremely conductive, so you can use this to cover long distances with multiple traces. It’s really a game changer for wearables.
Conductive yarns, which are thicker than threads, are available too. Habu’s silk-coated steel yarn is beautiful and easy to work with. As far as I know, it’s the only colorful conductive yarn. SewIY also has some beautiful insulated conductive thread that comes pre-loaded on metal bobbins. It’s a bit thicker than other threads but it looks fabulous and is easy to work with.
There are a wide variety of steel core or golden yarns and threads that are not specifically advertised as “conductive” that also work really well.
Fabrics

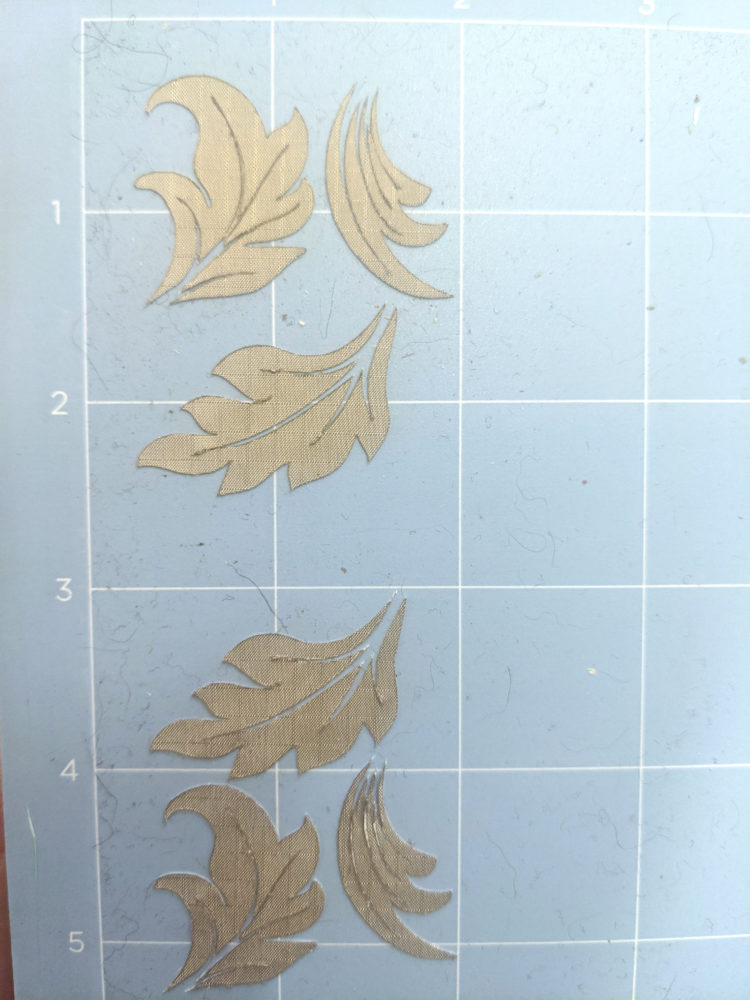
Wovens — A longtime beginner-friendly favorite is iron-on conductive fabric. This fabric is usually made of copper-nickel plated polyester, and it’s woven so it doesn’t stretch and is easy to place. It can even be cut with a laser or vinyl cutter so you can create beautiful designs and iron them on without worrying about being handy with appliqué.
There are also copper-nickel plated polyester strips of conductive tape that are great for paper circuits, and come in varying widths. Unlike the iron-on fabrics which are pretty robust, I’ve found that the adhesive on the tapes isn’t great for surfaces that move a lot, but they are so easy to apply and super fun for learners. Some iron-on or adhesive fabrics aren’t conductive on both sides due to the glue, so it’s best to double check before you buy.
My favorite non-adhesive woven fabric is the pure copper polyester taffeta from Less EMF. It’s got a gorgeous color, doesn’t tarnish, and is extremely conductive. While it’s easily the priciest, it really stands out as a centerpiece of any work.
Knits — There are a number of stretchy, knit conductive fabrics available in the last few years. They’re a bit harder to work with, and sometimes their resistance is different along the horizontal and vertical axes. This is due to the structure of the fabric itself which sometimes has a stretchy fiber as well as a conductive fiber in an interlocking pattern. While knit conductive textiles feel a bit more natural, they can be difficult for beginners because the edges tend to curl, and the stretch makes them harder to sew down. My favorite though, is the jersey knit fabric that has spandex and silver fibers — it feels like a T-shirt!
Nonwovens — Nonwoven fabrics can have interesting properties unlike knits or wovens because of their construction. Velostat is commonly used for pressure sensors, as it changes resistance when it is squished. I would argue that Velostat, aka Linqstat, is not really a fabric but a plastic sheeting, so sometimes it’s also a bit challenging to work with. Lucikly Eeonyx makes a few interesting piezoresistive fabrics that can be used both for heating and for force-sensitive resistors.
While some of these materials can be pretty pricey, if you find yourself using a lot of them I recommend searching for an industrial-sized bobbin on Alibaba. (I have one and I don’t think I’ll ever run out of silver-plated nylon thread.) They’ll cost you a few hundred dollars, depending on the thread or fabric, but it’s well worth it in the end. A great source for all of this is the Less EMF shop, and of course Kobakant has a stellar list of international suppliers for fabrics, yarns, threads, and more.
I should also mention that silicone wire is a great alternative to conductive thread. It’s incredibly soft and flexible, but of course it can’t be integrated into garments quite the same way.
Snaps and Clasps

Snaps and clasps are the unsung heroes of wearable electronics. When you’re working with materials that are, by design, squishy and flexible, it’s hard to get good connections without compromising wearability. Snaps and buttons are already a part of the mainstream design of clothing, so people won’t think twice about them being all over your wearable device.
Sewable snaps have small holes along their edges which are perfect for attaching conductive thread to make a connection. Snaps can also be soldered to the pads of your wearables board, so that it can easily be removed for washing.
Clasps and buttons can also be used as switches to turn your device on and off. While snaps do the task perfectly well, there are a variety of clasps that provide a more interesting interaction to close a circuit, like bag clasps and belt buckles. Some have protective coatings on them, so always test before you commit to adding traditional sewing elements to your circuit.
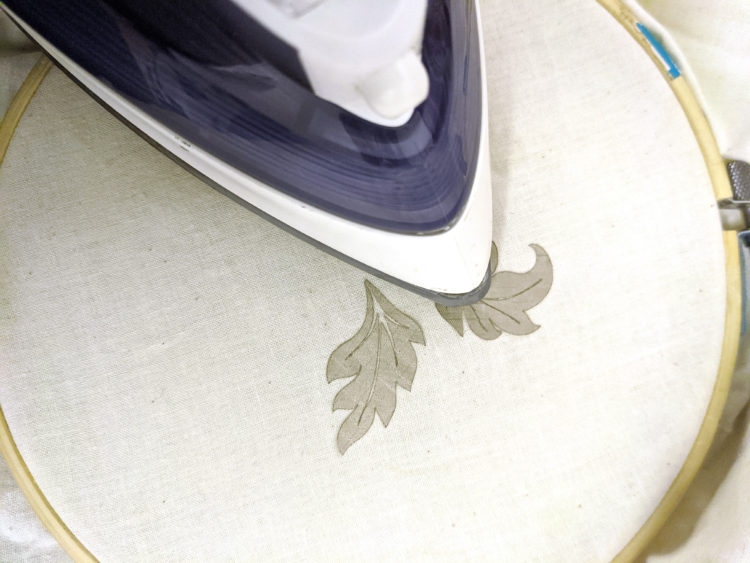
Make an Iron-on Textile Circuit

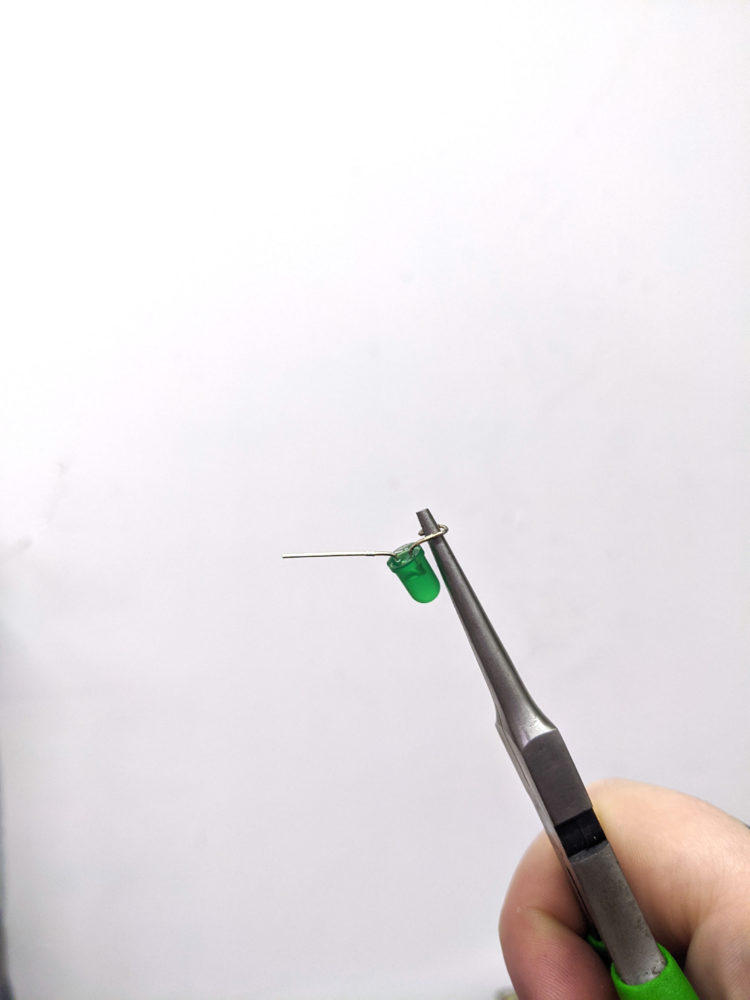
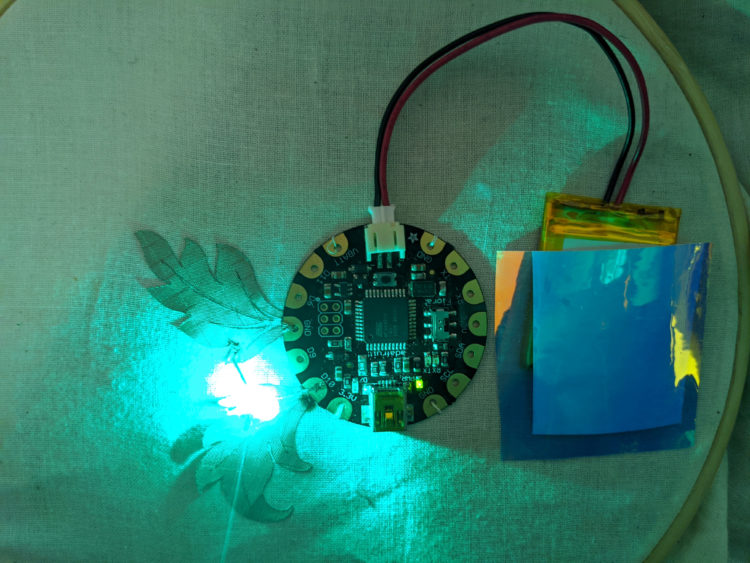
In this tutorial, I’ll show you how to build your first wearable circuit using iron-on conductive fabric . This project will take you through cutting, ironing, sewing, and programming as your introduction to wearable electronics. The technique I will show you is how to attach LilyPad-style electronics to traditional through-hole components — in this case LEDs — which is something you’ll do a lot if you build
soft electronics!
The benefit of using the iron-on fabric to make traces in this example is that you can get a much cleaner appearance, and experiment with the shape of your circuit. When you’re done with this project you’ll have a circuit that can live on a textile and blink any pattern you’d like — and the skills to try new circuits of your own.