test tube chandelier featured image

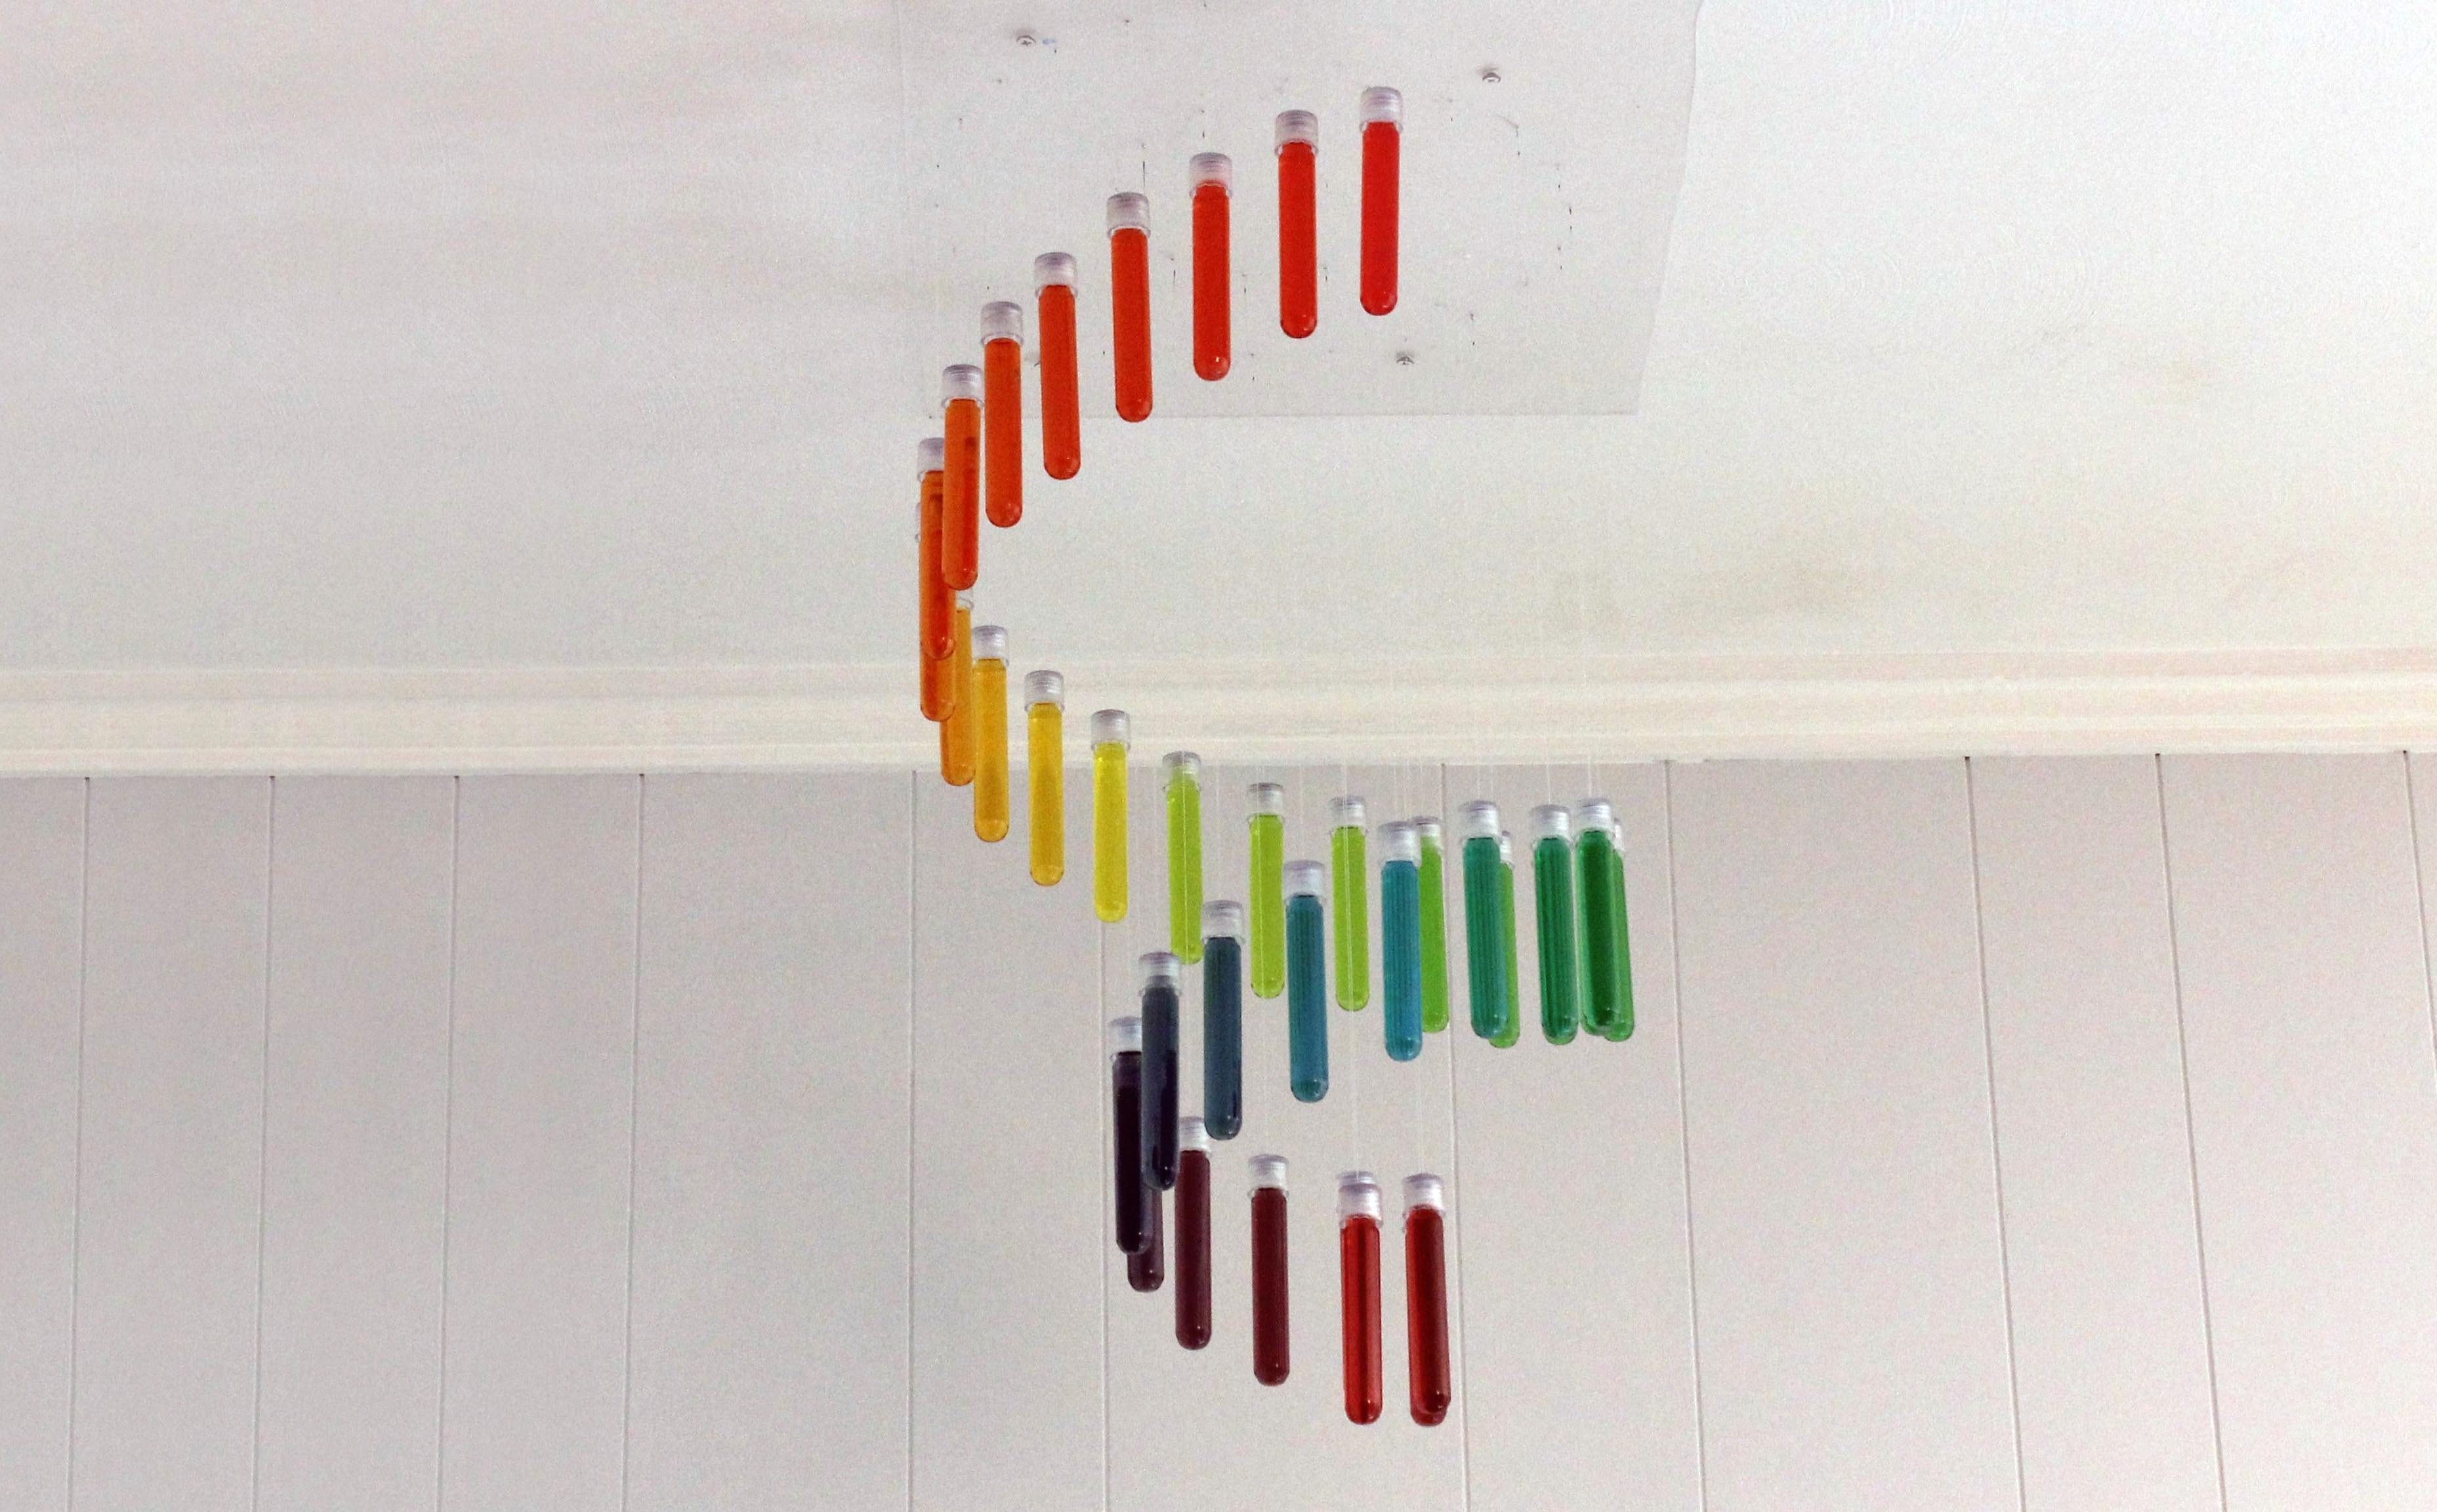
A while ago I picked up a bunch of glass test tubes that were being thrown out. At the time I didn’t have a specific project in mind for them, but I figured that I could come up with some way to use them. Then, I came across a design by Etsy user PaniJurek for a chandelier made from test tubes that were filled with colored water. I really liked the way that you can use the test tubes to make any color pattern that you want. So I decided to make my own version of the project.

SAFETY NOTE: Any time you are working with used laboratory glassware, you need to know what it was used for and how it was handled. In my case, I got these vials from a water testing lab. The only thing that was in them was tap water samples. I also know for a fact that the vials were sterilized with an autoclave before disposal, so I am confident that these vials are safe to use. Other labs might be working with dangerous chemicals or pathogens. Don’t use vials unless you are 100% sure that they are safe to use. When in doubt, play it safe and just get a new set of vials to work with.

YouTube player

Project Steps

Choose a shape of the chandelier

The first thing that you need to do is decide on the overall design of the chandelier. The test tubes can be arranged in any configuration you want. You can hang them in a straight line, make a wave pattern, or make a circle around a light source. It’s all up to you.

I chose to hang my test tubes in a conical spiral pattern. On the outer end of the spiral, the first test tube is suspended 2″ from the ceiling. Each test tube after this one drops by an additional ½”. All the test tubes are spaced out 1½” center to center along the spiral. There are a total of 37 test tubes.

Choose the color pattern of the chandelier

By carefully controlling the color ratios in each tube, you can make any color pattern you want. I decided to go with the classic color wheel pattern. The color gradually transitions from red to yellow to blue and back to red again.

Measure and cut the fishing line

​You need one piece of fishing line for each test tube. In the end, each piece will be a different length, but at this point it is easiest to just cut them all to the same length and adjust the length during the final assembly process.

I cut 37 pieces of fishing line that were each 24″ long. This is a little longer than the length of lowest hanging string.

Attach each piece of fishing line to a test tube cap

​Each piece of fishing line needs to be securely attached to the cap of a test tube. There are several ways that you can do this.

The simplest method is to use hot glue. Place a large drop of hot glue on the top of the cap. You want to cover most of the top face so that the glue will have enough space to stick to. Then tie a knot in the end of the fishing line and insert it into the hot glue. Make sure that the knot is completely submerged. Hold the fishing line vertical in the center of the cap until the glue sets. This method is fast and easy, but it can be prone to failure if the fishing line is not properly glued in place.

Another option is to drill a small hole in the center of the cap. Then insert the fishing line through the hole and tie it into a knot. As long as the knot is wider than the hole, it will hold the test tube securely in place.
NOTE: The downside of this method is that it breaks the seal of the test tube and leaves the contents exposed to the air. This can lead to water loss through evaporation or contamination from bacteria.

Print out the pattern on paper

​Next, you need to make an outline of the design. You can either draw one by hand or you can print it out on your computer.

Mark the locations of each test tube on the outline

​Now, you need to determine where each of the test tubes will be located. To know how the test tubes would be spaced, I first needed to know the length of the spiral. So, I took a piece of string and put it on top of the outline. Then I measured the length of the string.
It was about 53″ long.

I divided the length of the spiral by the number of test tubes (37). This gave me a center to center spacing of about 1½”.

To mark each location, I started at the center of the spiral and make a mark every 1½” until I had marked 37 locations.

Drill holes in the plastic sheet

​Now that you have the locations marked on the paper, you can use this as a template for drilling the mounting holes. Place the sheet of clear plastic on top of the paper design. Then drill a hole through the plastic at each marked location. Use a drill bit that is slightly wider then the fishing line.

Insert the fishing line through the holes

​Insert the free end of each piece of fishing line through the holes in the plastic sheet.

Mark the length of each piece of fishing line

To make it easier to keep track of how long each piece of fishing line should be, I wrote the lengths next to each hole.

Tie knots in each line at the appropriate length

​Measure out the designated length for each piece of fishing line and then tie a knot. When you are done, the caps should hang in a descending spiral.

Mix the colors for each test tube

Next you need to mix the colors in each of the test tubes. The easiest way to do this is to mix up three glasses with red, yellow, and blue food coloring. Then, mix the colors in the appropriate proportions to create your chosen color pattern (this is easiest to do with a small medicine dropper).

You can mix the colors using plain tap water. However, if your water gets contaminated with bacteria, it can turn cloudy. To prevent this, you can replace the water with some other clear liquid that is inhospitable to bacteria. One example of this is rubbing alcohol (70% or higher). This will still mix properly with the food coloring and it will prevent the test tubes from getting cloudy.

Hang the test tubes

To hang the test tubes, I propped up the plastic sheet on two pieces of OSB board. This let all of the lines hang in the appropriate place as you are attaching the test tubes.

Hang everything from the ceiling

The last step is to hang everything from the ceiling. To do this, I drilled four holes in the plastic sheet that were slightly larger than the screws. Then, I put the screws through the holes and screwed them into the ceiling. This should be sufficient to hold everything in place.

There is always the possibility that the test tubes might fall off if they haven’t been glued on properly. So to be safe, I hung the chandelier in a room with thick carpeting. That way if a test tube falls to the floor it will not break.