Just where and when humans first observed the chemical reaction between oil and potash is unknown. One legend says it was at “Mount Sapo” in ancient Rome, where a creek flowed over a deposit of wood ash and animal fats created by sacrificial fires for the gods. There’s evidence that the ancient Babylonians, Egyptians, and Celts all developed soap — but regardless of who was first, it’s clear that observing nature led people to re-create the chemistry of water, potash, and oil to produce the first liquid soaps.

Bar soaps were innovated in the 19th century, but soon after, the soap-making industry introduced problematic chemicals to the equation, such as propyl alcohol, limonene, benzaldehyde, and methylene chloride. Today, some soap ingredients are derived from animals rendered in factories, while others are known to be toxic, even carcinogenic, and contain byproducts of petroleum.

All natural, plant-oil-based soaps provide an eco-conscious alternative, but 2 downsides remain: the disposable packaging and the collateral damage of transportation. Fortunately, making soap at home is easy, and not much more complex than baking bread.

In its most basic form, soap consists of just 3 components — a strong base such as potash or lye, oil, and water. Potash (potassium hydroxide) is harder to find and is more conducive to liquid soap making, so we’ll use lye (sodium hydroxide).

Blended at the right proportions and temperatures, these ingredients produce a chemical reaction called saponification which renders the lye, normally caustic and dangerous when mixed with water, entirely benign while breaking apart the oils and eliminating their cloying greasiness.

And although curing (allowing the soap to dry and harden) takes about a month, the first and most demanding steps take just 30 minutes for practiced soap makers.

Now consider that a year’s supply can be made in a single batch; each bar will cost about a dollar; you won’t risk exposure to any lingering poisons — and one by one they mount: the good and healthy reasons to free oneself from chemical industries and never buy soap again.

Project Steps

Set up a soap-making station in your kitchen.

Weigh your ingredients and place each in its own vessel. Water goes in the heat-resistant jar, and coconut oil goes in the saucepan.

CAUTION: Do not use aluminum kitchenware. Lye and aluminum react to form flammable hydrogen gas and can cause fire or explosion.

Melt the oil

Gently warm the coconut oil on the stove. The chunks of fragrant fat will melt into clear grease.

Carefully add lye to water.

Open your doors and windows. Don your protective gloves and glasses, and slowly pour the lye into the jar of cold water.

Stir with a steel spoon. A fast exothermic reaction will occur as the temperature shoots to nearly boiling and the mixture momentarily emits a plume of toxic fumes. Do not inhale over the jar.

Insert a thermometer and watch the temperature as it slowly drops. Your target reading is 80°F.

CAUTION: Lye is highly caustic and will burn skin and eyes. Wear protective gloves and goggles, and follow all directions on the container for safe handling of lye. Clearly the figure outs us throwing caution to the wind.

Take the temperature.

Insert the other thermometer into the pan of melting coconut oil.

When the oil is 90°F and liquefied, turn off the heat and add the olive oil. The temperature of the blended oils should read 80°F.

Combine the liquids.

When both the lye water and oils reach 80°F, combine the two in the glass jar. The mixture will abruptly turn cloudy.

Blend it all together

Blend the liquid for roughly 15 minutes using either an electric eggbeater or stick blender. You can also whisk by hand, though this will take about an hour.

However you approach it, your goal is saponification, which occurs visibly as the liquid thickens and turns opaque. To test for it, lift the blender from the liquid and drizzle the soap across the surface. When droplets remain on the surface for a moment before sinking — known as tracing — it’s done.

Add scents and scrubs.

If you’re going to add fragrances, essential oils, or oats, now’s the time. Add and mix — and do it fast, because the soap may be thickening more quickly than you realize. Any additional ingredients must be all natural to avoid fouling up the delicate chemistry of the saponification process.

Mold it.

Pour the soap into your mold. Paper cartons should be thoroughly cleaned, and wooden molds should be lined with parchment paper.

Cover the filled mold with a cutting board or coffee table book and set it aside for 1–3 days to harden.

Cut, cure, and wash up.

Lift the long soap block from the mold, peel away the parchment paper, and cut the brick into roughly 10 bars.

Cut, cure, and wash up. (continued)

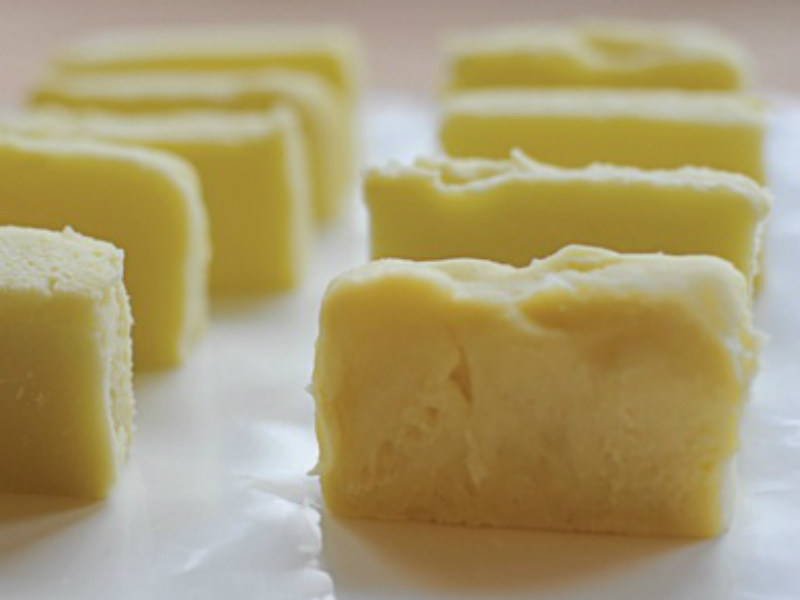
Stand each bar on end to allow the most surface-to-air contact, and set them aside to cure undisturbed.

Three weeks should do it, at which point the lye’s causticity has fully neutralized, and your soap is ready.

Congratulations. You can now wash your hands of the chemicals and toxins used by the commercial soap-making industry. Learn more at https://makezine.com/go/makesoap.

Conclusion

This project first appeared in MAKE Volume 29.