

In this tutorial, we’ll make a simple felt character for our stories.
Projects from Make: Magazine
Making Felt Board Stories
SpindleMade Project 2- Making Felt Board stories to enhance the curriculum at inner-city schools
SpindleMade Project 2- Making Felt Board stories to enhance the curriculum at inner-city schools
In this tutorial, we’ll make a simple felt character for our stories.
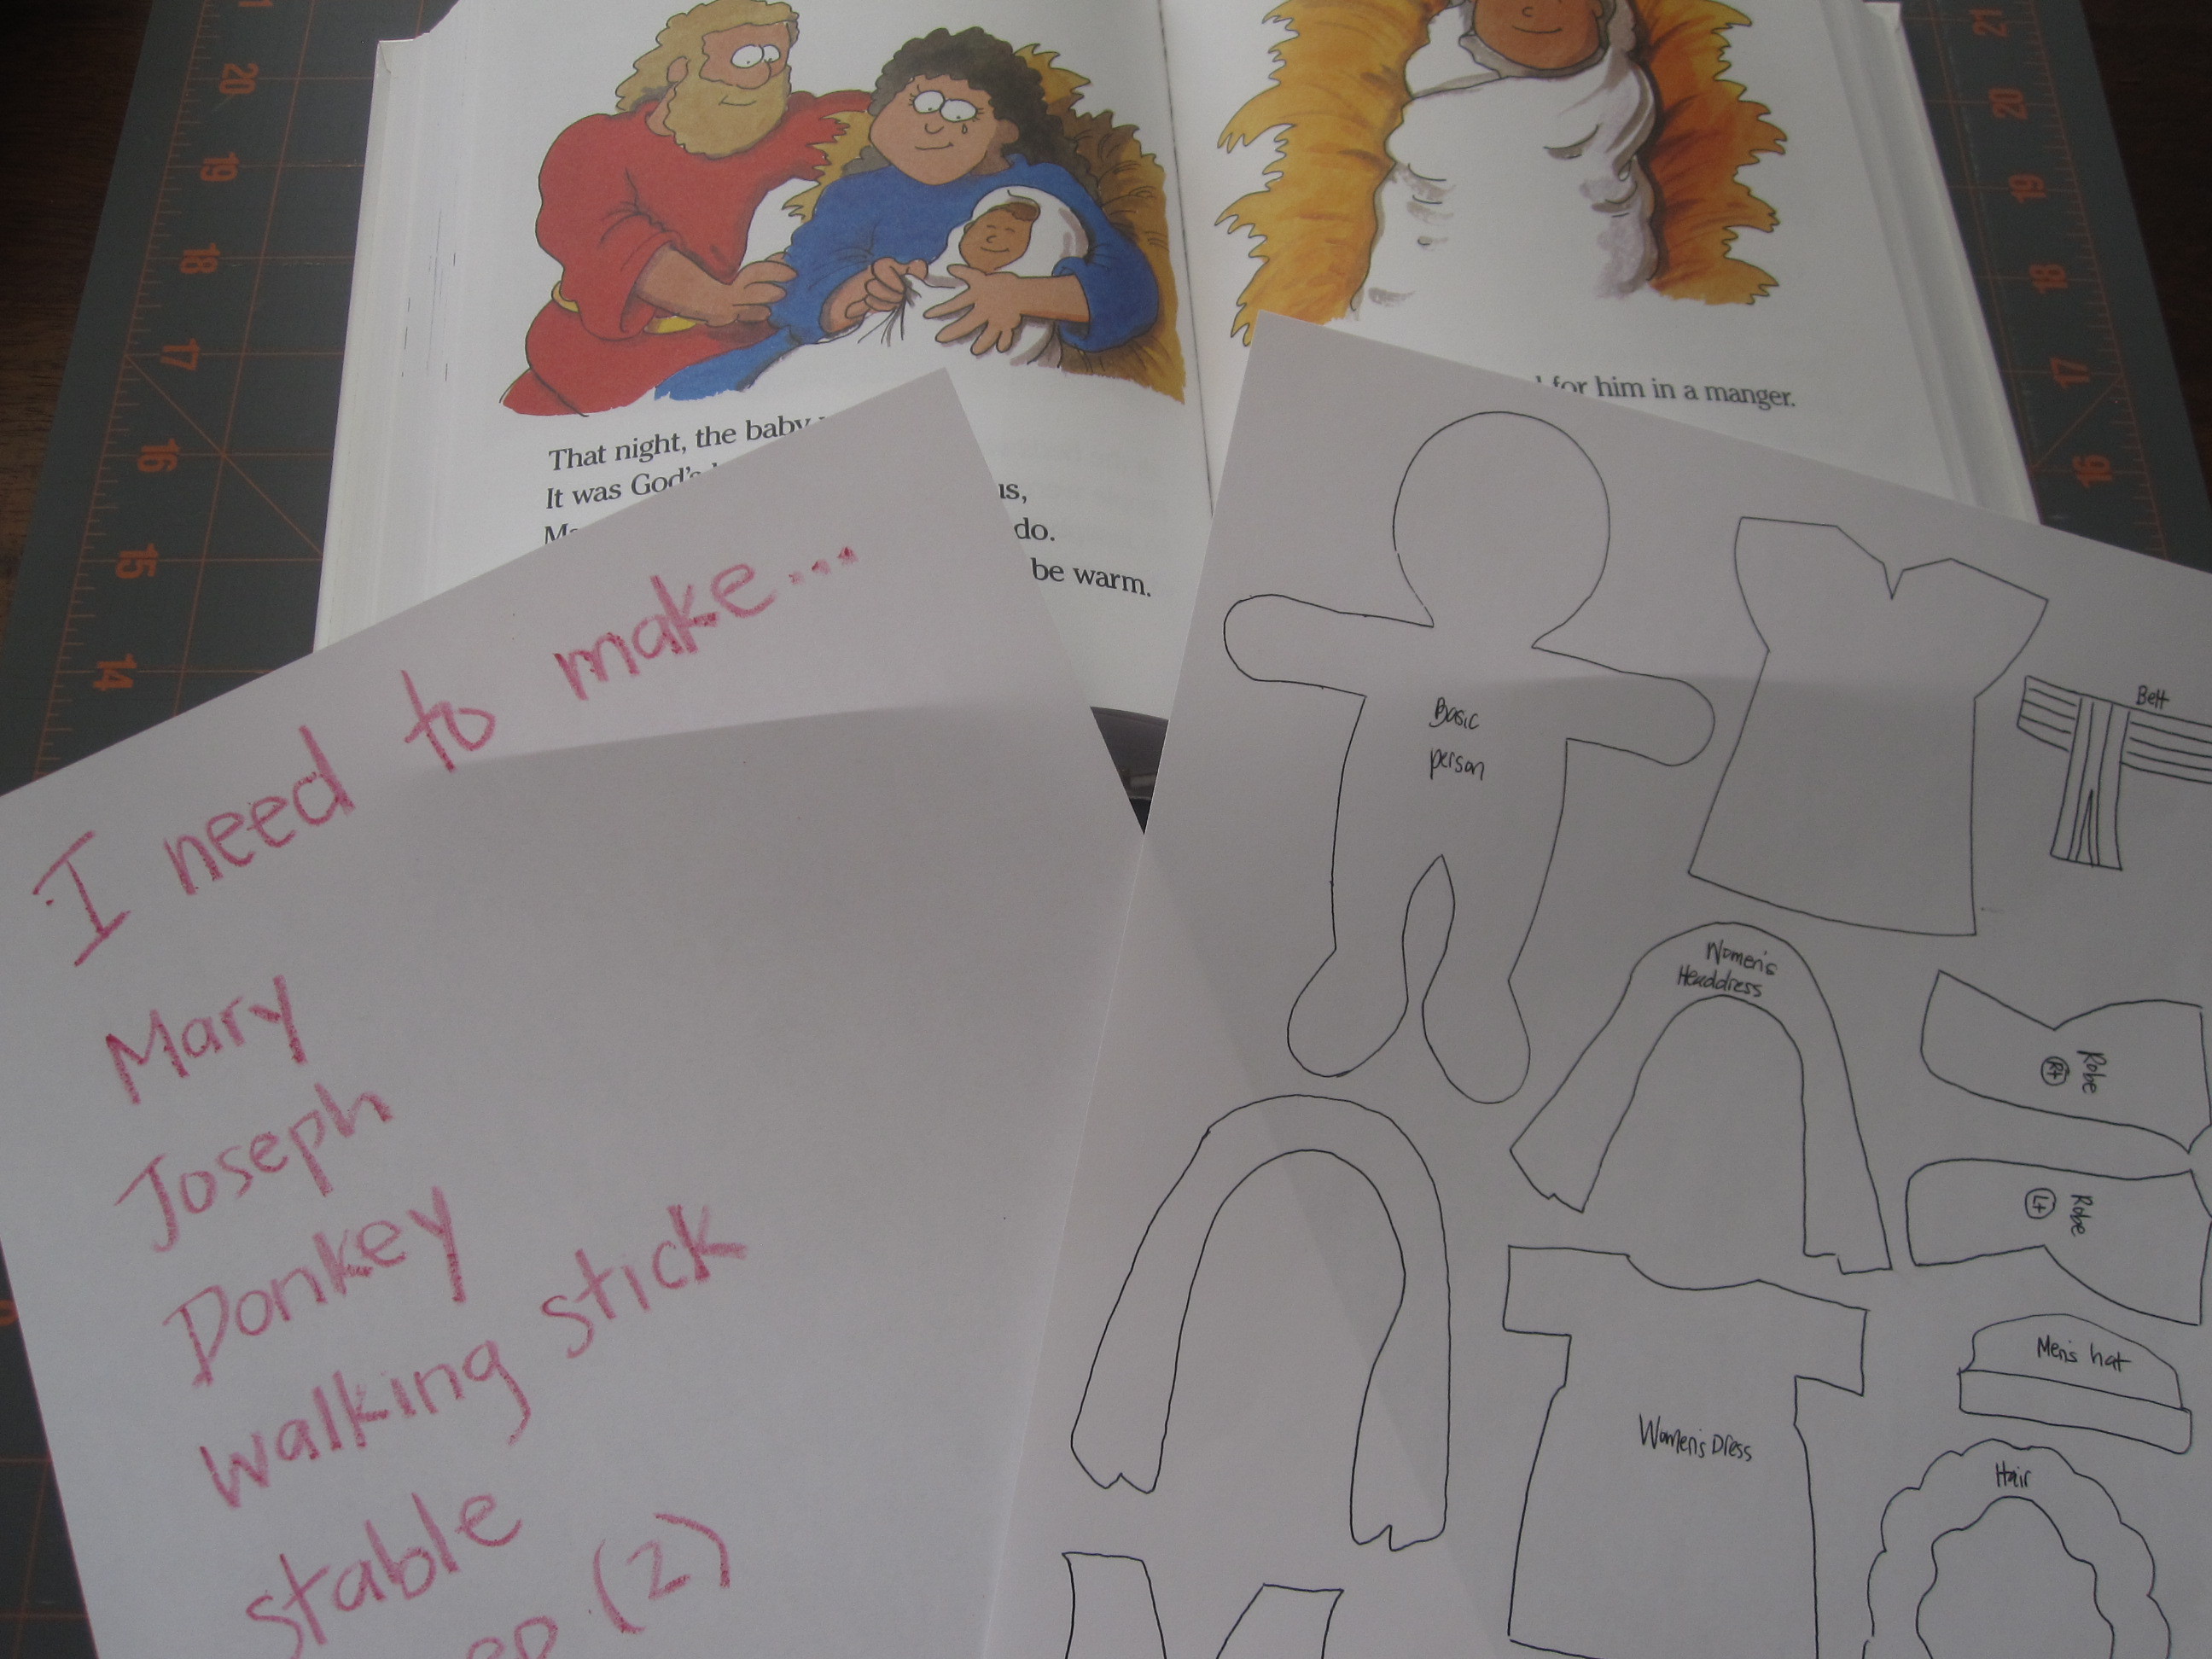
First choose a story that you would like to recreate in felt (refer to word doc). Figure out the characters, accessories, objects, animals, scenery, etc. that you’ll need to make. I used the children’s Bible to get good ideas. You can use the attached template to help create the characters. If you need other images, search Google Images under coloring sheets for basic outlines. (ex. “camel coloring page”).
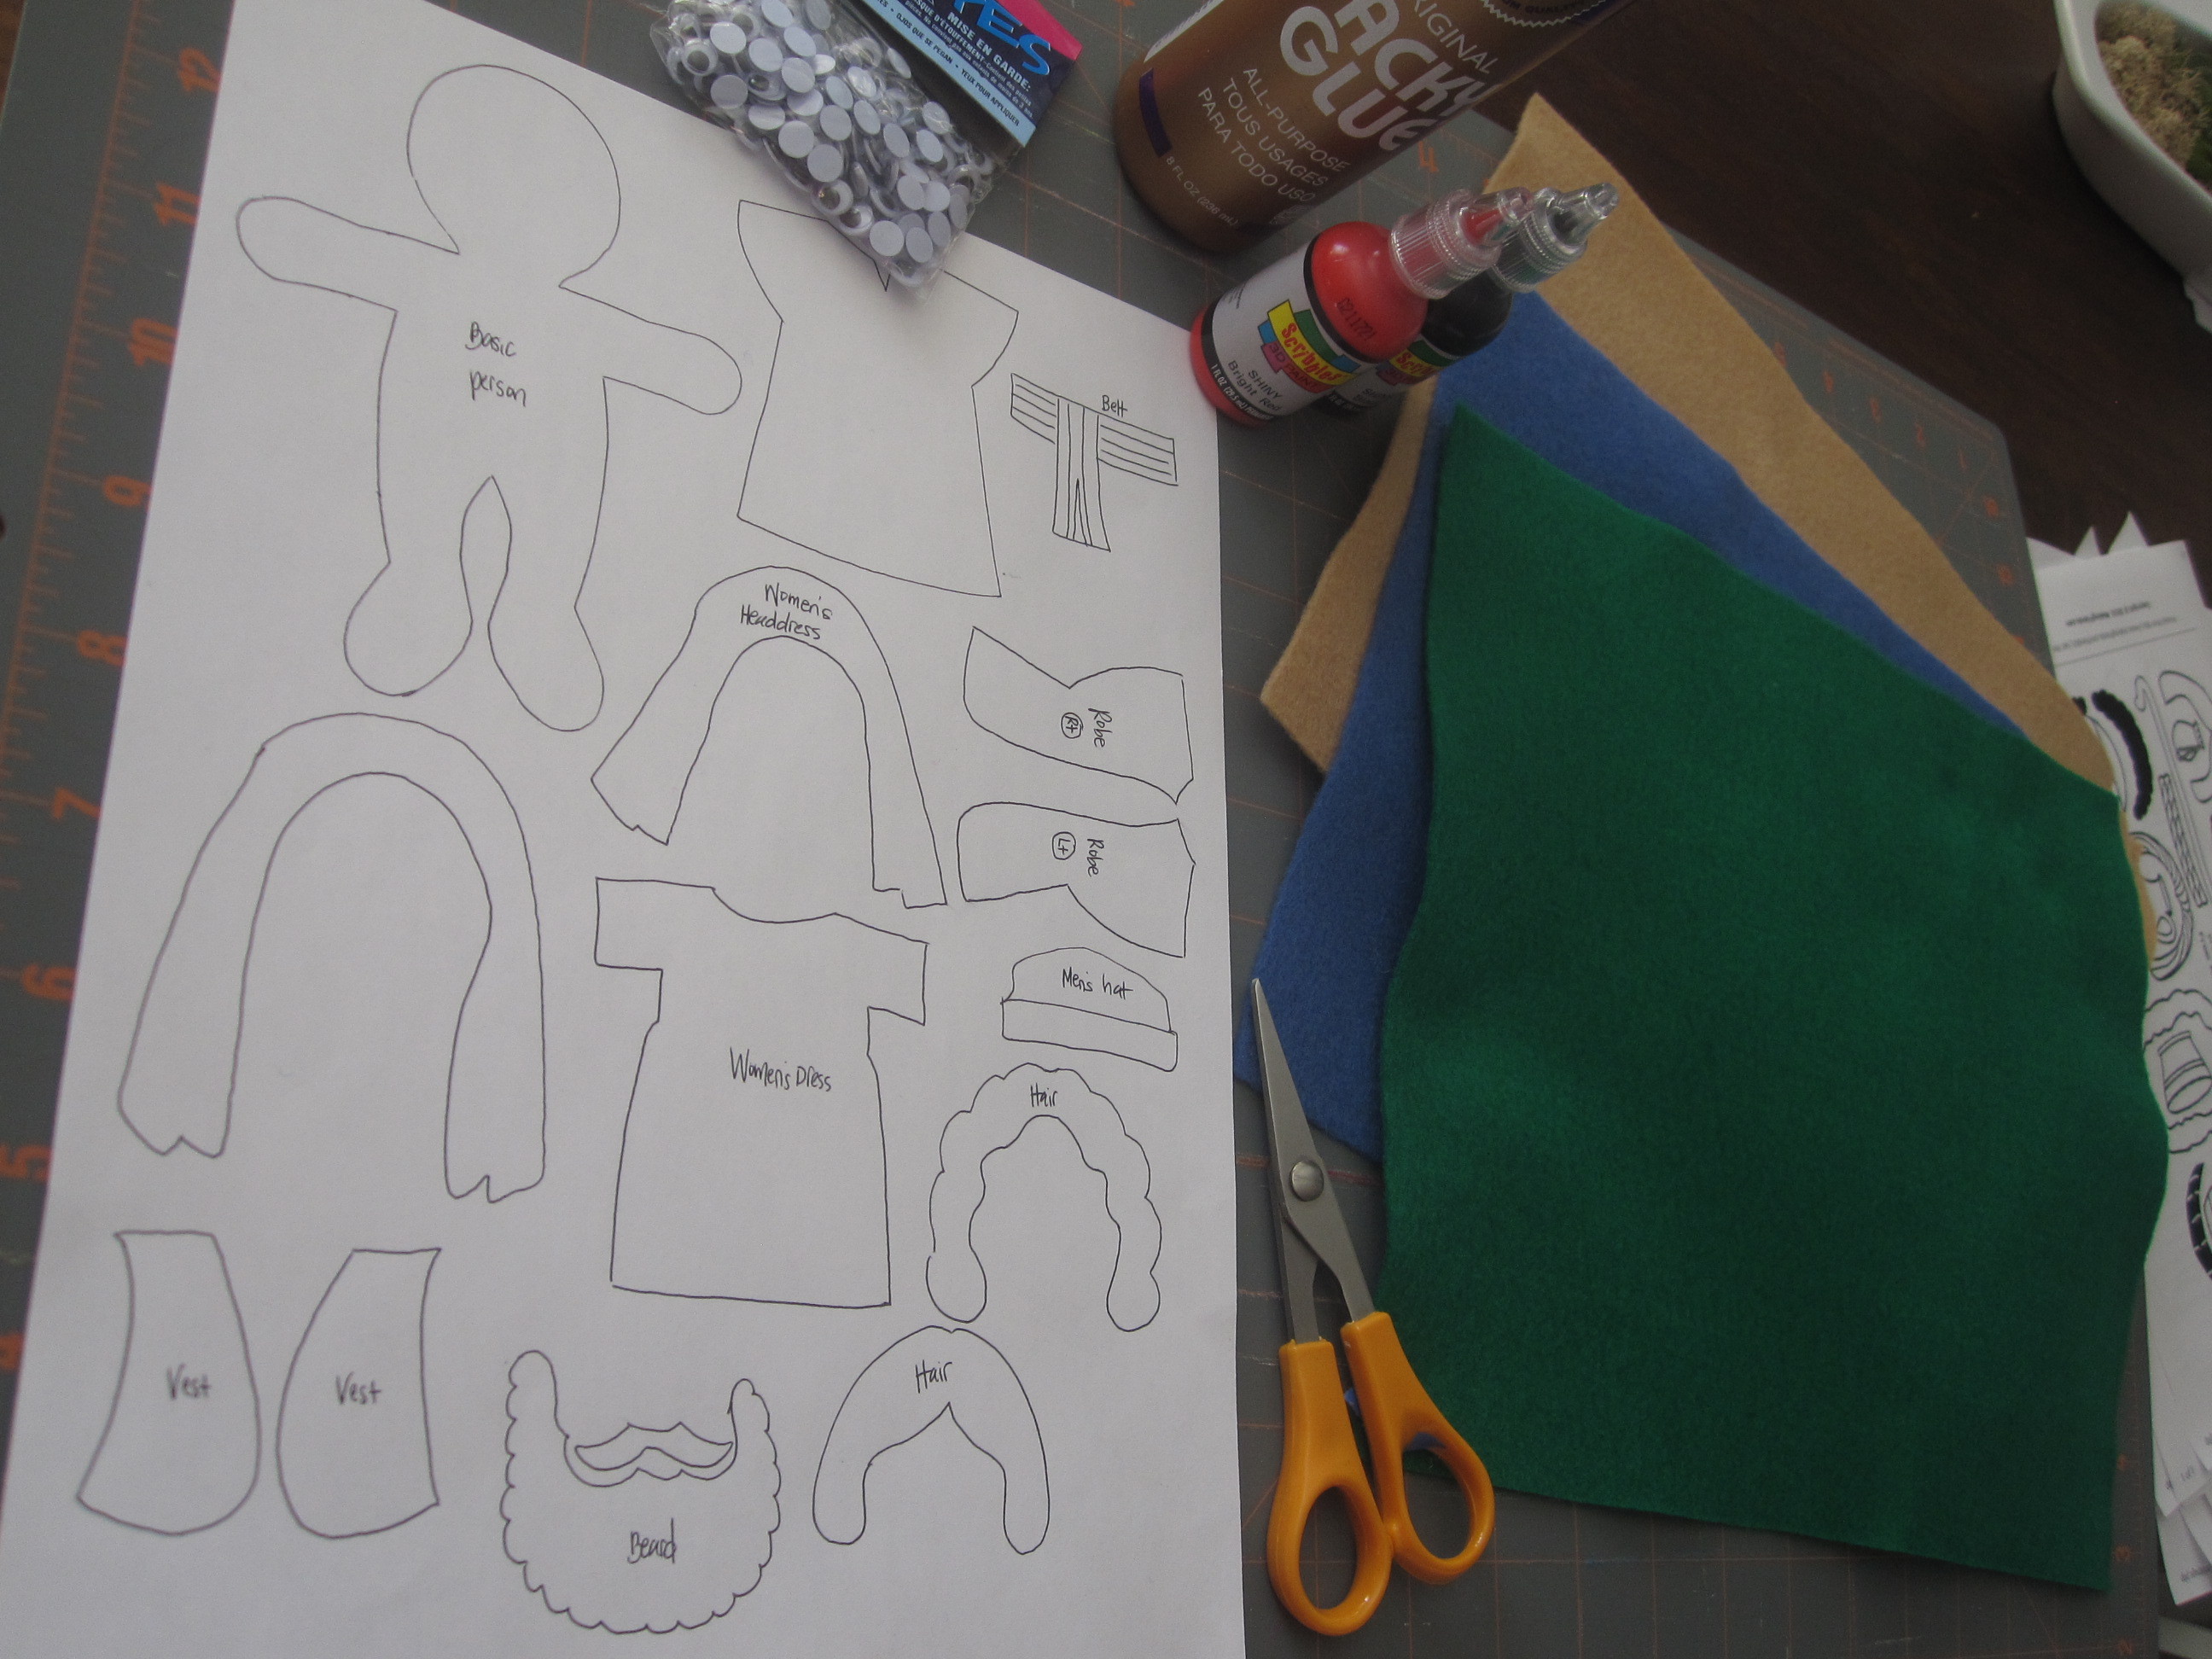
* GATHER SUPPLIES
-felt in various colors (tan, brown, black, brighter colors for clothing)
-templates- printed from attached sheet or your own
-scissors
-paste on googly eyes
-tacky glue or felt glue (regular elmer’s glue tends to soak into felt and also makes the felt hard and stiff)
-fabric marker or ultra fine point Sharpie for mouths, noses, decorations on clothing, shoes, etc.
-embellishments- doll hair, string, yarn, glitter, fabric remnants, puffy paints
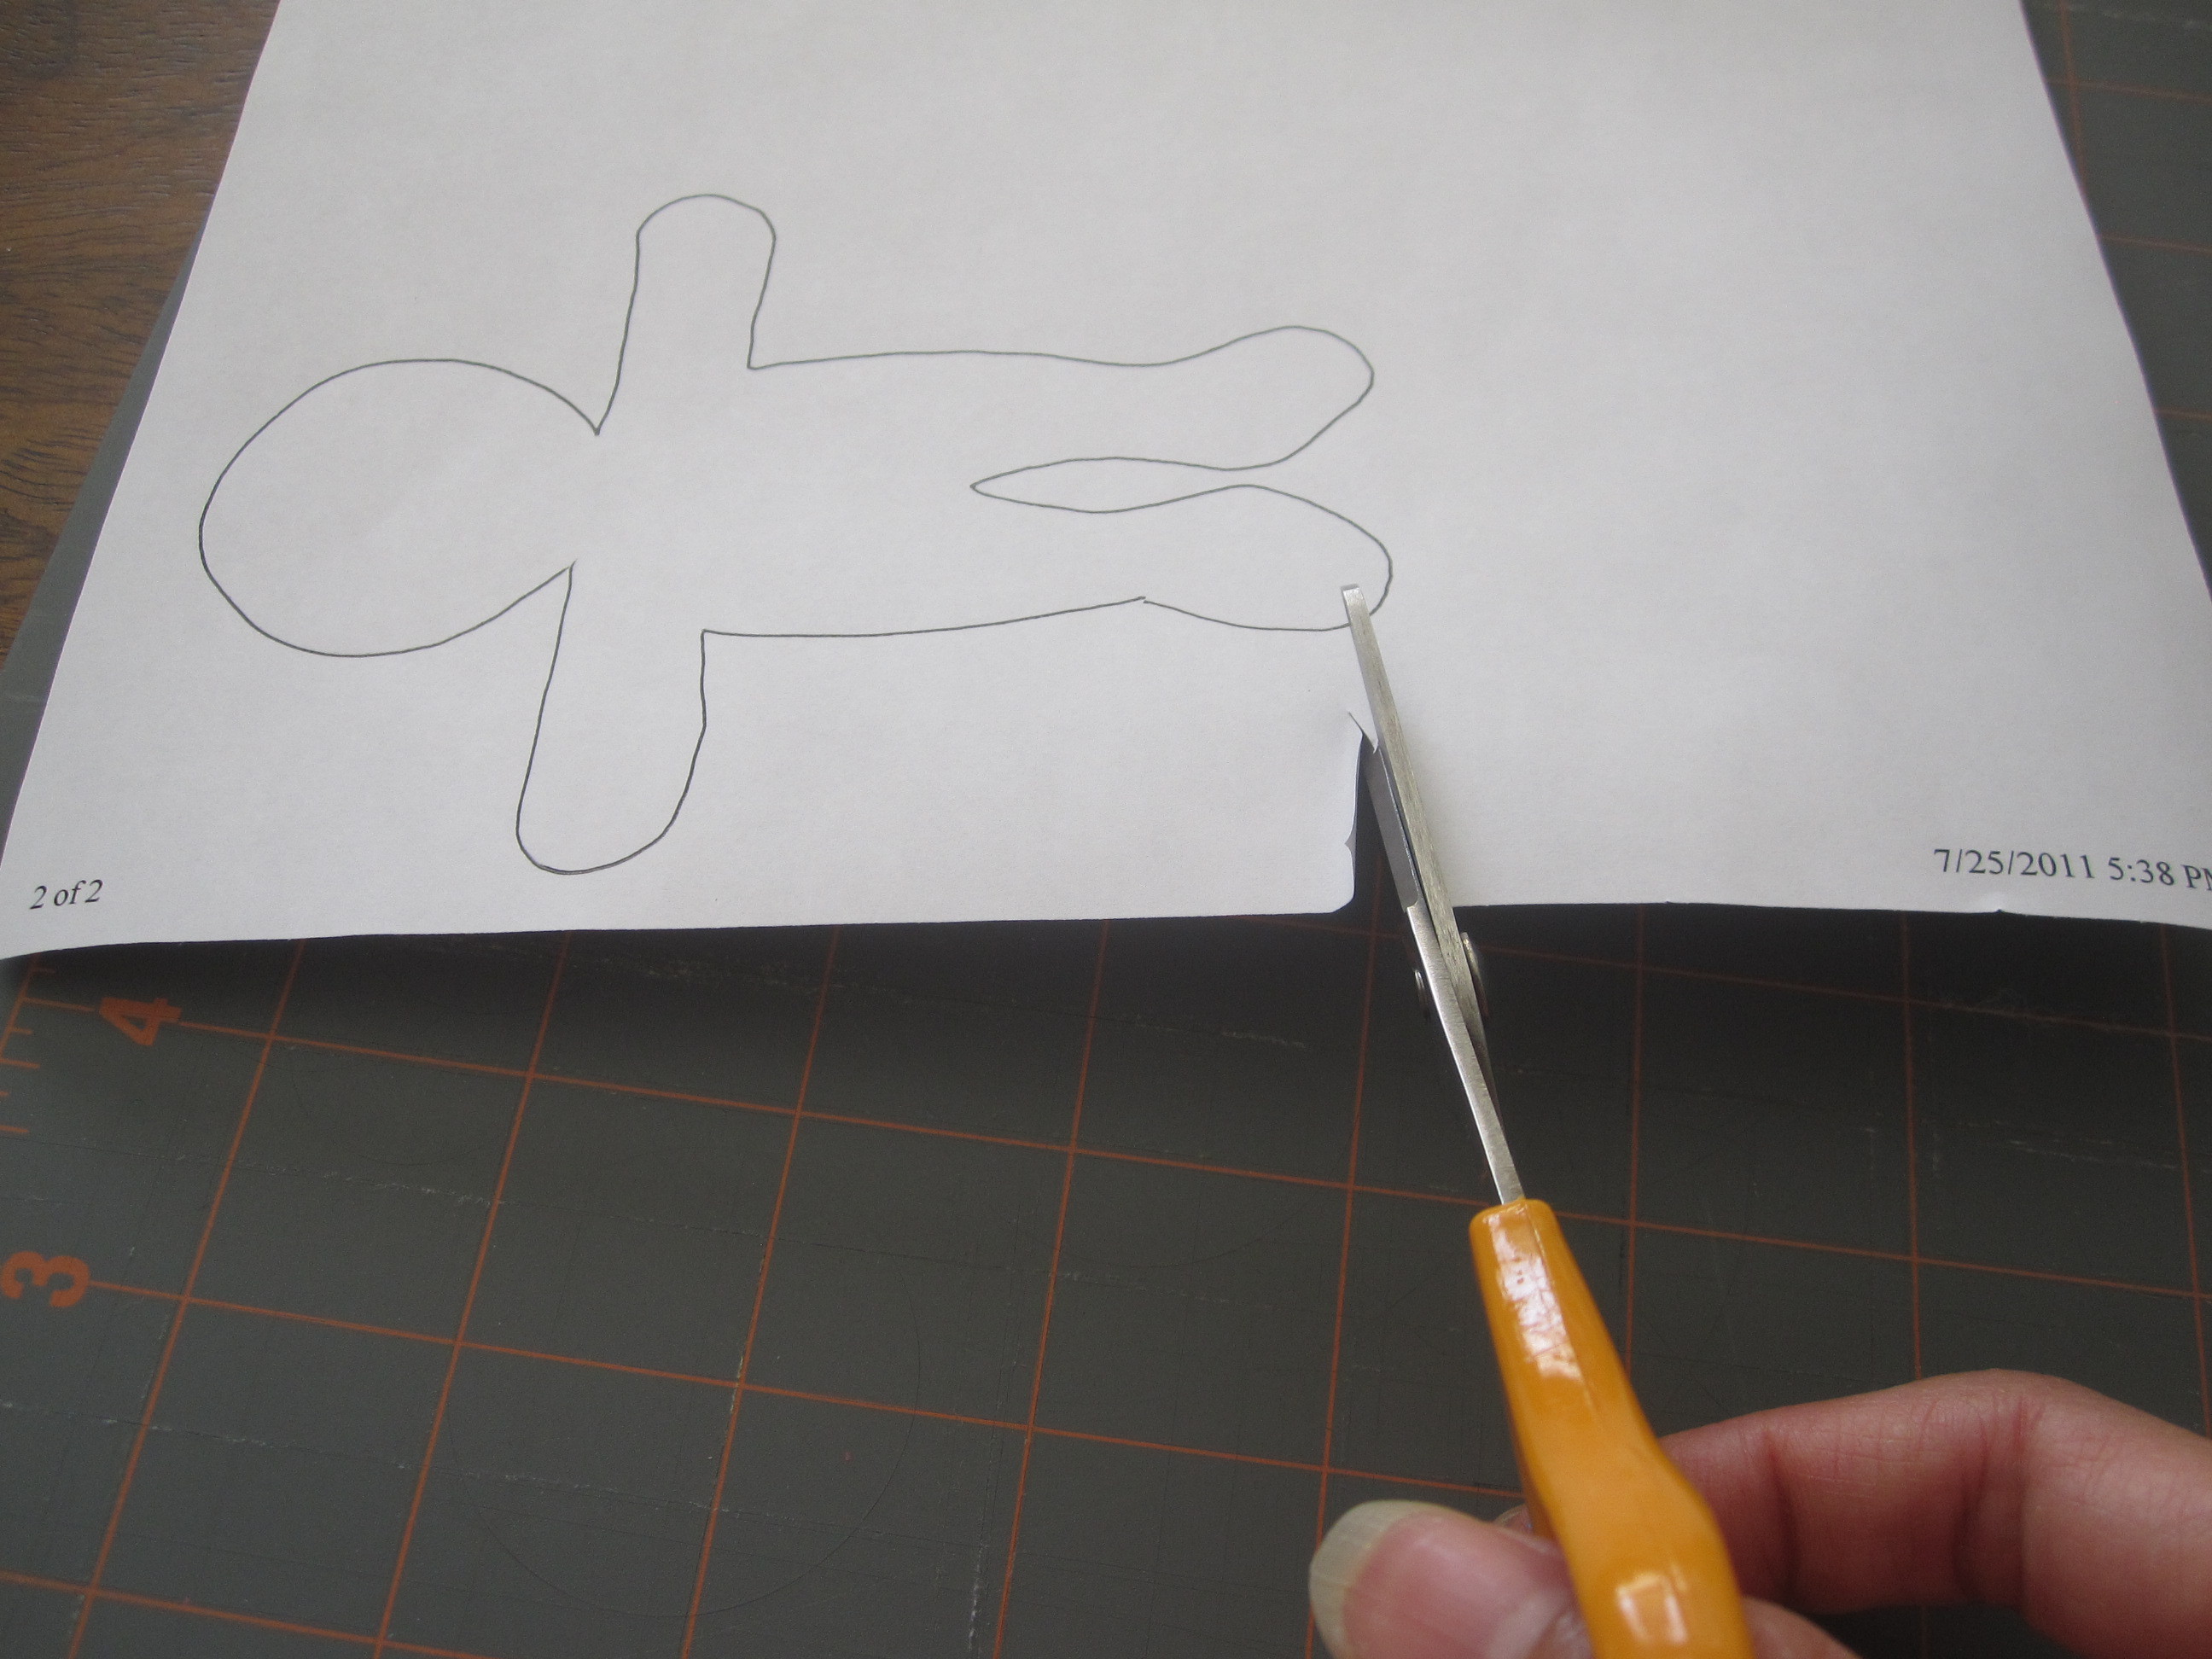
Print out template on cardstock for easier tracing.
Cut out template for character.
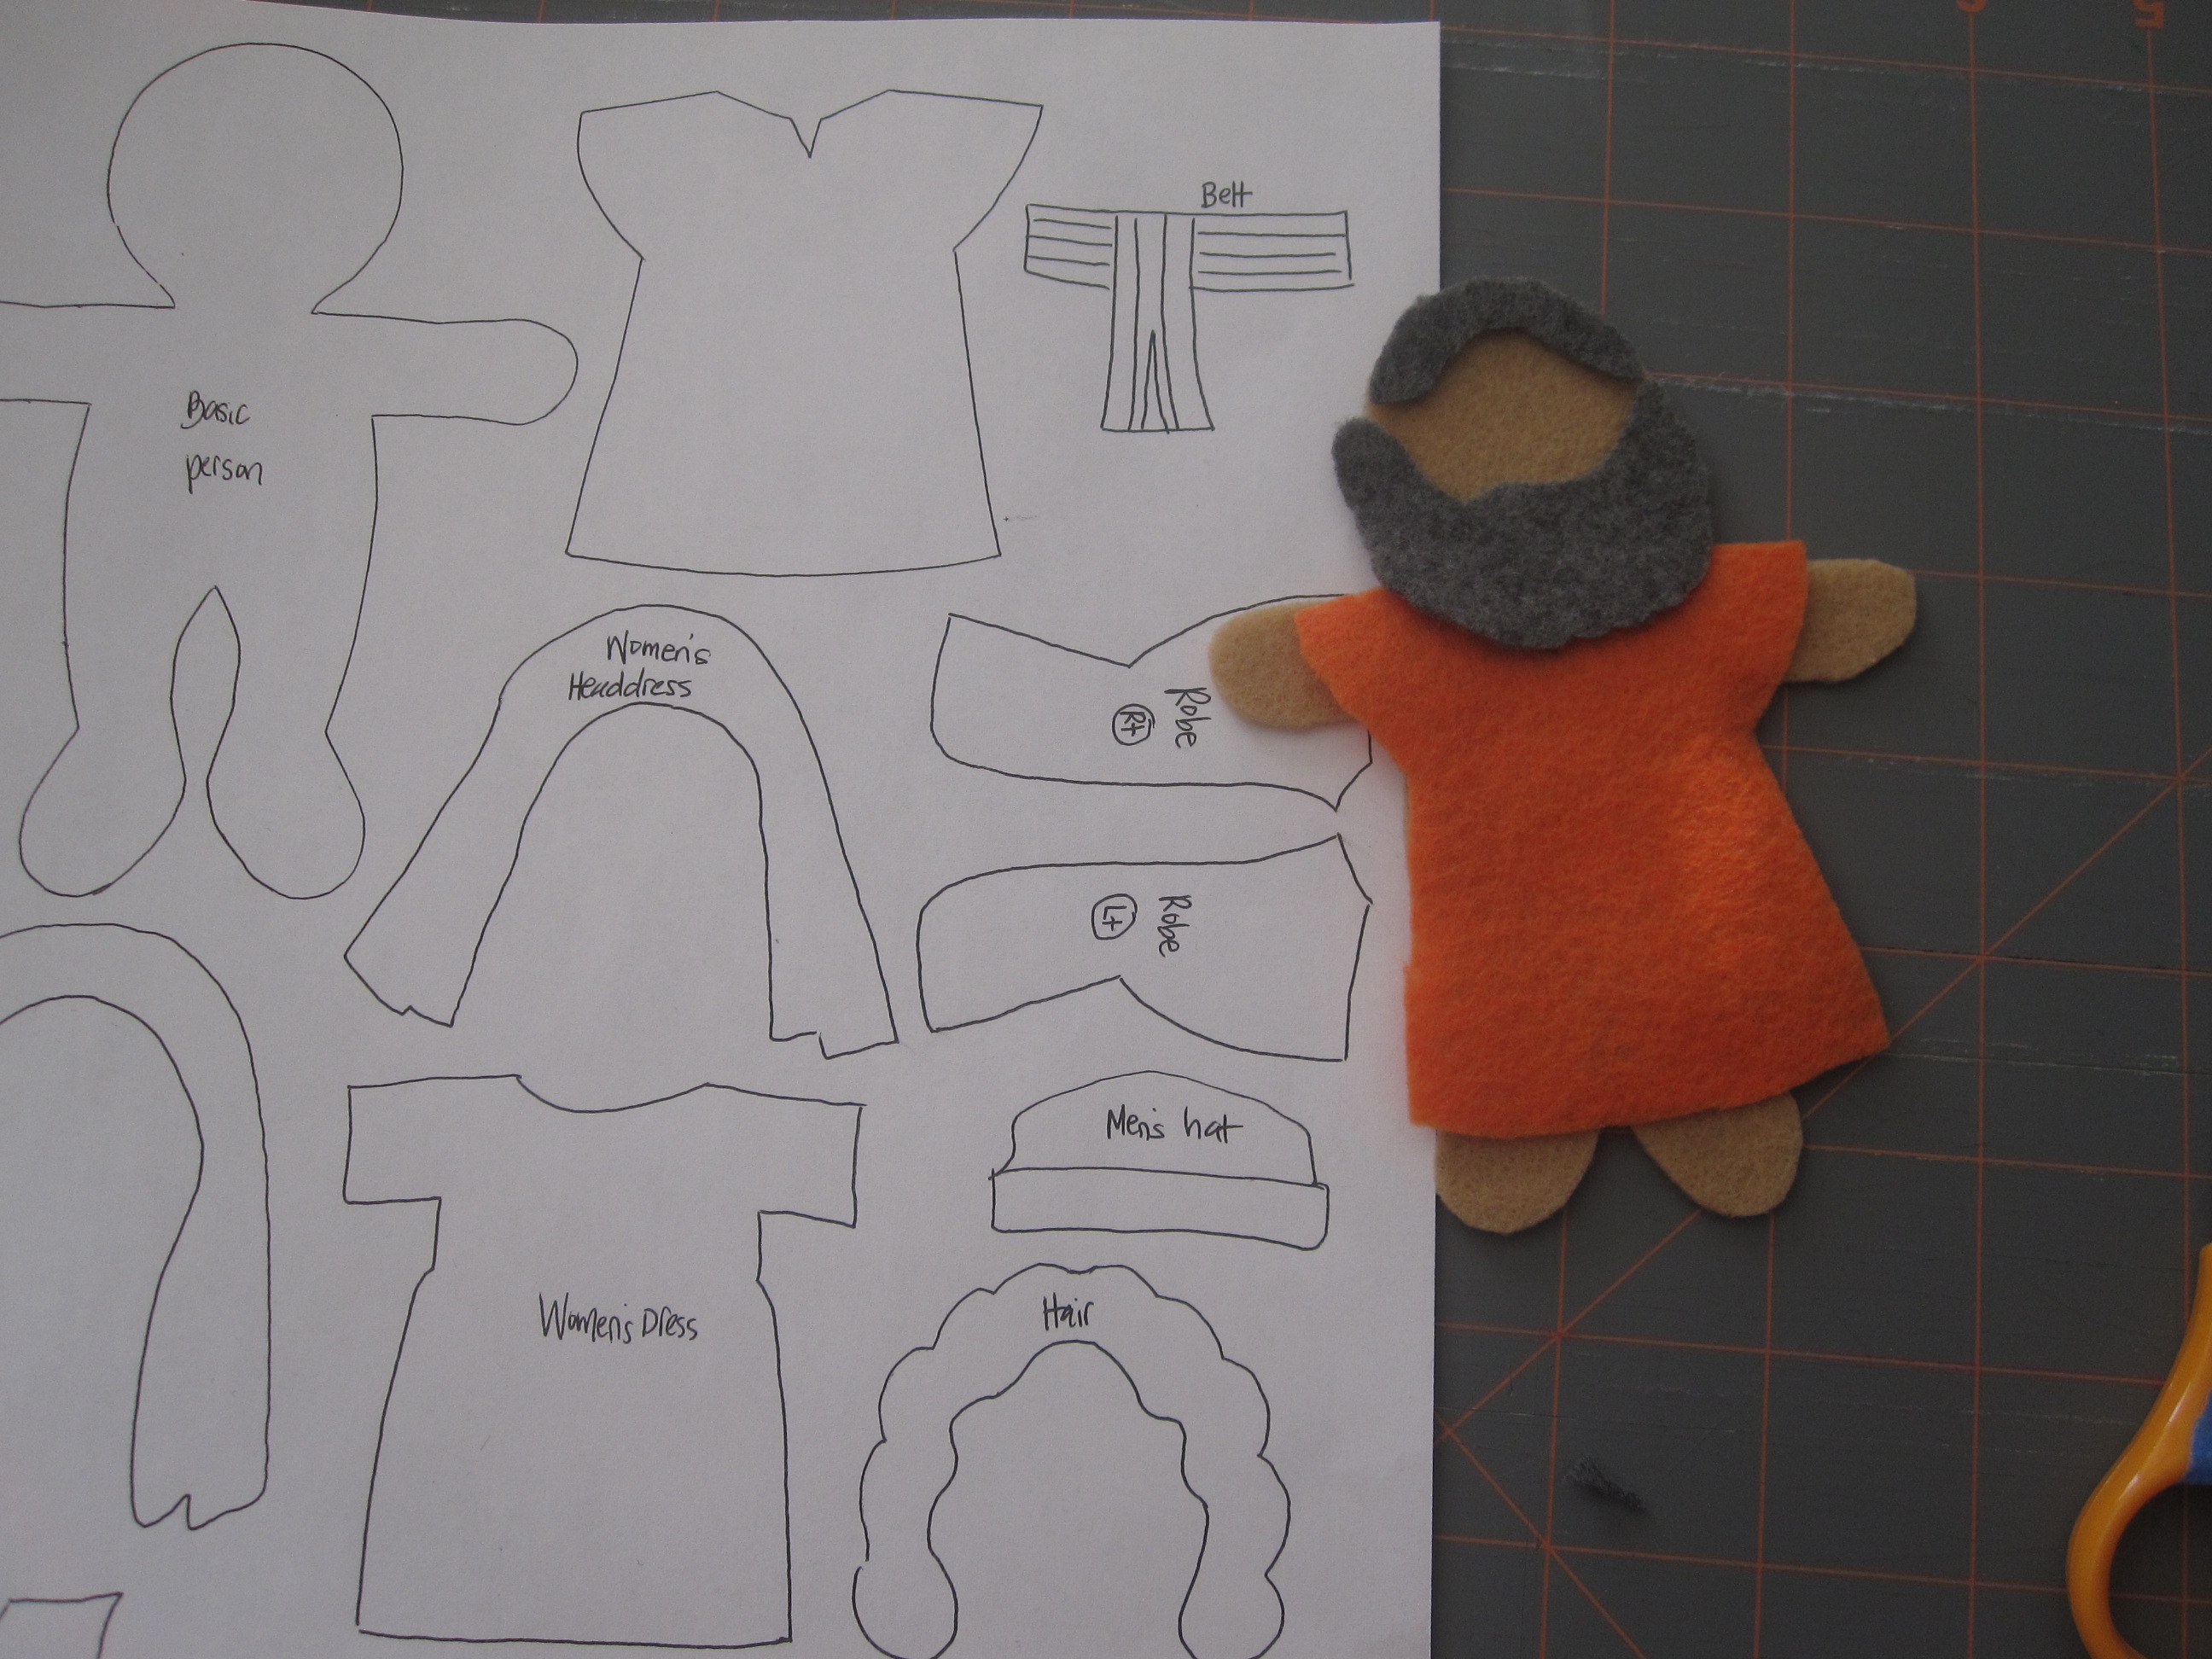
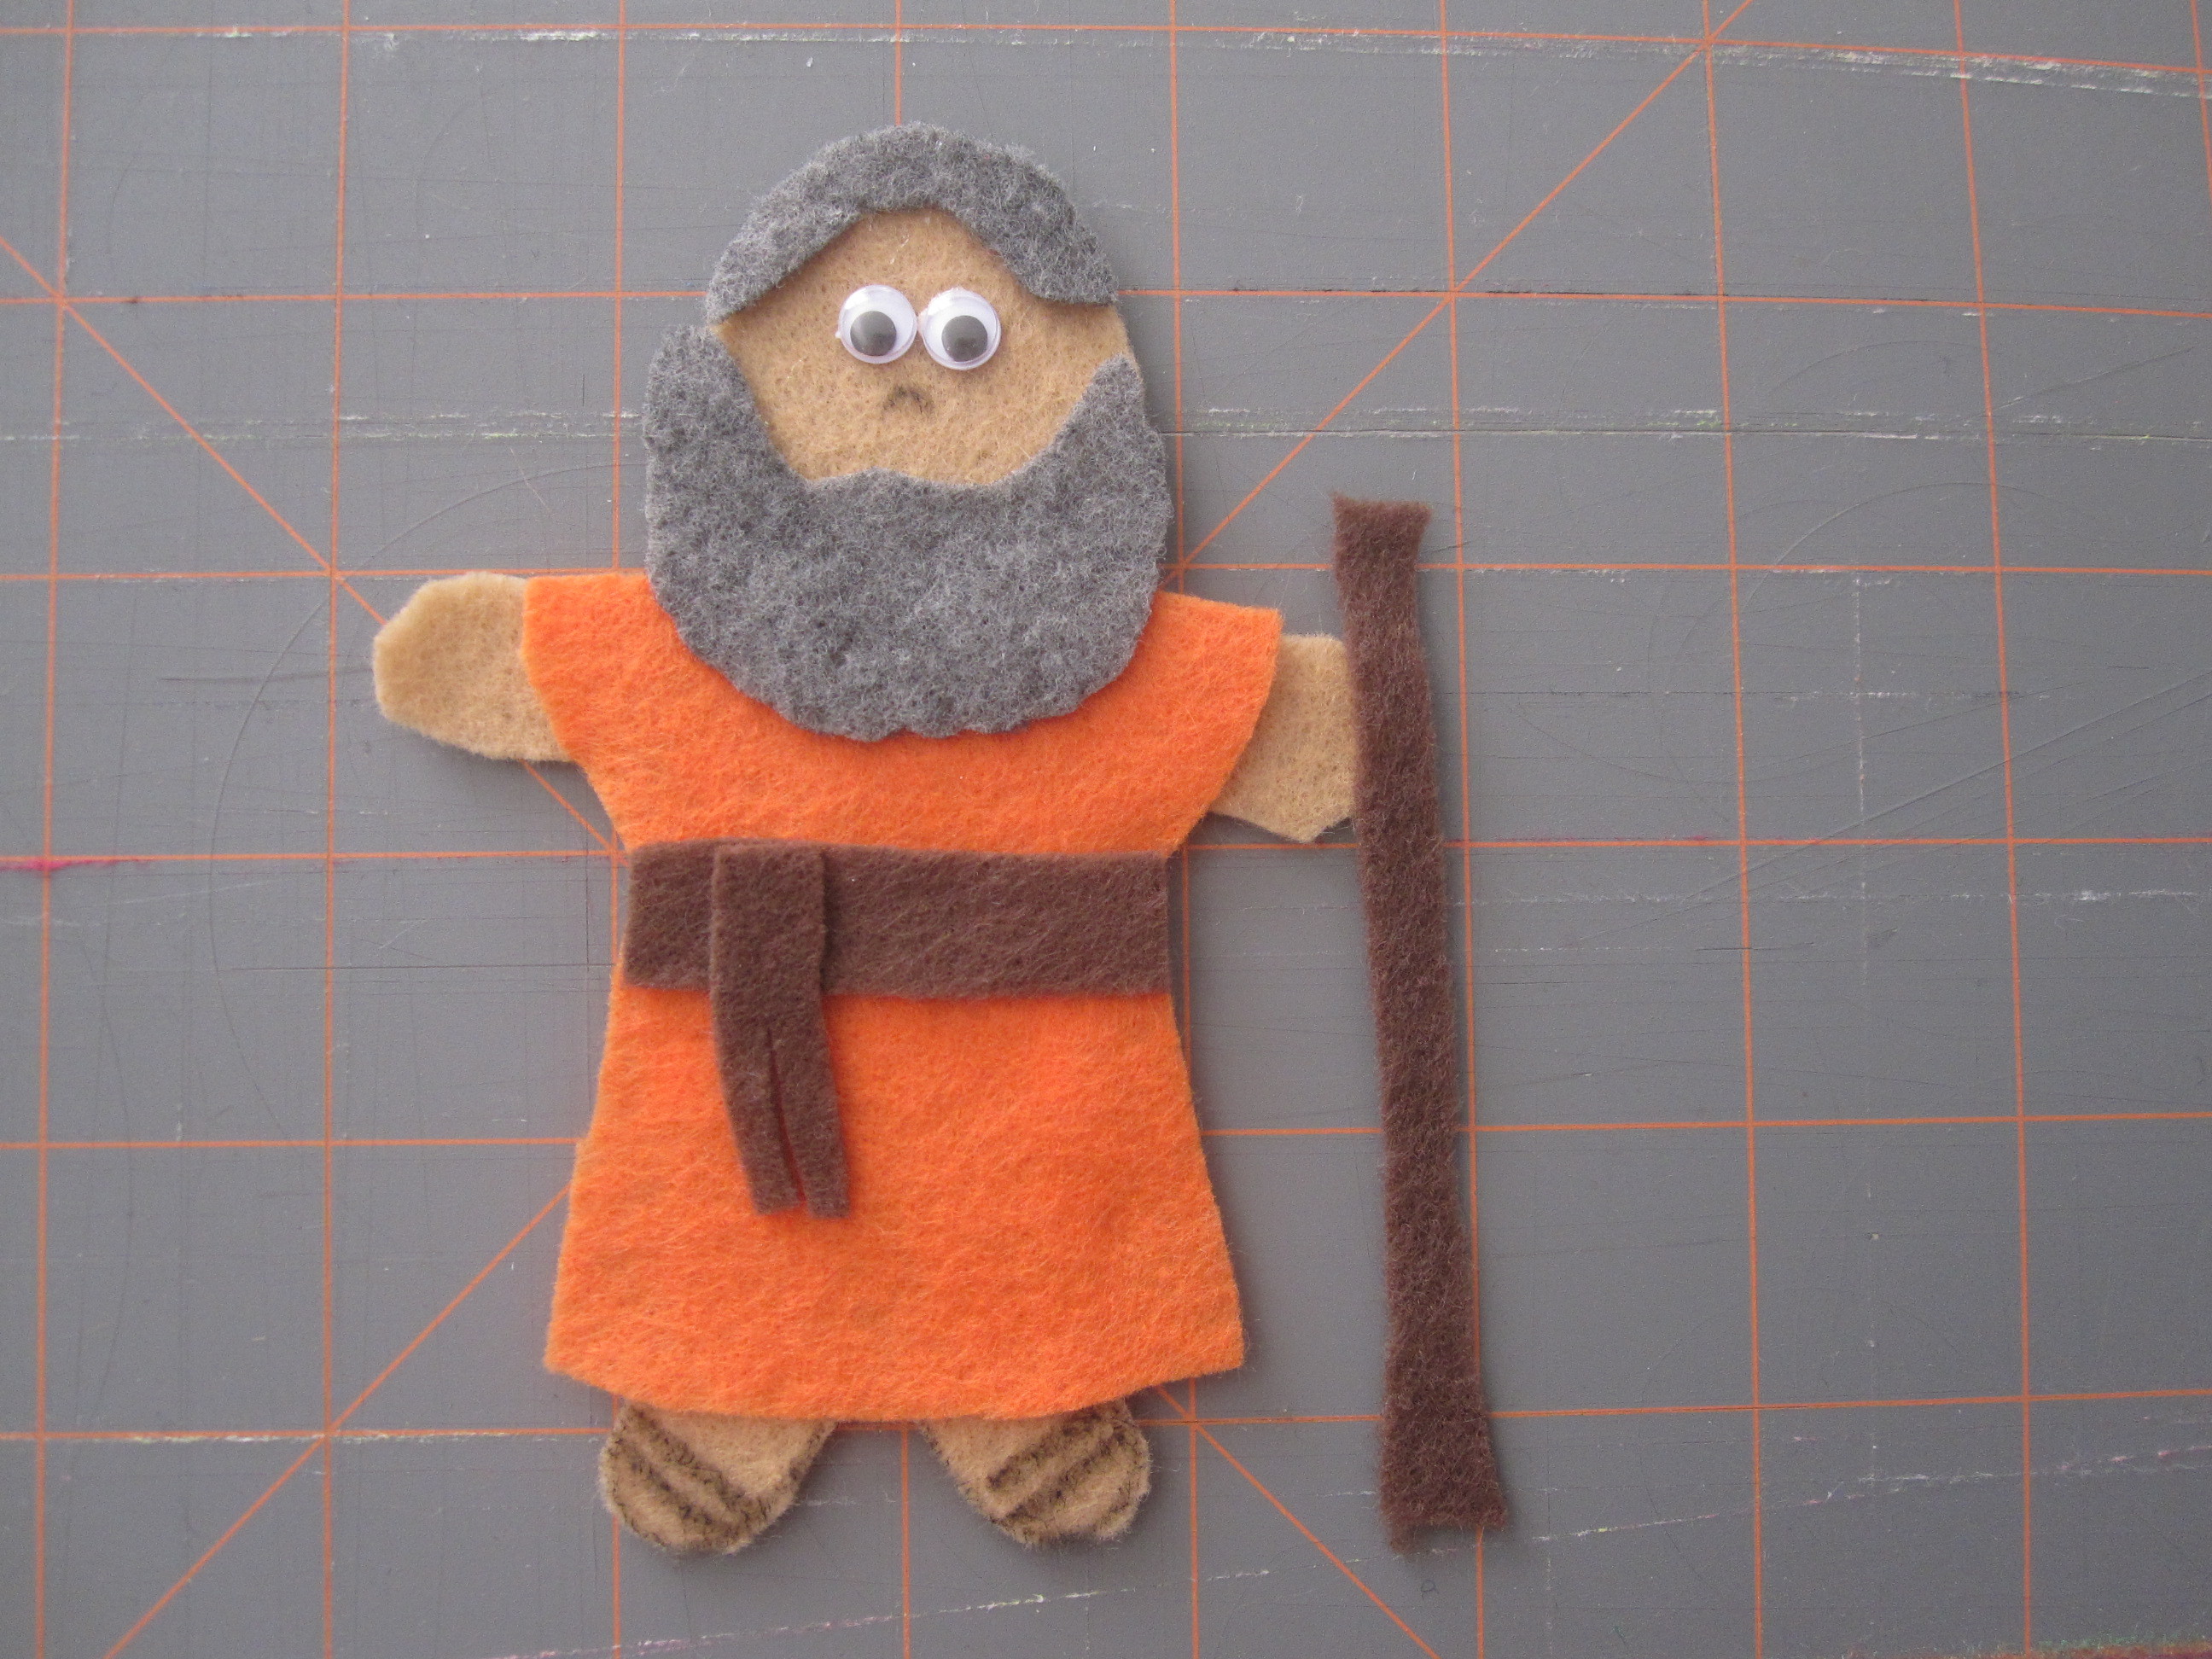
Dress and style the character by picking out clothing, accessories and hairstyle. Cut these templates out too.
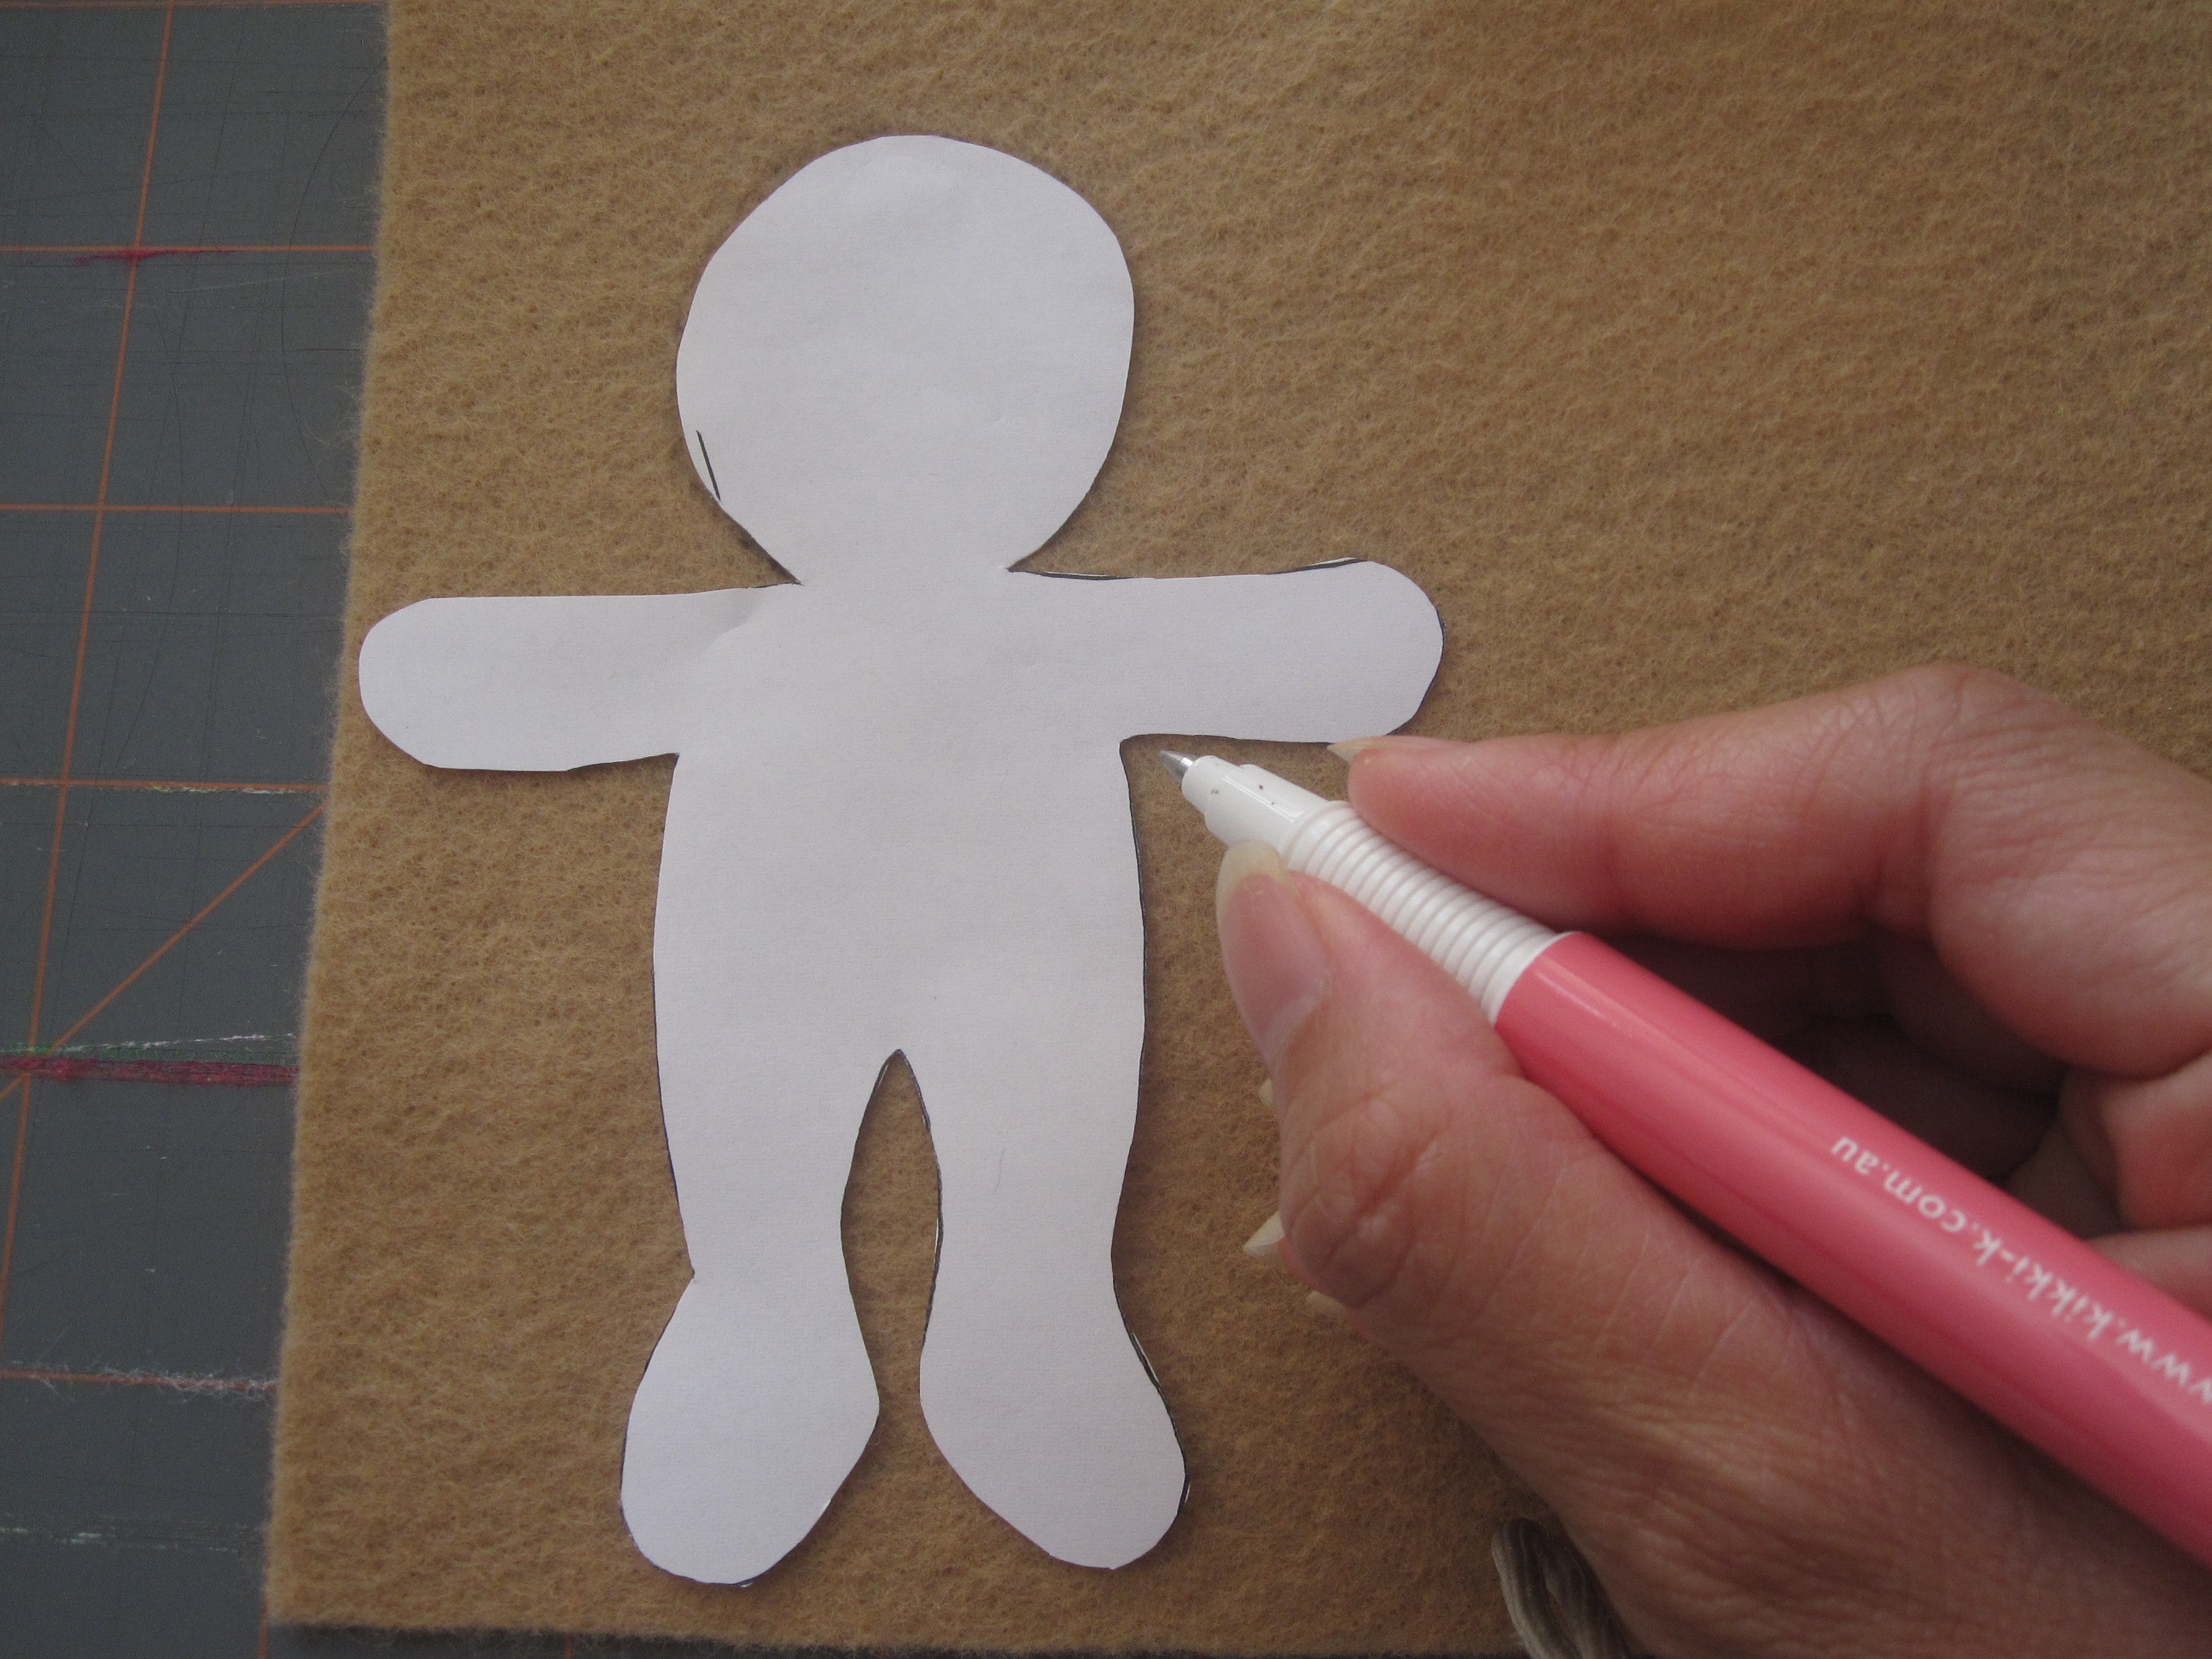
Trace your templates onto the appropriate colored felt and cut them out.
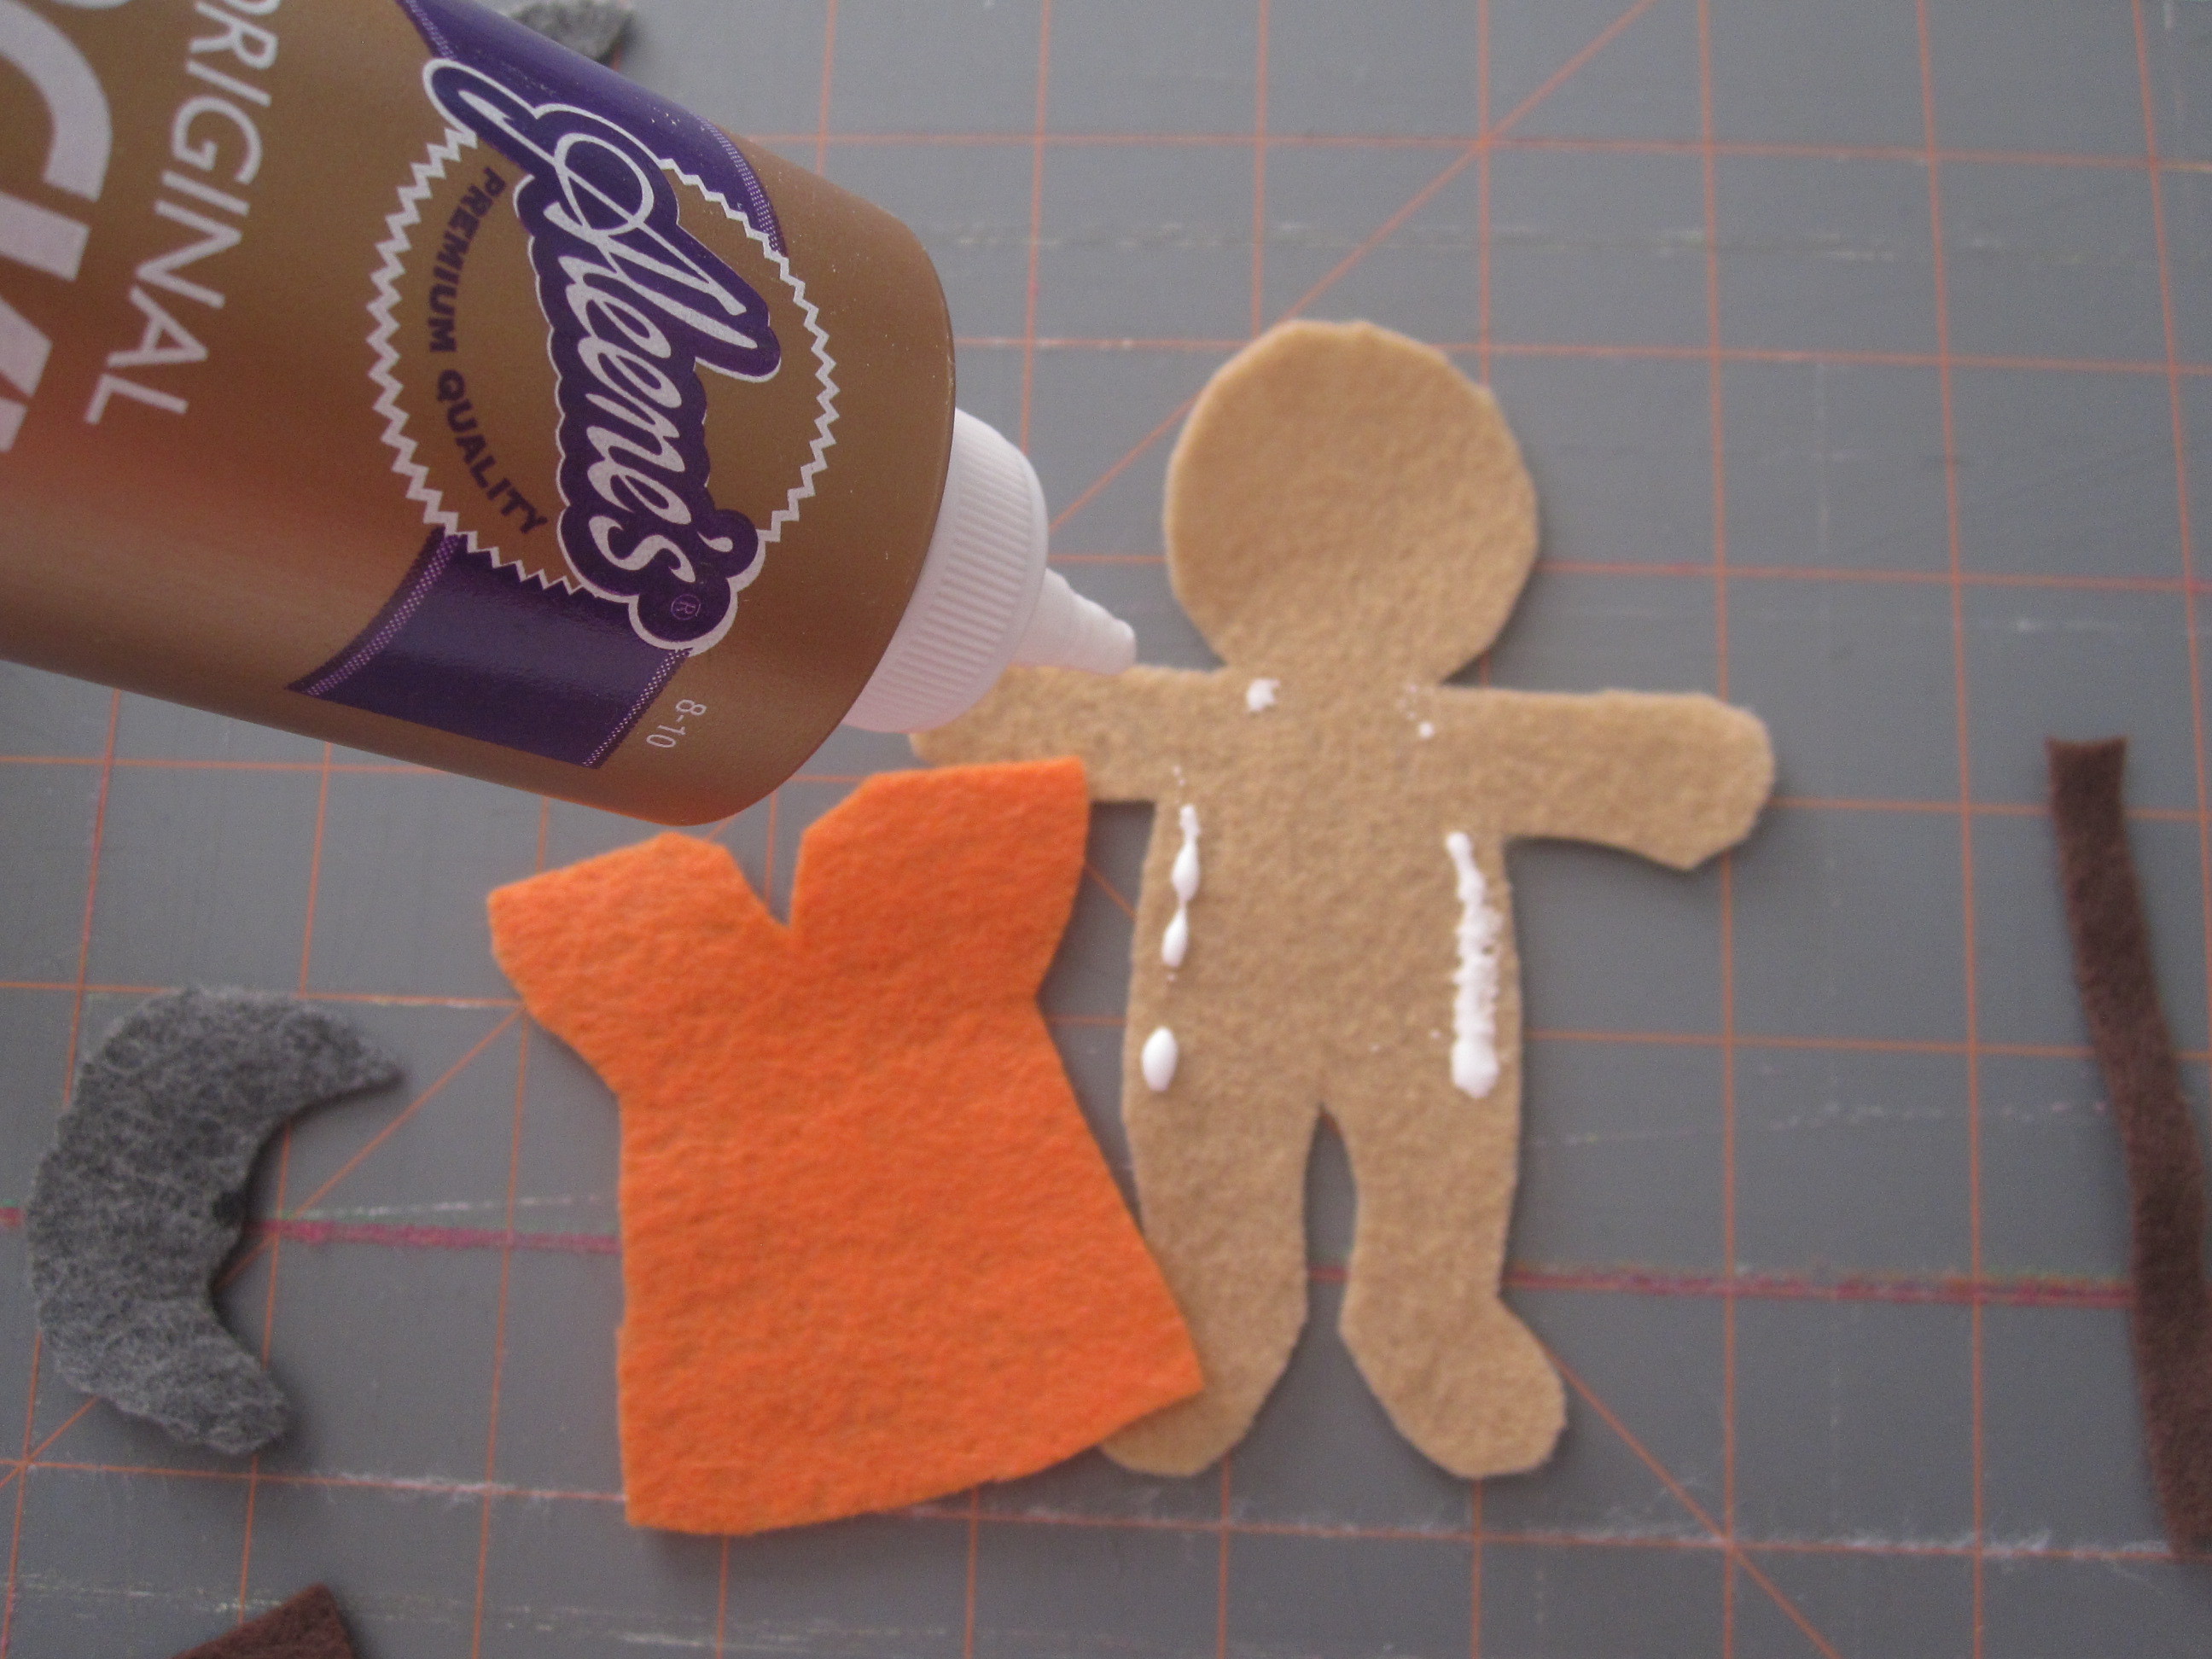
Carefully (without overdoing it on the glue) glue the hair, clothes and accessories to your character.
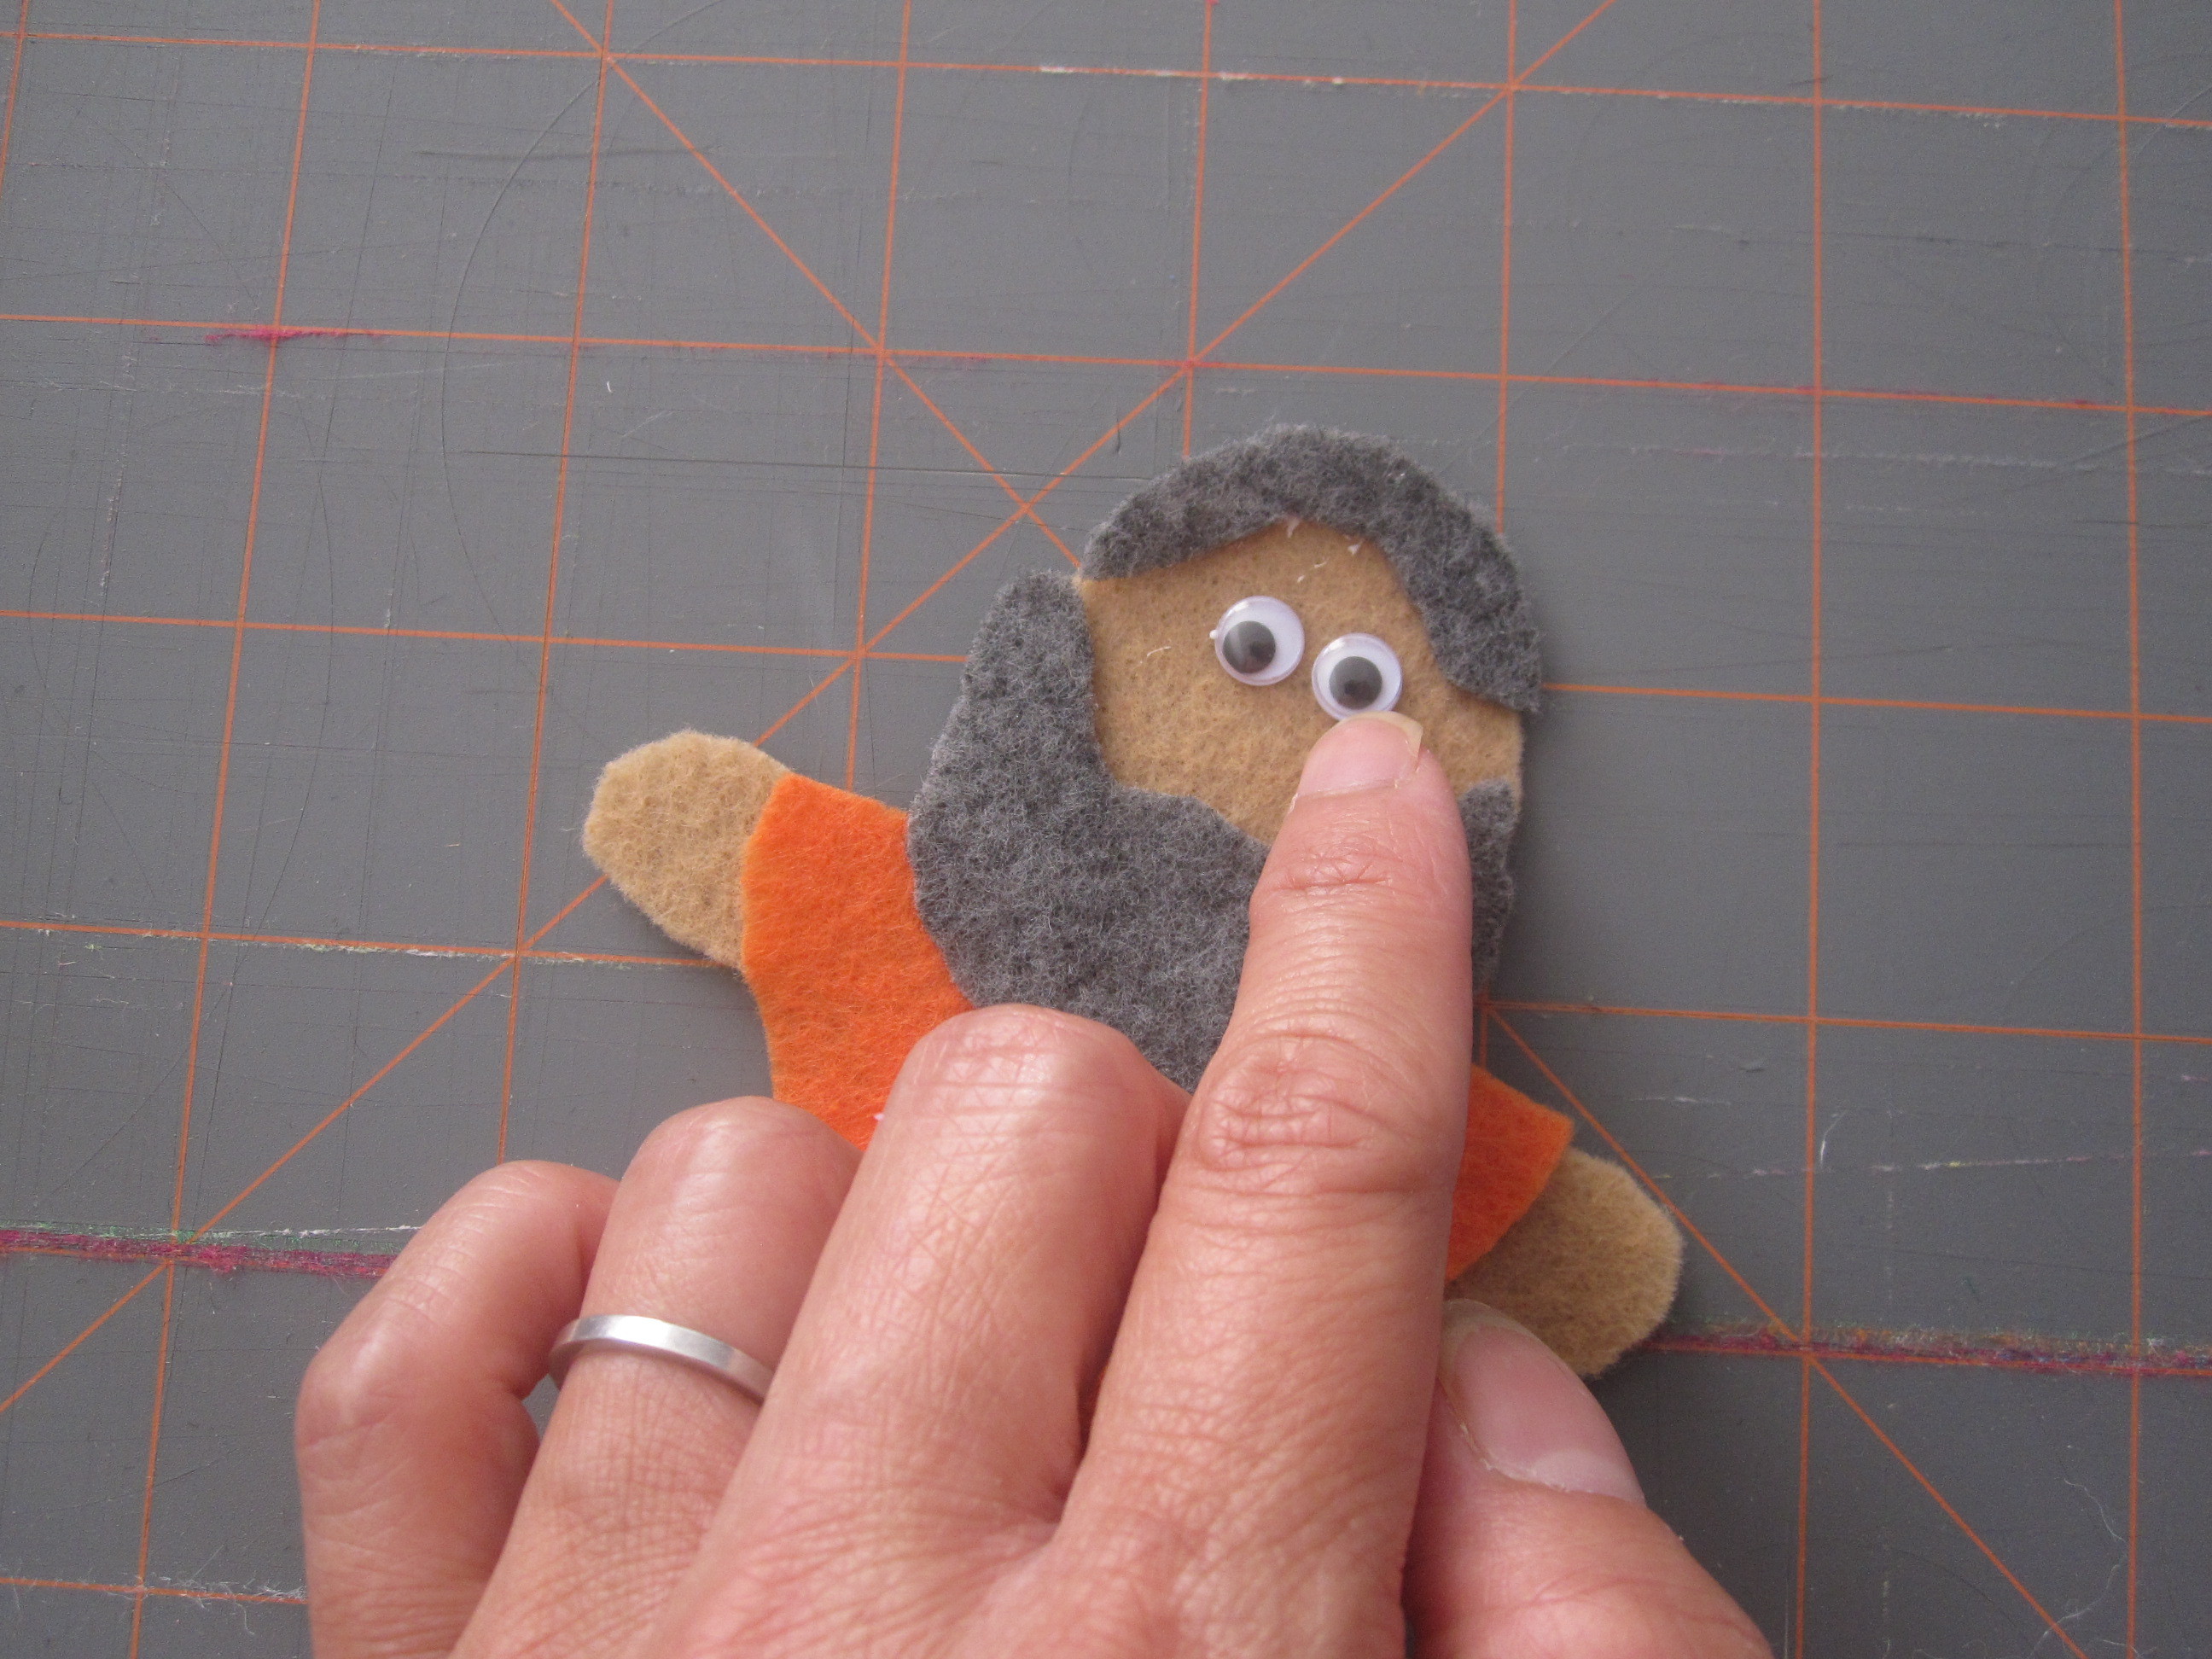
Give him sight! Glue the eyes on your little man.
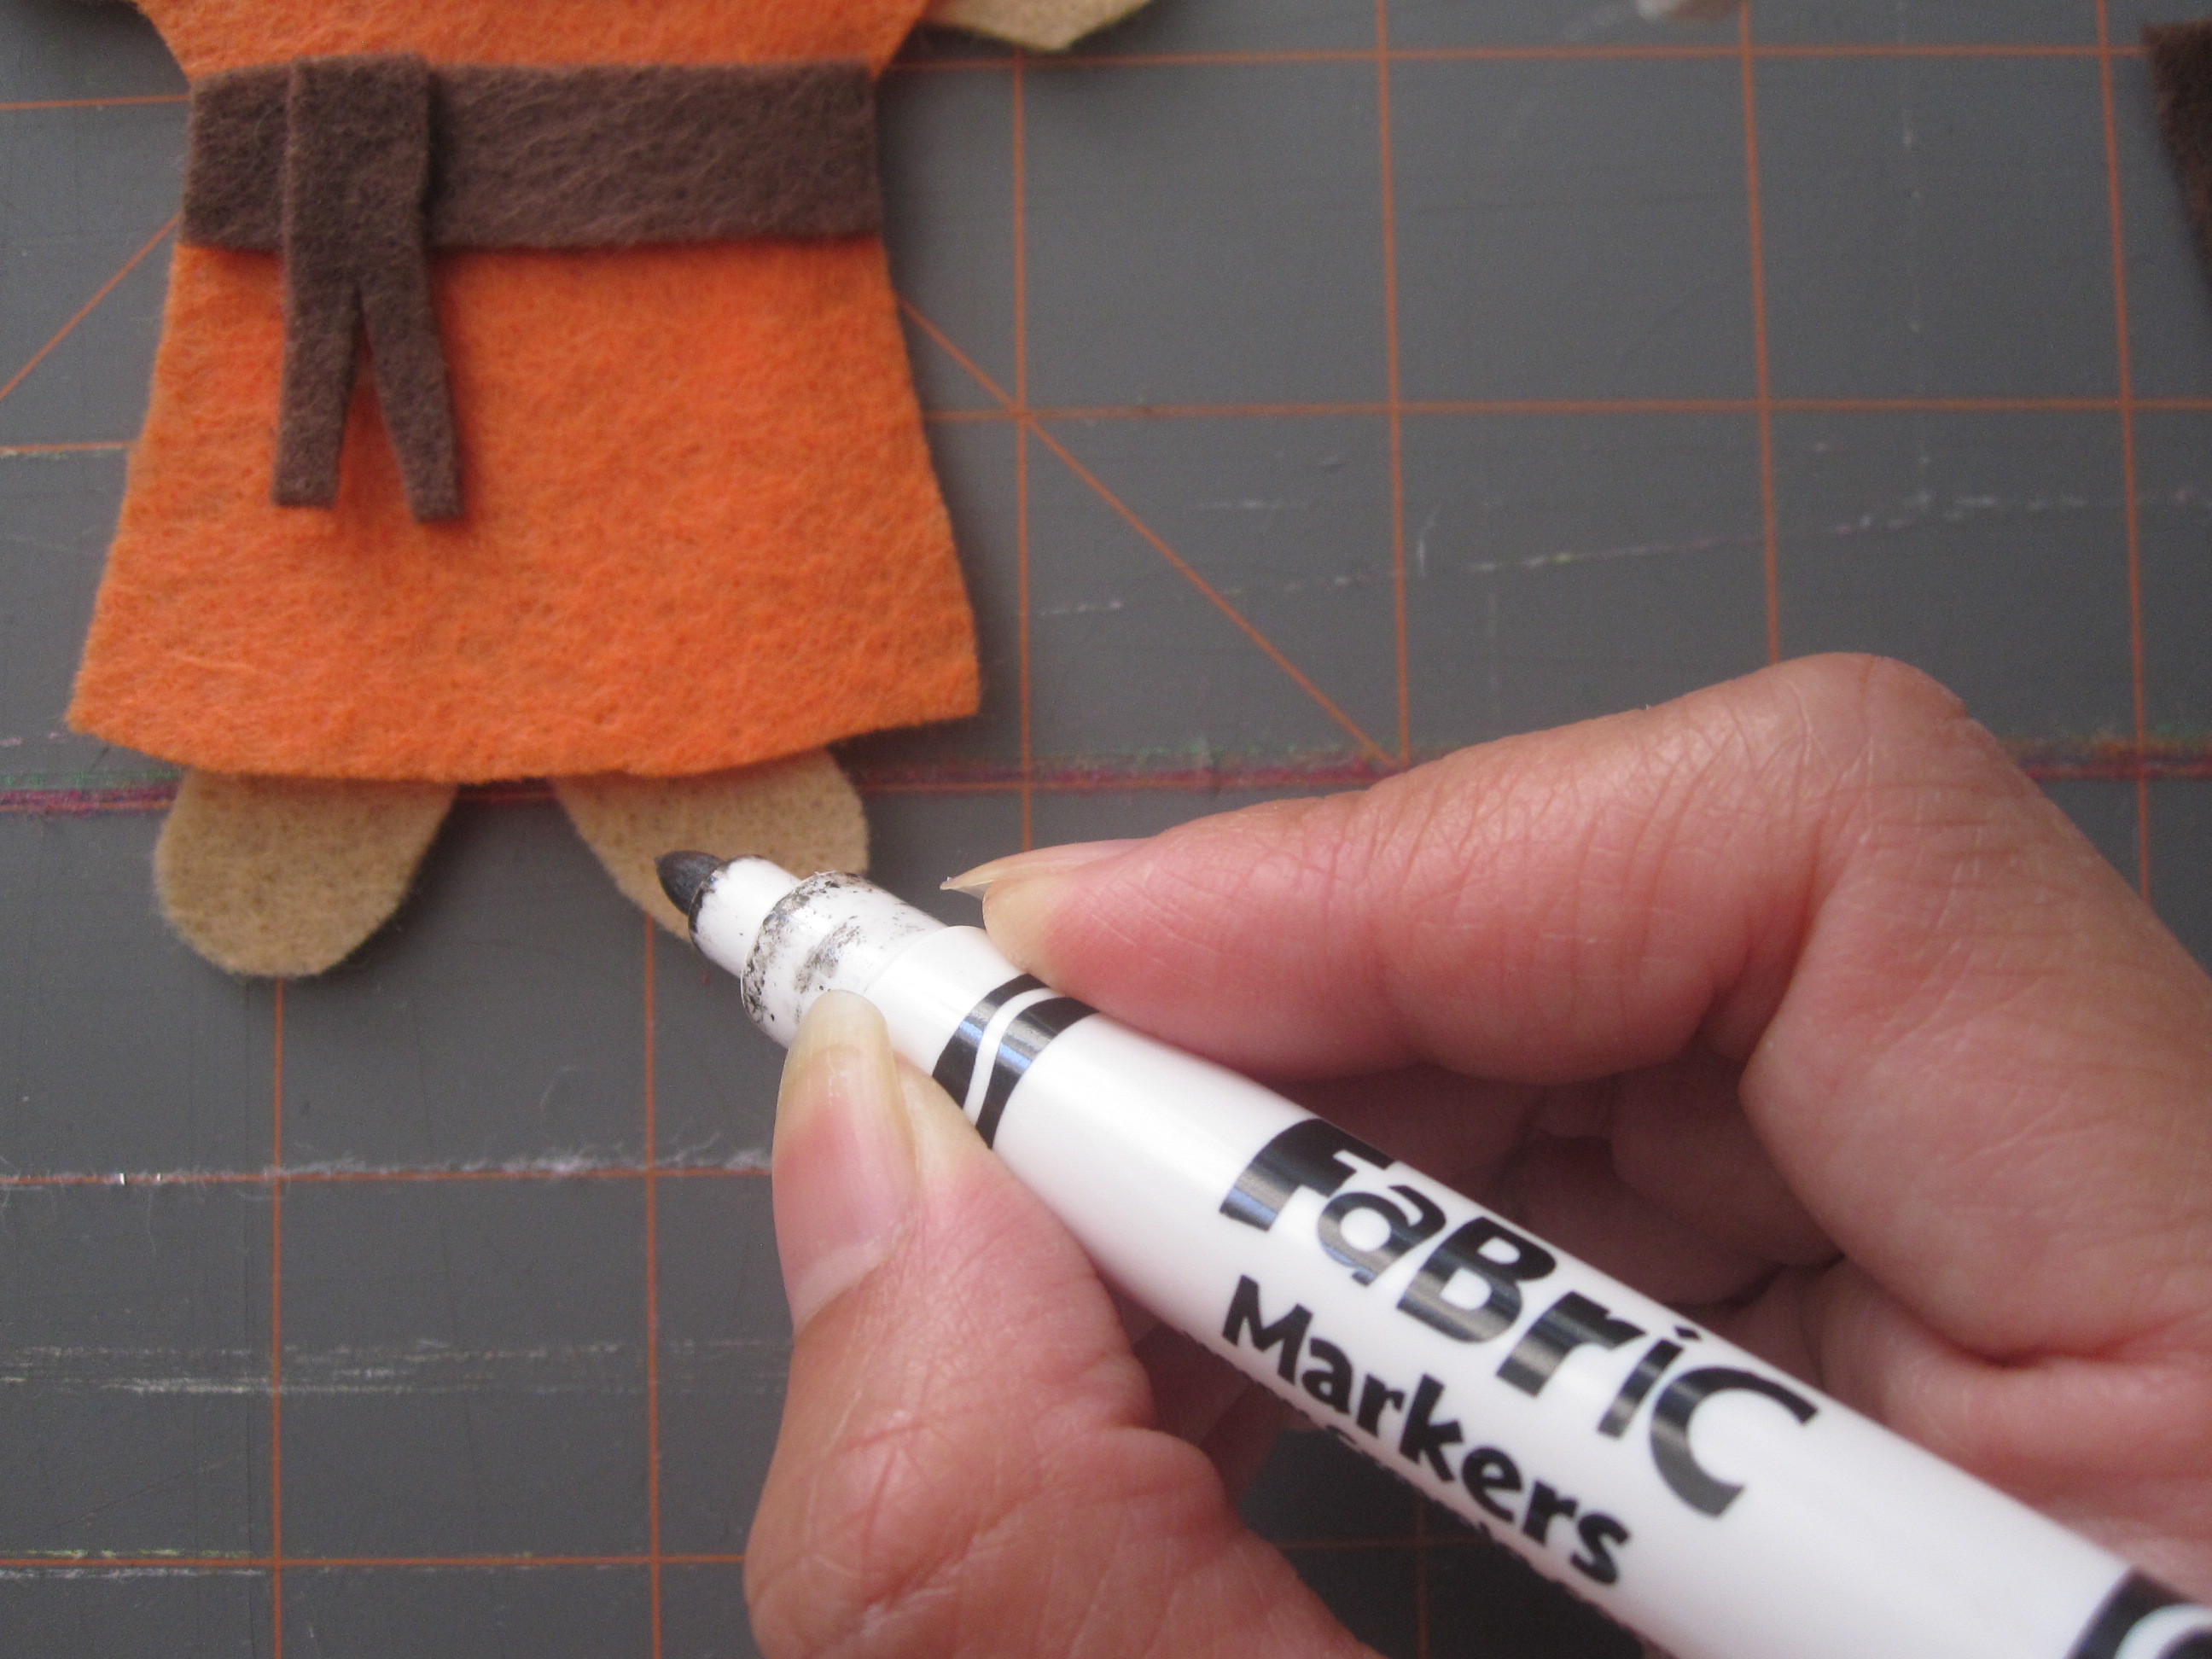
Using fabric markers or puffy paints, add details like sandal straps, noses, mouths and decorative details to clothing.
You can also add other embellishments to create these cute little characters…string for ties and belts, yarn hair, glitter for the gold/silver coins or angel wings, jewels or sequins on crowns.Be creative and have fun!!
“I’m ready to tell some good stories!!! Now I just need some friends to help me.” :)


