

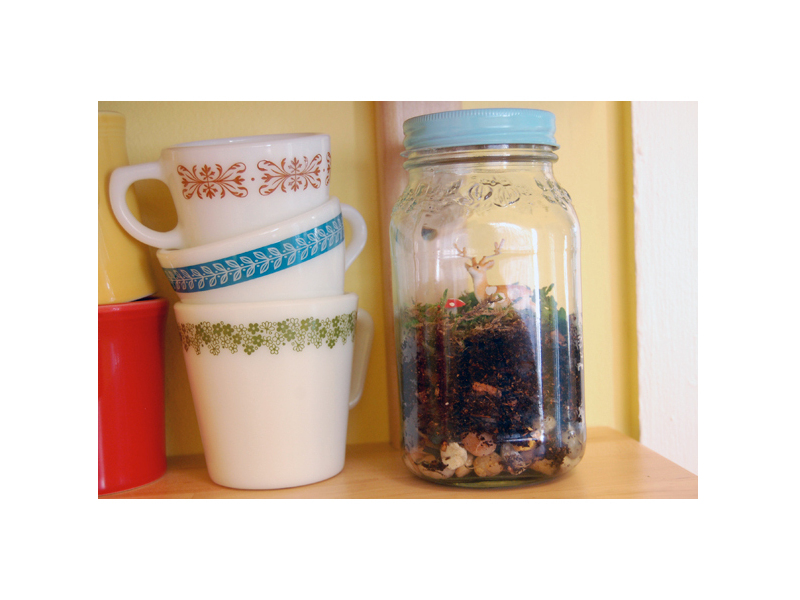
The crafting world seems to have come down with a major case of terrarium fever, and I’m no exception. It’s so much fun creating these verdant little worlds, and I especially like that my cats can’t get to the plants inside. I’ve been having a lot of fun making woodland-themed moss terrariums for friends, so I thought I’d share what I’ve learned. You can purchase lidded glass containers at craft stores, but this project relies on reusing mason jars you may already have on hand. The rest of the materials needed can easily be found at home and garden stores. Read on to find out more!
Projects from Make: Magazine
Mason Jar Terrarium
Join the terrarium-building revolution with these easy and cute verdant little worlds.
Prep your jar.
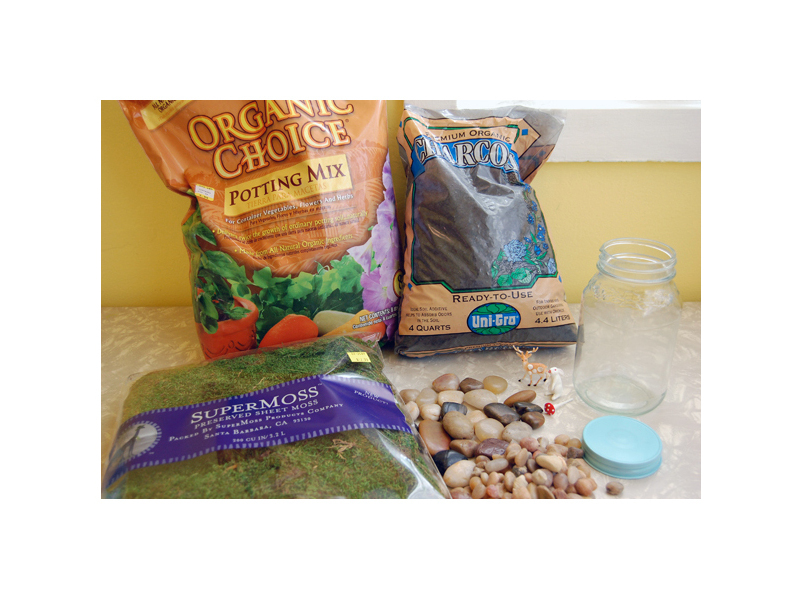
First prep your jar by washing and drying it. If you’re reusing a mason jar, you may want to spray paint the lid to cover any logos, etc. I painted mine using Krylon spray paint in “Blue Ocean Breeze.” The coverage is great and the drying time is only 10 minutes.
I also had to remove some sticker residue from the glass. I soaked the jar in warm, soapy water, which removed most of the label. Then I took the residue off with a bit of vegetable oil on a cleaning cloth.
Add the base.
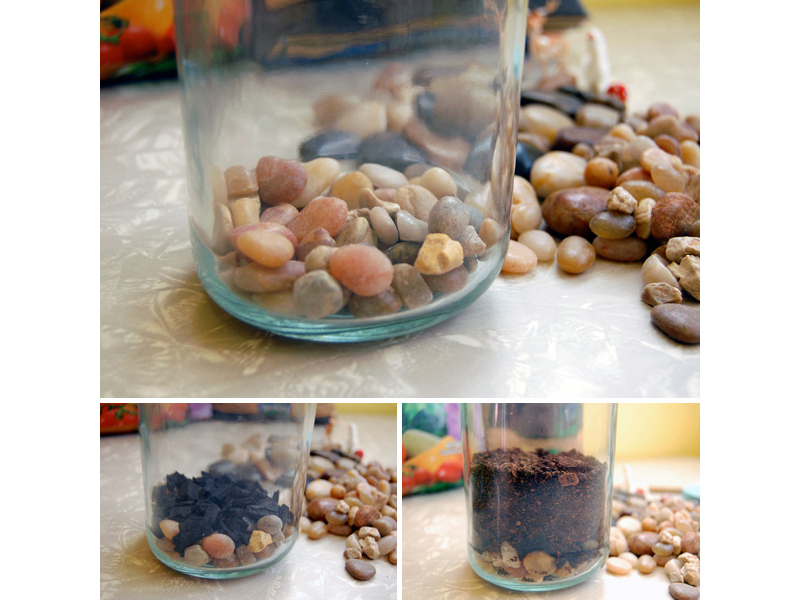
Start by adding a 1" layer of pebbles to the bottom of the jar, followed by a thin layer of charcoal. The charcoal will help filter the water in your terrarium and will absorb odors — otherwise your terrarium may start to stink.
You can also choose to mix some charcoal into your soil at a 1:4 ratio, but I prefer the layered look.
After the pebbles and charcoal, you’ll add a 3"–4" layer of potting soil.
Add plants and critters.
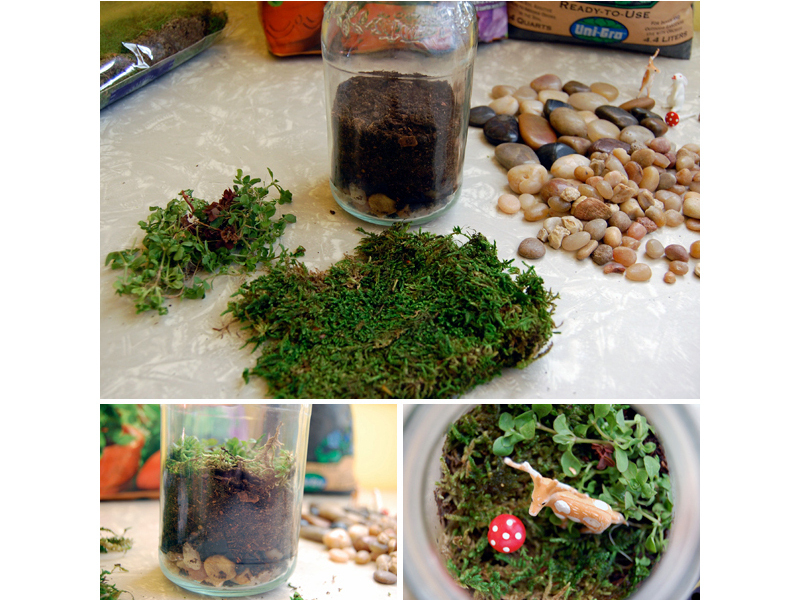
Now you’ll start adding in the greenery. Simply tear pieces of moss off the sheet and place them in a single layer inside the jar. It can be hard to fit your hand inside the jar to adjust things, so use chopsticks or a bamboo skewer to move the plants around. If you want to create some interest with height, you could mound up the soil in one area to create a mini-mountain to cover in moss.
All-moss terrariums look great, but you can also experiment with adding plants like small ferns and the like. I found some nice plants growing between the sidewalk cracks while walking my dog one morning, so I ripped a few out and brought them home to add to my jar. They’ve been absolutely thriving in their new mason jar ecosystem.
Decorate as you wish with a variety of rocks, shells, plastic toys, or whatever you like! I used some fun plastic deer and mushroom cupcake toppers from Bake It Pretty.
Water your terrarium.
Now water your terrarium lightly (until you can see some moisture down in the pebble layer), and screw on the lid. You will need to water your terrarium every few weeks.
Droplets of moisture are fine — you want to see these — but if it starts looking especially foggy in there, take the lid off for a few hours to let moisture escape. Otherwise, an occasional water and/or spritz with a spray bottle should be fine.
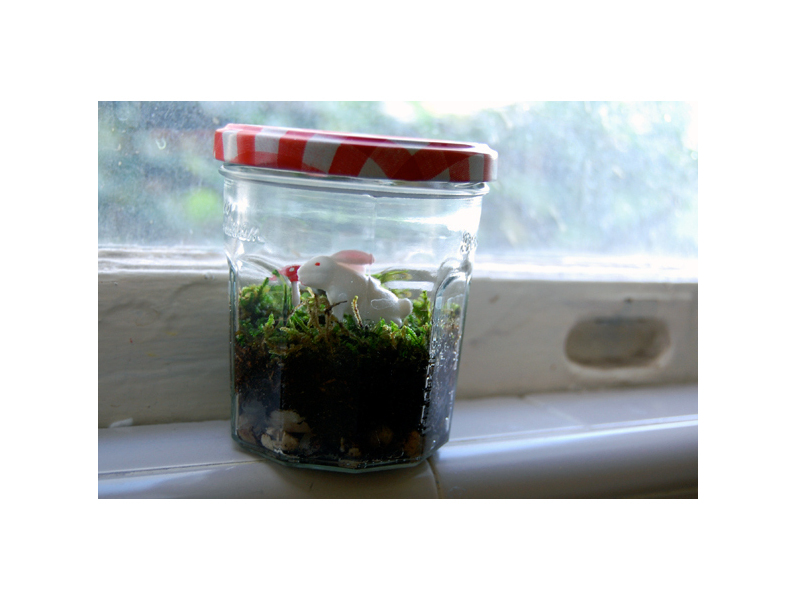
If you want to get super crazy, use a teeny jam jar to make a mini-terrarium! Here’s one I made using a Bonne Maman orange marmalade jar. I love these because the glass has a beautiful shape and they have a fun red and white gingham lid. Follow the same directions as above, just use less of all the supplies.


