I am a klutz. I break dishes all the time. This is why I like mosaics. It’s a wonderful way to make amends to all my precious pieces of pottery. “Sorry, Teacup, you can be a picture frame now! Oops, too bad, Vase, your flower-holding days are over, but please, live on as this pretty planter.” The most intimidating part about creating mosaics is getting dirty with adhesive and grout. But I promise, it’s not that bad. The glue can be cleaned with hot water and soap, and working with grout is much easier than you might think.

It’s OK to forgive yourself — you can turn accidents into art.

Project Steps

Before you start breakin’ stuff and gluing everything down, it can be helpful to make a plan. This tabletop is a simple pattern, with the color used sparingly in the design. There’s not much structure — just a bright border with a few chips of color mixed in with the black and white china. This makes the mosaic a somewhat spontaneous creation. If you have greater ambitions for the mosaic, it’s crucial to draw out your design in advance. Use colored pencils to map out placement in full color. This step will allow you to work faster, and with very satisfying results.

CAUTION: Breaking glass and ceramics is dangerous. I’m talking flying shrapnel here. Wear the goggles. Use the gloves. Cover everything with a towel. Don’t get hurt!

Choose and prep your mosaic surfaces.

Mosaics can be created on any surface that you can glue something to. Be certain that your choice is sturdy, as tiles, adhesive, and grout can be quite heavy. For this project, select a wooden table that has ample weight-bearing tolerance. Then clean your surface (the tabletop) and make sure it’s dry.

If the tabletop is smooth, it will need some roughing up. Sanding and gouging will help the adhesive bond well to the wood. Use 80-grit sandpaper to scuff the wood. Don’t be concerned with unevenness. With an old saw, score the tabletop. Drag the saw horizontally across the table to grate it further.

Choose your tile.

This might be the best part of the whole project! Mosaics are eye-catching and meaningful because of the tesserae — the colorful bits of tile and pottery that make up the mosaic. Every crafter is drawn to her individual aesthetic, or has a color scheme she is partial to. Let these variances in your personal art guide your choices when creating and gathering tesserae. If you like, you can try not to purchase anything new for your mosaic. Use leftover tiles from your neighbor’s bathroom, or save favorite dishes that have cracks and chips. Including meaningful pottery in a mosaic is a wonderful reuse. Choose colors and patterns you like, and don’t forget to consider the grout — it’s also available in many colors.

Break it up.

Historically, Roman and Byzantine tesserae were smalti: opaque glass cubes that were cut with a chisel. Other tesserae included small pebbles, coins, and mirrors. For this project, we’ll make the tesserae by breaking up larger ceramic tiles and old plates. There is no perfect method for creating tesserae — while you can get pretty close most of the time to the shape you want, there’s always an element of surprise when breaking things. If you’re using glass, it can be scored with a glass cutter to increase the chance the glass will break along a particular line. Mosaic glass cutters are useful

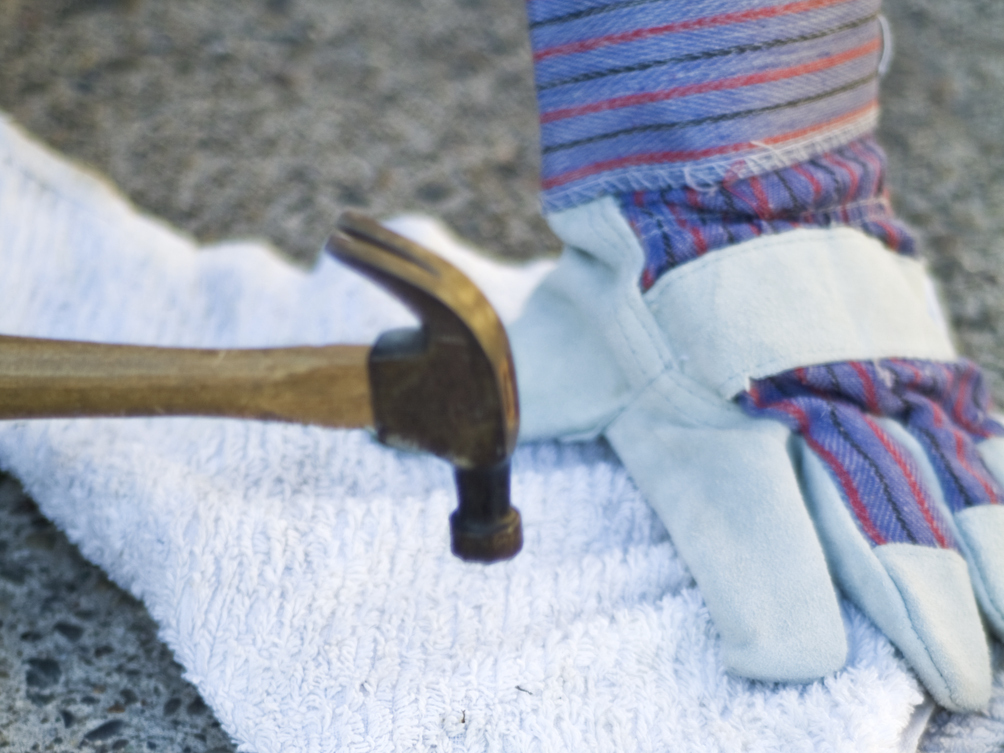
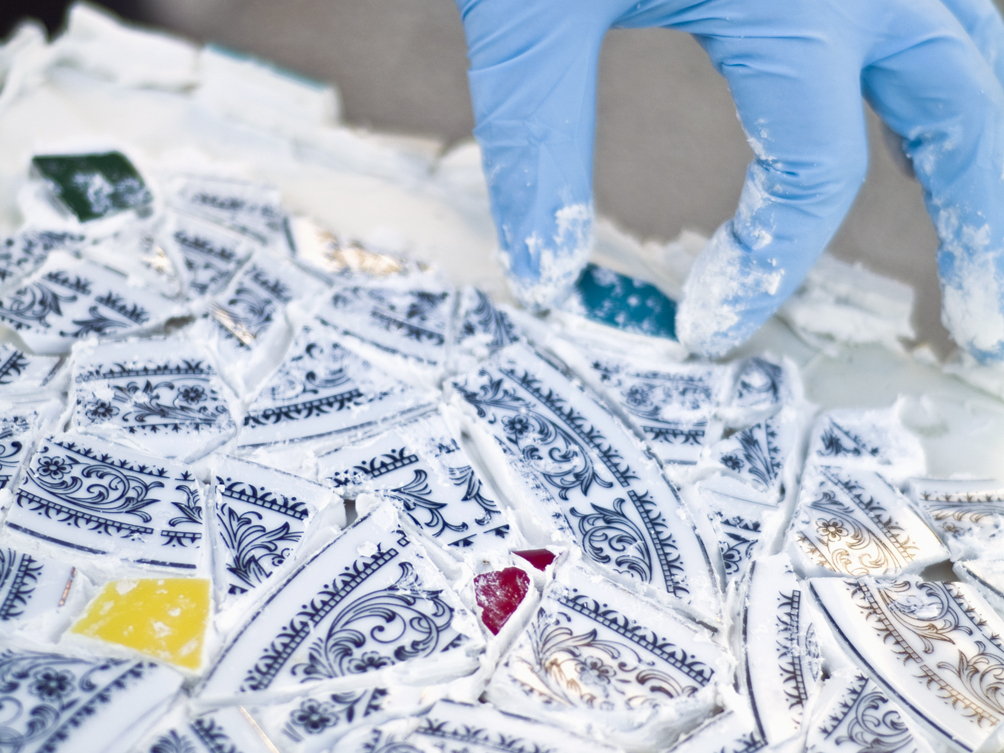
To prevent the pieces from flying through the air with great force, wrap the dish to be broken in an old rag. With the heavier hammer, hit the plate once in the center, through the rag. Check to see how the pieces look. If you’d like to make them flatter, or to achieve a specific look, rewrap them in the towel and use the lighter hammer to chip away at them.

Breaking ceramic tile is similar to breaking plates, with a few differences. Some tiles, when hit with a hammer, tend to crack into perfect pieces, while others crumble away. This has to do with the tile itself, but you can adjust your breaking technique if you notice the tiles are crumbling. Set the tile on top of a hammerhead, drape it with a rag, then gently hit it with another hammer. Breaking tiles over a fulcrum like this will give you greater control over the final pieces, and should cause a good crack, instead of a bad crumble.

Once you’ve broken the tile into pieces, it can be broken down further using tile nippers. Place a piece of tile in the nippers, cover it with a rag, and then squeeze the nippers. They will break the tile fairly accurately every time. Tile nippers are invaluable for creating (mostly) square tesserae.

Stick it on.

Choose a tub of pre-mixed tile adhesive and follow the manufacturer’s directions. Wear rubber gloves for this task.

It’s important to keep the adhesive off the front of the tile. Try as hard as you can to keep it all on the back. This will save you a lot of work in the end. If adhesive does end up on the front of the tile, you must clean it off.

With a trowel, smear a thin layer of adhesive over your tabletop. Once the first layer of adhesive has been spread, you’ll have to work quickly to set the tesserae before the adhesive dries, usually about 45 minutes. So, with that in mind, only cover as much of the surface with adhesive as you can cover with mosaic pieces in that time. If the adhesive does dry before you set your pieces on it, scrape it with the trowel and, if necessary, add another thin layer of adhesive.

Select the first of your tesserae and cover the back with a thin layer of adhesive. Then place it on your surface. Cover the next mosaic piece with adhesive and set it very close to the first, aiming for about ¼”–1″ of space between them. Continue to lay out all the pieces in this way.

When mixing plates with tiles, you’ll find that different pieces have different thicknesses. Smear a thin layer of adhesive onto the thick pieces, and a thicker layer of adhesive onto the thin ones. The goal is to have a flat surface, so the amount of adhesive will need to be adjusted to keep all of the tesserae level.

Cure and clean.

After setting all the pieces, use a damp sponge to wipe off any stray adhesive while it’s still wet. Let the mosaic dry according to the directions on the adhesive. Generally this will take about 24 hours.

After 24 hours, return to the project and scrape off any bits of adhesive that may be stuck to the front of the tesserae. Also remove adhesive that may be stuck in between the pieces. You want to ensure that the space between the pieces will be filled with grout, not glue.

Grout your masterpiece.

Put on a fresh pair of rubber gloves, then mix the grout as directed on the package. The grout should be on the thick side — a nonpourable consistency. Be certain to thoroughly stir in the water. Scrape down the sides of the bucket; there should be no dry grout in the mix.

Drop a good amount of the mixed grout onto your tabletop (and its fresh mosaic). Using a trowel, cover the surface, and fill in all spaces with the grout. The edges will need some shaping, so use your fingers and hands to press the grout around the edges, and to sculpt the top and sides. Massage the grout in well.

Let the grout dry for a short time, again referencing the product’s directions. In about 10–30 minutes it should be set well enough to begin removing the excess. Scrape away any grout that will come off with the trowel. Then use a wet sponge to very carefully clean up the tesserae. If you moisten the grout too much, you’ll remove it from where it has set in between the pieces. The best technique is to dab it gently with the sponge. After most of the excess grout is removed, there might still be thin smears of grout on the pieces. Use a paper towel to clean them up even more.

It can be tricky to get the table clean while the grout is wet. Just remove as much as you possibly can, and once the mosaic has dried, you can gently scrape the rest away.

Finish with a last cleanup.

Once the grout has dried (generally after another 24 hours) the table can have its last cleanup. Brush or scrape away any grout left on the surface of the tesserae. If you plan on using the table outside, seal it with a tile and grout sealant. Otherwise, your hard work is done, and you’ve got wonderful, lasting art!

Some very complicated patterns do not lend themselves to being placed spontaneously. If you’re interested in making a design and want to lay out the tesserae first, consider using the indirect method. Draw a pattern on butcher paper, and then use craft glue to stick the tiles in place, facedown on the paper. Once the tiles have been glued in place, carefully lift the paper and invert it onto a surface that has been prepped and covered with tile adhesive. Remove the paper from the front of the tiles by wetting it with water to dissolve the craft glue.

Conclusion

This project first appeared in CRAFT Volume 09, page 90.