Sam Freeman is an Online Editor at Make. He builds interactive art, collects retro tech, and tries to get robots to make things for him. Learn more at samtastic.co, or on socials @samdiyfreeman.
This article appeared in Make: Vol. 89. Subscribe for more maker projects and articles!
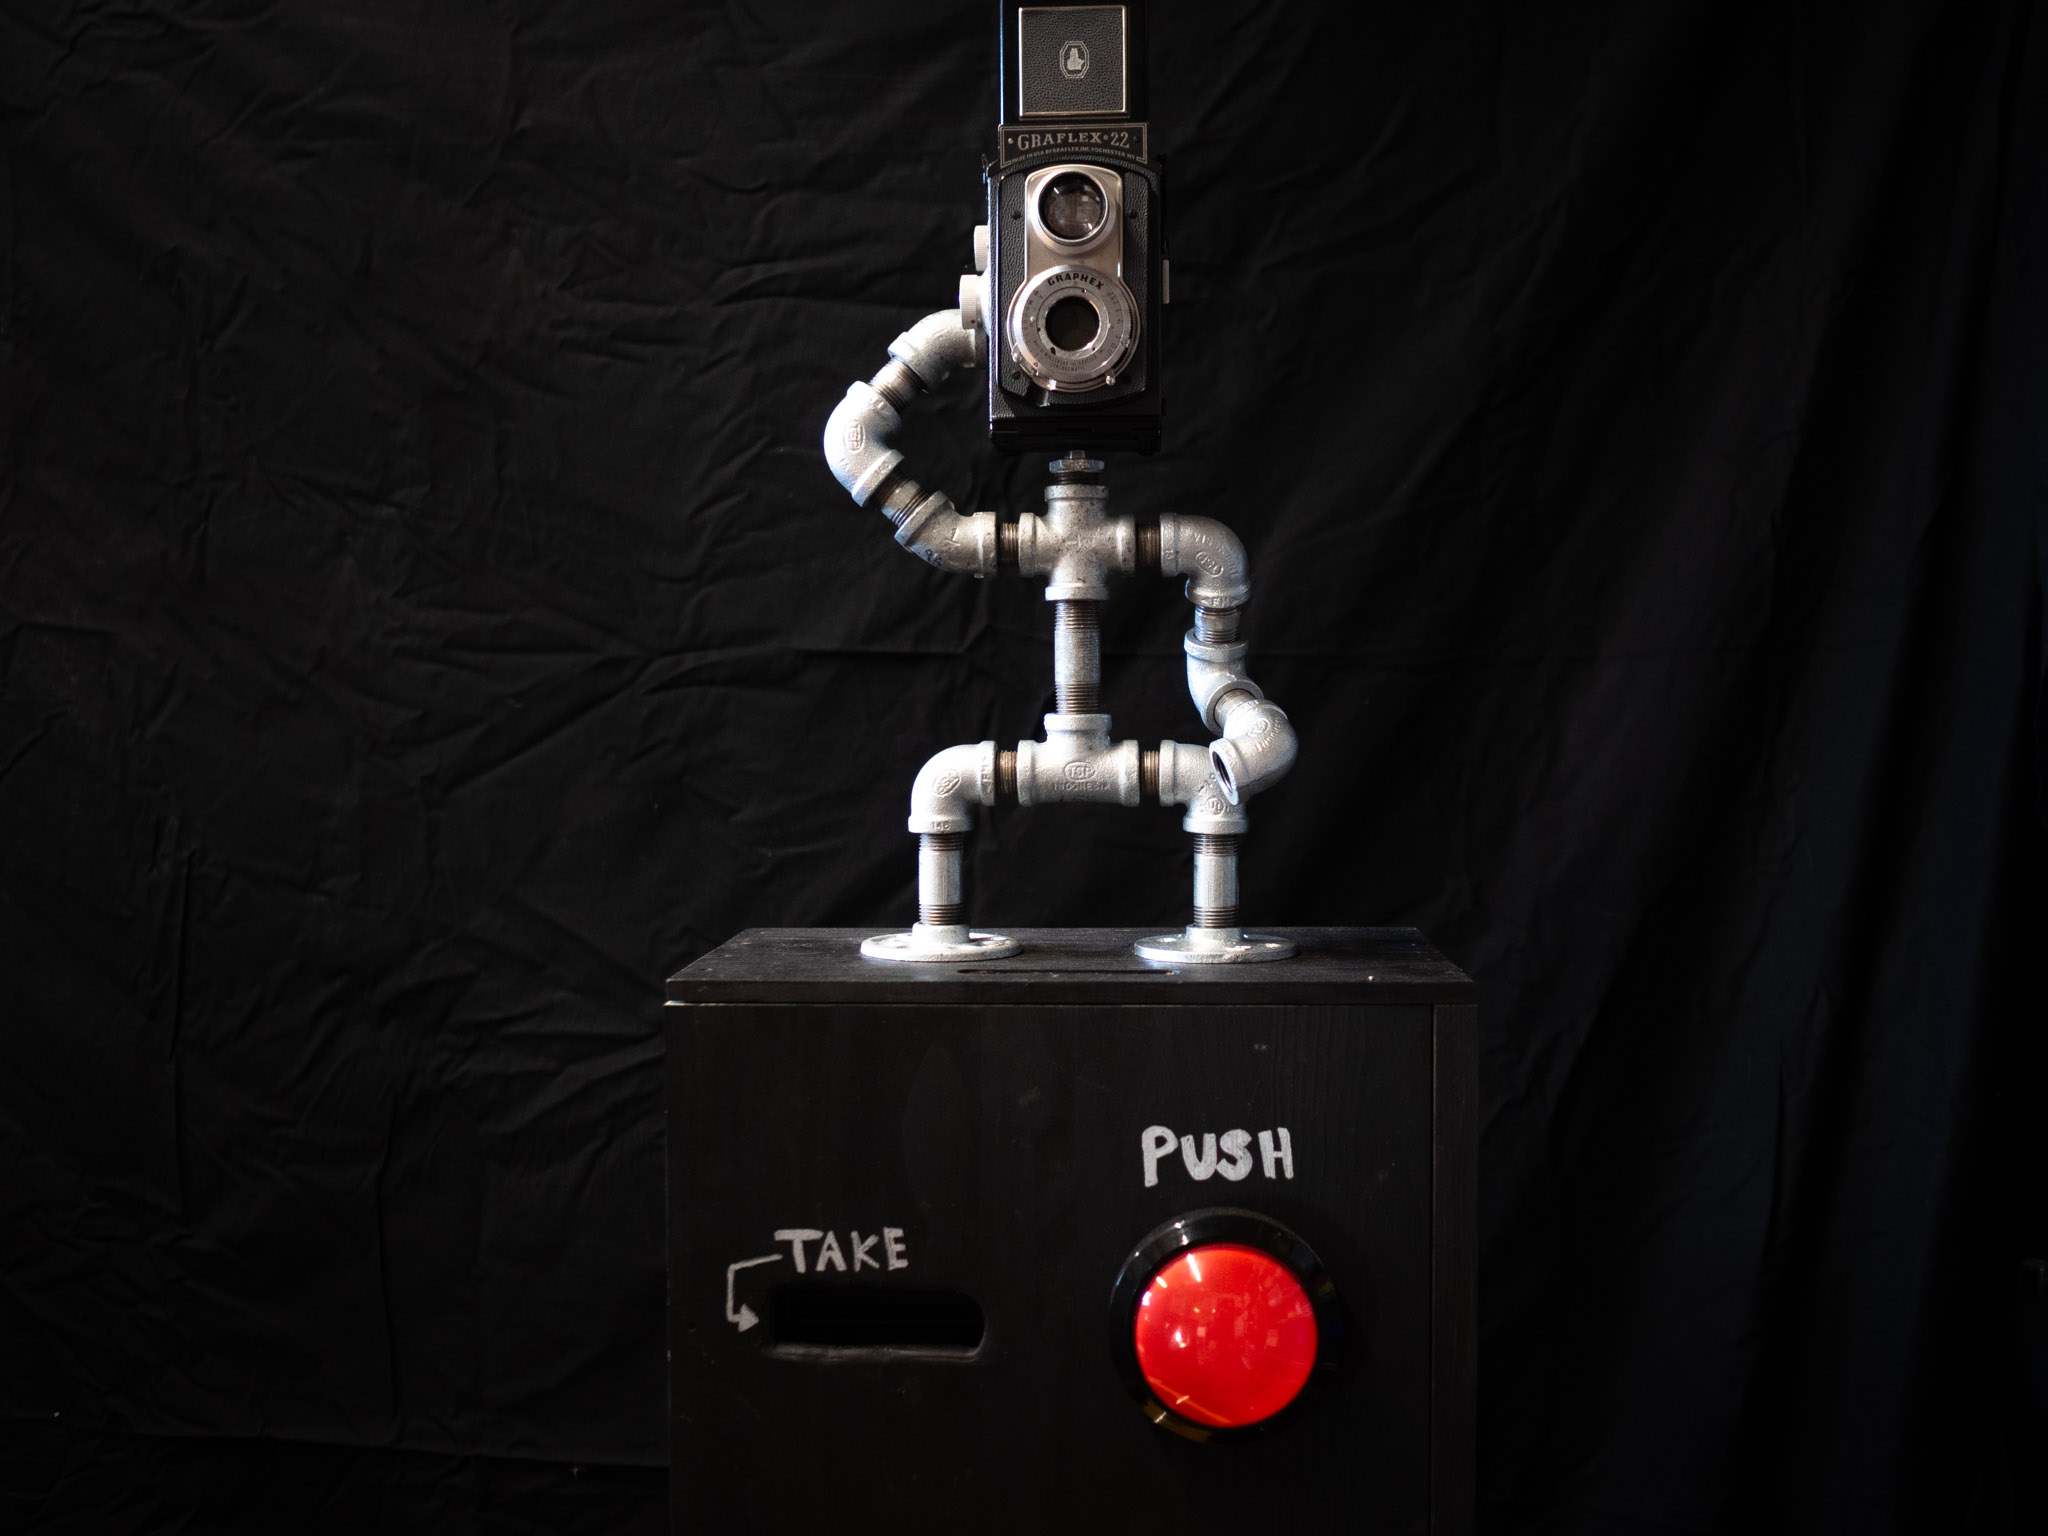
There’s something undeniably charming about old cameras, and there’s something undeniably fun about photo booths. This build brings both together in a blend of low-fi prints, vintage hardware, and modern circuitry. A Raspberry Pi camera inside an old TLR (twin lens reflex) camera takes a user’s photo and prints it instantly on receipt paper. Your guests will be able to snap a selfie and keep a thermally printed souvenir.
I built the original bot for my wedding, but today we’re making an improved version that debuted at Maker Faire Bay Area 2023.
Finding a Camera
Photography by Sam Freeman
I’ve tested a Graflex 22 and an Argoflex. Whatever you use, you’ll want to make sure there’s room for a Pi camera module and a path for the ribbon cable. Since the Pi camera can’t see through the shutter, you’ll need a vintage camera that supports time mode. We’ll also be removing the lens, so it might be best not to start with a camera you’re strongly attached to.
Choosing a Thermal Printer
I chose this particular printer because I needed auto-cutting for a busy crowd, and it already had Pi support. If you trust your audience more than I do, you can find newer/cheaper options. Also, while receipt printers make charmingly lo-fi images, the thermal paper they use isn’t very eco-friendly. Switching to an ink-based system would let you print on ordinary recyclable paper.
Project Steps
1. Grab the Code
The program is a simple script that waits for a button press, then lights an LED and sends a photo from a Pi camera to the printer. Head to Github for the code, as well as installation instructions for printer drivers.
2. Prepare the TLR Camera
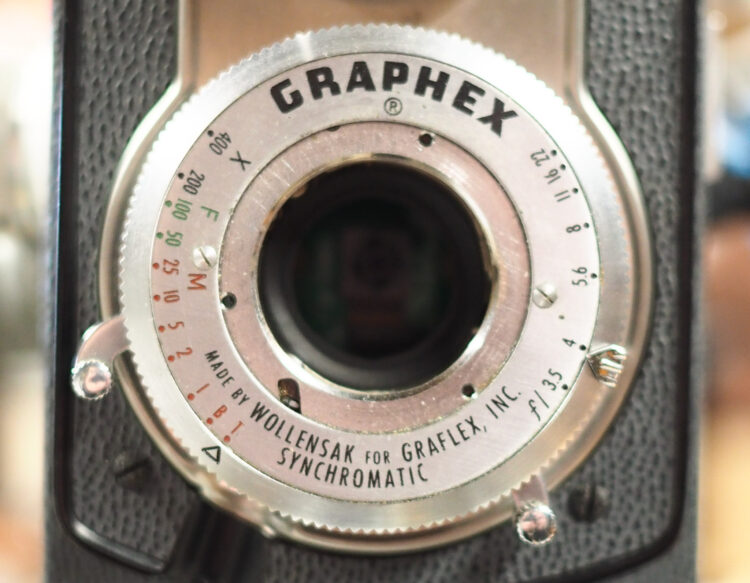
Don’t tell anyone, but we won’t be using the original lens. It might not be authentic, but keeping the original glass would open up a graduate-level optical engineering challenge, and at our resolution the difference would be entirely lost.
Unscrew the objective or taking lens, front and back. On some models, you may need a screwdriver to take apart the outer assembly. Proper disassembly could be its own tutorial, so go slow and keep track of everything so you can put it together without the glass. A thin piece of flat stock can work as a makeshift spanner for the rear lens. Note that the black coating scratches easily.
Open up the aperture to the widest setting unless you want the blades in the way. To set your camera to time mode, turn the dial to the T indicator, wind the crank, and open the release lever.
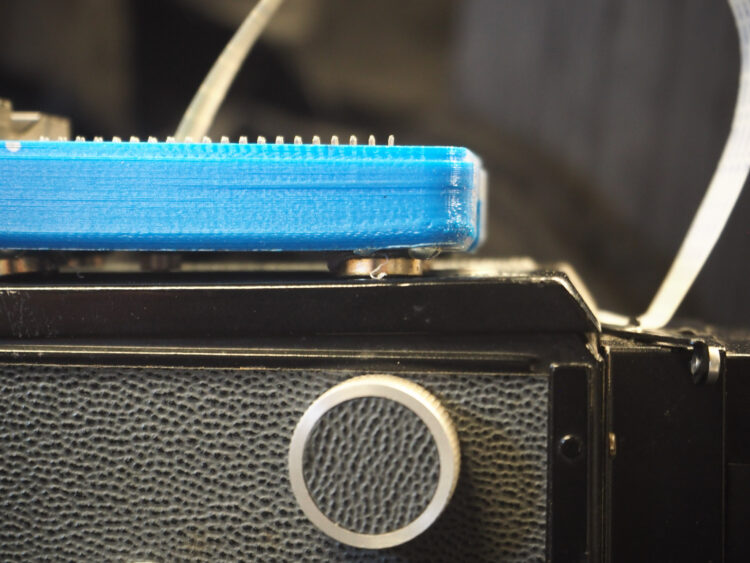
3. Place the Pi Cam
Mount the Pi camera module behind the now-empty taking lens (not the viewfinder lens). Feel free to 3D print a custom mount, but I used cardboard and duct tape and it’s held for 5 years and counting.
4. Build the Robot Body
Technically your camera could live anywhere, but a pipe robot gives this build maximum personality. Its form is up to you. A ½”–¼” hex bushing with a ¼-20 nut jammed inside and a bolt through the neck provides mounting to the camera’s tripod socket.
A 3D-printed case and four hot-glued magnets hold the Pi securely on the back.
5. Wire it Up
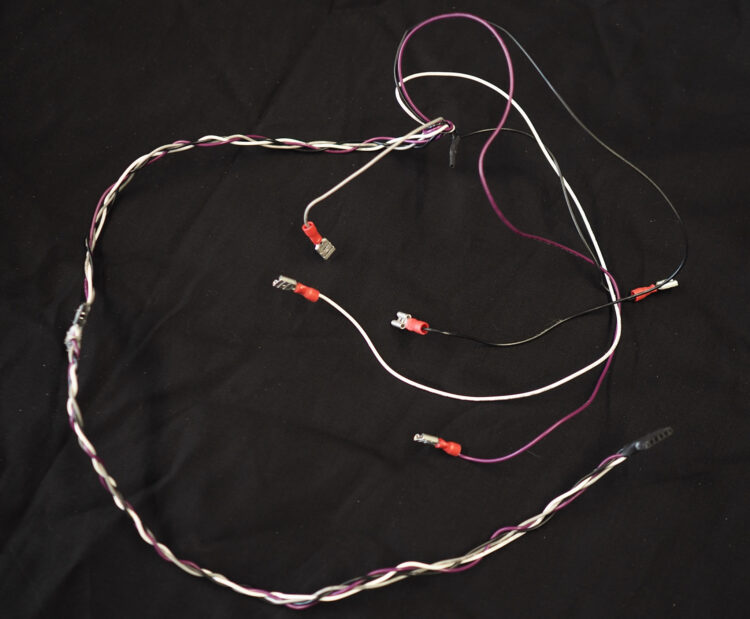
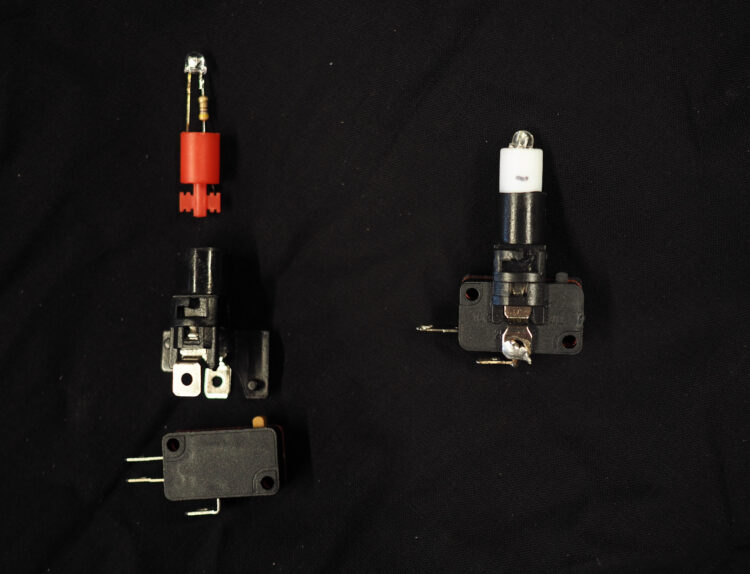
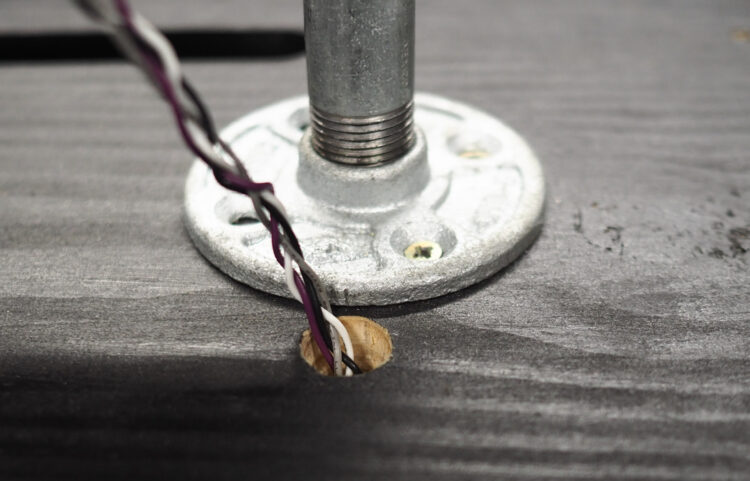
A four-wire harness with spade crimps on one end and header sockets on the other connects our buttons and LED to the Pi. You can solder your own harness or use cables off the shelf, as long as they’re at least 30″ long. The ground (–) wire should have three connectors.
The big button’s built-in LED runs on 12V. To make it run on 5V from the Pi, bust out your soldering iron and swap the resistor with one that’s 150Ω. Tying the LED (–) and button COM together will save you a crimp connector and prevent anyone (yourself included) from ever removing the LED again.
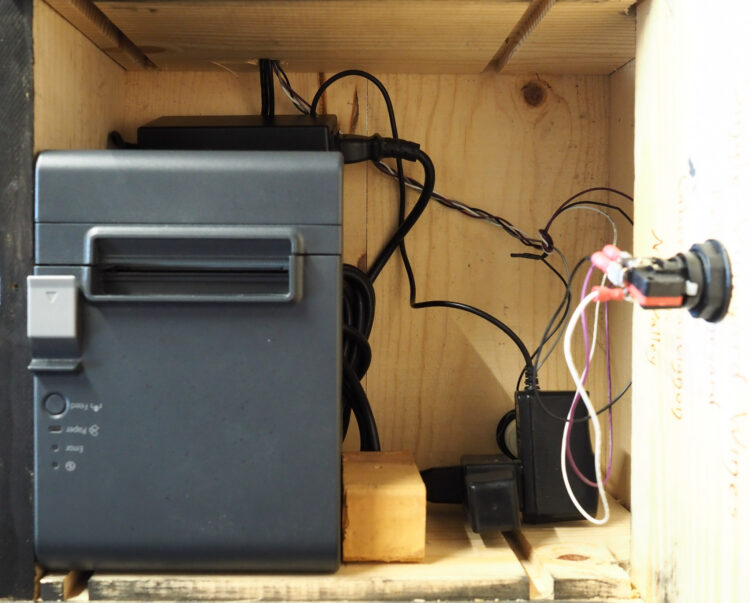
6. Build the Base
While the Pi and camera module live on the TLR, all the other components are housed in a wooden base. It needs enough room for the printer and power supply, a shutter button, power button, USB supply, and multi-outlet power cord. Mine’s 14″×12″×8″.
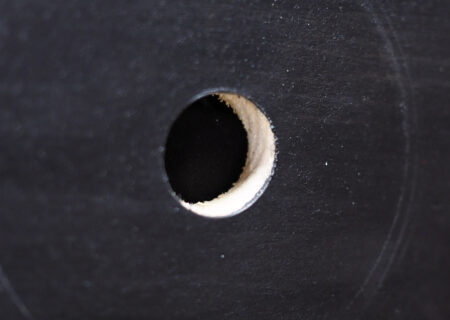
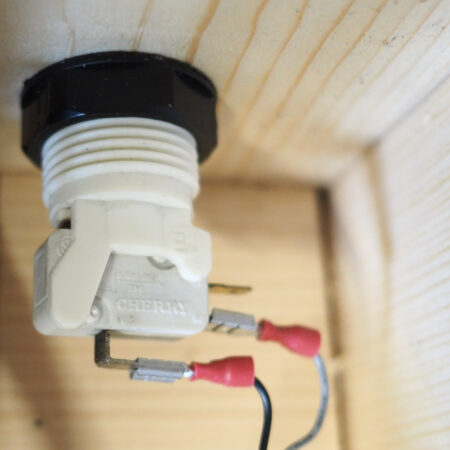
Cut a hole big enough for your power cord, and a 11/8″ hole for the big arcade button in front, and another for the power button in back. Make a hole on top wide enough for your wire harness and USB cables.
Cut out a 1″×4″ slot for the printer. The prints don’t shoot out very far, so you’ll need to position the printer as close as possible to the face — this might require routing out the backside. The printer is held in place loosely with scrap blocks of wood.
Mount the big button in front and the little one in back. Connect your crimps to the buttons and LED, then run all your cables through the base and up to the Pi. The code uses GPIO pins 16 for LED, 20 for “Shutter,” and 21 for Shutdown. Physical pin 34 is common (–).
Conclusion
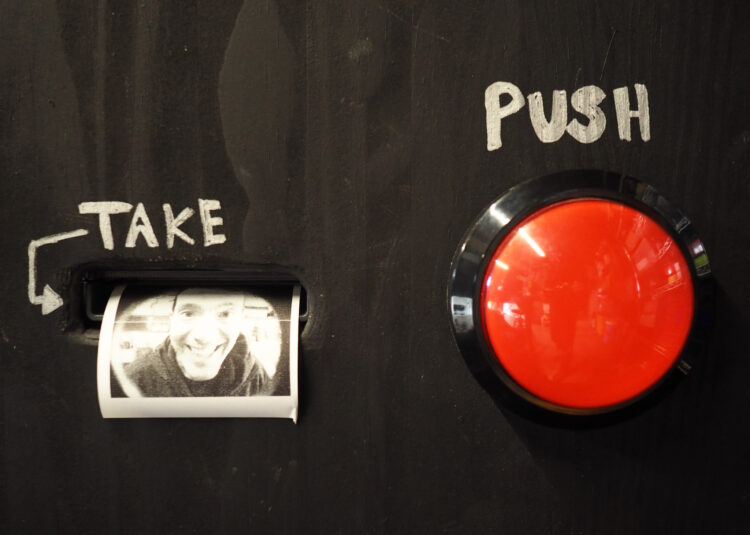
Pi Picture Party!
Setup is simple. Plug your Pi and printer power into the multi-outlet. Then plug your bot into the wall and make sure the shutter’s open.
The script will automatically start on boot — the LED should turn on when it’s ready. Now hit the shutter button for your first test print, and congratulations! You’re the proud owner of a bot who’ll free you up to enjoy the party.
Upgrades
I recently upgraded to a V2 Pi camera, so I’m using the current library. Next I’m working on delicately shoving a Pi Zero inside a vintage TLR instead of mounting it on the back. You could also back up photos to the card or the cloud.
Vintage Photography Projects
OpenSX70
This open source, community project led by Joaquín de Prada in Barcelona is reverse-engineering the classic Polaroid SX-70 self-developing Land camera to replace its ancient PCB with Arduino-based hardware and software. The goal? Total manual control of shutter speed, double exposures, flash operation, timer, and more. Join in at opensx70.com.
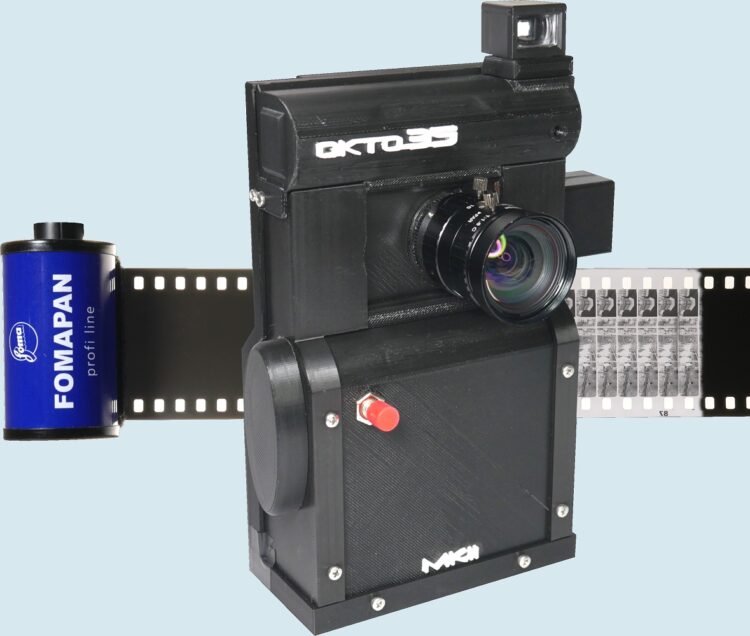
OKTO35 3D-Printed Movie Camera
Movie film has become rare and expensive, so this brilliant bit of engineering shoots four Super 8 tracks on a roll of affordable 35mm film. It also takes stills and time-lapses, and can even scan old film to digital. Slovenian maker Blaž Semprimožnik is working on a MK3 version; follow along with his amazing builds.
Joshua Bird (“Wigglegram Lens,” Make: Volume 79) aimed for the same goal with his own “absurd and impractical” 3D-printed movie camera; enjoy his cautionary saga.
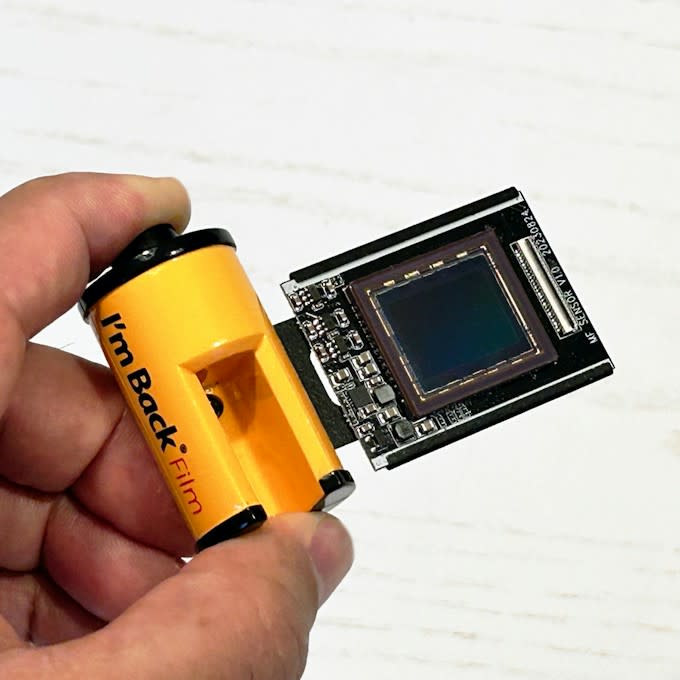
Adapt Film Camera to Digital
Can you convert a classic film camera to digital? DIYers have, but the drawbacks are severe: small sensors capture only a fraction of the standard 35mm frame. Finally some crowdfunded solutions are shipping: the DigiSwap adapter mates old SLRs to your iPhone optics, while I’m Back Film is a drop-in digital sensor in a film-cartridge form factor. Hype or hope, at least they’ll give camera hackers some new jumping-off points.
Sam Freeman is an Online Editor at Make. He builds interactive art, collects retro tech, and tries to get robots to make things for him. Learn more at samtastic.co, or on socials @samdiyfreeman.