Change the casing of an old Pong console into something a little sturdier, like concrete!

Project Steps

Demolish

Find a clone Pong console. Make sure you are not sacrificing a valuable piece of hardware like a Magnavox Pong console since your project might go all wrong, leaving the world with one Pong console less. I found a rather obscure German piece of hardware that looks quite terrible. The manual mentions “realistic sounds” by which I guess they mean “realistic Pong console sounds.” In this case it is true (either that or tennis sounds very different in Germany). Unscrew the console. Keep the front so you can decipher the switches later on.

Create Model

“Either create, or better: find ready-made.” Wine boxes are good for many things; for example, a Pong-console-in-cement-model.

Operation Waterproof

Electronics don’t like wet; make the Pong circuit board waterproof. I folded cardboard around the circuit board and then used mighty gaffer tape to make it waterproof.

Test Test Test

When you abuse old electronics make sure you test after every step. Just bending something that is could-easily-be-bended-looking can screw up your entire project. I cut off the controllers since I needed to attach those when the cement is dry. The Pong console stops showing the bats as soon as I detach the controllers.

Choose Your Game

I like simple; extra features are just there to make the electronics look more expensive. The Pong console offers all kinds of unnecessary features like “single play,” small bat size (making it virtually impossible to play the game) and 20-degree-angle ball bouncing, turning the game into the dullest thing on TV ever. The great thing of simplifying complicated stuff is that it forces you to make decisions; what do you really want? In my case, I like “Football” (or “Hockey” on other Pong consoles), normal-speed ball, 40 degrees ball angle, normal-sized bats.
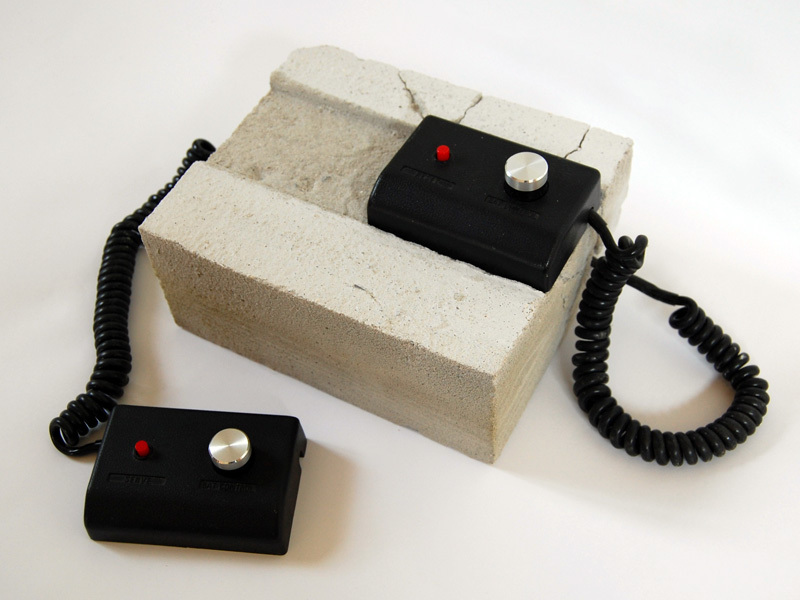
Extend controller wiring

I have to extend the wiring for the controllers. To be very sure that everything works (I’m not that good at soldering), I attach the controllers again, phew, it still works. Interesting that when you detach the controllers, the player bats also disappear from the screen.

Interfaces

In my quest for simplicity, I like to use the same connections for both the antenna (red) and power (black). I use normal “tulip” connectors.

I drilled two holes in the back of the box. The connectors fit in precisely so wet cement won’t get through.

Prepare for cement

I drilled a hole for the controllers on each side. I put in an aluminium tube that fits exactly in the hole. The wiring for the controllers goes through the tubes. I created extra space at the back (gaffer tape) of the circuit board so I can push the wiring back when I attach the controllers. I attached 3 screws on the sides of the package, making it float (cement needs to go underneath the package).

I would like the controllers to fit on top of the brick, so I put in a piece of wood that will leave a “gap” on top of the brick.

Cement!

Cement is terrible stuff; make sure you wear some kind of plastic gloves. I create rather wet cement, so it flows in all corners. While pouring, shake the model so the cement covers each corner and bubbles of air come out. And now the hardest part: wait… Wait some more… … and some more…

NOW PLAY!

To watch the video, click here.