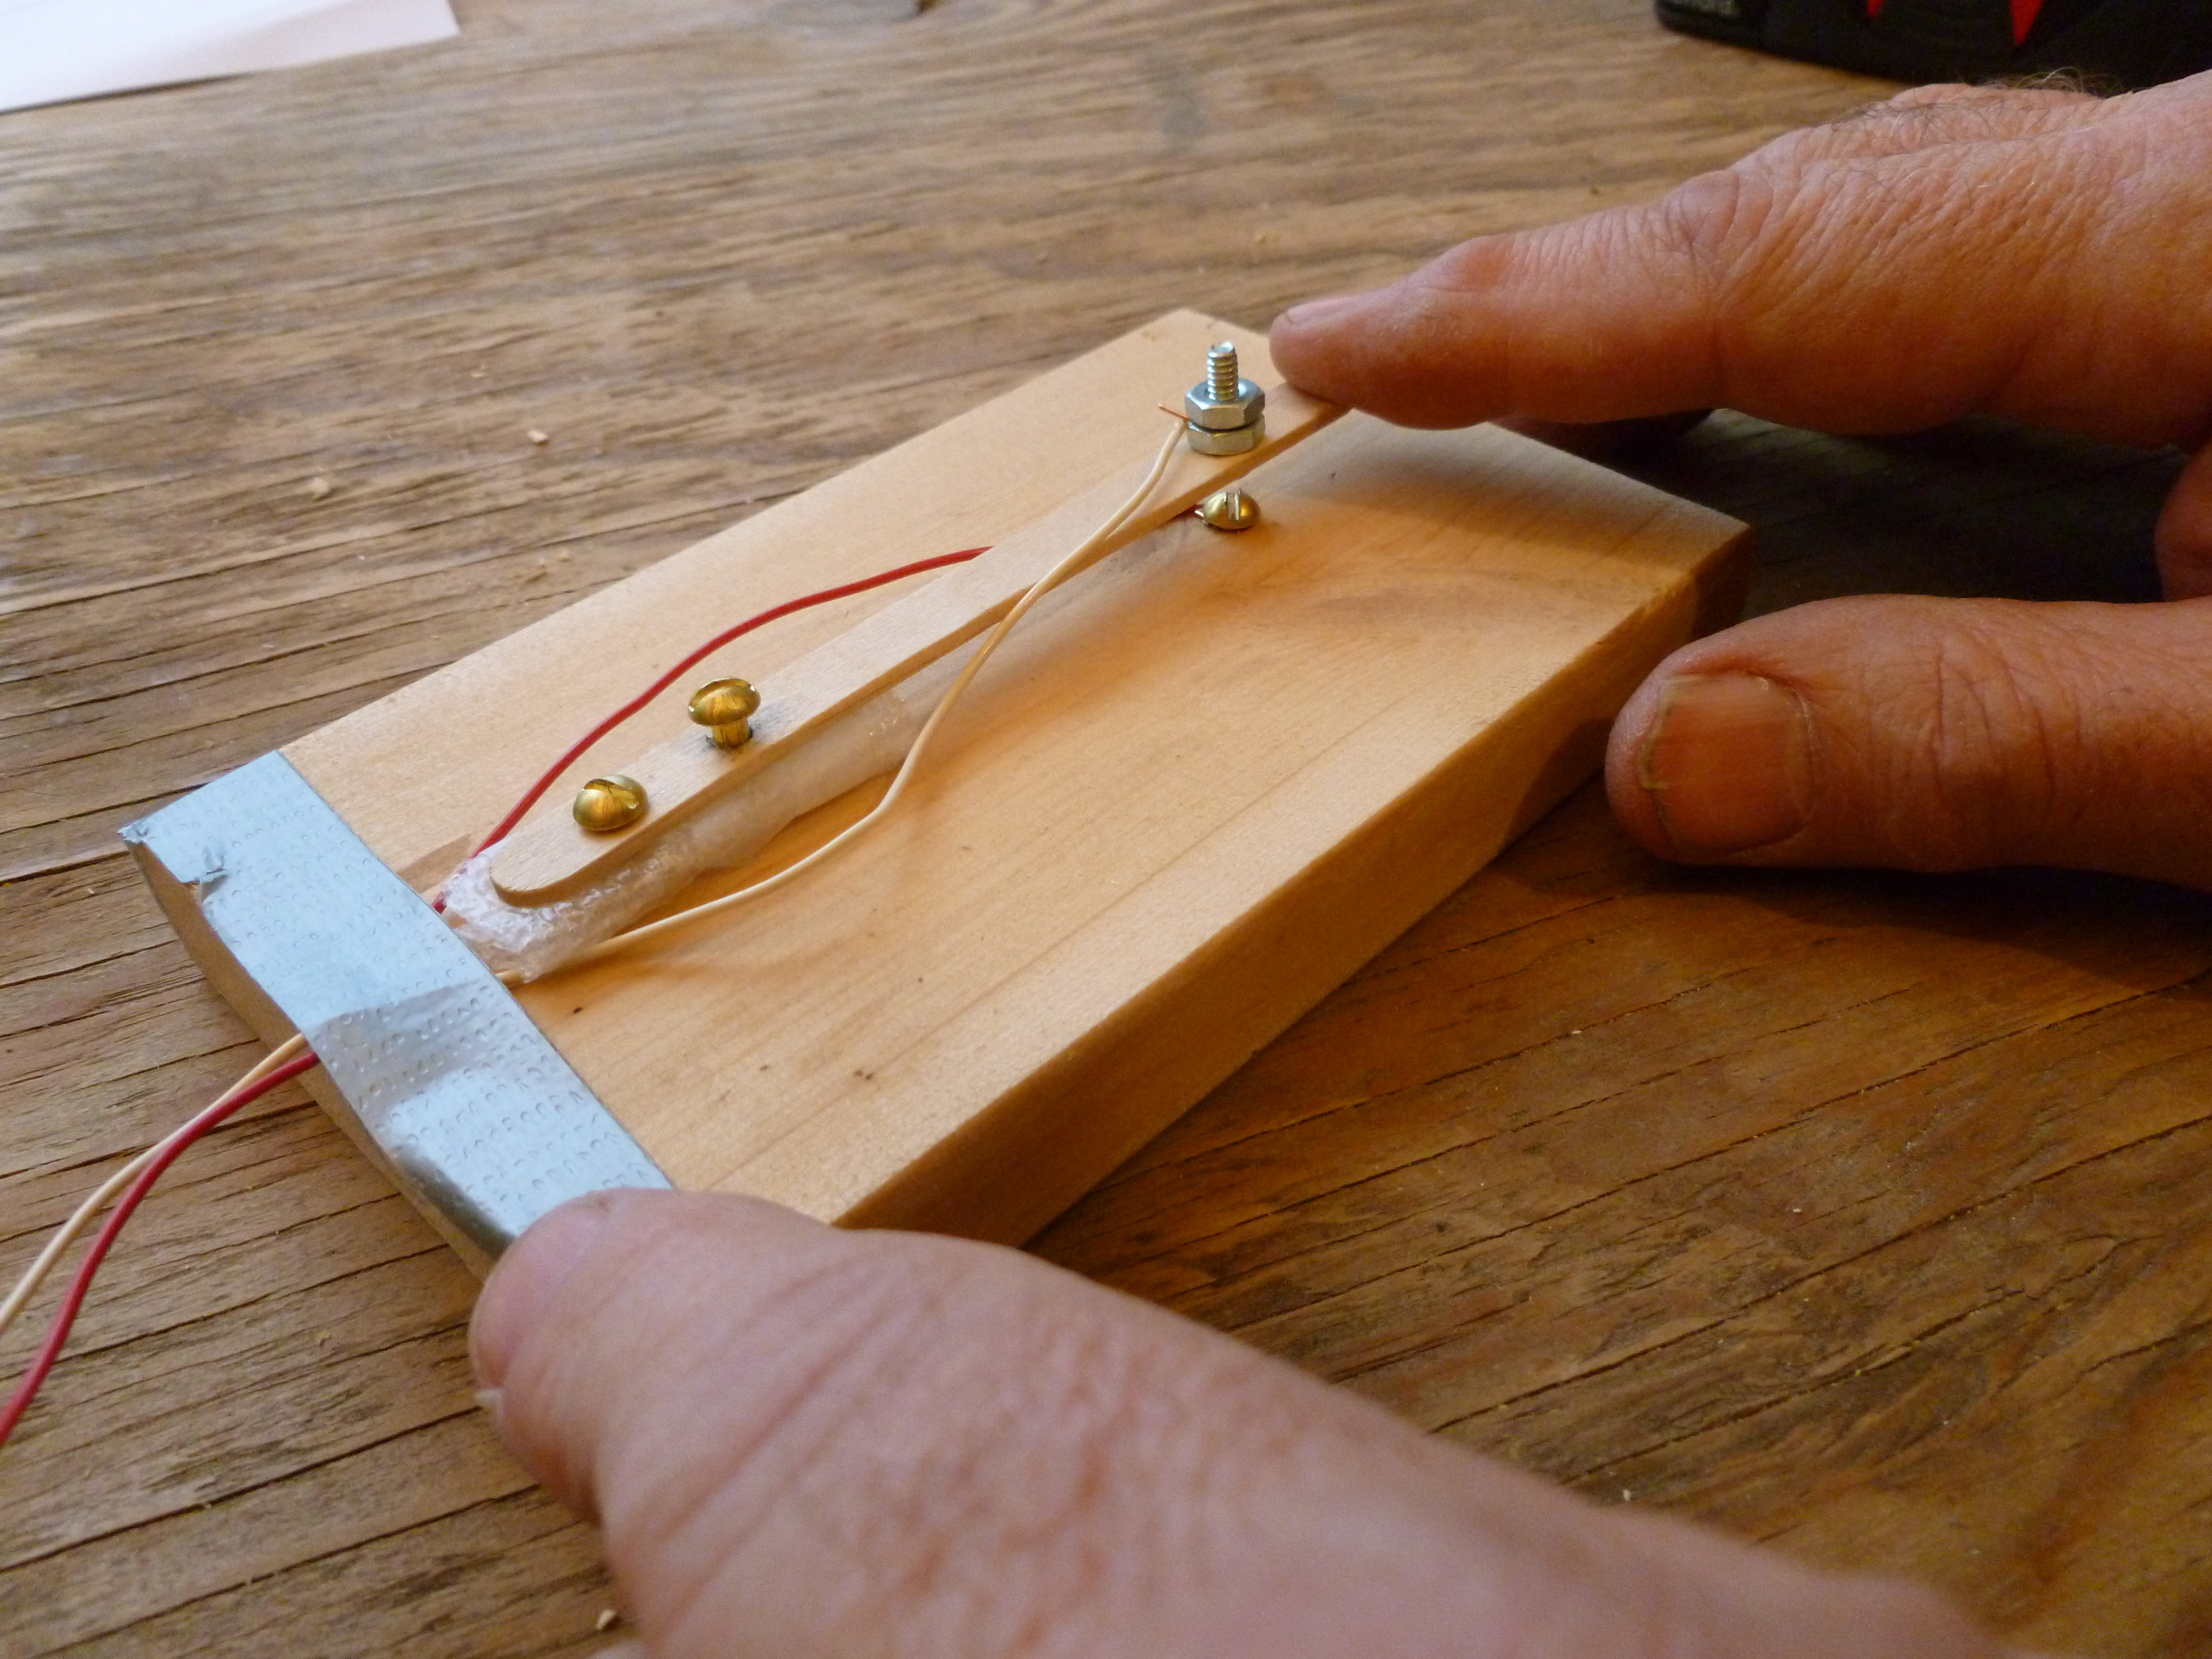
I have been Workshop Editor for both Boys’ Quest and Fun For Kidz magazine for over 15 years. One of my early projects was a Morse Code Telegraph. Of course this project needed a switch to send out the code. I came up with the Popsicle Stick switch since it could be easily made from a Popsicle Stick (a regular craft stick also works fine) and a couple of screws. This I thought would be great for kids to make themselves since in making it they would learn the basic principles of an electric switch. In addition to having a nice sound to its name, the switch worked out better than I hoped. I have used it in numerous other projects, including my Wireless Telegraph, Popsicle Stick Electronic Organ, Solar Powered Flashlight, Electric Buzzer, Reaction Timer Game, Game Timer and more.

Project Steps

Follow drawing and make marks on the Popsicle stick for the 1/8″ holes that you drill as described in Step 2.

Use a 1/8″ drill bit to drill the three holes at the place you marked with a pencil. See Step 1.

Hint: Don’t press hard with the drill or you might crack the stick. Take your time drilling.

Use the holes you drilled in the Popsicle stick as a template and use a pencil to make marks on the baseboard. In the next step you will drill pilot holes where these marks indicate.

Use a 1/16″ drill bit to drill pilot holes in the baseboard at the pencil marks you made in Step 3.

Start a 3/4″ #6 wood screw in the pilot hole. See photo.

Remove about an inch of insulation from one end of a wire.

Twist the bare end around the screw between its head and the base board.

Tighten the screw.

Stick the 1/2″ 6-32 machine screw in the hole where shown.

Twist on two 6-32 nuts.

Fold a small piece of foam packing material and keep in place with a bit of transparent tape.

Stick two 3/4″ #6 wood screws through the holes made in the Popsicle stick and press their tips through the foam as shown.

As shown, attach the Popsicle stick to the baseboard by screwing in the two wood screws into the baseboard, using the pilot holes you drilled earlier as a guide.

Remove an inch of an insulation from another wire and twist it around the 6-32 machine screw between the nuts.

Use long nosed pliers to tighten nuts.

Use a narrow strip of duct tape to keep the wires in place.

Conclusion

This is a simple project but is quite useful especially in any homemade electronic games. It is inexpensive and yet quite reliable AND you can always fix it yourself if something does go wrong!