IMG_0151
Photography by Mike Senese
pizza
Cover girl? No, cover pizza! Read articles from the magazine right here on Make:. Don’t have a subscription yet? Get one today.

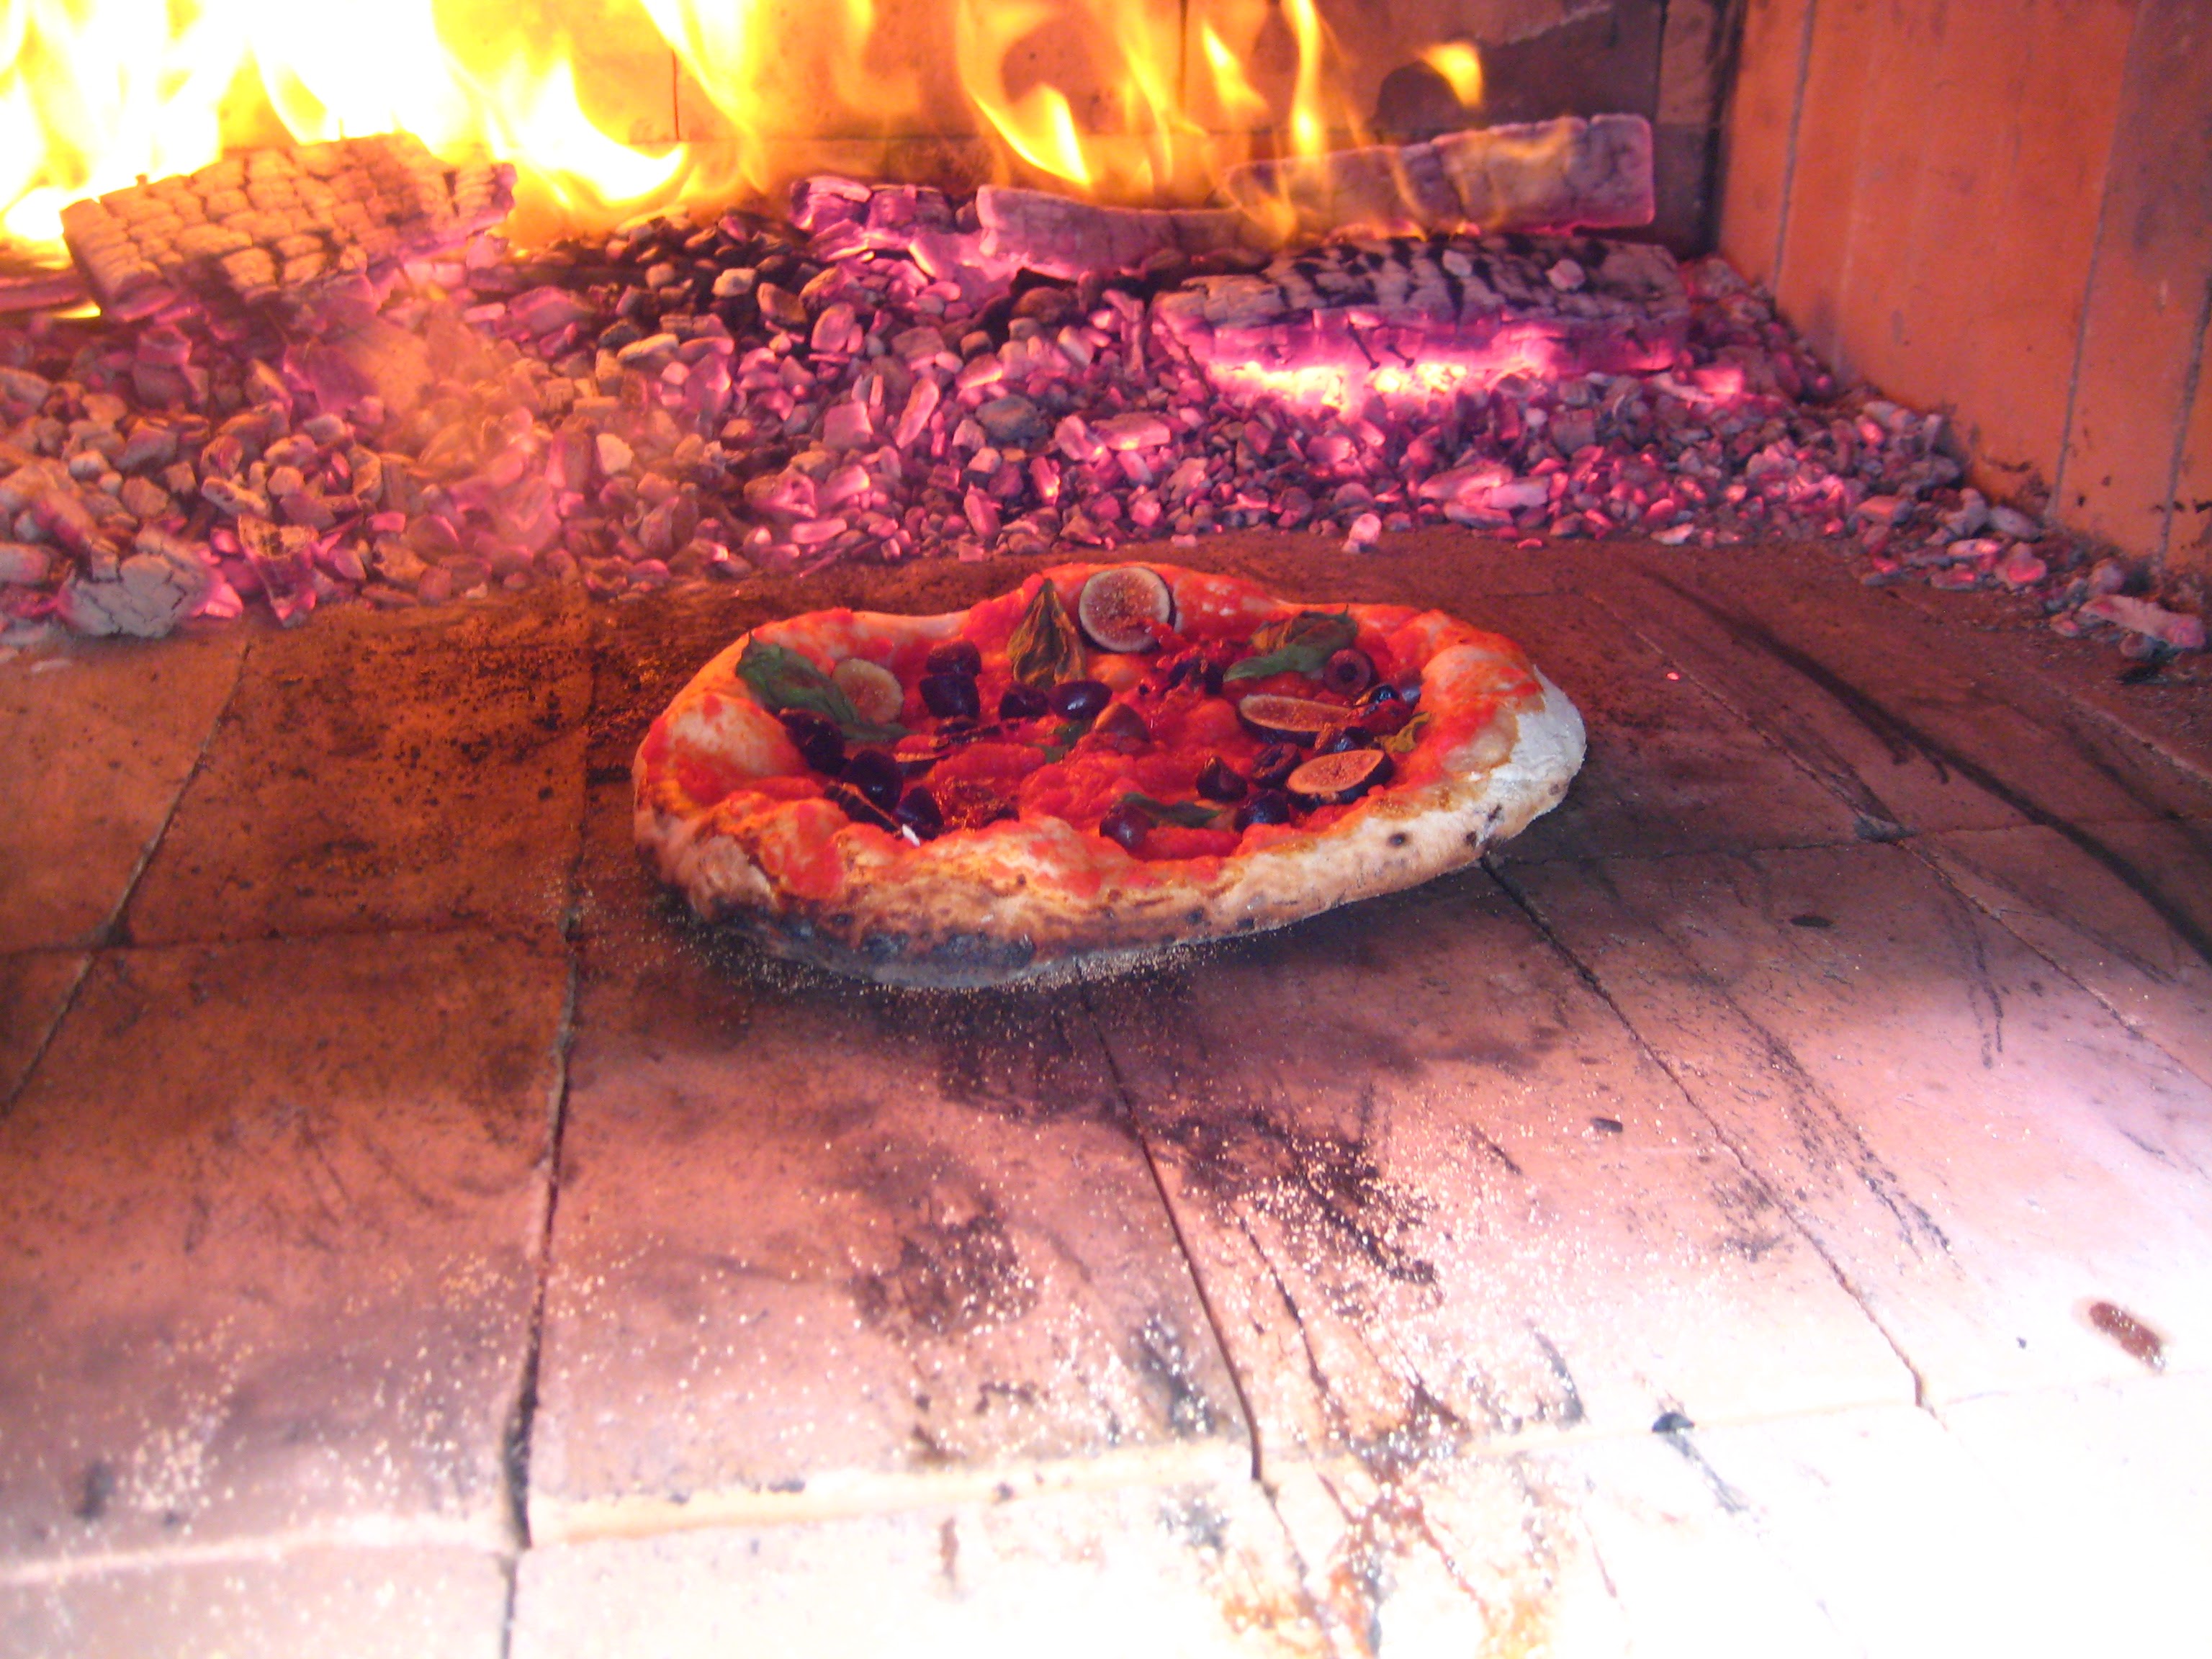
For the pizza aficionado, a wood-fired brick oven is the pinnacle. Nothing else cooks a pie the same way, with the 800°F–1,000°F temperatures needed to get that thin, crisp layer of smoky char covering a moist, airy crust. Unfortunately, these types of ovens are usually large, expensive, and complicated to build, leaving most of us to keep making dry, boring pizzas baked for 15 long minutes in our kitchen oven set at a disappointing 375°F.

Here’s a brick oven design that overcomes those hang-ups. It’s as simple as stacking blocks, and with a couple of helping hands, you can put this together, cook amazing pizzas, and tear it apart in an afternoon. Brick sizes vary, so modify the layout as needed. I first built one during a weekend course led by Michael O’Malley at Machine Project in Los Angeles, and have since helped inspire others to make their own.

I built this oven a couple weeks ago. It's still in my back yard, getting regular use.
I built this oven a couple weeks ago. It’s still in my back yard, getting regular use.
Illustration by Rob Nance
Illustration by Ron Nance

Project Steps

1. PICK A LOCATION

The weight of the bricks is considerable, so make sure you start with a strong workbench on a firm, level surface. We used a metal welding table — look for used ones on Craigslist — but you can also create a sturdy 4′ by 4′ platform of cinder block topped with 2 half-sheets of ¾” plywood.

2. LAY THE PAVERS AND FIREBRICK FLOOR

Make a 4′ by 4′ insulating base with the cement pavers on top of your platform. Centered on top of that, make a surface of firebrick, laid flat, roughly 10 bricks wide and 5 bricks deep. Keep the bricks tight together — this is the floor of the oven.

CAUTION: Don’t use standard red bricks, as they may shatter explosively when heated to high temperatures. Use Firebrick.

3. STACK THE WALLS

Begin with the back wall, 4½ bricks wide by 5 bricks tall, laid flat. You’ll need to split some bricks in half; do so by scoring a line and hitting with a chisel and hammer, or use a masonry blade on a circular saw. Save the chips. Offset each layer by half a brick, so the seams sit in the middle of the bricks below. Center 5 more on top, in two levels.

To build the sides, first drill two 3/8″ holes in each 48″ angle iron, 1″ from both ends, in one leg of the angle. Lay 2 angle irons front-to-back on the platform, facing inward so that bricks can sit in the inside corner. Slot threaded rods through the drilled holes and tighten a nut onto each end.

Build the side walls by standing 13 bricks on end inside each angle iron, starting from the back wall. If already mixed, run a line of clay mix (Step 6) on the inside bottom edges. Cap each side with 3 bricks laid flat, then place the remaining 48″ angle irons on top, facing down. Add threaded rods and nuts.

4. MAKE THE ARCH

To make the roof, build an arch-shaped jig of plywood screwed to two 2×4 legs. The arch length should be just shorter than the distance between the side walls — mine is about 32¼”. The height should be about 5¼” tall, with a radius of about 27″. Cut 2 matching pieces with a jigsaw, then affix to the 2×4s so that the legs extend about 9¼” below the plywood — you want this jig to stand a bit taller than your first row of standing bricks (Figure A).

IMG_0090
Fig A

To assemble the arch, place the jig against the back wall, on top of the ¼” risers. Stand the bricks on edge, pointing forward (Figure B). Keep an even space between the bricks by filling the gaps with brick shards. Remove the jig by sliding out the risers, then shimmying the legs forward to tip it backward. Repeat 2 more times to get an arched ceiling 3 bricks deep.

Fig B
Fig B

5. BUILD THE ENTRANCE AND CHIMNEY

On each side of the front of the oven, stack 2 layers of 3 bricks on edge, running front to back. These will frame the oven’s mouth. Bridge the top with a 24″ angle iron facing up and in. Place 3½ bricks across the front of it, on edge. Add 4 more on either side extending back to the arch.

Place the last 24″ angle iron against the arch to bridge the gap, facing up and out. Center the clay flue insert over the gap, with its edges resting on the bricks and the angle iron (Figure C). Cap any gaps with bricks.

Fig C
Fig C

6. COVER IN CLAY

Smoke and heat will escape this oven unless you seal it. Mix the refractory clay with water and sand and generously coat all outside brick seams and gaps — go heavy on the arch. It won’t be pretty, but you won’t mind when your belly is full of amazing wood-fired pizza. Your oven is now ready to be fired up — no curing needed (Figure D).

IMG_0116

To disassemble, let the oven cool down at least a couple hours before dismantling. Then spray the clay off the top and sides with a hose, and simply unstack the bricks. Store in a convenient spot, or pack into a trailer for mobile deployment. Or replace the refractory clay with a hardening mortar and make this a permanent fixture in your yard. Buon appetito!

IMG_0137