


The sector, also known as the compass of proportion, is a fun and easy-to-use calculating device that uses the power of geometry to perform a variety of useful math jobs. Although at first glance a sector might seem as quaint and old-school as a slide rule, it can do at least a few maker-style jobs better, faster, and easier than any modern electronic calculator. Once you get the hang of using a sector, you’ll find it a valuable tool in woodworking, drafting, surveying, and even doing mathematical calculations on the fly.

So, what is a sector? The one described here is a pair of rectangular legs, each about 10 inches long, connected by a rotating joint (Figure A ).
).
The numerical scales are inscribed on the legs. My sector is made of plastic, but originally sectors were made from wood, brass, or ivory.

Right up to the late 19th century, using a sector was the way to lay out woodworking or other fabrication projects. It enabled Renaissance scientists to make complex computations and it showed early cannoneers how to aim their guns. So, when you make and use a sector you are figuratively walking in the footsteps of millions of makers of the past.

Usually, the credit for its invention goes to the great 15th-century Italian scientist Galileo Galilei, although some historians of science give invention credit to Englishman Thomas Hood, a Galileo contemporary. In any event, it was certainly Galileo who made the sector popular. Almost immediately after it was invented, Galileo realized that this new gizmo was an extremely useful instrument, and he started teaching others how it worked. Galileo made quite a bit of money by writing and selling a book that explained how to use a sector as an arithmetical tool. For the next 500 years, the sector was one of the most commonly used mathematical instruments in Western civilization.
Its secret lay in the rules of geometry, specifically, in the simple fact that similar triangles have similar length ratios between their various sides. In Figure B , the two triangles ABE and ACD are similar (their angles are congruent), so by definition, the ratio of the length of the sides AB and AC to the ratio of the length of the bases BE and CD is identical. Written mathematically, the ratio of AB / BE = AC / CD.

This geometric truth means you can multiply, divide, find ratios, scale up, scale down, and so on, just by building or measuring similar triangles. And that’s how the sector works; it’s basically just a quick and easy way to build and scale similar triangles.
Making a sector is an easy and inexpensive project and something that parents and children can make together and have fun using even without a specific goal in mind. But don’t let its relative simplicity fool you; the sector is useful to woodworkers, artists, metal workers, and others in a bunch of different ways.
So, let’s get started. First, we’ll fabricate the frame of the sector instrument. Then we’ll make the all-important scales that are written, printed, or inscribed on the frame pieces. Finally, we’ll use the sector to do different types of important mathematical jobs.
 . You can use thin plywood, solid wood, plastic, or any light, non-flexible sheet stock that you can cut into the shape shown. I used 1/8"-thick HDPE plastic and it worked great.
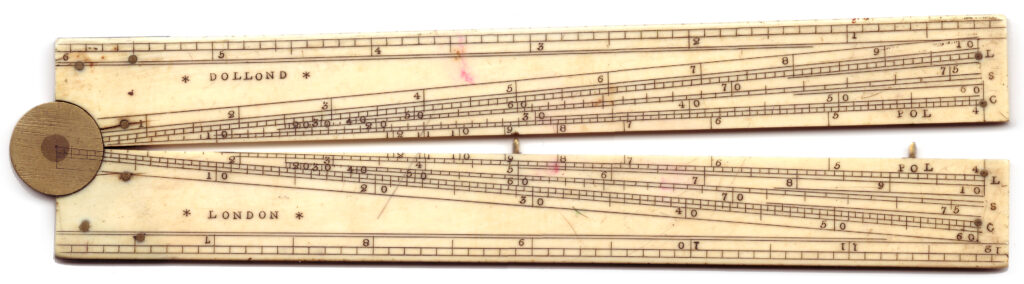
 shows, the sectors made by London instrument makers in the 18th century were chock full of scales or “lines.” Many of them were rather specific in what they could do. For instance, the Line of Quadrature allowed engineers to calculate polygons of different side lengths that were equivalent in area. The Line of Inscribed Bodies was used to determine the length of sides of different polygons that were able to fit inside a circle of given diameter. There was even a Line of Metals to calculate the diameter of spheres made of different metals when all the spheres had the same weight.
 shows the layout of the scales we will use on the frame pieces.
 ).
).
 G.
G.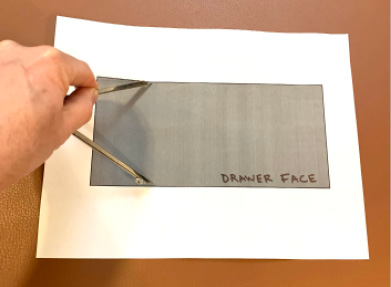
 ).
).
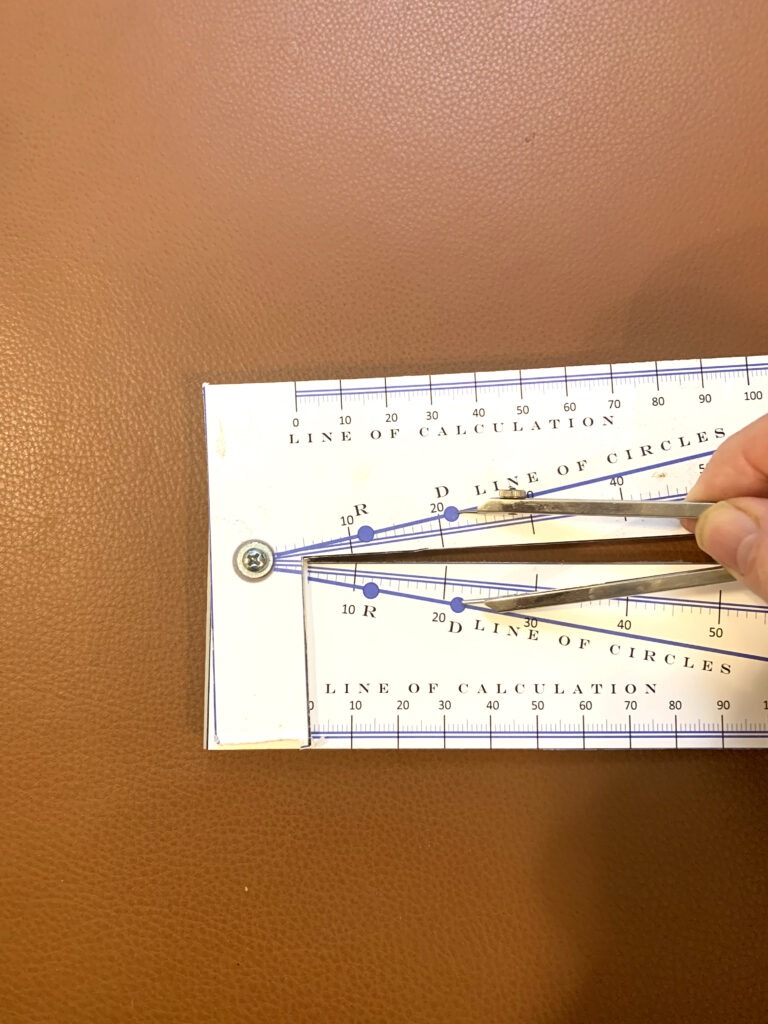
 ). Measure the distance between the divider tips. That distance is exactly 2/7ths of the total distance from the top of the drawer face to the bottom (Figure J
 ).
).
 ).
).
 L).
L).

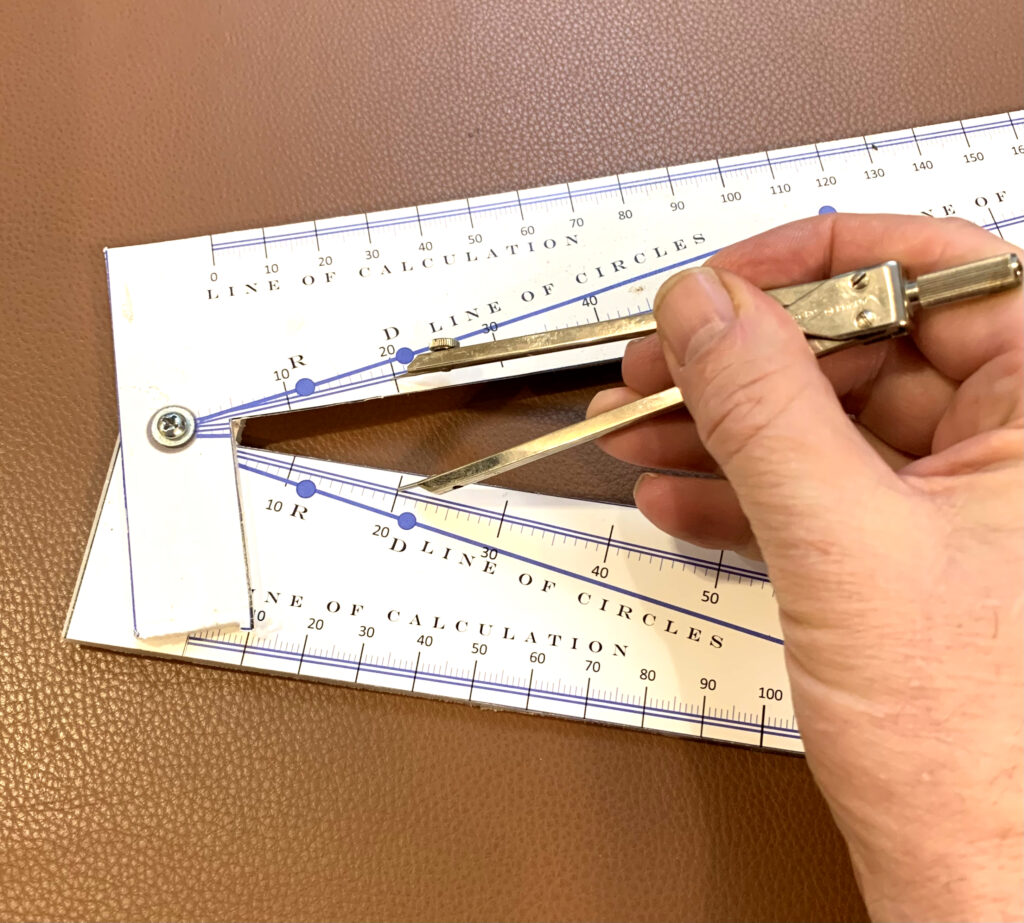
 ). Move the divider to the Line of Calculation. Place one tip on the zero point and the other tip on the line, where it points to the answer to the problem, or 18.3 (Figure
  N).
N).
 O).
O).
 ).
).
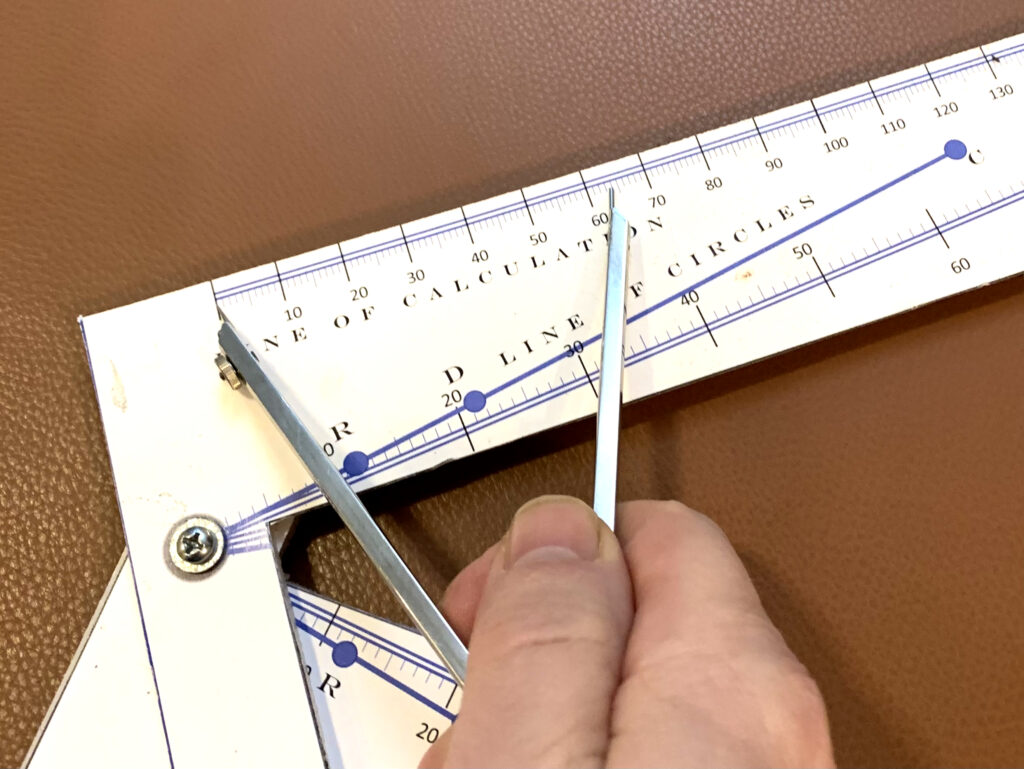
 ). Place one tip of the divider on the zero point of the Line of Calculation and read the answer from the spot where the other tip touches the Line of Calculation (Figure R
 ) — in this case, about 3 inches.


