Salt-Pepper1H1A7150

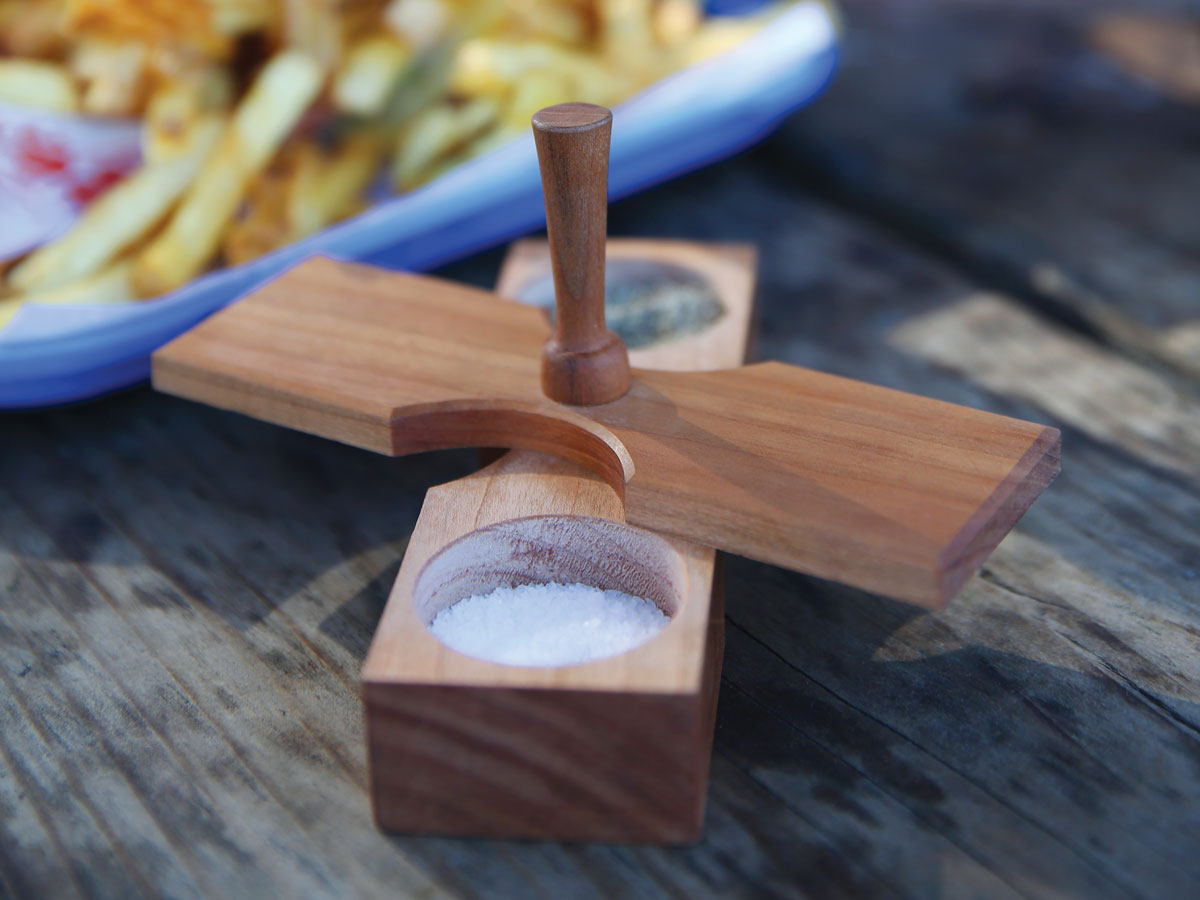
This salt and pepper well is something my girlfriend spotted in an old magazine. The setting was a rustic country picnic, with nice wine glasses and plates and of course beautiful food. In the midst of it all was this old and well-worn well. It struck me as so much more elegant than the usual cardboard shakers you find in a picnic basket — so I decided to make her one.

It’s a simple woodworking project with a twist — you’ll use a drill press as a lathe, to shape the little handle that goes on top.

Project Steps

Make the center hole.

As with most of my projects, the first step is to find center. On the 2″ face of the block, measure and mark 1″ in from each side and 3″ in from each end. You are making the point that the cover will pivot on, so take the time to make sure you’ve found dead center.

Using the drill press and a 1/4″ bit, drill a hole on this center point about 1″ deep.

Cut the coves.

You can do this in different ways, but I like the smooth round and the minimal cleanup that a Forstner bit can give. Since I’m using a 1¾” Forstner bit for the salt and pepper wells, I’ll use the same to cut the coves. Because drilling a half-round would remove too much of the block, I drill these holes off-center, using a sacrificial piece of 2×4 to act as the fence and to stabilize the drill bit while

it cuts.

If you don’t have some kind of wooden top on your drill press table, now would be the time to add one. I use a piece of MDF held on with double-stick tape.

Using a square, make a reference line near the center of the 2×4, then make a mark 3/8″ in from the edge. This is the center point for the 1-3/4″ bit. Center the 2×4 beneath the bit and clamp it in place. Now align the centerline of the block to that on the 2×4 and clamp it in place. Smoothly drill through to the table. Repeat on the other side.

Cut the lid.

Mark a line 5/16″ from the top, all the way around the block. Using a handsaw, cut the lid piece away.

Lightly mark the top of the lid, to help you orient it during final assembly. Clean up the saw marks with sandpaper or, like I did, with a plane.

Drill the wells.

On the cut face of what is now the bottom piece, make 2 marks centered 1-1/8″ from either end and drill the two 1-3/4″ well holes about 7/8″ deep.

Use sandpaper to soften the edges of the holes.

Make the handle blank.

The handle is made from 1/2″ dowel, with its bottom portion narrowed down to 1/4″. Because this portion acts as an axle and holds the whole project together, it’s important that it be a fairly accurate 1/4″. However, I’ve found accuracy to not be one of the features of my lathing method, so I like to insert a 1/4″ dowel into the end of the 1/2″ one. Here’s how to center it:

Clamp the 2×4 to the drill press and drill a 1/2″ hole all the way through. Insert the 1/2″ dowel. It should be a good fit with little or no wobble. (If it wobbles, give the dowel an even wrap of tape.)

Chuck up the 1/4″ bit, and drill 1/2″ to 3/4″ into the end of the dowel.

Set up the “lathe.”

Whenever I need a small turned item, I resort to tricking my drill press into thinking it’s a lathe. This method is slower — you abrade the material using sandpaper or files instead of shaving it away with chisels — but with patience you can get good results. Here’s how I do it, using a common top guide bearing from a router bit.

Choose a router bearing. The bottom of my workpiece has a 1/4″ diameter, so I need a bearing that fits a 1/4″ shaft.

Mount the bearing. Clamp a scrap of 2×4 to your drill press table and drill a hole to fit your bearing, about 1/4″ deep. (I prefer a Forstner bit, but a twist bit is fine.) Then drill a clearance hole 1/16″ wider than your shaft width (in this case 5/16″) through the center of the first hole, all the way through the 2×4. Insert the bearing into the hole. It should fit snugly; if it’s loose, give it a wrap of tape.

Mount the workpiece in the drill press. Tighten the chuck, but not enough to crush the wood. Lower the chuck so the end of the workpiece goes through the bearing, then use the depth stop on the press to lock it in place. Turn on the drill press. Your workpiece should spin smoothly.

Turn and shape your workpiece. For initial shaping, I use either a file or an aggressive-grit sandpaper (60 or 80) wrapped around a dowel. Take your time, stay focused, and avoid getting your fingers or the tip of the tool too close, as this can cause it to kick. Pressing too hard will only clog your file or, worse, throw the dowel off center.

Once you’ve worked the piece down to shape, fold a strip of finer-grit paper (120–220) and smooth the surface.

Turn the handle.

Cut off the 1/4″ dowel 1″ below the shoulder. Mark the 1/2″ dowel: You want the handle to be about 2″ long, so make a reference mark there to indicate the top, and another at 1/4″ to indicate where to start the handle’s little base curve.

Chuck the 1/2″ dowel in the drill press. Make sure everything is locked down, then turn on the drill press and turn the handle as described in the Skill Builder, cutting the basic shape with rough sandpaper or a file, then smoothing the surface with finer-grit paper.

Stop the drill press on occasion to check your progress. When you’re happy with it, remove the handle and cut it to length.

Assemble it.

Assembly is straightforward except for one important trick. To prevent the lid from getting glued to the base or the axle, use a small brush to apply paste wax to the upper 5/16″ of the 1/4″ dowel and to the area surrounding the hole on both the lid and the base. Just be careful not to get wax on the end of the dowel or in the center hole on the base, because it will prevent the glue from bonding. If you don’t have paste wax, you can use candle wax or even wax paper.

Using a toothpick or a splinter of wood, apply a small amount of glue to the inside of the hole in the base. Orient the lid the same way it was before you cut it, then press the 3 parts together (Figure 8b). Give the lid a couple of turns to make sure it’s moving smoothly, and then let it dry. Giving it a turn every 20 minutes or so for the next hour isn’t a bad idea.

Finish it.

When the glue has set, let the sanding begin! Soften the corners and smooth all the exterior faces. I like to chamfer the top with a knife.

For an exterior finish, I like paste wax or butcher block oil. But avoid getting any on the inside — it might give your salt and pepper an odd flavor or, worse, go rancid and make the well unusable.

You’re done. Prepare to picnic!

Conclusion

This project first appeared in MAKE Volume 37, page 70