

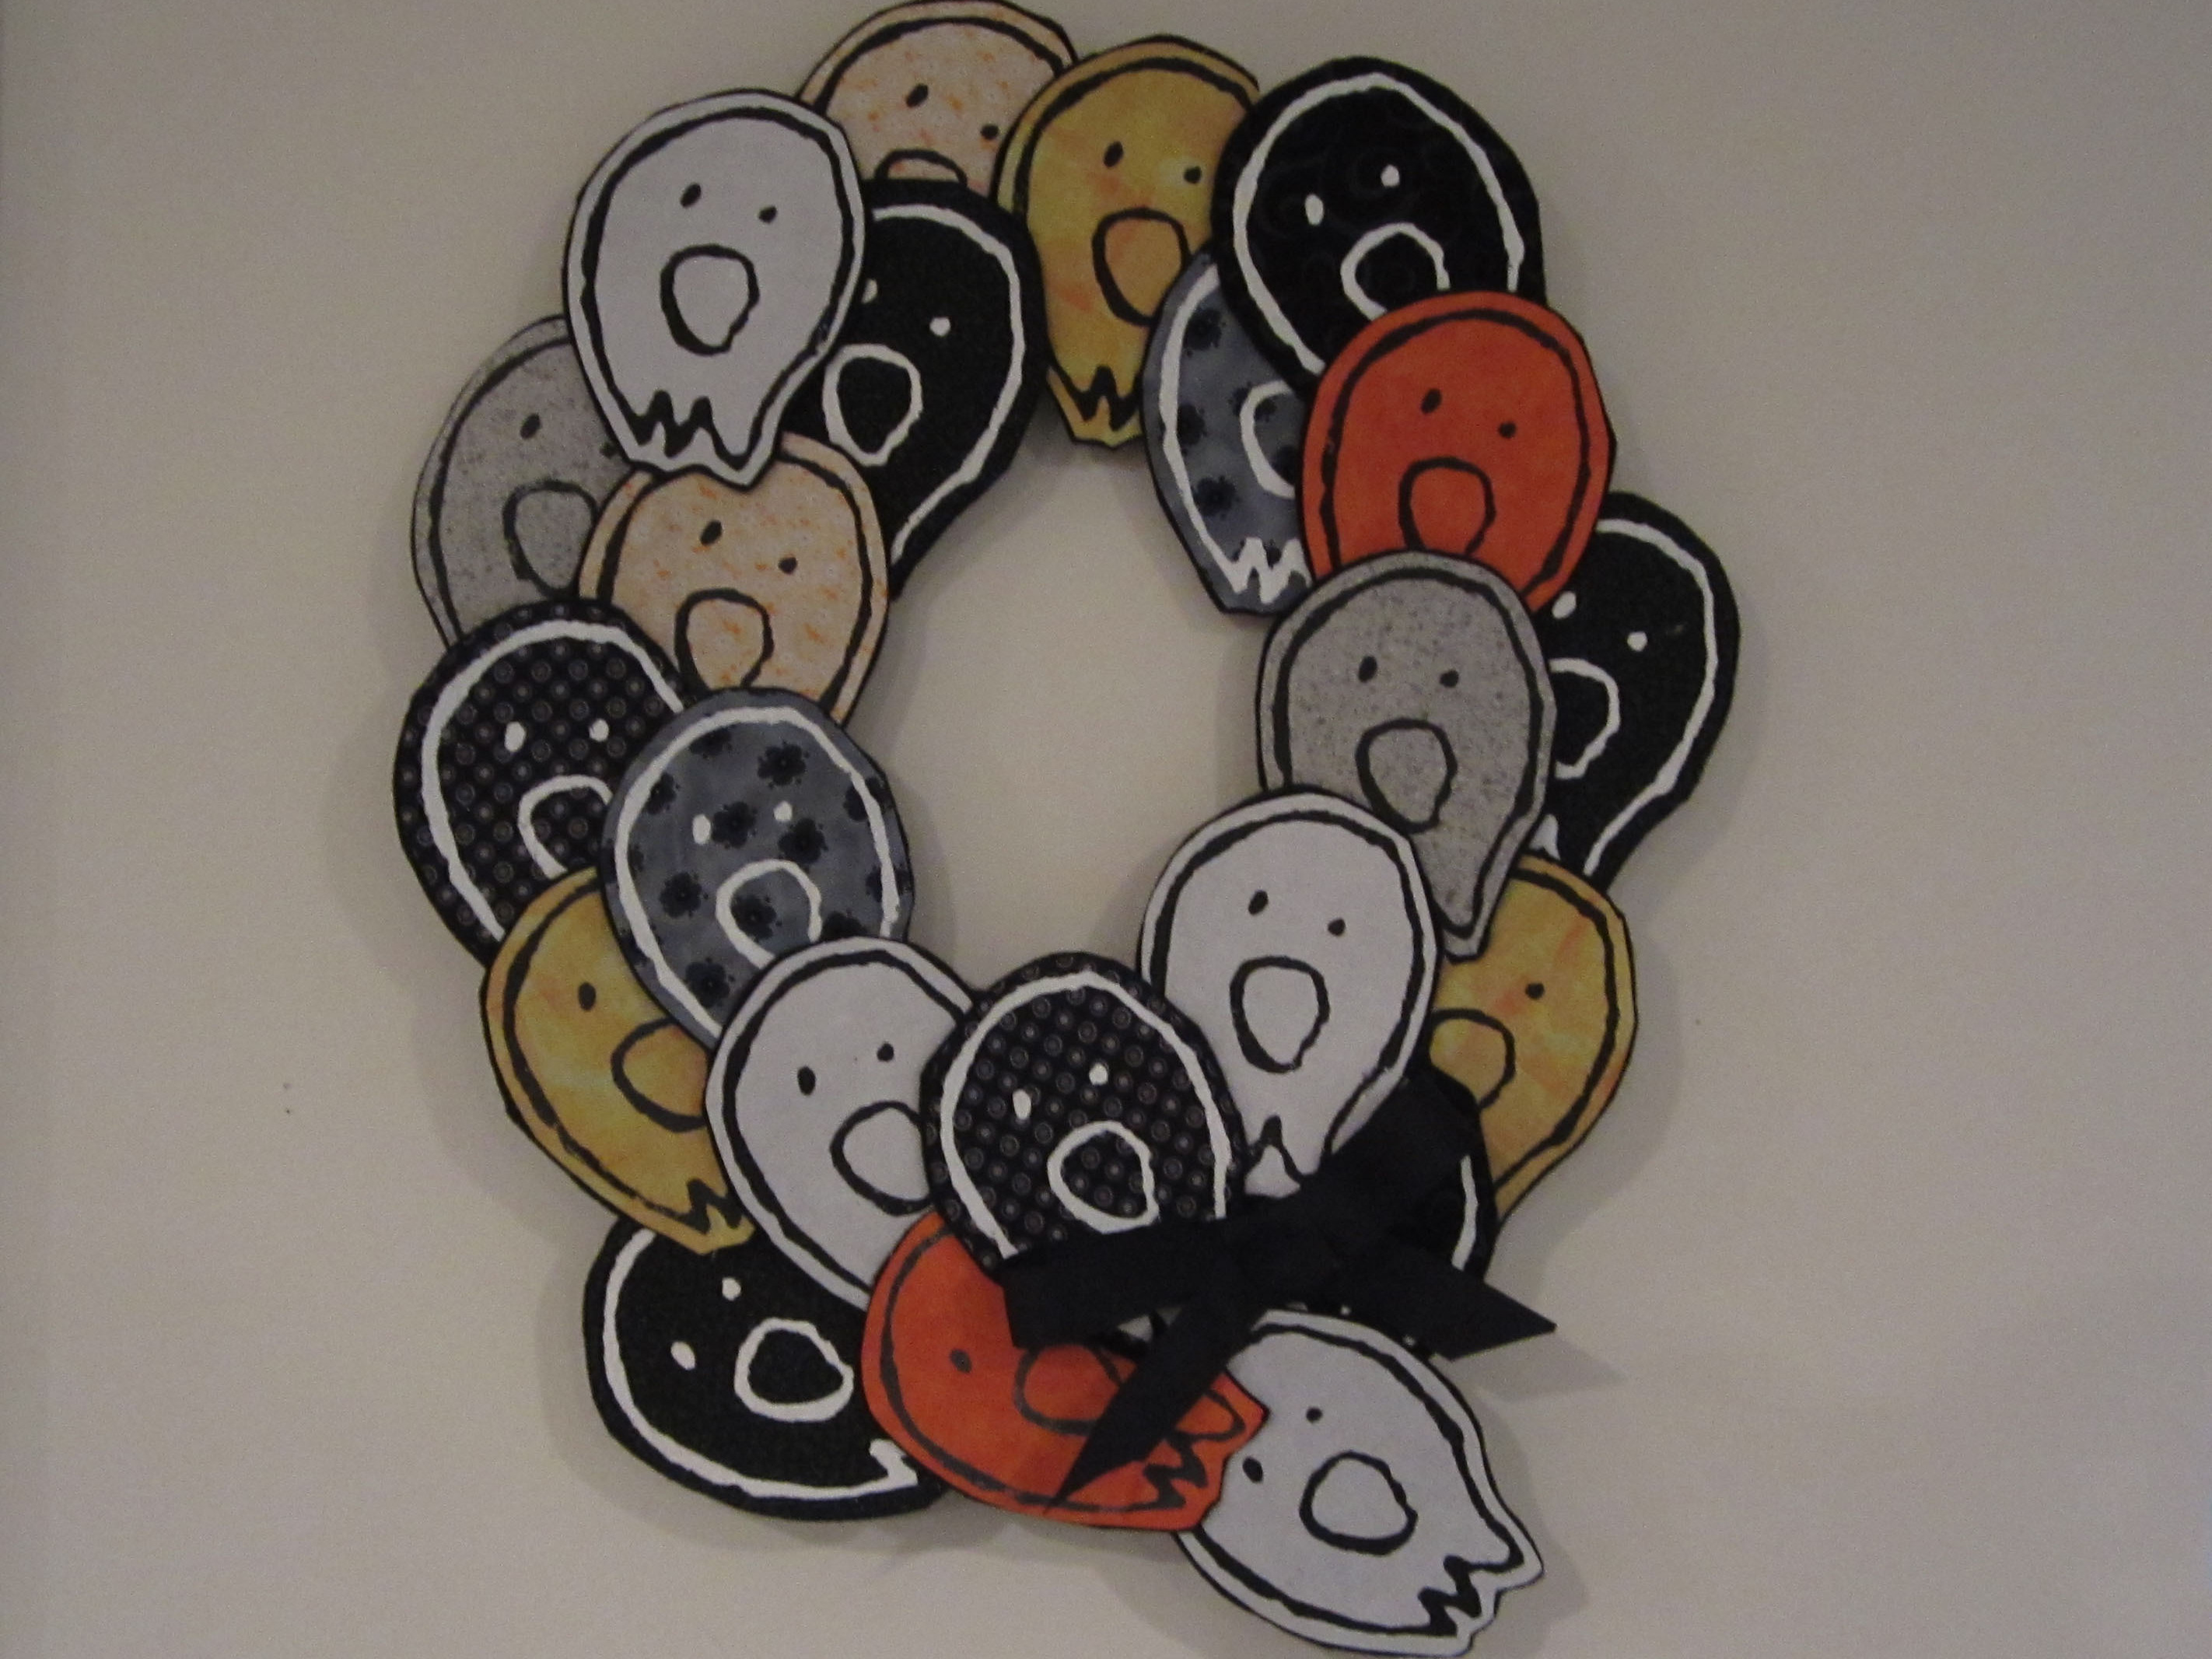
Who doesn’t like Halloween wreathes? The possibilities are fairly endless: ghosts, bats, spiders, eyeballs… In this guide I show you how I put together a wreath with my ghost design, and you are invited to make your own.
Projects from Make: Magazine
Screen-Printed Ghost Wreath
This is a wreath made out of two-dimensional ghosts printed on and cut from fabric. The fabric is stabilized with applique adhesive and mounted on felt. The ghosts are then glued to a wire wreath frame.

Create a design or ghost screen from which you can print. (I use the method described in this tutorial.)
Based on the size of your ghost (Mine are about 4 inches wide), cut out 20-25 pieces of fabric to print. I like an inch border on all sides of the design; that way, one doesn’t have to be too precise with the printing. (It helps to cut them out first, because then you can move the wet ones out of the way as you finish them and lessen the risk of sticking the elbow of your sweater into fabric paint, or getting paint on the wrong side of the screen that will transfer to every subsequent ghost.)
Print with fabric paint. Allow to dry.

Iron all the squares to fix the fabric paint, according to the paint’s directions.
Cut a square of double sided applique adhesive for each ghost – smaller than the fabric the ghost is printed on, larger than the design. Affix each ghost to some adhesive, by ironing.
Cut out the ghosts, leaving a small margin outside the line. (You don’t have to do this, but I like the effect myself.)
Removing the paper backing of the adhesive, iron them to some black felt. (I used a quarter of a yard of the 72″-wide stuff.)
Cut out ghosts, leaving a margin of felt around all edges (again, optional).
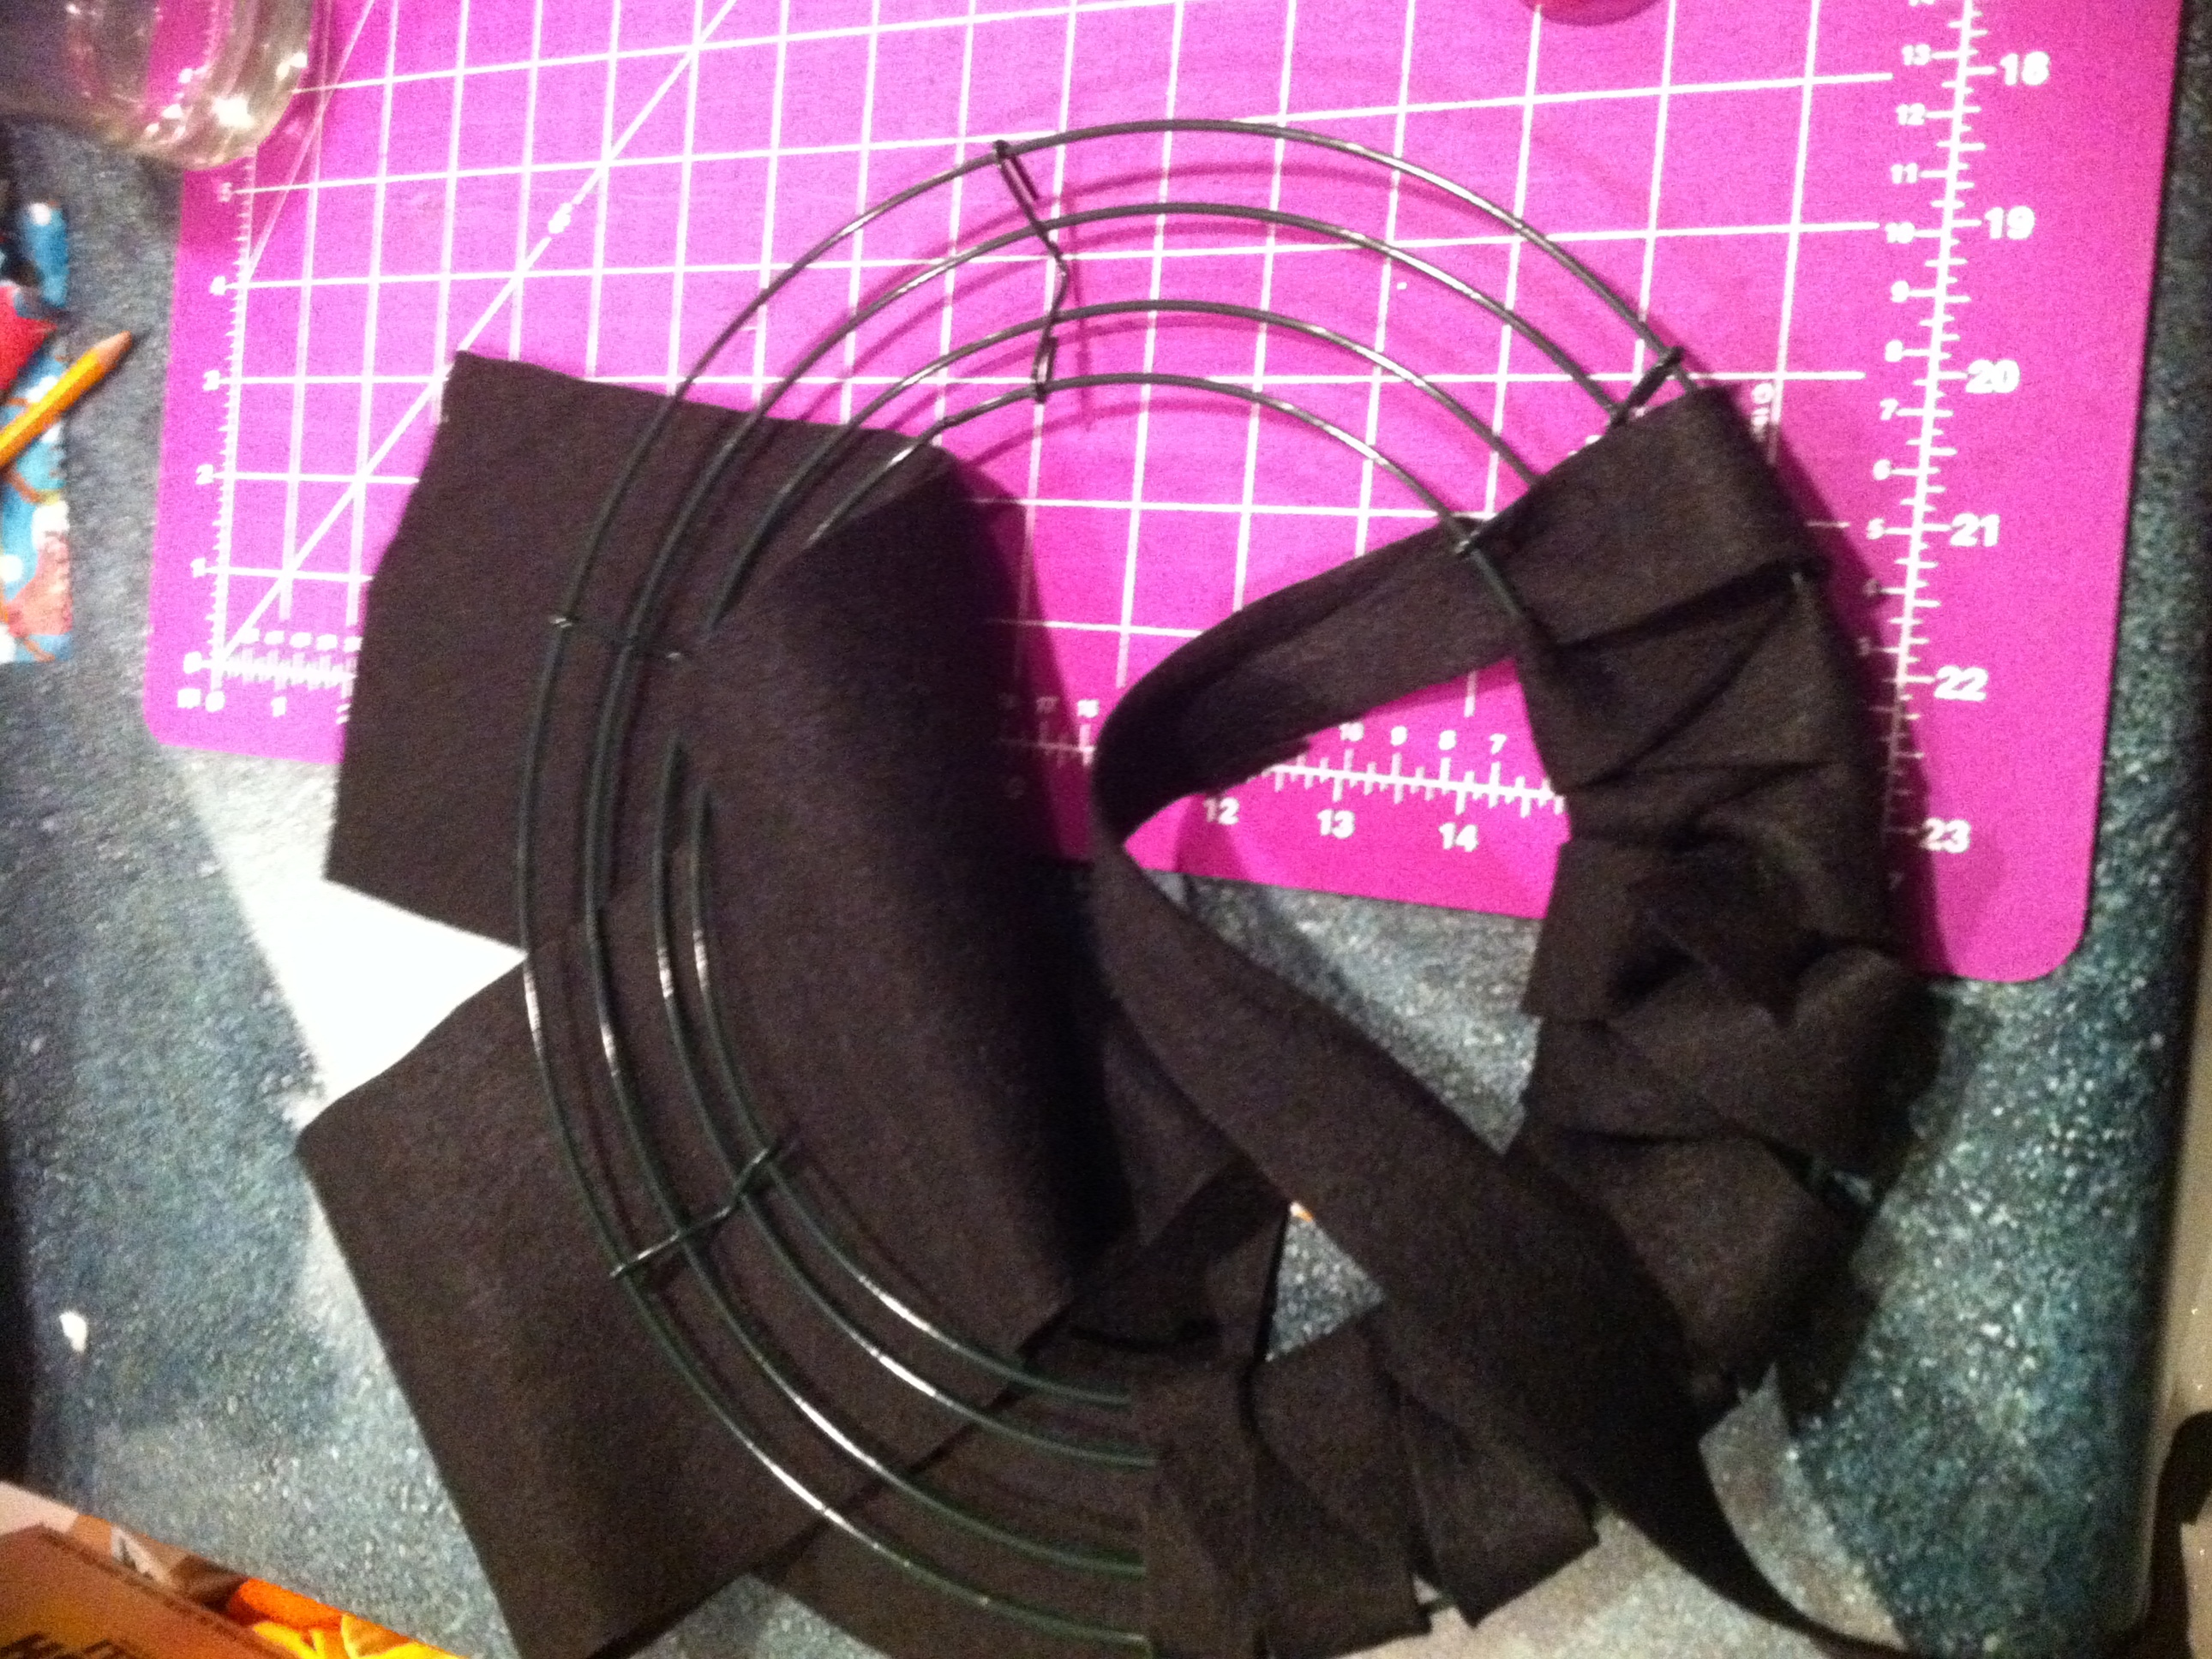
Now the wreath – I used a wire frame from the craft store, and wrapped it with strips of the leftover black felt.

Using your hot glue gun, attach ghosts to wreath.
Add a bow.


