

Lights out everyone! Or is it? We all like staying up past our bedtime, but if you’re trying not to wake everyone else in the house up, it’s handy to have your own torch to light your way to the fridge.


In this project we’re going to explore how switches work and make our own squishy switch that turns your torch light on when you apply pressure and off when you release. We’re also going to explore what happens when we link batteries in series and learn a new embroidery technique: the blanket stitch.
Tools
.. Sharp scissors
.. Needle-nose pliers
.. Two needles
.. Sewing pins
.. Tracing paper and a pencil
Materials
.. Two squares of felt
.. Two 3-mm white LEDs
.. Cotton thread
.. Conductive thread
.. Two 3V batteries
What Is a Switch?
A switch controls whether a circuit is open or closed. An open circuit allows electricity to flow around it, but a closed circuit does not. Switches give us a handy way to turn our projects on and off without having to put the battery in or take it out every time we want to turn it on or off.

There are many different types of switches that you can use in your projects, but they all fall under two broad categories: maintained switches that stay the way you left them in (e.g., a light that you switch on or off) and momentary switches that only work when you’re pressing on them (e.g., keys on a keyboard or the button of a doorbell).
In this project, we’re going to make a momentary switch that responds to pressure, and then we are going to use that switch to make a tiny torch that lights up when you squeeze it.
Preparing Your Materials

Make sure that you’ve got all your tools and materials ready. Then prepare your felt, using the printable template [link]. Cut out the two bigger squares with rounded edges first. Pin them to one of your squares of felt, and cut the shapes out. These big squares are the outside of the torch.
You’ll need to trace and cut out five of the smaller squares. You’ll see that they have an even smaller square in the center. Cut that out, and discard the center, leaving you with a frame. These frames will be the center of your pressure switch. The remaining two shapes will be your battery pack and an optional small circle to cover your pressure pad stitches on the front of your tiny torch.
Thread a needle with conductive thread, and tie it off, securing the knot with a dab of nail varnish.
Sewing Your Pressure Sensor

Take one of the larger squares of felt, and push your needle through the center. Make lots of stitches in a star shape covering a half inch area. This area of conductive thread will be the connection for your pressure sensor switch, so make sure that the coverage is good. Take a look at the picture to see the kind of coverage you should be aiming for. I made about 15 stitches in this example.
When you’ve finished your stitches in the center, push the needle through to the other side, and flip your felt over. Your stitches might look messy from this side, but that’s okay: we’ll cover them up later. This side is now the front of your project.
Now we’re going to sew the LEDs of your torch. We’re going to do this in a series circuit, like a daisy chain. When you wire up a component in series, you have to remember to add up their power requirements. We will talk more about this when we add the batteries for this project.
Sewing Your LEDs

From the center star, stitch outward at a right angle to one of the sides of the square until you’re about half an inch away from the edge. Now we’re going to add our first LED. For this project, I decided that it would look cooler to have the curly legs of the LED on display. Use needle-nose pliers to curl the legs of your ordinary LEDs into sewable LEDs. Put more of the positive leg in the “teeth” of the pliers before you start twisting it so that you can tell which leg is positive (the long leg) and which leg is negative (the short leg).
Once your LED is ready to sew, stitch the positive leg onto the felt. Tie off on the underside of the fabric, and secure the knot. Rethread your needle with conductive thread, and stitch the negative side of the LED to the felt. Take care that you do not overlap any positive and negative stitches or your LED will not light up. Once the negative leg is in place, sew down the side of the square, keeping about half an inch from the edge. When you get to half an inch from the bottom of the square, turn the corner and sew all the way along until you’re half an inch away from the next edge. Turn that corner with your stitches, and start sewing back up the side of the square. Just before you hit halfway, pause and prepare your second LED for sewing. Sew the positive side of the LED to the felt, and then tie off and secure the knot on the underside of your fabric. Rethread your needle with conductive thread, and stitch the positive side of the LED to the felt, making sure that you do not overlap any positive and negative stitches.
Sewing the Other Side of the Pressure Sensor

Sew your way from the negative side of the LED to half an inch from the top of the felt square. Then pause your sewing, leaving your needle on the top of the fabric, to prepare the other side of the torch. Take a sewing pin, and pin the top of the two squares together, just under half an inch away from the edge. Open the pinned squares out so that they form a rectangle, and start sewing again. Push your needle from the front square to the back square. Don’t pull this thread too tightly because you’ll need a little wiggle room when you add the pressure switch padding.
On the back part of your tiny torch, sew one or two stitches along the top edge of your square about half an inch from the edge. You will be sewing pretty close to your pin, but take care to sew only through a single layer of felt: these stitches should be on just the back square. When you’ve reached the center of the top side of the square, pause your sewing of this path.
Thread another needle with conductive thread, and push it through the felt in the center of the square so that the secured knot is on the outside. Flip your squares over, and make another set of stitches in a star shape covering a half-inch area. The two squares should look like a reflection of each other, as in the picture. Take your thread back to the other side of the material, tie it off, and secure the knot.
Sewing the Rest of the Battery Pack

Take the needle attached to the top of the square, and push it through one of the tabs on the battery pack bit of material. Sew a path to the center of the tabbed circle without going back through the square. Then make several stitches in a rough star shape. Tie off your conductive thread, and secure your knot.
Next, thread a needle with ordinary cotton thread, and secure the battery pack in place onto the back square. Sew one tab first and then in a semicircle around the bottom to the other tab. Sew the second tab in place, and test the size of the battery pack with two 3V batteries. If the pouch is too loose, sew a little up the sides until they are snug but the batteries are still removable. When you’re happy with your DIY battery pouch, tie off your thread.
Finishing Your Pressure Switch

Stack your five layers of the small frame-like squares so that all the holes are aligned. Flip your squares so that the inside stars are showing, and place your frames between the two squares.
Take a moment to trace the path from the center star on the top, around the LEDs, over to the other side, through the batteries, and out to the star on the inside of the back square. The frame-like squares in the middle of your torch are keeping the two stars from touching, meaning that your circuit is not complete. When you squeeze the torch in the center, the stars touch, completing the circuit and allowing electricity to flow through and light up your LEDs.
If you like, you can now add the remaining circle from the pattern to cover the stitches on the front. Just make sure that your cotton knots don’t prevent your conductive stars from making contact.
The next step is to sew up your project. You may wish to add your batteries at this point to test whether your circuit works. To see how to do this, skip ahead to the “Adding Your Batteries in Series” section. Make sure that you take your batteries out again before you sew everything up. When you sew the edges up, you can use a running stitch with small, tight stitches to keep everything in place. You can also use a technique called a blanket stitch.
How to Sew a Blanket Stitch

Pin all three edges of your torch to make it easier to sew, and double thread your needle with a long length of thread. I used two threads of embroidery thread about 40 inches long (20 inches long and four threads after doubling) in a contrasting color to my material. If blanket stitching is new to you, take some time to practice it on scrap material before starting to sew your torch.
Start your blanket stitch on the right-hand side of the unpinned edge, from the inside so that the first knot is hidden. Push your needle up to the top of your fabric about . inch from the edge. Pull the needle around to the back of the torch, and push it through to the same place you started, making a loop around the edge. Before you pull the loop closed, send your needle from right to left under the loop stitch you just made, and then pull the thread through so that it is secure but not too tight.
Next, poke your needle from back to front about half an inch to the left of your first stitch. As you pull that thread through, you’ll see another loop. Again, push your needle through the loop from right to left under the stitch you just made, and then pull the thread through. This is blanket stitch! Keep going counterclockwise around your torch, pulling out the pins when you get to them. To get the best results, keep the space between each stitch the same (about . inch), and do the same for each stitch distance away from the edge (about half an inch). If you’re finding blanket stitching tricky, search online for a video to help you with this technique.
Adding Your Batteries in Series

As we learned earlier, we can increase the amount of power in our circuit by linking batteries. In Chapter 10, we will learn how to link our batteries in parallel. For this project, we’re going to bump up our voltage by linking two 3V batteries together in series.
If you wire two batteries in series, you increase the voltage available. For example, linking two 3V batteries in series will give you 6V. This is too much for one LED, but we’ve sewn in two LEDs in series. This means that the power required by the LEDs is added together, so 6V is approximately right. To link two batteries in series, you need to link the negative end of one battery to the positive end of the other. In Chapter 7, we did this by daisy chaining two battery packs together. In this project, we’re simply going to stack two 3V batteries in the DIY battery pouch.
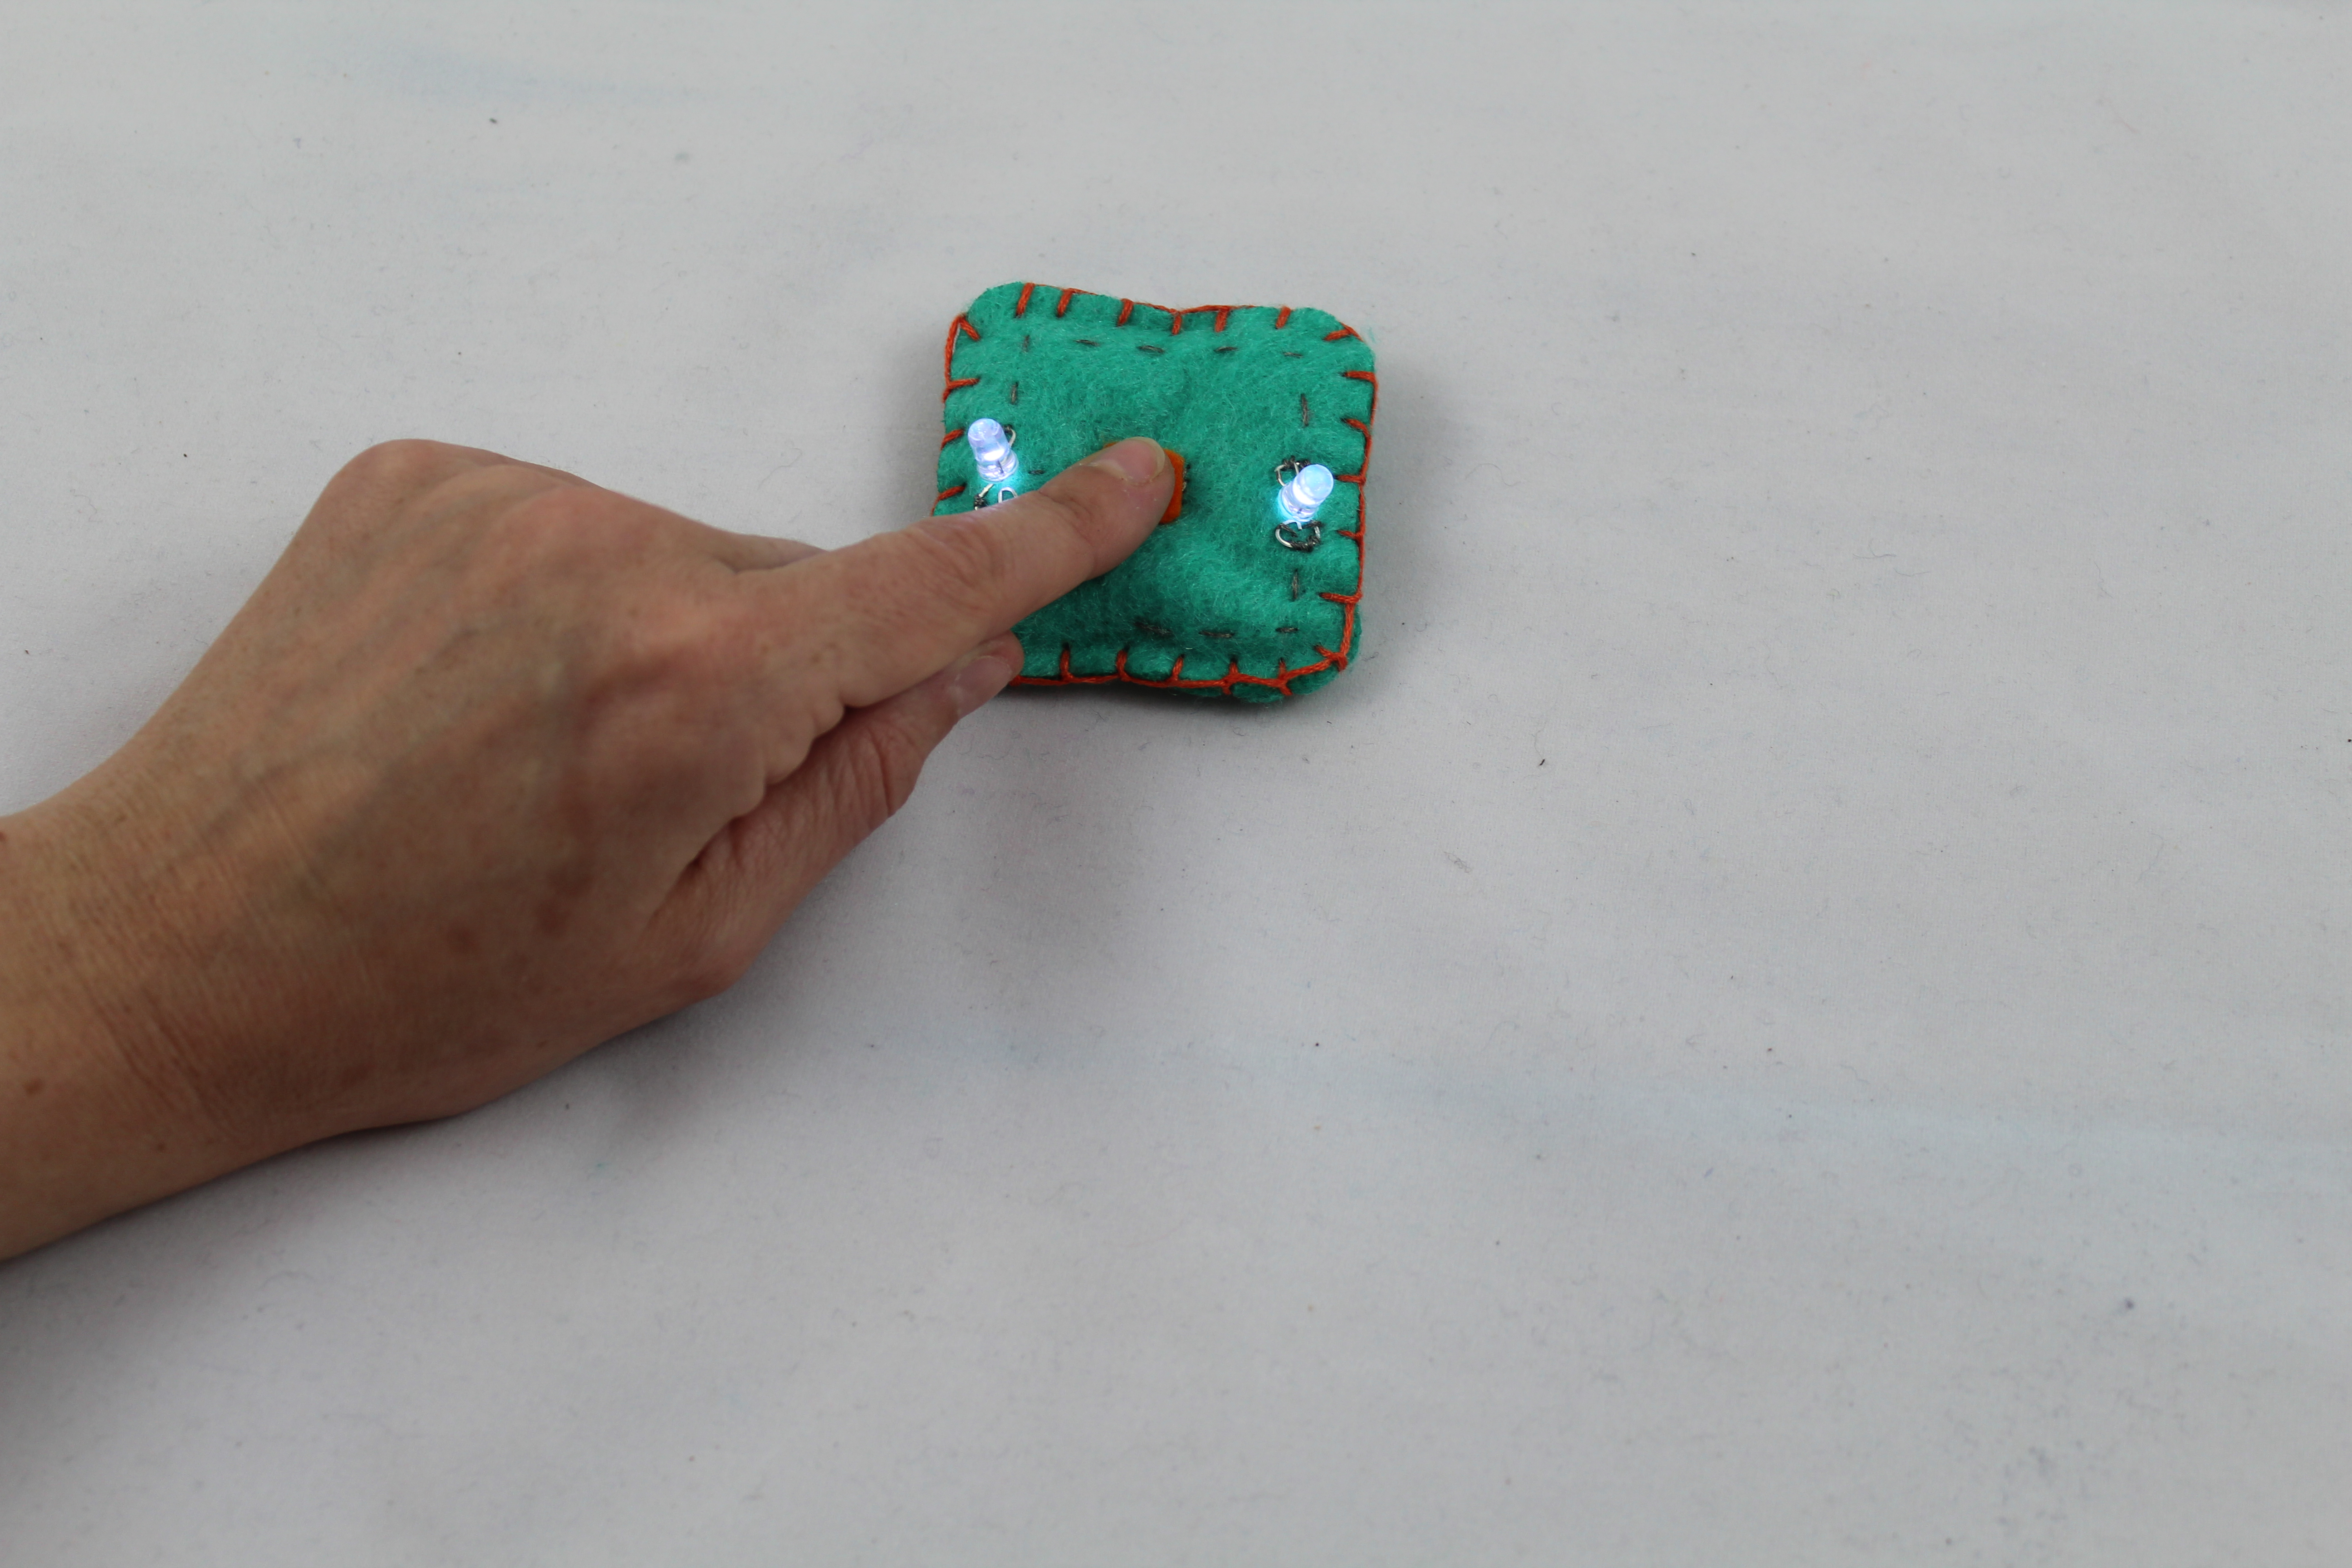
Push one 3V battery into your pouch with the positive side facing the front of the torch, and give it a squeeze. What happens? Now add the second battery into the pouch, facing the same way as the first so that the negative side of the first battery and the positive side of the second battery are touching, just as in the picture. Now your circuit should light up when you’re squeezing it.
That’s it! Happy squishing.
Fix It
Not working? Don’t worry! Follow these steps to figure out why, and fix it.
Check your power.
.. Are your batteries the right way around? Flip them over and see what happens.
.. Have your batteries run out of juice? Try another set of batteries.
.. Are your batteries connecting into your circuit? Make sure that your batteries fit snugly into the pouch and that the conductive thread is connecting to the correct side of the batteries. Check that your stitches are neat and not touching the wrong path.
2. Check your components.
.. Are your LEDs working? It’s a good habit to check each component before you add it into a circuit.
.. Are your LEDs securely sewn in place? Loose connections mean that your circuit won’t work. Tighten your connections, and try again.
3. Check your wiring.
.. Do you have a short circuit? If your positive and negative paths touch, no matter how slightly, your circuit won’t work. Tidy up your loose ends, check your knots and thread for fraying, and restitch any crossing paths.
Make More
DIY pressure switches are a great technique to use in all sorts of projects. You can use them in any soft circuit project that you don’t want to be on all the time. How about hacking the squish able sparkle heart in Chapter 8 so that the heart sparkles only when you squeeze it? You even could try making a big squishy pillow for your head that uses a little vibration motor to massage you when you lie on it.


