arduioo-week

YouTube player

Build a smart cocktail shaker that helps you mix a drink with help from an Arduino, Android device, and kitchen scale.  An Arduino can sense the weight applied to a scale’s load cell and send it to an Android application over a Bluetooth or USB connection. Mixing a drink is as easy as following the instructions on screen; no more fumbling with measurements or spilled drinks!

This is an intermediate difficulty project which requires basic knowledge of Arduino and breadboarding circuits.  If you need a little more help, check out the project’s write up on the Adafruit learning system.

Project Steps

Tear Down Scale

Take apart the kitchen scale to access the load cell inside of it. The exact disassembly steps will depend on your scale, but in general you’re looking for a metal bar with strain gauges glued to it and is directly below the weighing platform.

Look for 4 wires coming off the load cell and desolder them from the scale electronics. There should be an E+, E-, S+, and S- wire. The scale I used from Harbor Freight tools had its load cell wires conveniently marked for me.

Build Hardware

Assemble the hardware as shown in the diagram and schematic above.

Use terminal blocks to simplify attaching the tiny load cell wires to larger, breadboard friendly wires.

For the instrument amplifier, you will attach one trim potentiometer between the Rg pins. This potentiometer will control the gain of the amplifier. The other trim potentiometer will connect its wiper (middle pin) to the IAref pin and let you control the output offset of the amplifier.

Calibrate Amplifier

When voltage is applied to the load cell’s E+ and E- wires, the S+ and S- wires will output a small voltage proportional to the weight applied to the cell. This output voltage is in the low milli-volt range and is too small to easily read with an Arduino (you can read it with a multimeter though, give it a shot!). An instrument amplifier will be used to increase the voltage of the load cell output so it can easily be read by the Arduino’s analog to digital converter.

The output offset and gain of the instrument amplifier must be adjusted so the amplifier output falls within a range of 0.5 volts with no weight applied, up to 5 volts with maximum weight applied (a full glass of water since this project is built to mix drinks).

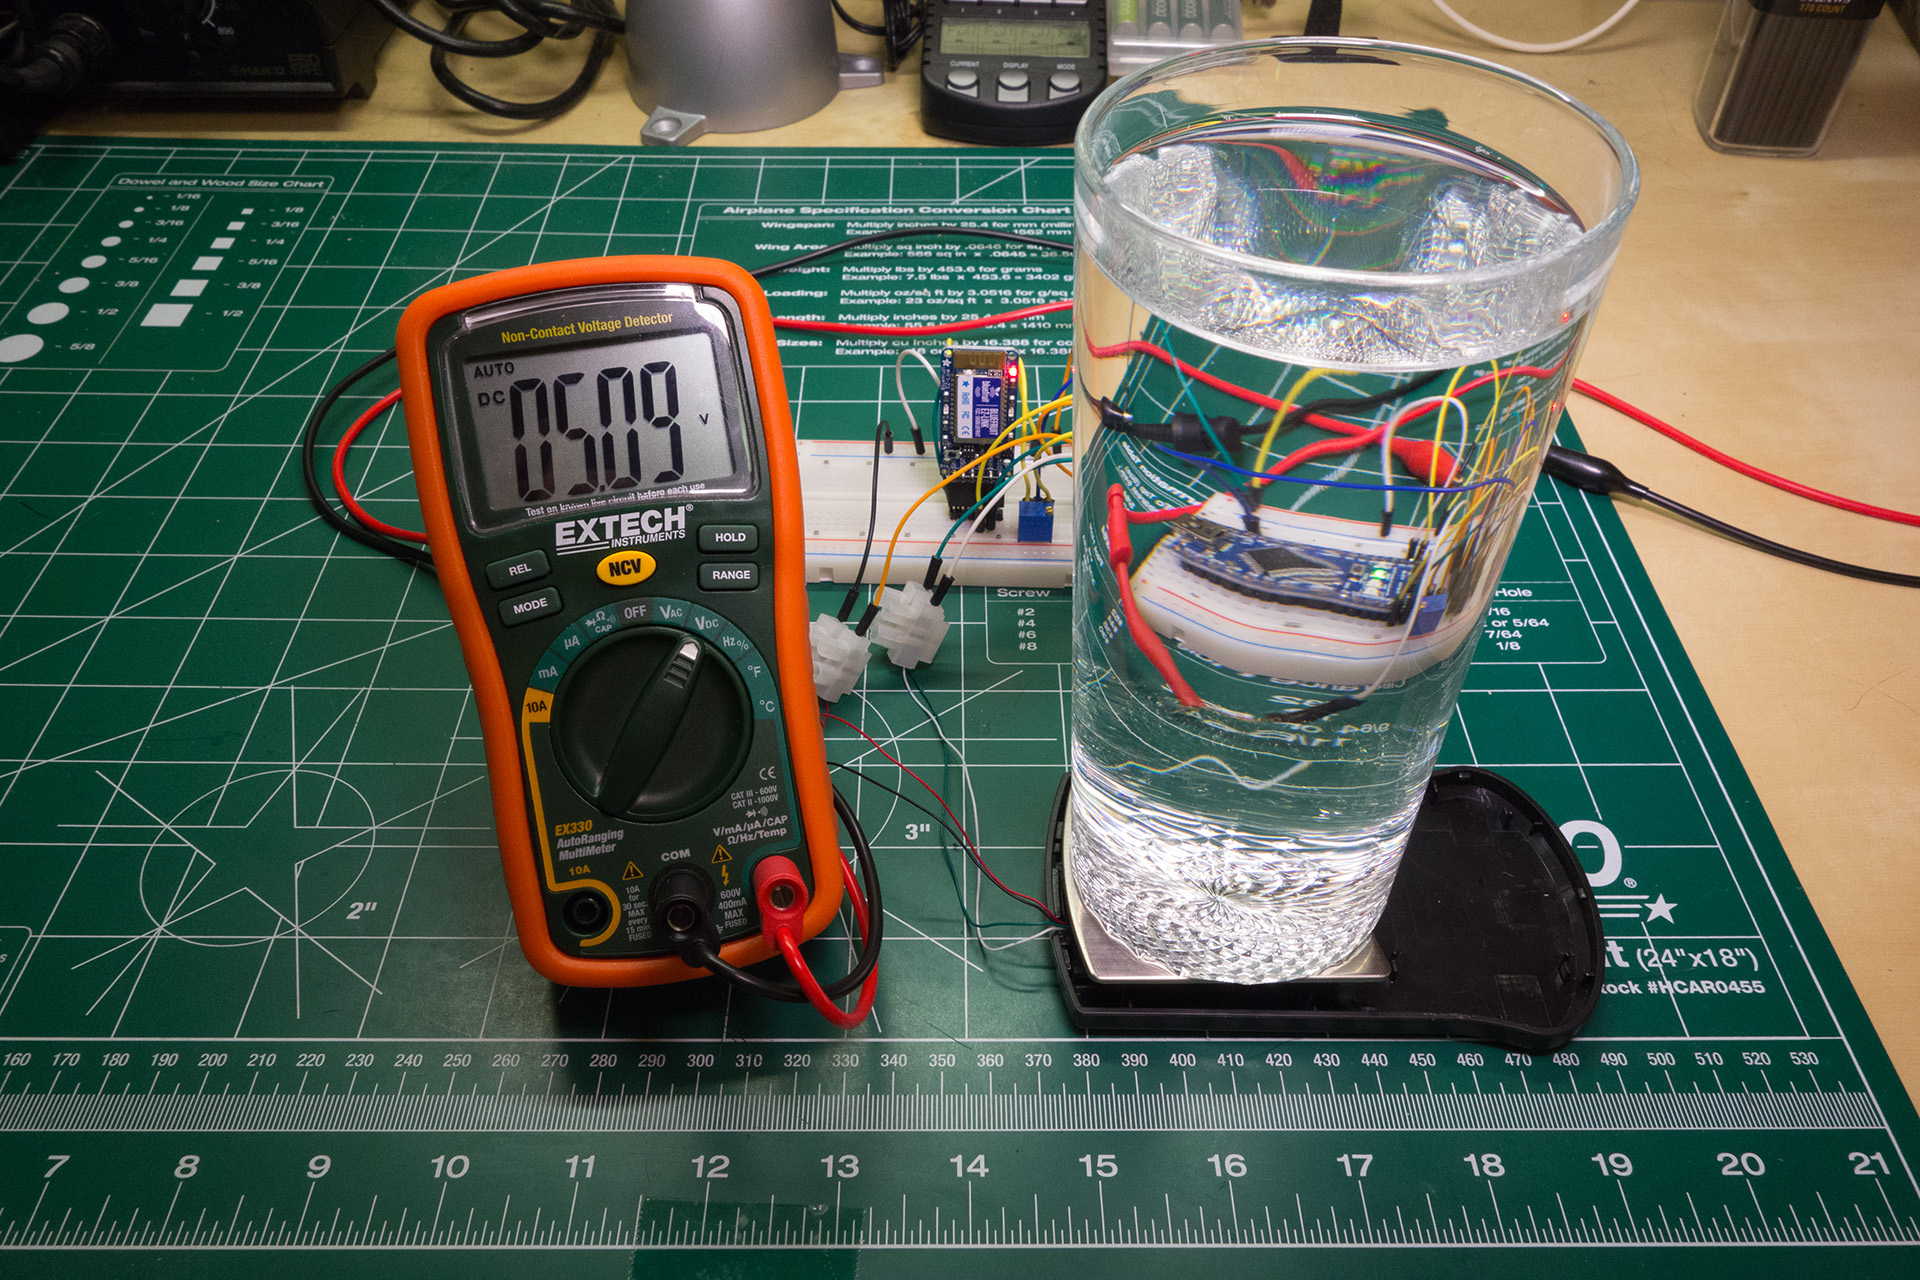
Start by powering the circuit and removing all weight from the scale. Connect a multimeter’s positive probe to the Vo output pin of the amplifier, and the negative probe to ground.

Turn the output offset trim potentiometer with a small screwdriver until the voltage on the multimeter is as close to 0.5 volts as possible.

Next put a full glass of water on the load cell and turn the gain trim potentiometer until the voltage is as close to 5 volts as possible. Note that if you see the output voltage fall when weight is applied, swap the S+ and S- wires and start the calibration again.

Remove the weight from the load cell and verify the output voltage is again 0.5 volts. Repeat adjusting the output offset and gain trim potentiometers until the signal is close to 0.5 volts with no weight applied and 5 volts with full weight applied. Also check that when an intermediate amount of weight is applied (like a half full glass of water), the output voltage falls somewhere in the range of 0.5 to 5 volts. The output voltage will be proportional to the weight applied to the load cell.

Calibrate Scale

Download the software for this project from the following link: https://github.com/tdicola/SmartCocktailShaker/archive/master.zip

Unzip the archive and load the ScaleCalibrate sketch in Arduino. Upload the sketch to your hardware and open the serial monitor at 9600 baud.

Follow the instructions in the serial monitor to calibrate the scale. The sketch will first take a reading of the empty scale output, and then take a reading of an item with a known weight. Use another scale or object of a known mass (like a pile of coins) during this calibration.

Once the calibration is complete, save the ZERO_OFFSET and GRAMS_PER_MEASUREMENT values that are output by the sketch.

Finally, load the SmartCocktailShakerSketch Arduino sketch and adjust the #define values for ZERO_OFFSET and GRAMS_PER_MEASUREMENT to match the values you measured in calibration. Upload the sketch to your hardware.

Run Android App

On your Android device, enable loading applications from unknown sources by following these instructions: http://developer.android.com/distribute/open.html#unknown-sources

Transfer the SmartShaker.apk file from the download onto your Android device, or grab it directly from: https://github.com/tdicola/SmartCocktailShaker/blob/master/SmartShaker.apk?raw=true

Install the SmartShaker.apk file when prompted by the Android OS. The Smart Shaker application should be added to your Android device; look for an application with a green star logo.

If you’re using a USB connection, connect the USB on-the-go cable to the device and Arduino.

If you’re using a Bluetooth connection, pair your Android device with the Bluefruit by following these steps: https://support.google.com/nexus/answer/2819579?hl=en

Run the Smart Shaker application, select a drink, select your device connection, and start making drinks with ease!