Projects from Make: Magazine
Soda Bottle Submarine
Make a simple, self-propelled submarine out of soda bottles and other household items.
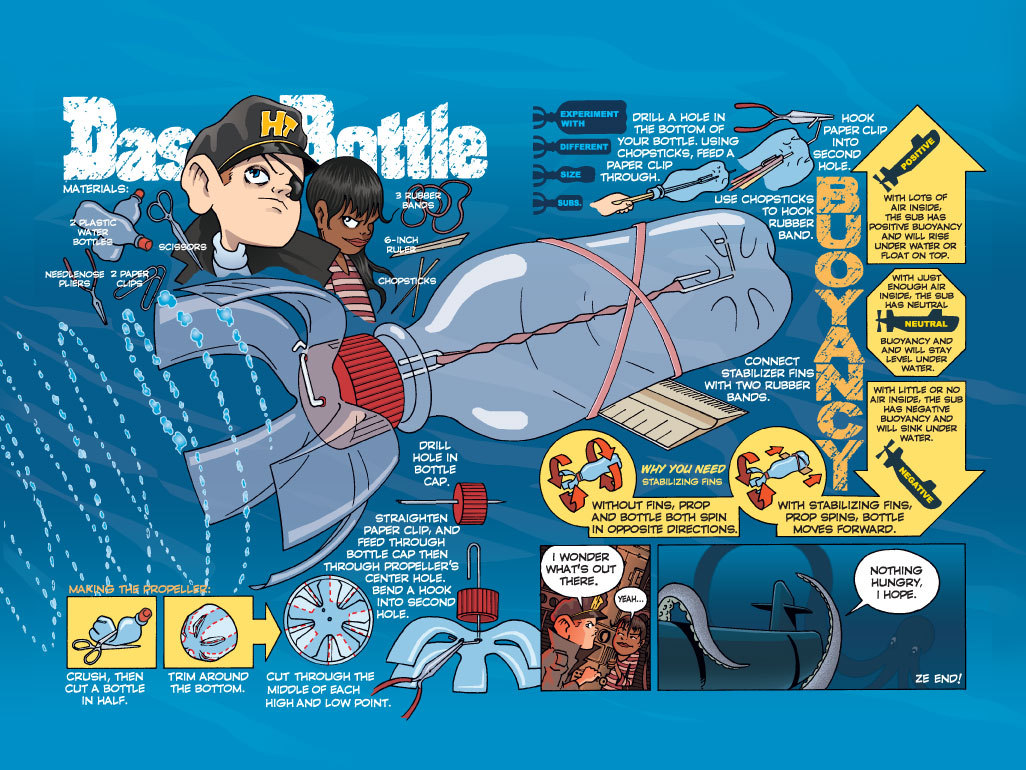
Assemble the submarine interior.
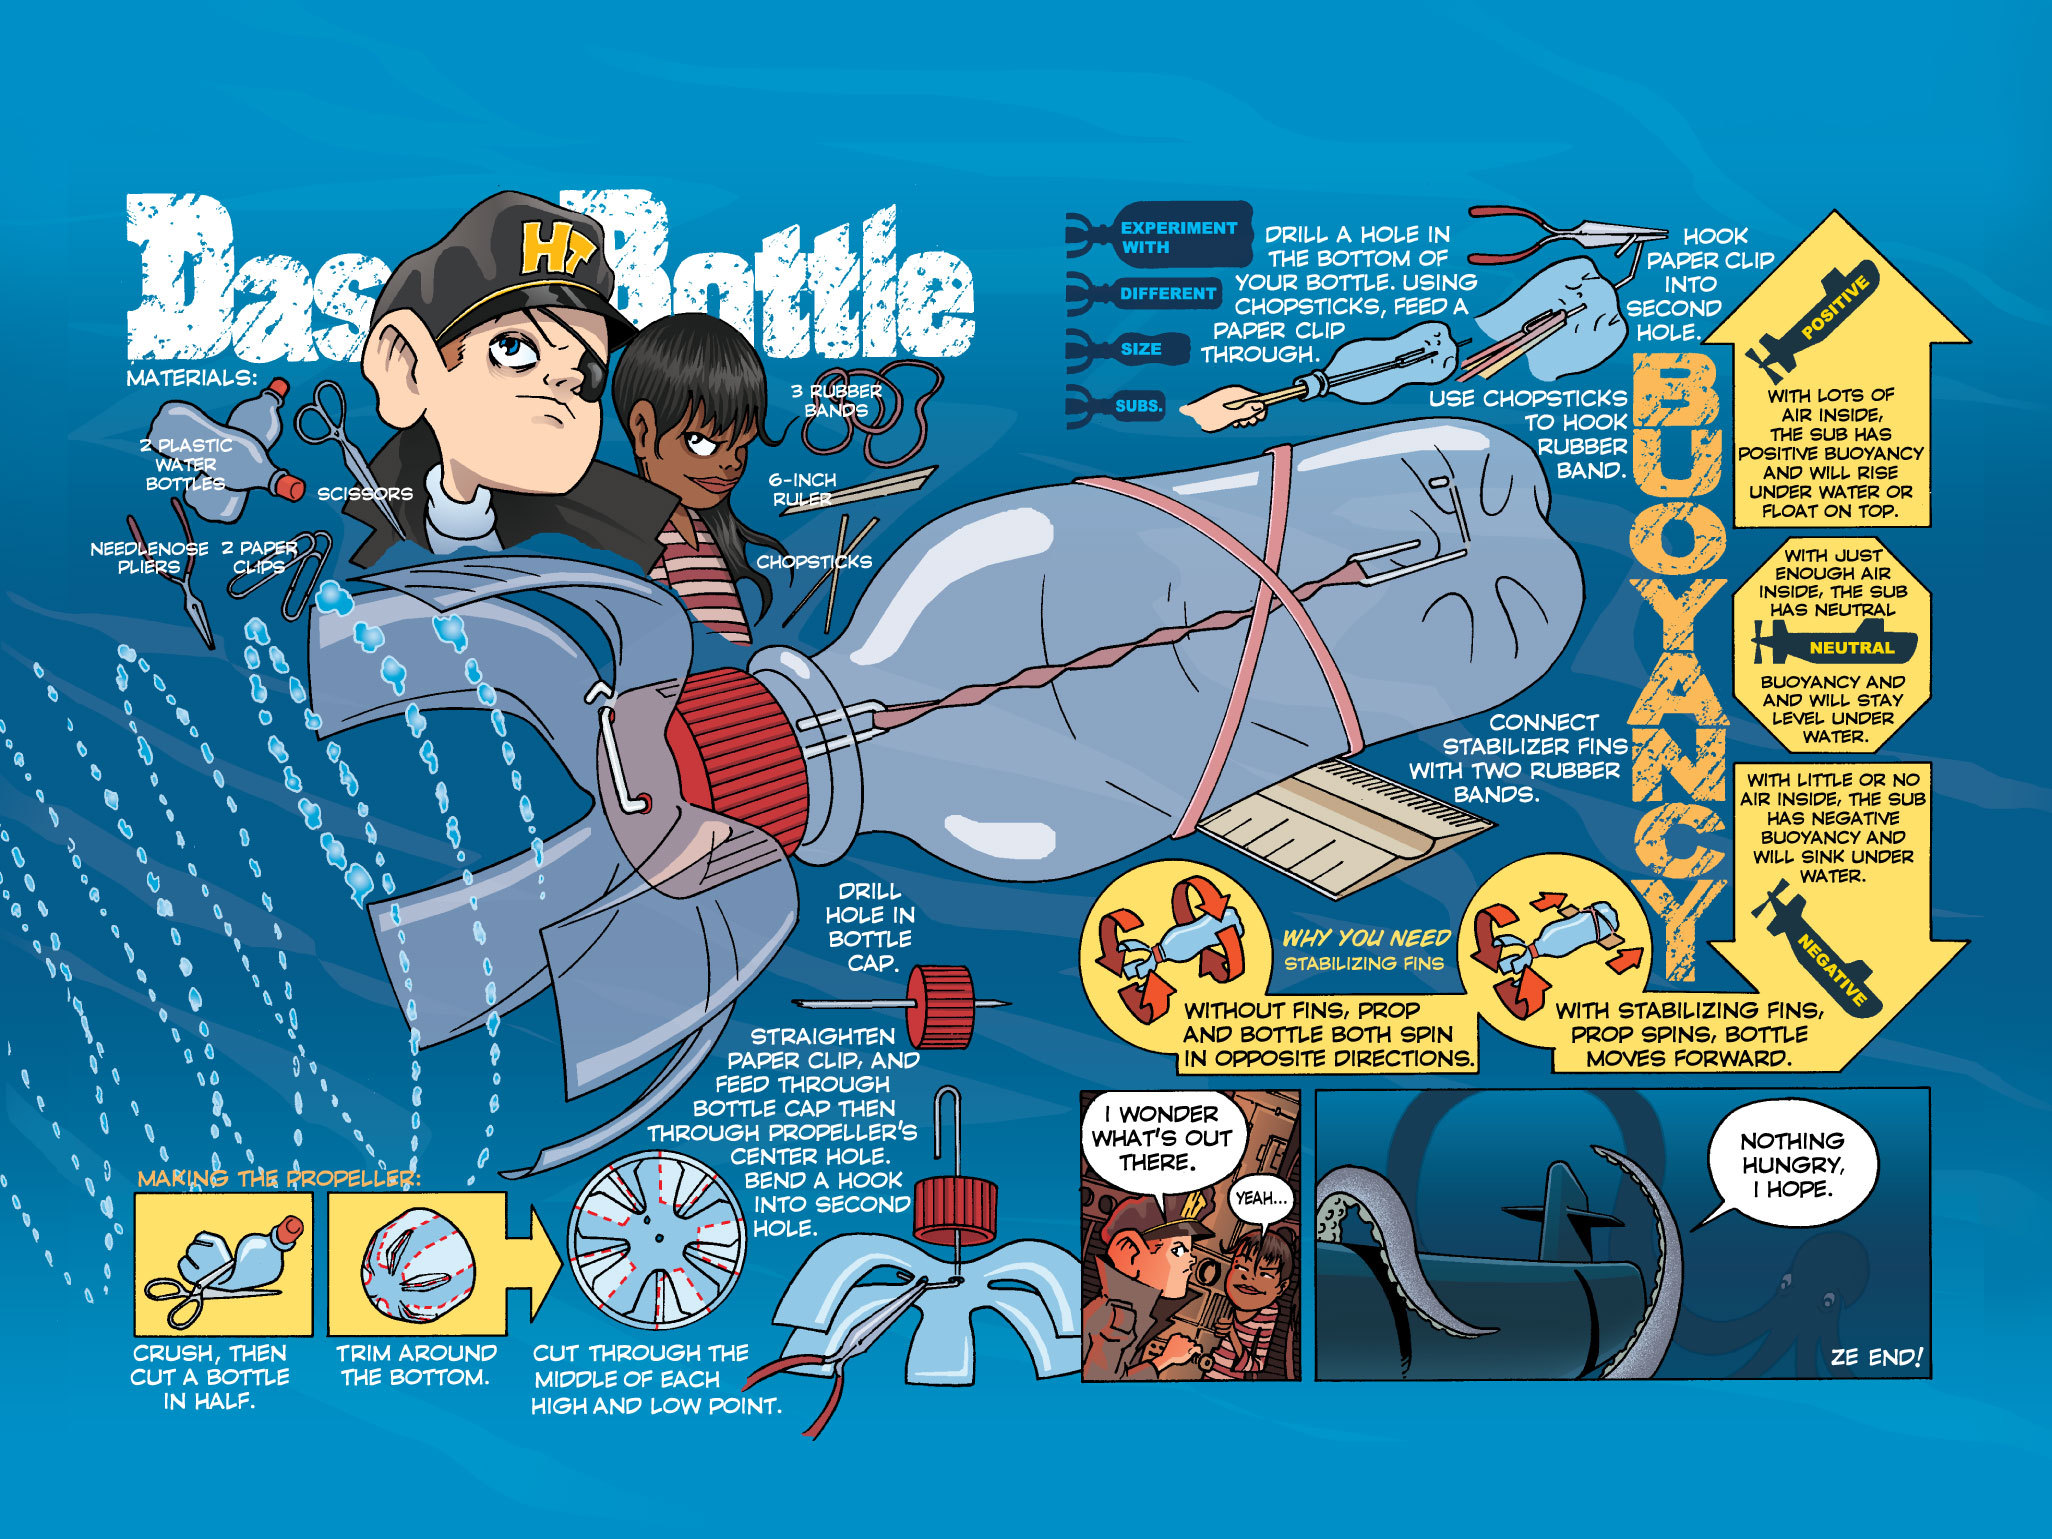
Drill a hole in the bottom of your bottle.
Using chopsticks, feed a paper clip through.
Hook paper clip into second hole for stability.
Use chopsticks to hook the rubber band to the paper clip.
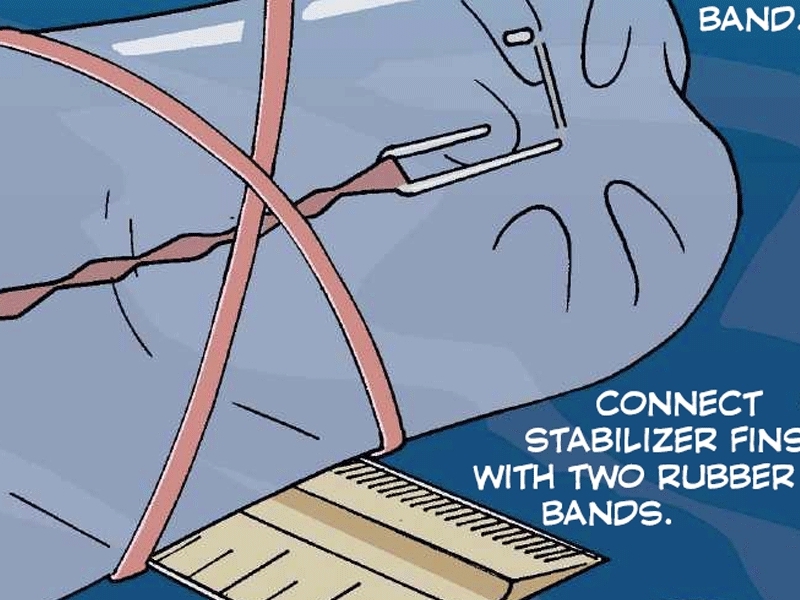
Connect ruler stabilizer fins with 2 rubber bands.
NOTE: Why you need stabilizer fins: Without fins, prop and bottle both spin in opposite directions. With stabilizing fins, the prop spins and the bottle moves forward.
Make the propeller.
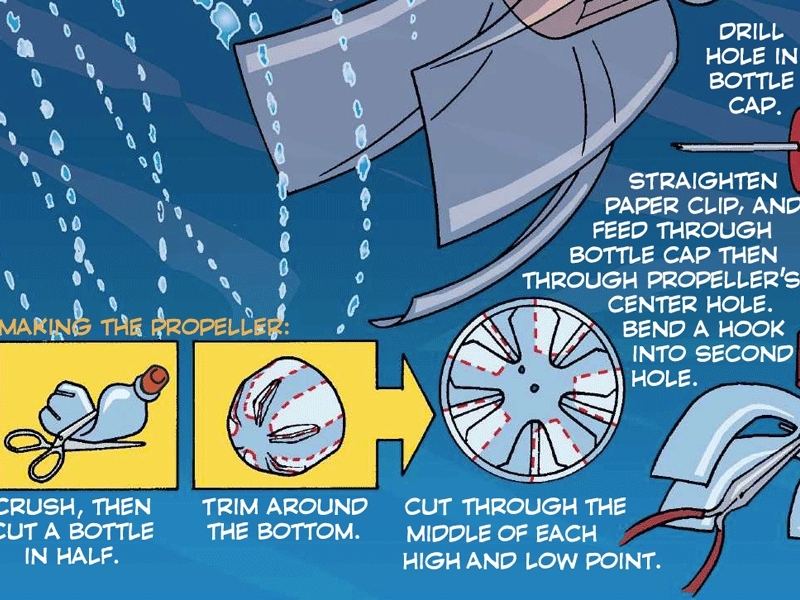
Crush, then cut a bottle in half.
Trim around the bottom, and cut through the middle of each high and low point.
Drill a hole in the bottle cap.
Straighten paper clip, and feed through bottle cap then through propeller’s center hole. Bend a hook into second hole.
Attach loose end of rubber band to paper clip hook.
Experiment with buoyancy.
With lots of air inside, the sub has positive buoyancy and will rise under water or float on top.
With just enough air inside, the sub has neutral buoyancy and will stay level under water.
With little or no air inside, the sub has negative buoyancy and will sink under water.
Conclusion
This project first appeared in MAKE Volume 10.


