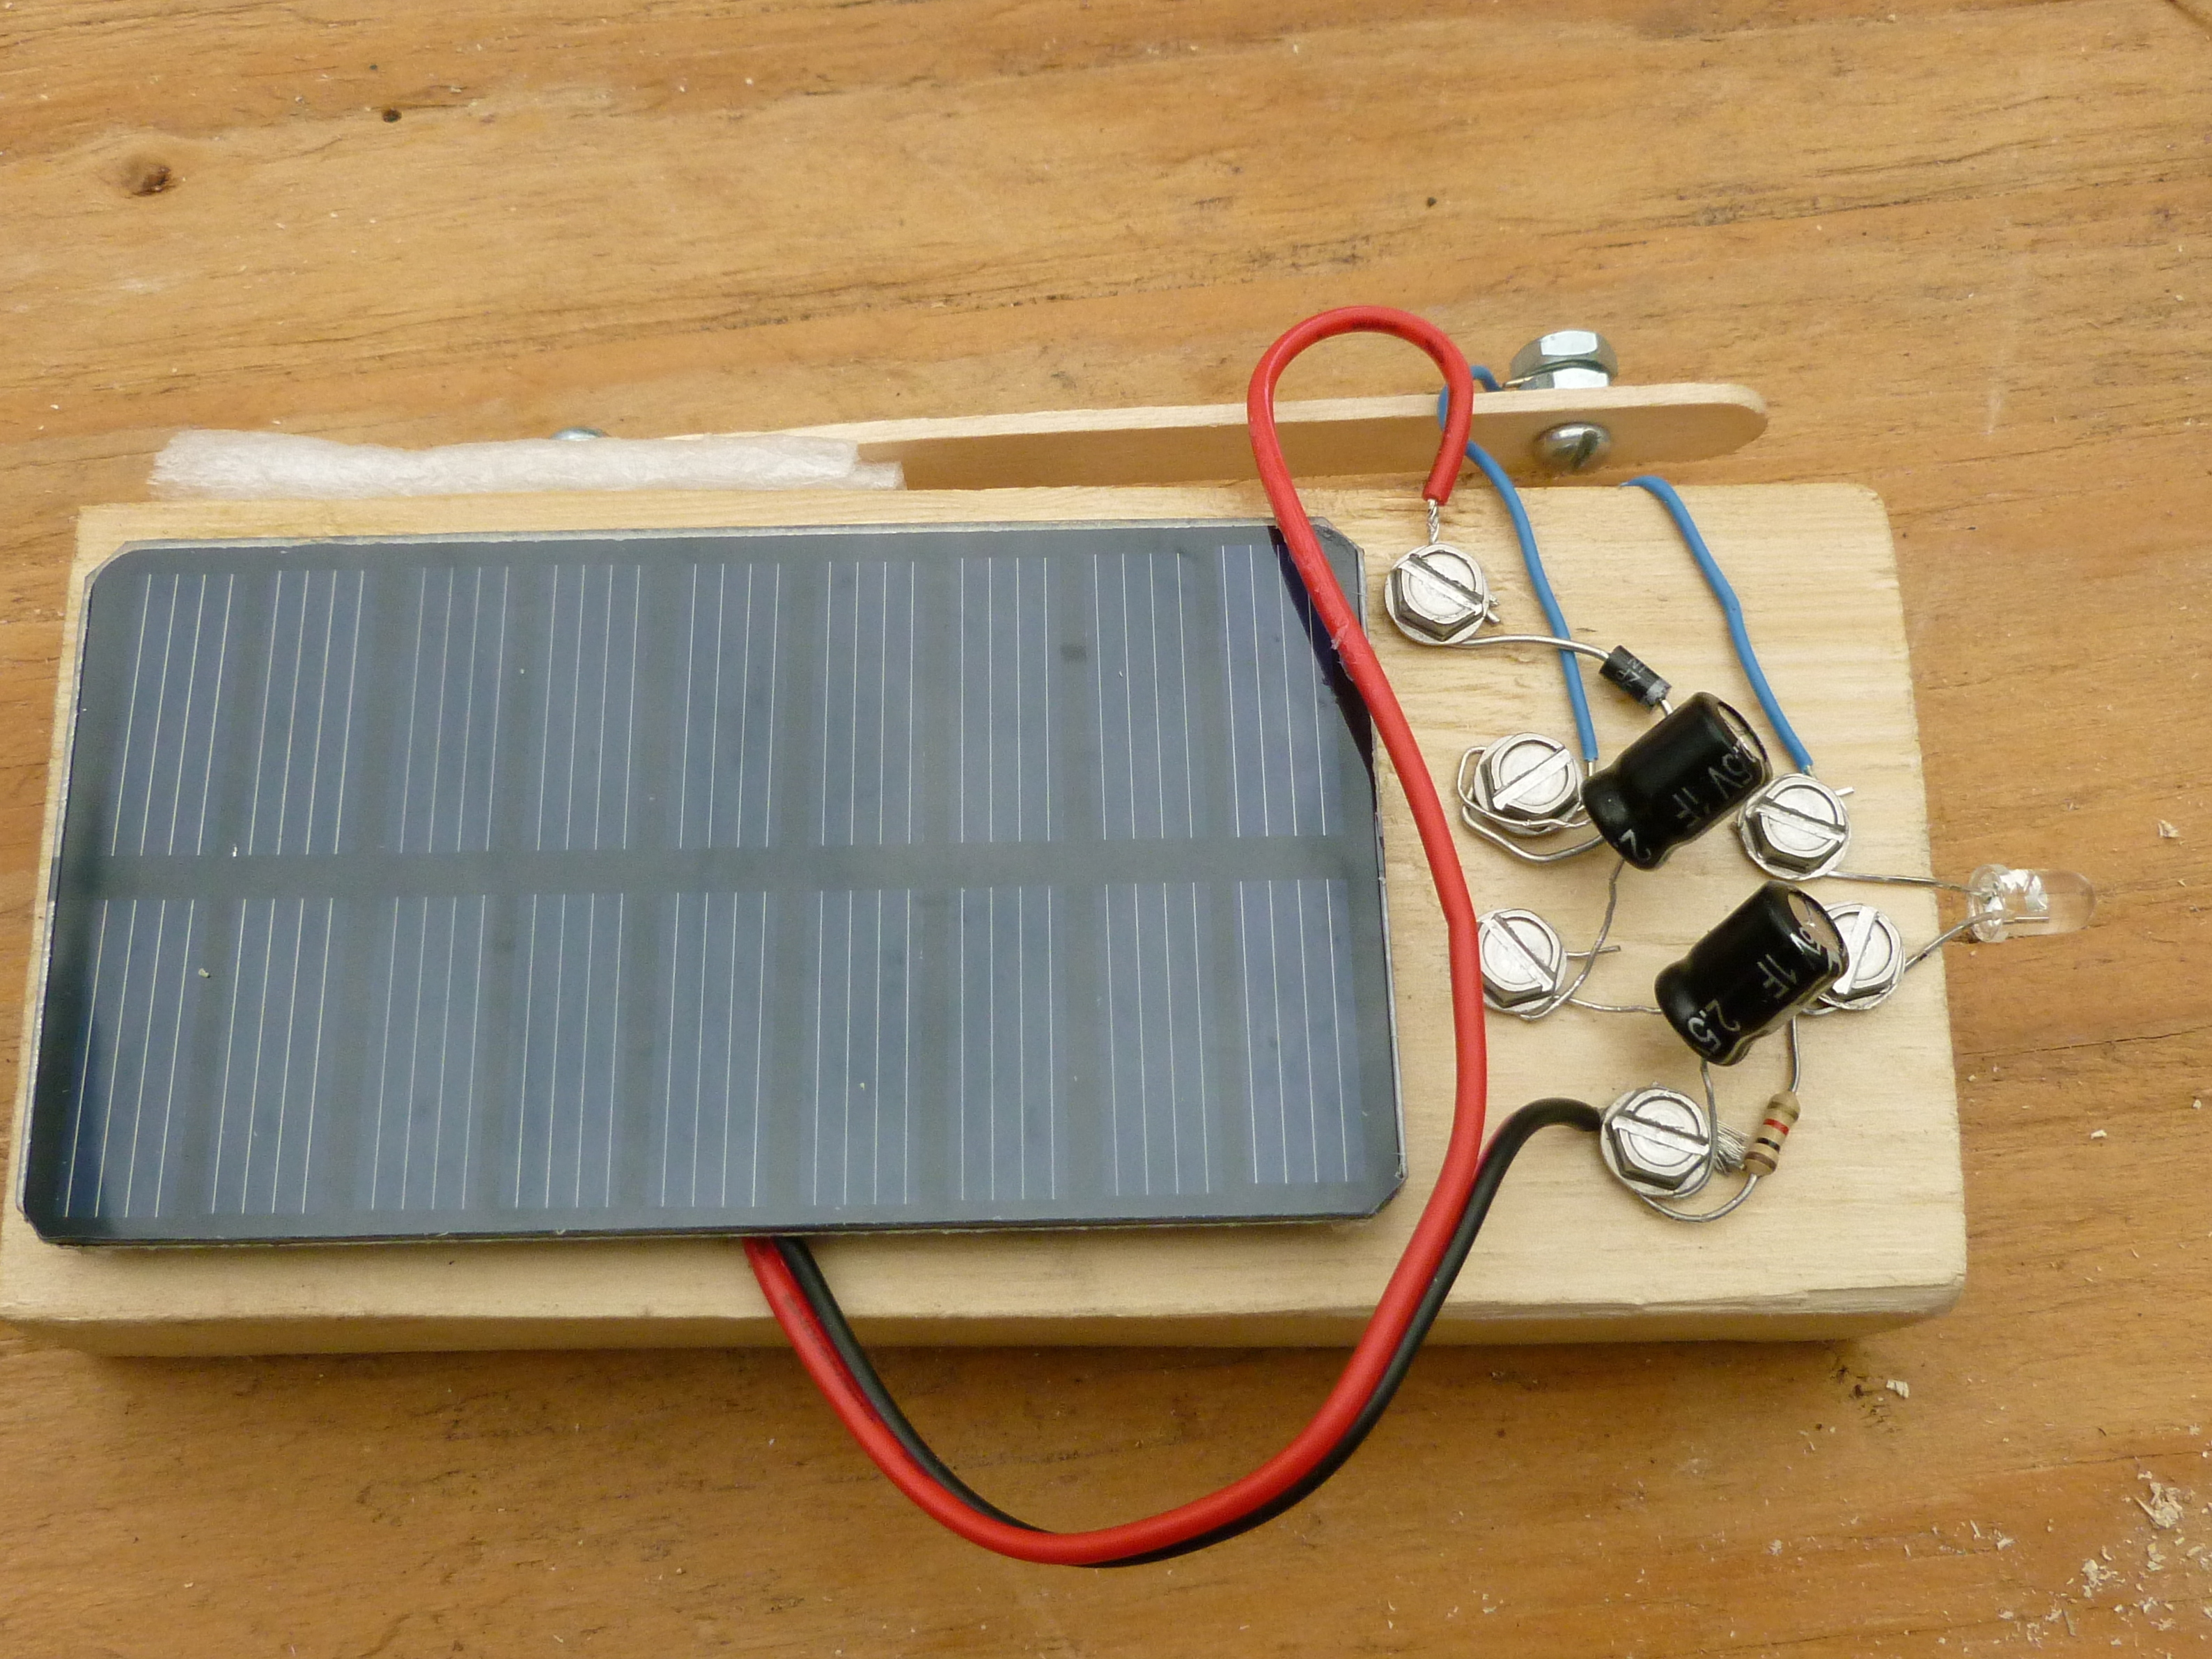
No, this isn’t a trick project. It actually works. Since the energy source for this flashlight is light and it works just fine at night, it must have a way of storing energy–and it does. However, like commercial solar powered flashlights, which store chemical energy in batteries which then convert this chemical energy to electrical energy, this flashlight stores electrical energy directly in two one-farad super capacitors. Today we use two 1-farad capacitors to store electrical energy to light an LED; tomorrow we will be using a bank of 10K farad capacitors to store electrical energy to power an automobile!

Project Steps

Follow drawing and make marks on the Popsicle stick for the 1/8″ holes that you drill as described in Step 2.

Use a 1/8″ drill bit to drill the three holes at the place you marked with a pencil. See Step 1.

Hint: Don’t press hard with the drill or you might crack the stick. Take your time drilling.

Use the holes you drilled in the Popsicle stick as a template and use a pencil to make marks on the baseboard. In the next step you will drill pilot holes where these marks indicate.

Use a 1/16″ drill bit to drill pilot holes in the baseboard at the pencil marks you made in Step 3.

Start a 3/4″ #6 wood screw in the pilot hole. See photo.

Remove about an inch of insulation from one end of a wire.

Twist the bare end around the screw between its head and the base board.

Tighten the screw.

Stick the 1/2″ 6-32 machine screw in the hole where shown.

Twist on two 6-32 nuts.

Fold a small piece of foam packing material and keep in place with a bit of transparent tape.

Stick two 3/4″ #6 wood screws through the holes made in the Popsicle stick and press their tips through the foam as shown.

As shown, attach the Popsicle stick to the baseboard by screwing in the two wood screws into the baseboard, using the pilot holes you drilled earlier as a guide.

Remove an inch of an insulation from another wire and twist it around the 6-32 machine screw between the nuts.

Use long nosed pliers to tighten nuts.

Use a narrow strip of duct tape to keep the wires in place.

Download the template from the document section and print it out.

Cut the template out and tape it to the 5-1/2″ 1×4 board.

Use a 3/32″ drill bit and drill pilot holes for the six head screws.

At each pilot hole, start screwing in the six 1/2″ #6 hex head sheet metal screws.

Don’t tighten these screws!

The Popsicle stick switch described in the first 11 steps of this guide is custom made and mounted to the side of the baseboard as shown.

The distance between the switch’s contacts are adjusted with the screw shown in the photo.

Use a general purpose cement, such as Duco shown in the photo, to attach the solar panel to the board.

Whenever wiring circuits with insulated wires or leads, make sure you strip off a half to an inch of insulation before connecting them. I often use side cutters to do this although you might want to use a special purpose wire stripper.

Follow this wiring guide for the next two steps.

The super capacitors have their negative lead marked. Make sure you connect the capacitors, rectifier, and the LED as shown. If you connect any of these three components backwards the flashlight will not work.

A 1K resistor is called for in the parts list. If you want a brighter flashlight you can use a 480 ohm or even a 330 ohm resistor. However, the smaller the resistance of the resistor the shorter the time the LED will light between charges.

Connect wires to the Popsicle Stick Switch. Also see Wiring Guide in the last step.

Completed project.

Press the Popsicle switch when you want light. A couple of minutes of bright sun will fully charge the capacitors which store enough electrical energy to light the LED for half an hour of continual use.

Conclusion

This project makes use of super capacitors to store electrical energy. It shows in a practical way the superiority that super capacitors have over chemical batteries. What are the advantages that capacitors have over chemical batteries? They last far longer, they can be charged much faster and they don't produce flammable or toxic gases.

For a clear understanding behind how a capacitor can store electrical charge and thus electrical energy see the video http://youtu.be/PAPGTuvHSRo

Will a capacitor someday replace a car's gas tank? See the video http://youtu.be/4tEYRjSIJaA for my view of this possibility.