m50_FoldawayTable-opener table

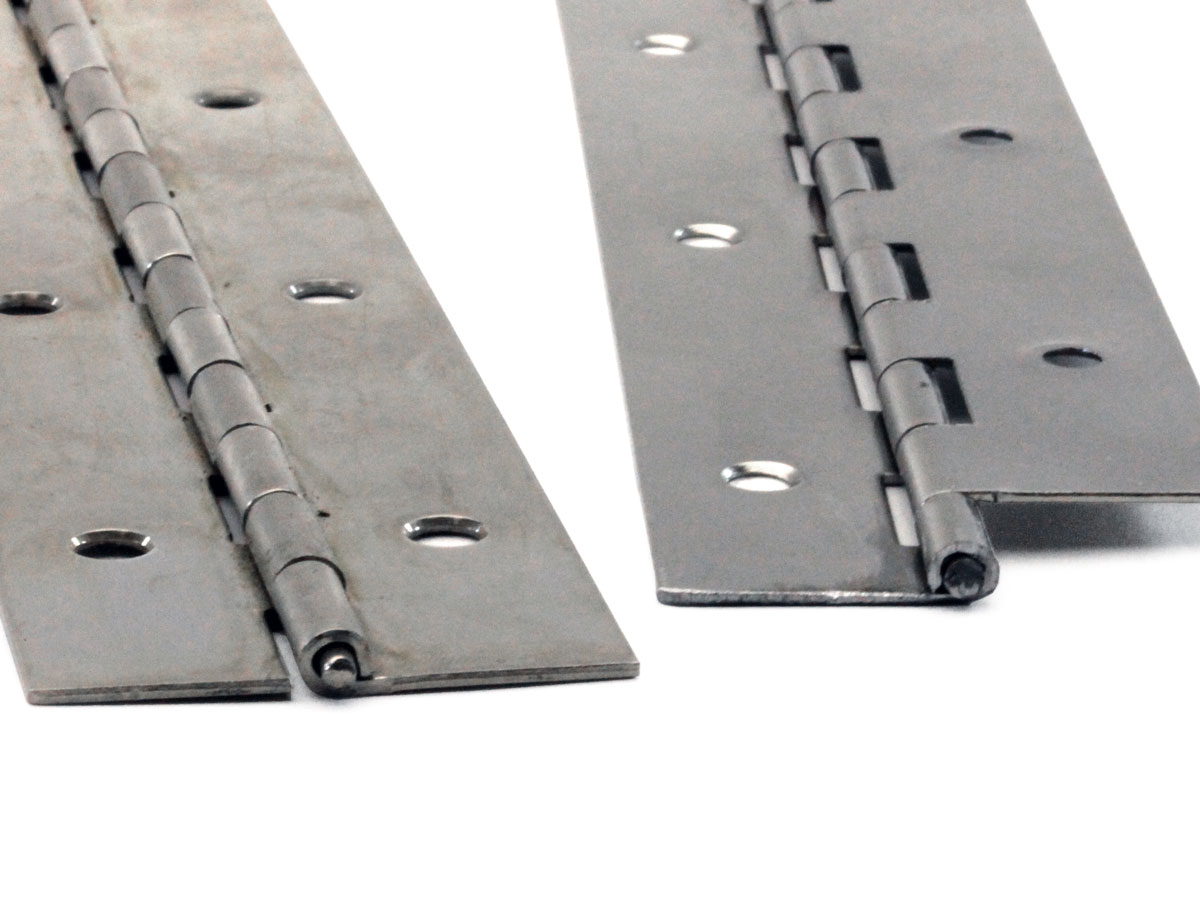
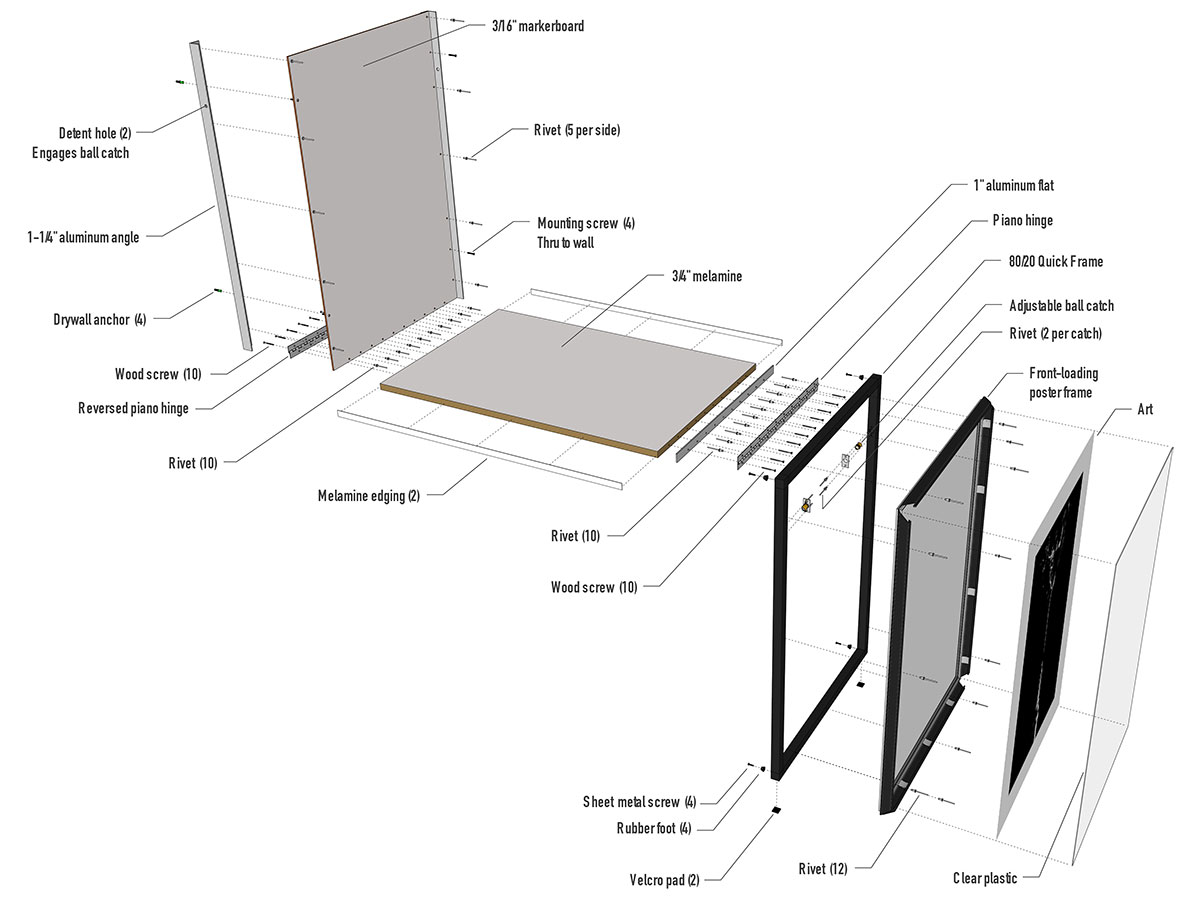
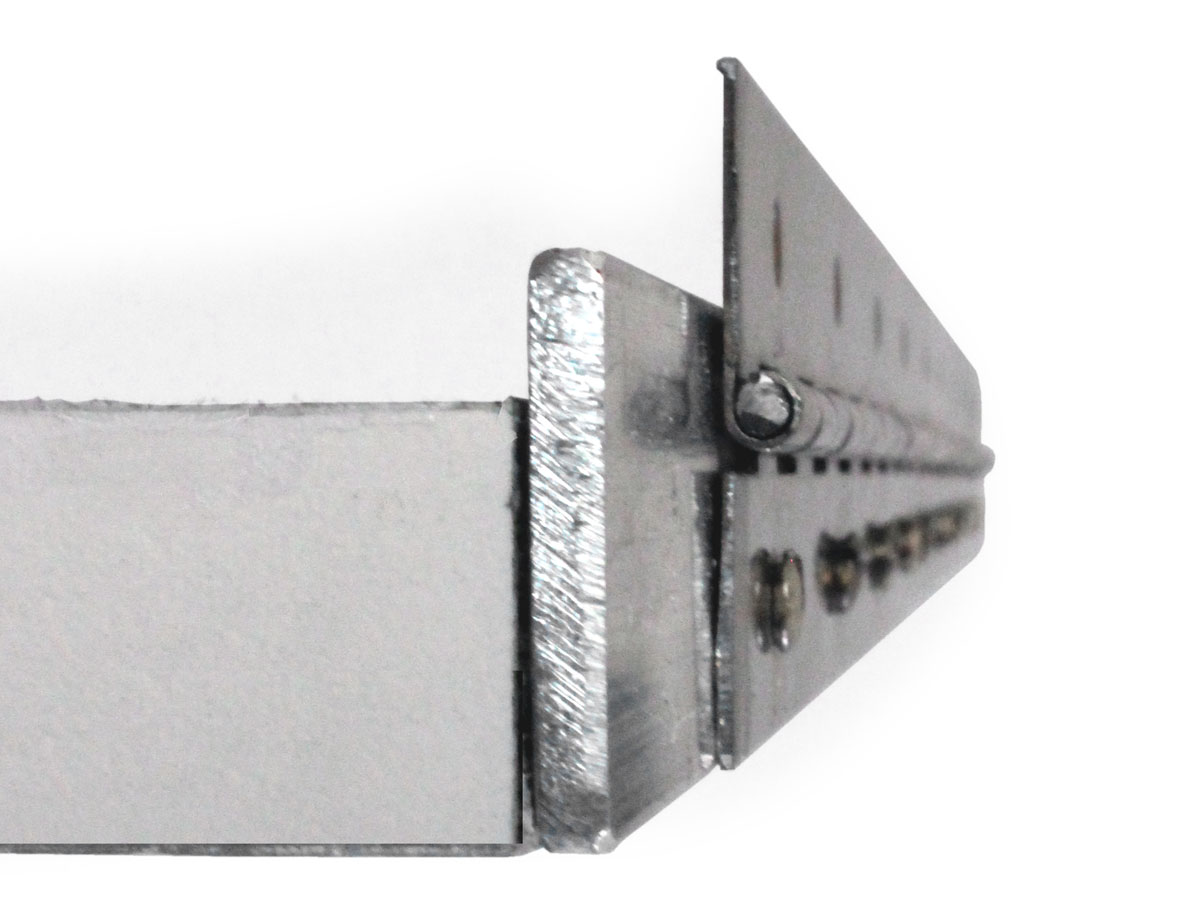
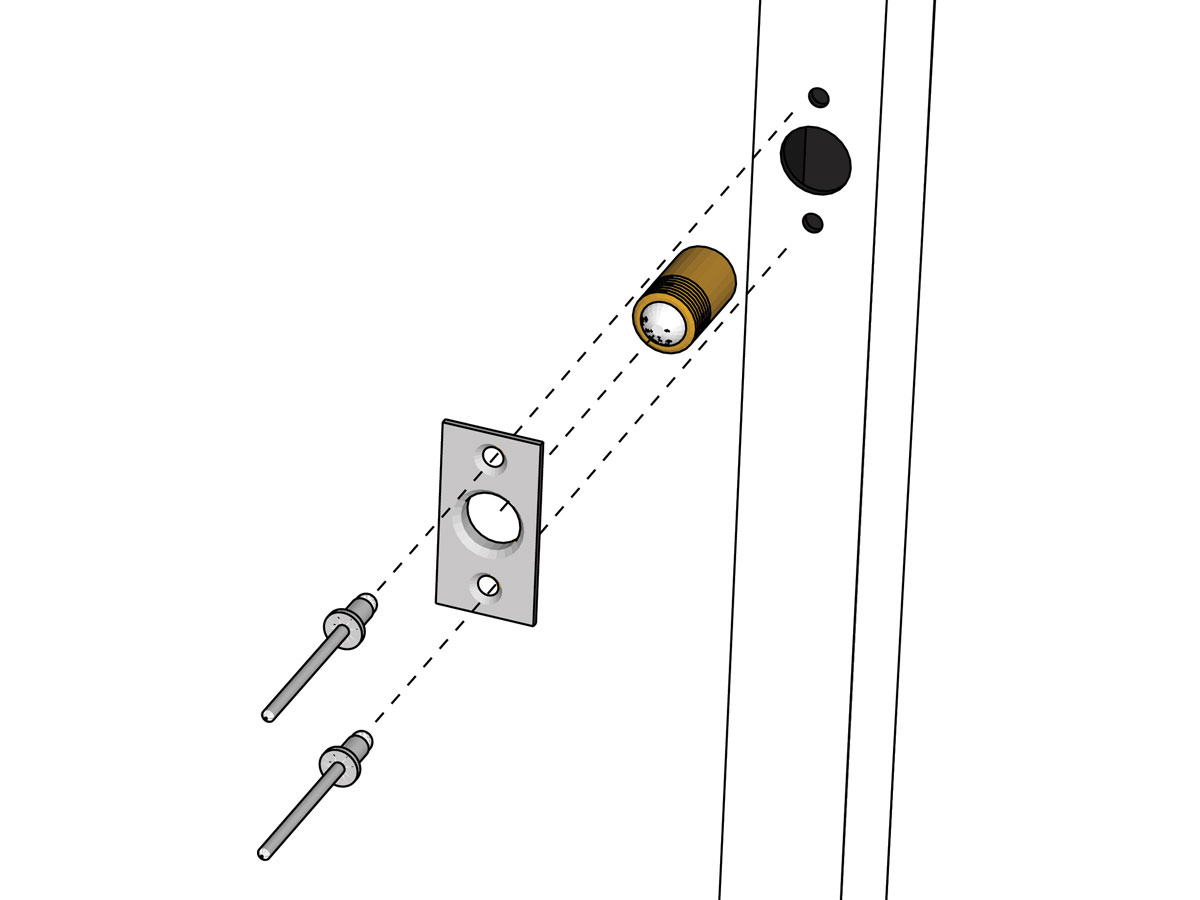
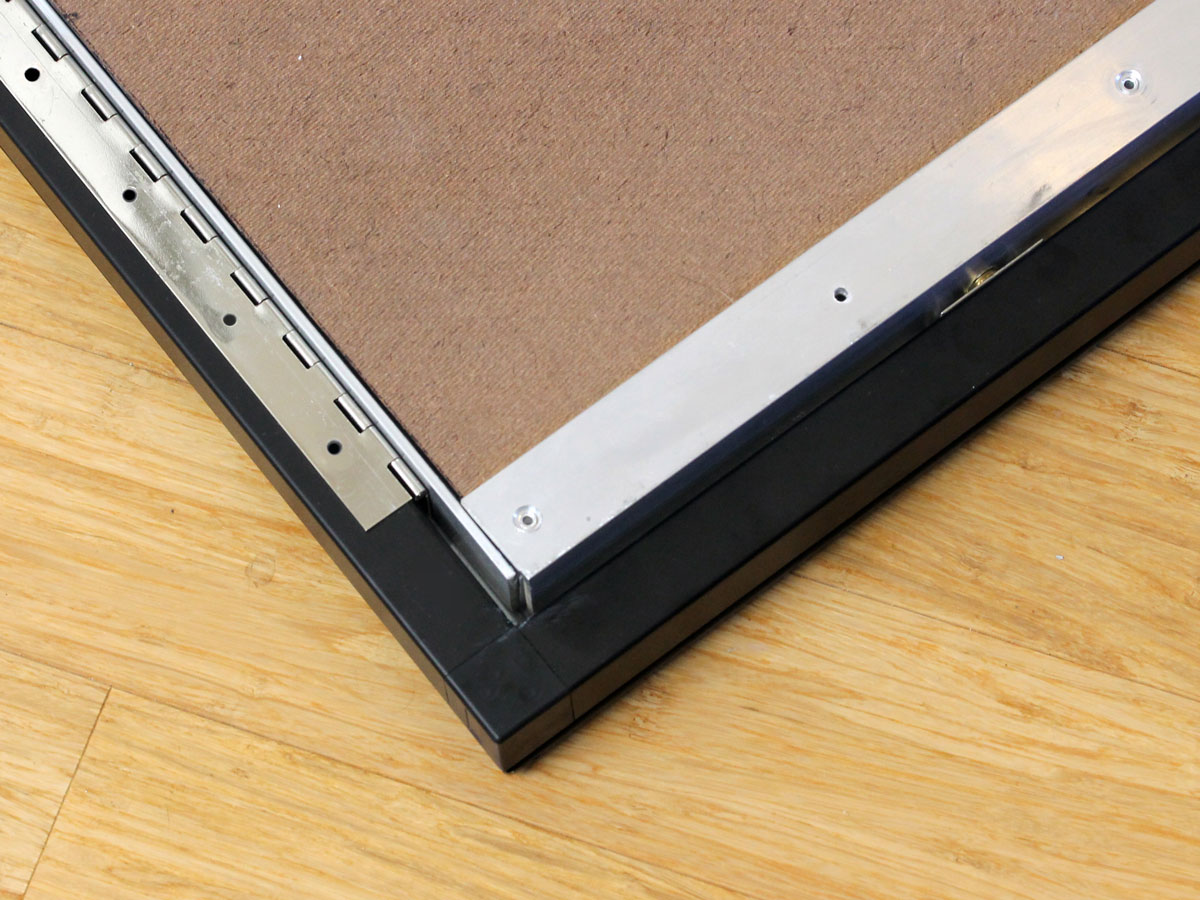
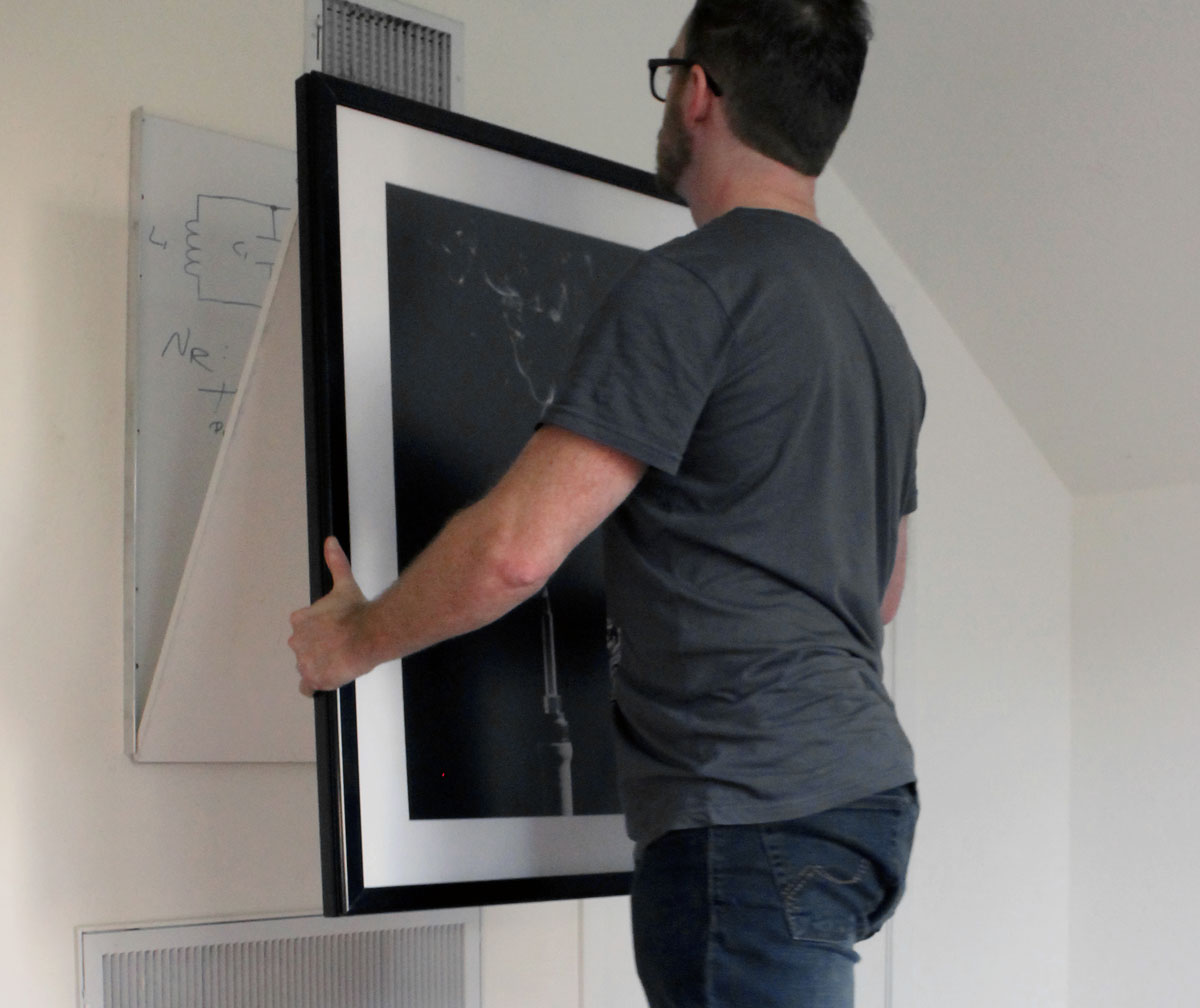
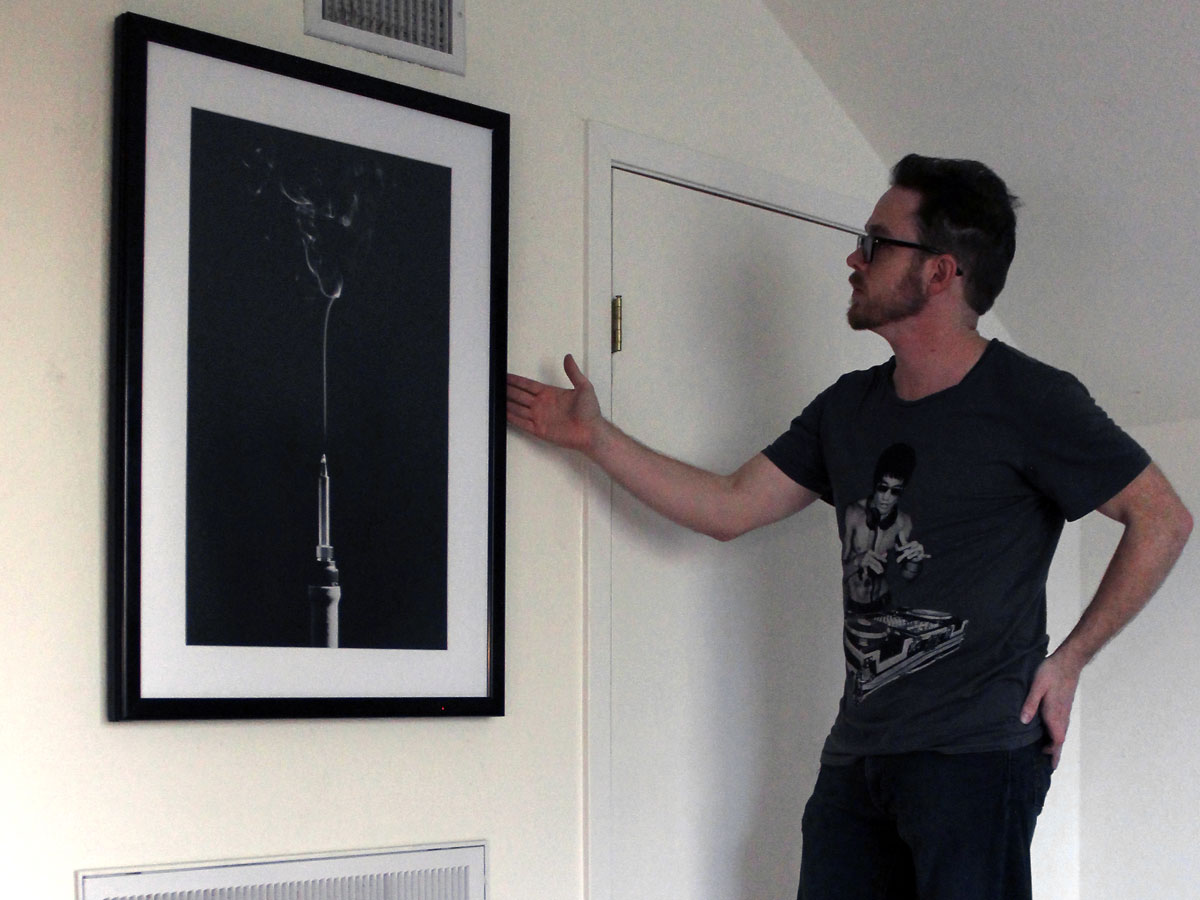
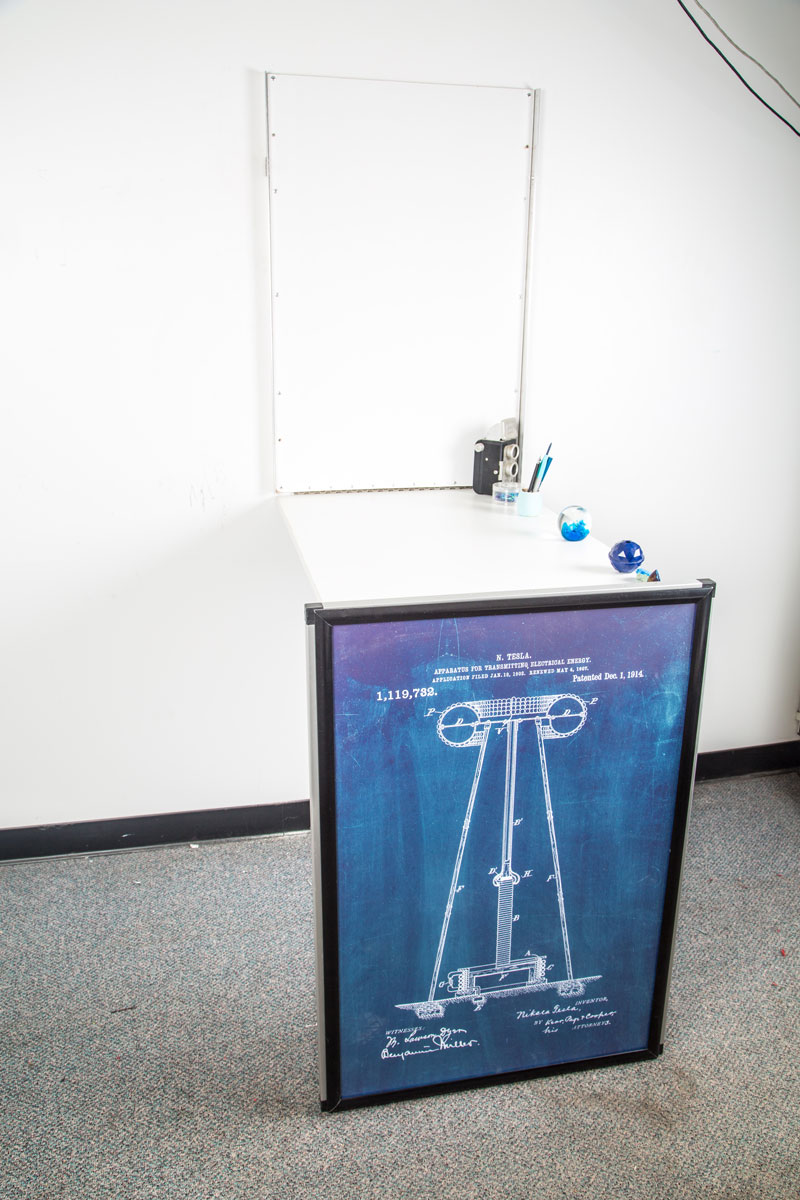
I first saw this idea in the 1973 DIY classic Nomadic Furniture — a picture frame that folds down to become a table. Recently, I found a German site selling a similar design for almost $1,000. I’d always wanted to build one, so I took on the challenge of matching the Germans’ quality at a better price. My design is sturdy and easy to deploy, revealing a handy hidden whiteboard. When stowed, it protrudes less than 2″ from the wall, shows no fasteners, and locks securely in place. Part of the trick is using one standard piano hinge and one reversed hinge to make it all fold up tight.

Animated Folding Table

Foldaway-Table-exploded-small
Click to enlarge.

Project Steps

Cut the panels and hinges

Saw the markerboard and melamine to 35⅛” long, then rip the markerboard to 23¼” wide, and the melamine to 23″. Apply edging to the long sides of the melamine.

Hacksaw a 20″ length of continuous hinge, and clean up with a file. Punch the pin out of the leftover hinge, reverse one leaf (see photo), tap the pin back in, then saw the leftover to 20″ too.

Build the backboard

Cut 2 pieces of aluminum angle to fit the markerboard’s long edges. On each piece, mark a parallel line down an outside face, 9/16″ from the corner. On your line, drill five 5/32″ holes: one 7/16″ from each end, one in the middle, and 2 halfway between these. Countersink all holes, from the outside, to three-quarters depth.

Fit the angles to the markerboard edges, drill matching holes, and secure with rivets from the front. Center the reverse hinge along the backside of the board’s bottom edge and likewise drill and rivet in place. Once all rivets are set, punch the broken-off mandrels out from the flange side.

Finally, drill four 5/32″ mounting holes, midway between the 2 rivets in each corner, through both aluminum and markerboard.

Add the worktop

Cut a 23″ length of aluminum bar to fit one end of the melamine, then use the standard hinge to locate and drill 10 holes in it as shown. Attach bar and hinge together to the melamine edge, with wood screws. Now lay the melamine on the markerboard, between the angles, with the protruding lip of the bar flush against the markerboard’s top edge. When everything’s aligned, secure the reverse hinge to
the bottom edge of the melamine with wood screws.

Build the quick frame

Mount one ball catch in each of the longer Quick Frame tubes with the ball centered 6¾” from the end. Use the catch plate as a template to drill three 5/32″ holes, then step-drill the middle hole to 9/16″ to accept the catch body. File away the “countersinks” on the back of the catch plates, thread the catches into the plates as far as they’ll go, and rivet the plates to the tubes (1st photo).

Assemble the Quick Frame by pounding the corner connectors into the tube ends with a rubber mallet, making sure to orient the long tubes with the catches directly opposed.

Turn the table assembly facedown and place the Quick Frame around it, with the catches nearest the top hinge leaf (2nd photo). Align the edges as squarely as possible, locate and drill mounting holes in the Quick Frame to match the hinge, and fasten with rivets. Finally, mount 4 rubber feet on the back corners by driving sheet metal screws into the plastic Quick Frame connectors.

Hang and adjust

With a helper, mount the backboard to the wall using drywall anchors or other suitable hardware (1st photo). Make sure, before you commit, that there is room for the table to deploy, and that it’s flat and level when folded out.

Once it’s hung, test the folding action, but be gentle, as the catches are probably sticking out too far right now. Screw the catches in until they just clear the aluminum angle; you should feel firm resistance as the balls compress their springs. Now locate the detent holes by rubbing the aluminum with pencil lead and closing the frame a few times to leave tracks in the pencil markings (2nd photo). Mark centers where the tracks end, drill to ⅜”, and deburr the holes with a file. Verify that both catches click cleanly in place when you stow the frame. If not, adjust the detent holes with a round file. I didn’t use the detent plates that came with the catches — the simple hole works great.

Finally, add short strips of velcro loop tape on the frame’s bottom corners to prevent scuffing.

Art it up

Align the poster frame to the Quick Frame edges, open the top flap, drill through the mounting holes, and fasten with rivets. Repeat for the side and bottom flaps, then mount your art in the frame. Test the folding action a couple times, clean up any pencil marks or blemishes, and your foldaway table is ready to use.

Note: If you want to soften the unfolding action a bit, deploy the table halfway (onto a stool or other prop) and cover the hinge leaf on the Quick Frame with velcro loop tape. Then remove the prop, unfold the table fully, and trim away any excess tape with a hobby knife.