Bizzaro is a professional magician from Las Vegas turned escape room and interactive experience creator. Sometimes he eats Doritos, sometimes they eat him. More at www.bizzaro.ninja.
This article appeared in Make: Vol. 98. Subscribe to Make: for the latest articles.
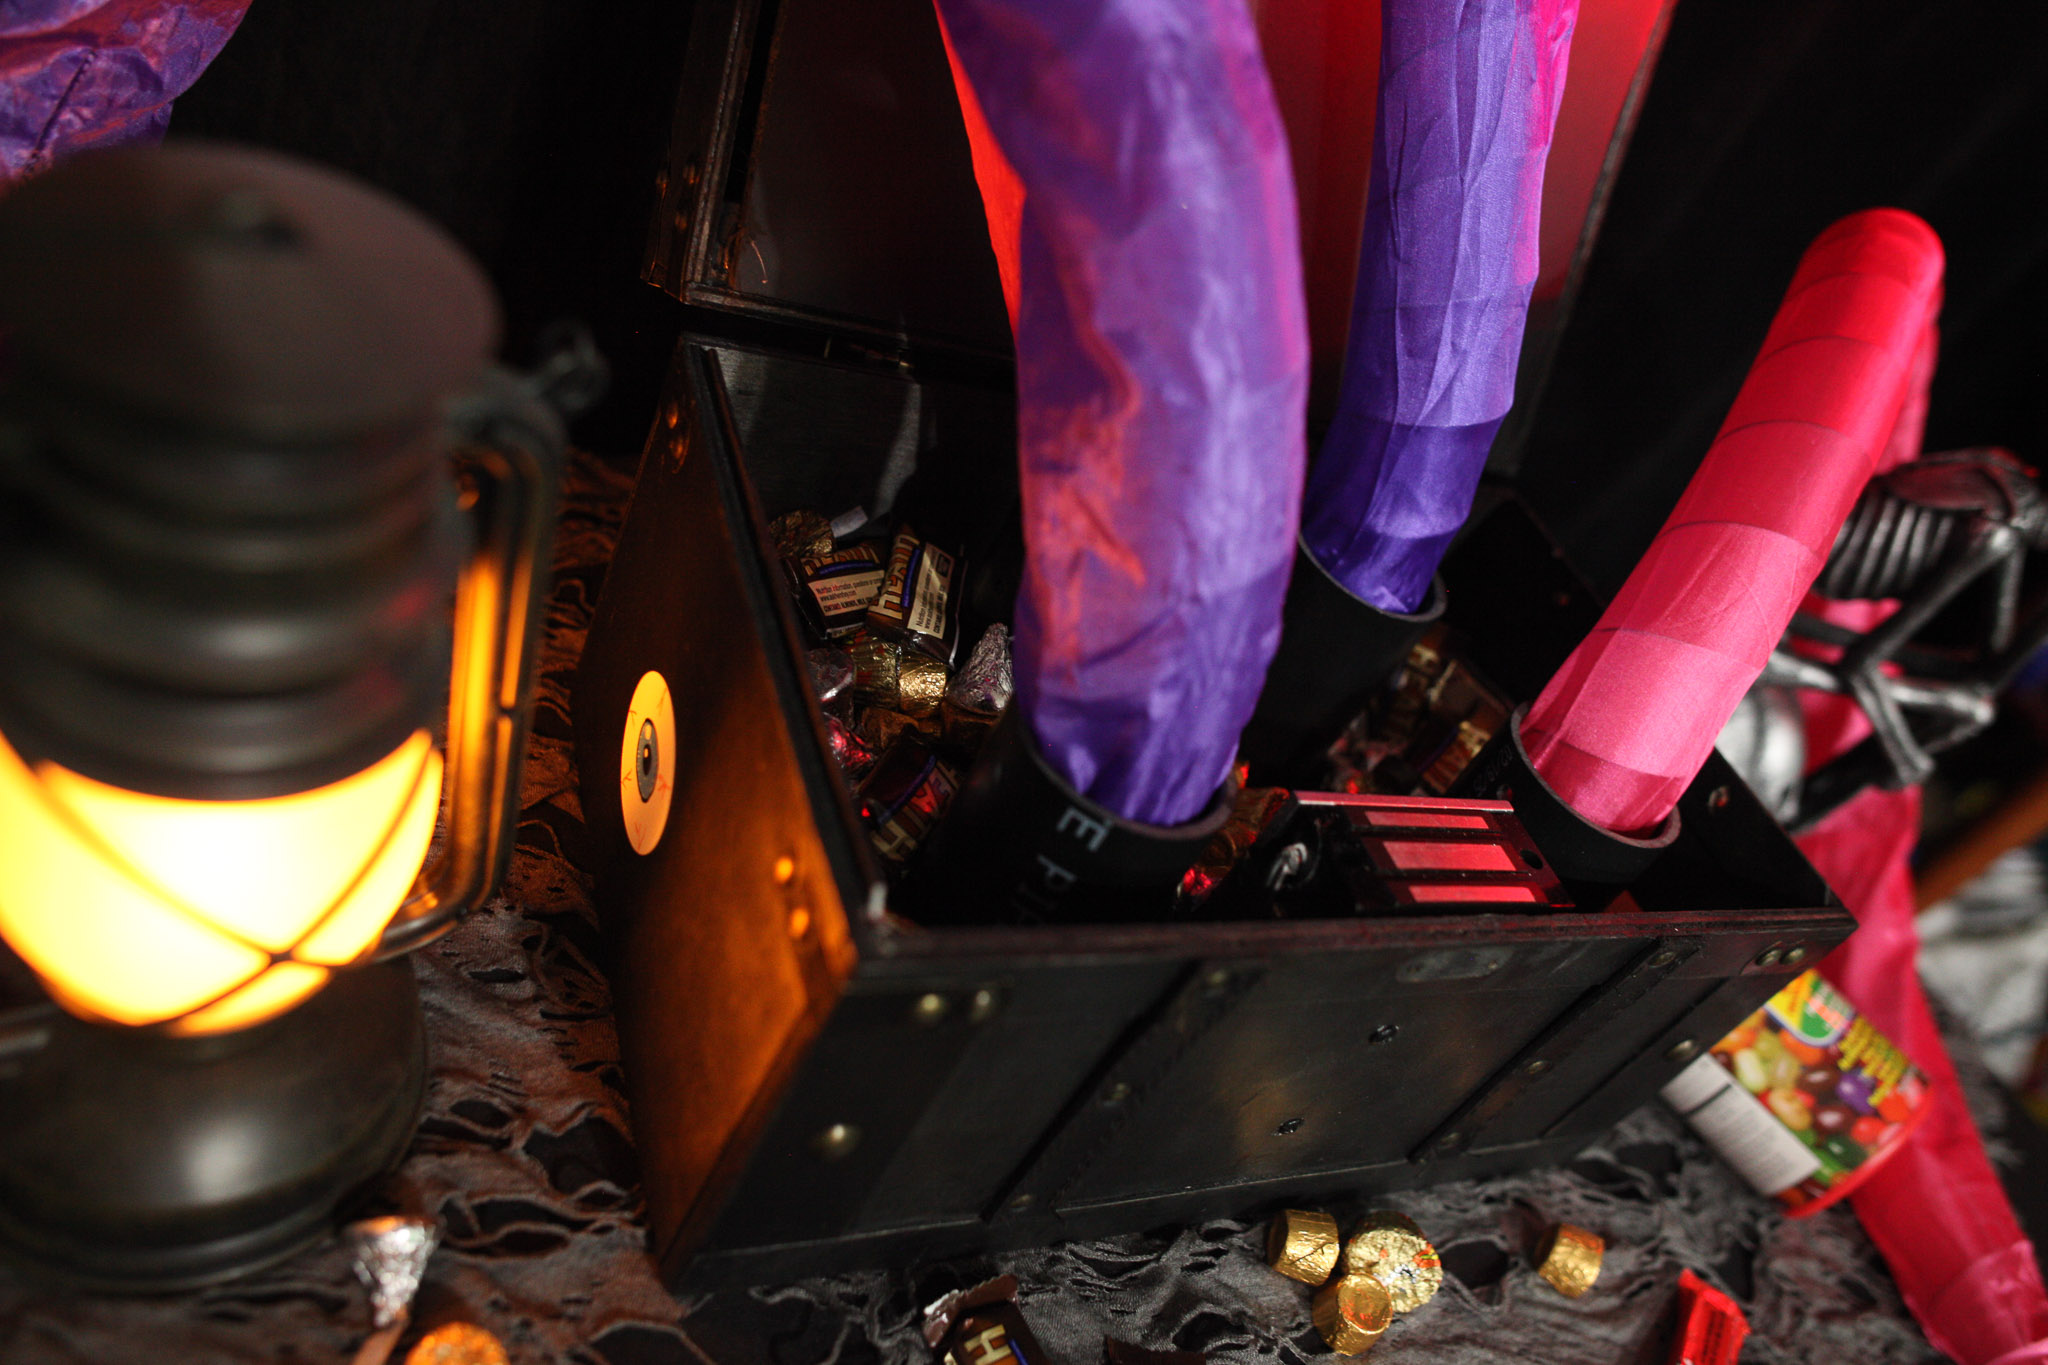
With Halloween just around the corner, what better way to celebrate than combining some simple tech with a good old-fashioned scare? Pass a magnet over a hidden spot on the box and — surprise! — the lid snaps open and four spring-powered snakes fly out at your startled guest. This build takes some basic tech I use in a lot of my escape room builds and lets you add some interactive chicanery to your skill set.
Photography by Bizzaro.
Project Steps
1. Start With the Top
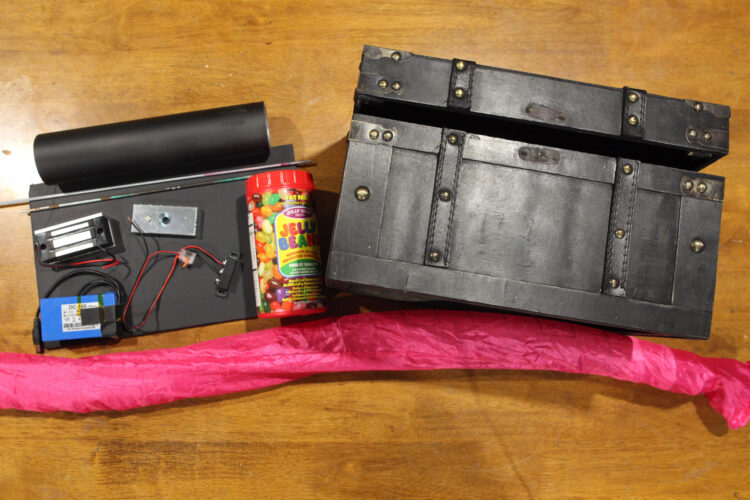
Materials.
If your lid has depth to it like mine, measure the length and width of the inside of the lid. If your lid is flat with no sides, you can skip ahead to step 2.
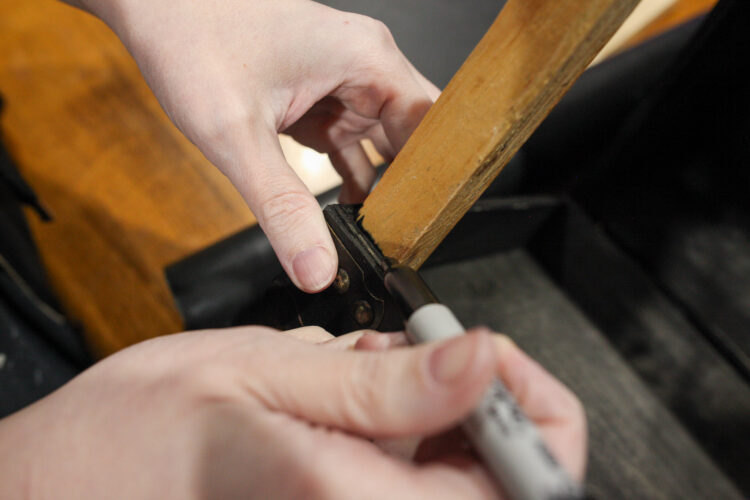
Cut the black foamcore board to match the inside dimension of the lid. This board will need support, so put your wooden square dowel into the lid and mark where the edge is.
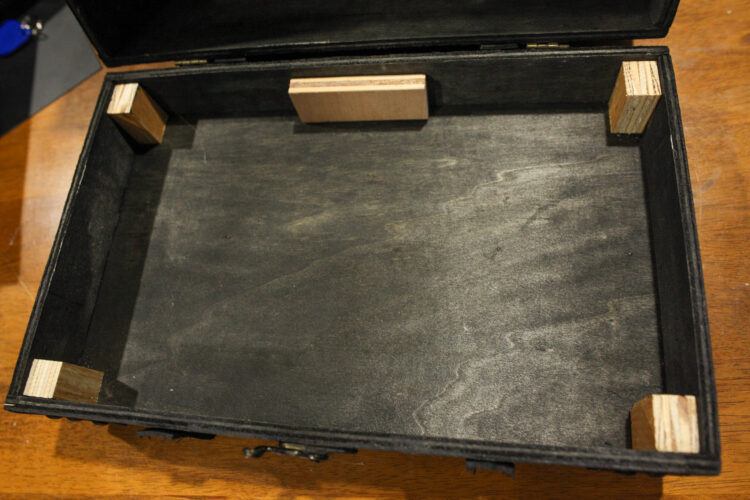
Cut the square dowel to match the inside depth of the lid, minus 3/8" for the foamcore board. You will need four pieces, one for each corner. For the middle back, I used a random wood scrap I had but you can use another dowel. I used hot glue to attach them into the lid.
2. Lock It Down
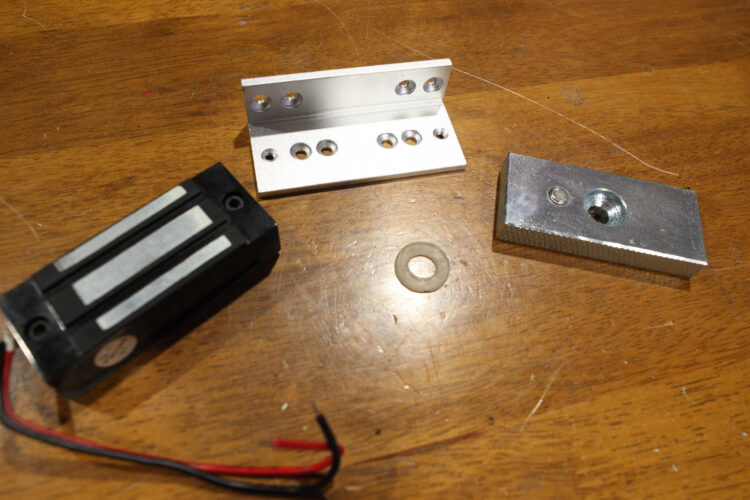
You are now going to attach the magnetic lock. These are usually composed of three parts: the strike plate (the big silver chunk of metal), the mounting bracket, and magnetic base. Usually the base and mounting plate are attached and have to be separated by way of an included Allen wrench.
Hold the lock against the inside of the box, lining it up flush with the edge of the box, and measure the distance from the bottom of the box to the back of the mounting bracket. Using this measurement, cut a piece of 2×4. Remove the magnetic base from the mounting bracket and screw the bracket into the top of the 2×4, lining it up with the edge of the block of wood. Reattach the magnetic base and screw the wood block to the box from the front.
If the wood of your box is thick enough, you could skip the 2×4 entirely and just screw or bolt the mounting bracket to the wall of the box itself, but the box I got was too thin to do that and using the 2×4 gives it a lot of strength. 2×4s are also the perfect size to mount these kinds of locks.
NOTE: If your lid is flat, you need to allow room for the strike plate to line up with the base, so don’t mount the base flush to the top edge of the box.
3. Back to the Top
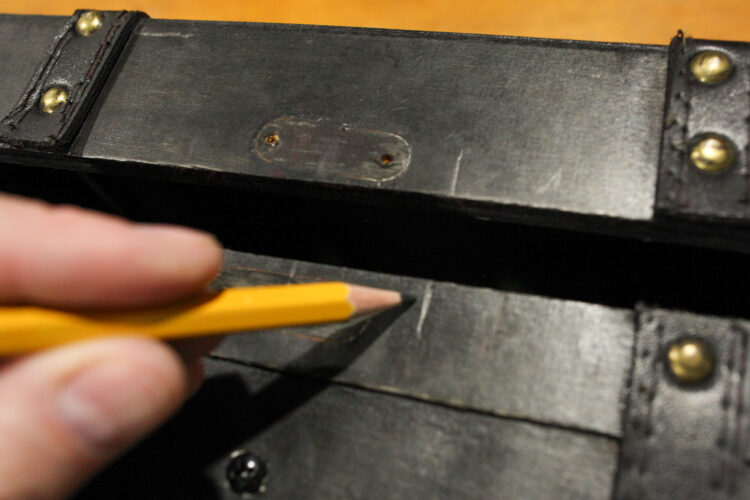
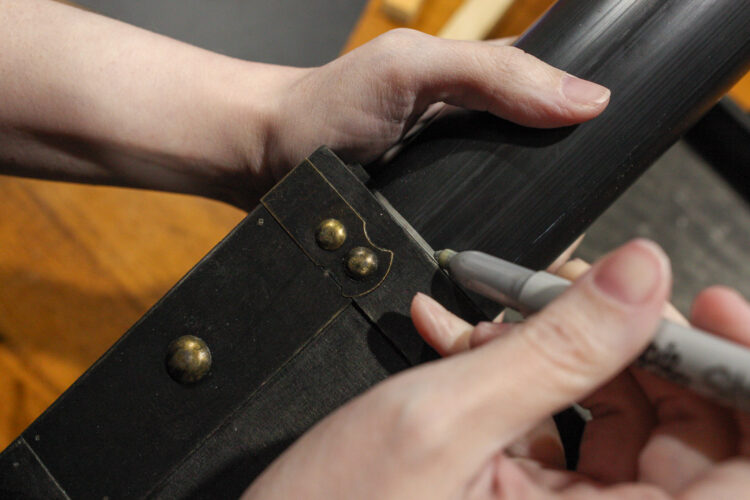
Now you need to line up the strike plate to the magnetic base. Make pencil marks on the outside of the box that line up with the edges of the base. Close the box and transfer those marks to the outside of the lid.
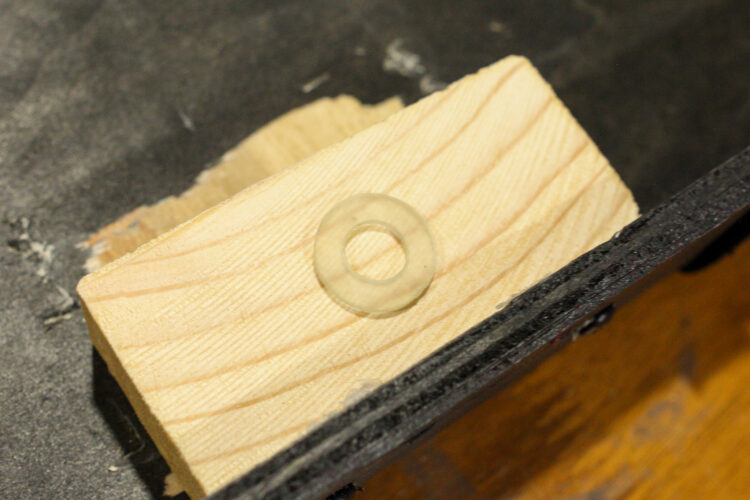
You are now going to do the same thing you did with the base. Hold the strike plate against the inside of the lid, making sure it’s flush to the edge. Measure from the bottom of the plate to the inside of the lid and cut a piece of 2×4 to that distance. Screw the piece of wood into the lid from the outside.
Now you’ll line up the strike plate to your pencil marks on the box and screw it down. But first, take note: Included with almost all maglocks is a clear rubber washer. This piece is very important. It’s what makes the lock work reliably. The rubber washer goes between the strike plate and the wood. It gives the plate flexibility to shift around and seat itself properly for a secure connection. Do not skip this part!
To mount the strike plate I had, I needed a washer so my screw head didn’t go through the recessed hole. Yours might not. Don’t tighten it too much, it needs a little bit of wiggle for the rubber washer to do its job.
Finally, cut a hole in the foamcore board to fit around the strike plate. Make it slightly bigger than the plate itself. Put some hot glue on the tops of the wood dowel supports and press the foamcore firmly in place.
4. Inner Tubin’
Stand the ABS pipe in the bottom of the box and mark its height, flush with the box edge. I used ABS because it is already black and tends to have a thicker wall for stability. Cut four of these tubes to the same length.
Glue the four tubes into the box in whatever configuration suits your needs. I chose a staggered layout, to leave room for an object in the middle and to disperse the spring snakes’ force across the lid. I used, you guessed it, hot glue for this because it works surprisingly well with the ABS and wood. You could use epoxy but the hot glue does its job.
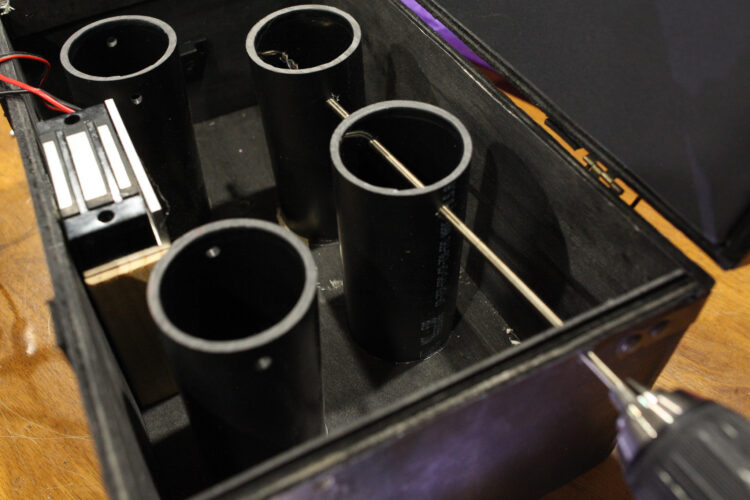
Drill into the box from the side and through the tubes with the long 3/16" bit, about 1" below their top edges. This creates a channel for the 1/8" metal rods to slide through. (If you don’t have a long bit you could pre-drill these holes in the tubes before gluing, but lining them up might be a challenge.)
5. Time To Wire
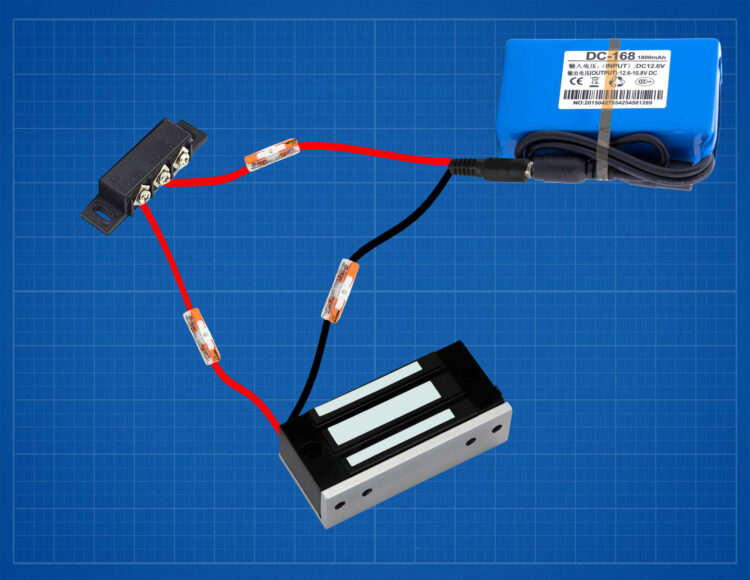
For this application I am using single inline Wago wire connectors, aka Lever Nuts.
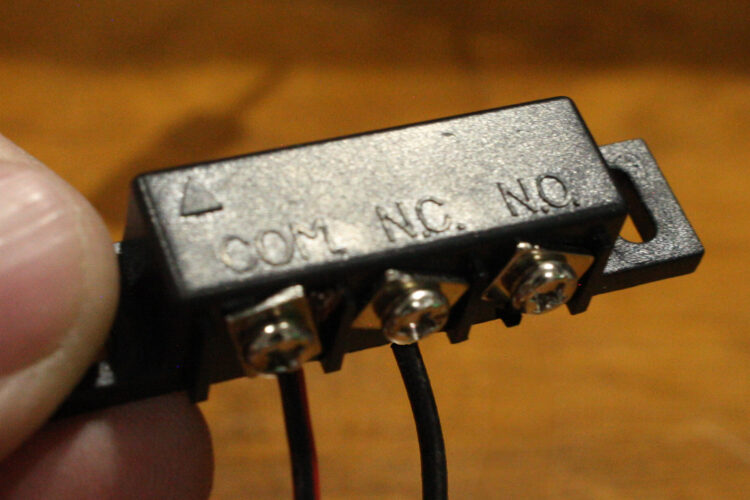
You will also need a magnetic reed switch but they’re not all the same. I used the kind found on doors, as they have both NO and NC connections. What you want is the NC (normally closed) port. That means the switch will supply constant power to the lock until a magnet releases it. Attach the reed switch anywhere to an inside wall of the box. I chose the side.
The wiring for this pretty simple. Once you get everything connected, hide the wires and battery in the bottom of the box. If this is going to be a permanent prop, you can wire it up to wall power using a 12V adapter power plug.
6. Why’d It Have To Be Snakes
Find a friend who likes jellybeans and have them open the can you bought. After they get done being mad at you, take the snakes that shot out and stuff them into the black tubes.
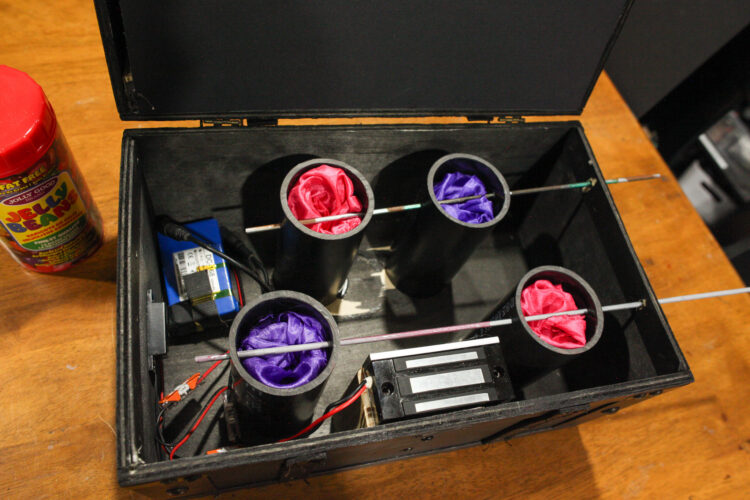
Start on the right side and run a 1/8" metal rod through the side of the box and through the holes in the ABS pipe. This locks the snake in place. Shove the metal rod the rest of the way through the left tube, locking both snakes in place. Repeat this for the other two tubes. You’ll remove the rods once the lid is locked.
7. The Fun Part
Now it’s time to test it! Close the lid, making sure it locks in place. If it doesn’t, check your wiring, especially the reed switch, and make sure the battery is on. If those are fine, make sure the strike plate isn’t too tight and that it lines up to the base. After the lid is secured shut, place a magnet on the outside where the reed switch is to make sure the box unlocks.
If everything is in working order, pull out the metal rods to set the box. Touch the magnet to the box and watch out! If everything has gone right, the lid will fly open and four spring snakes will eject from the box.
One piece of advice: Secure the box to whatever surface it’s on. You can screw or tape it down.
Conclusion
There are lots of ways to use this box! You can use it as a gift box and create a scavenger hunt to have someone find a trinket to open it up. Or wire up a button on the outside of the box and fill the inside with candy for trick-or-treaters. You could even wire it up to an RF remote to trigger it when someone walks by. The choice is up to you!
You can cover up the wires and battery in any way you see fit: paper, fabric, candy, a false bottom, etc. It really depends on your use case.
If you make your own version of this, head over to testsubjects.com and let us know! We would love to see it.
Bizzaro is a professional magician from Las Vegas turned escape room and interactive experience creator. Sometimes he eats Doritos, sometimes they eat him. More at www.bizzaro.ninja.