The vacuum siphon coffee brewing method dates back to the 1840s. It produces some of the cleanest, smoothest-tasting coffee of any method. Commercial vacuum pots are available, but I wanted to heighten the drama of vacuum brewing by taking it into the realm of the mad scientist’s lab. Thus the Florence Siphon was born!

After studying original patent drawings and existing devices, I identified these key features:

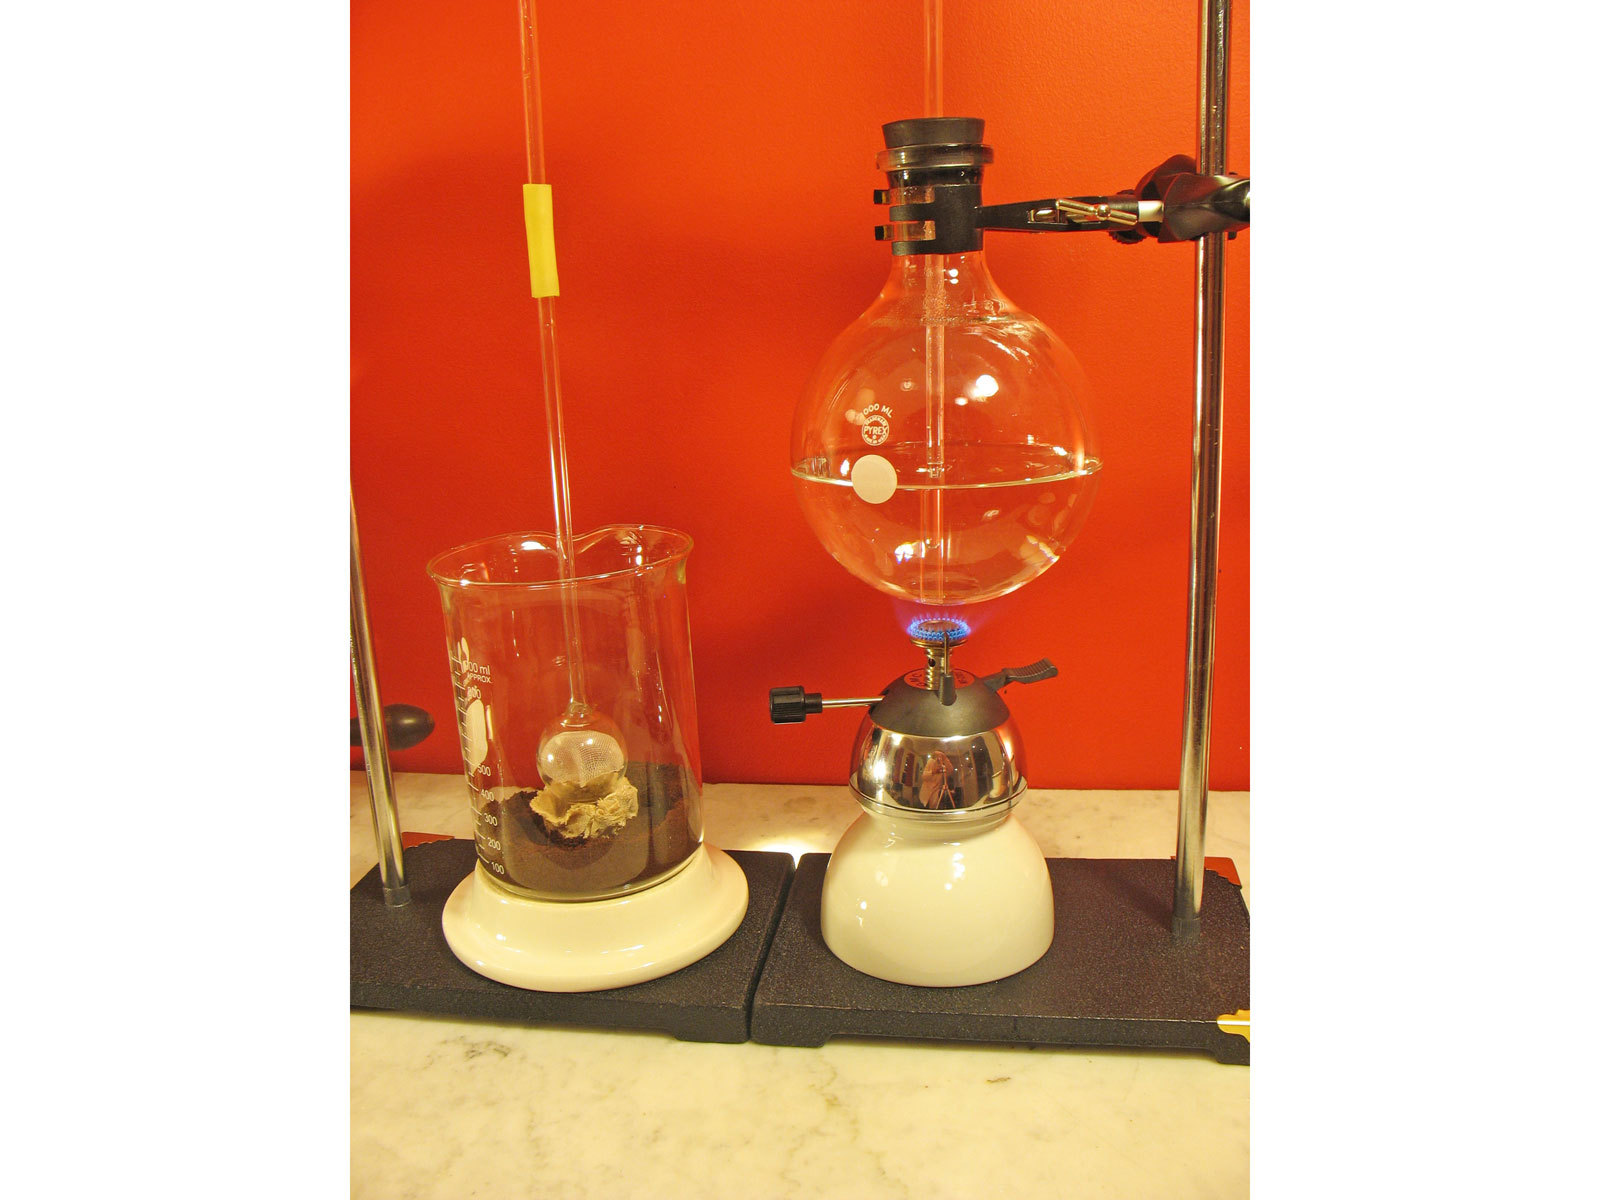
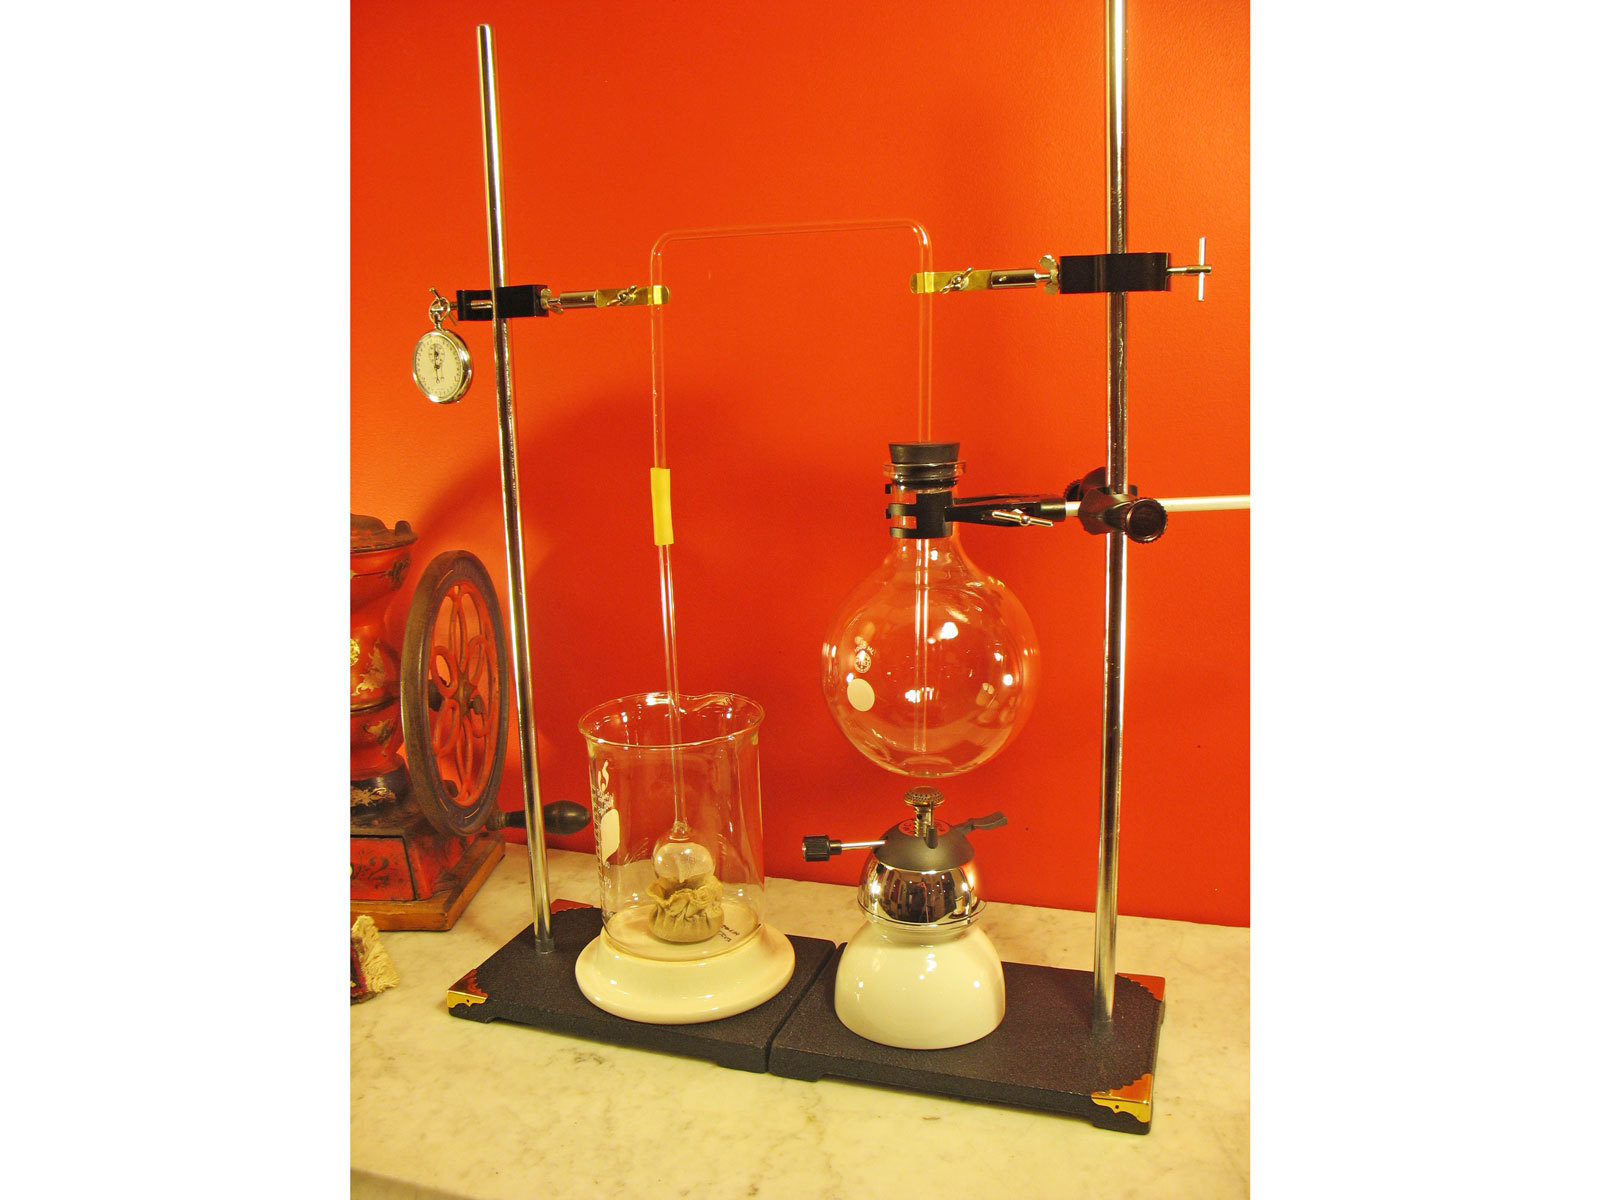
  • Water is heated in a boiling flask that has a tube leading to a second vessel containing ground coffee.
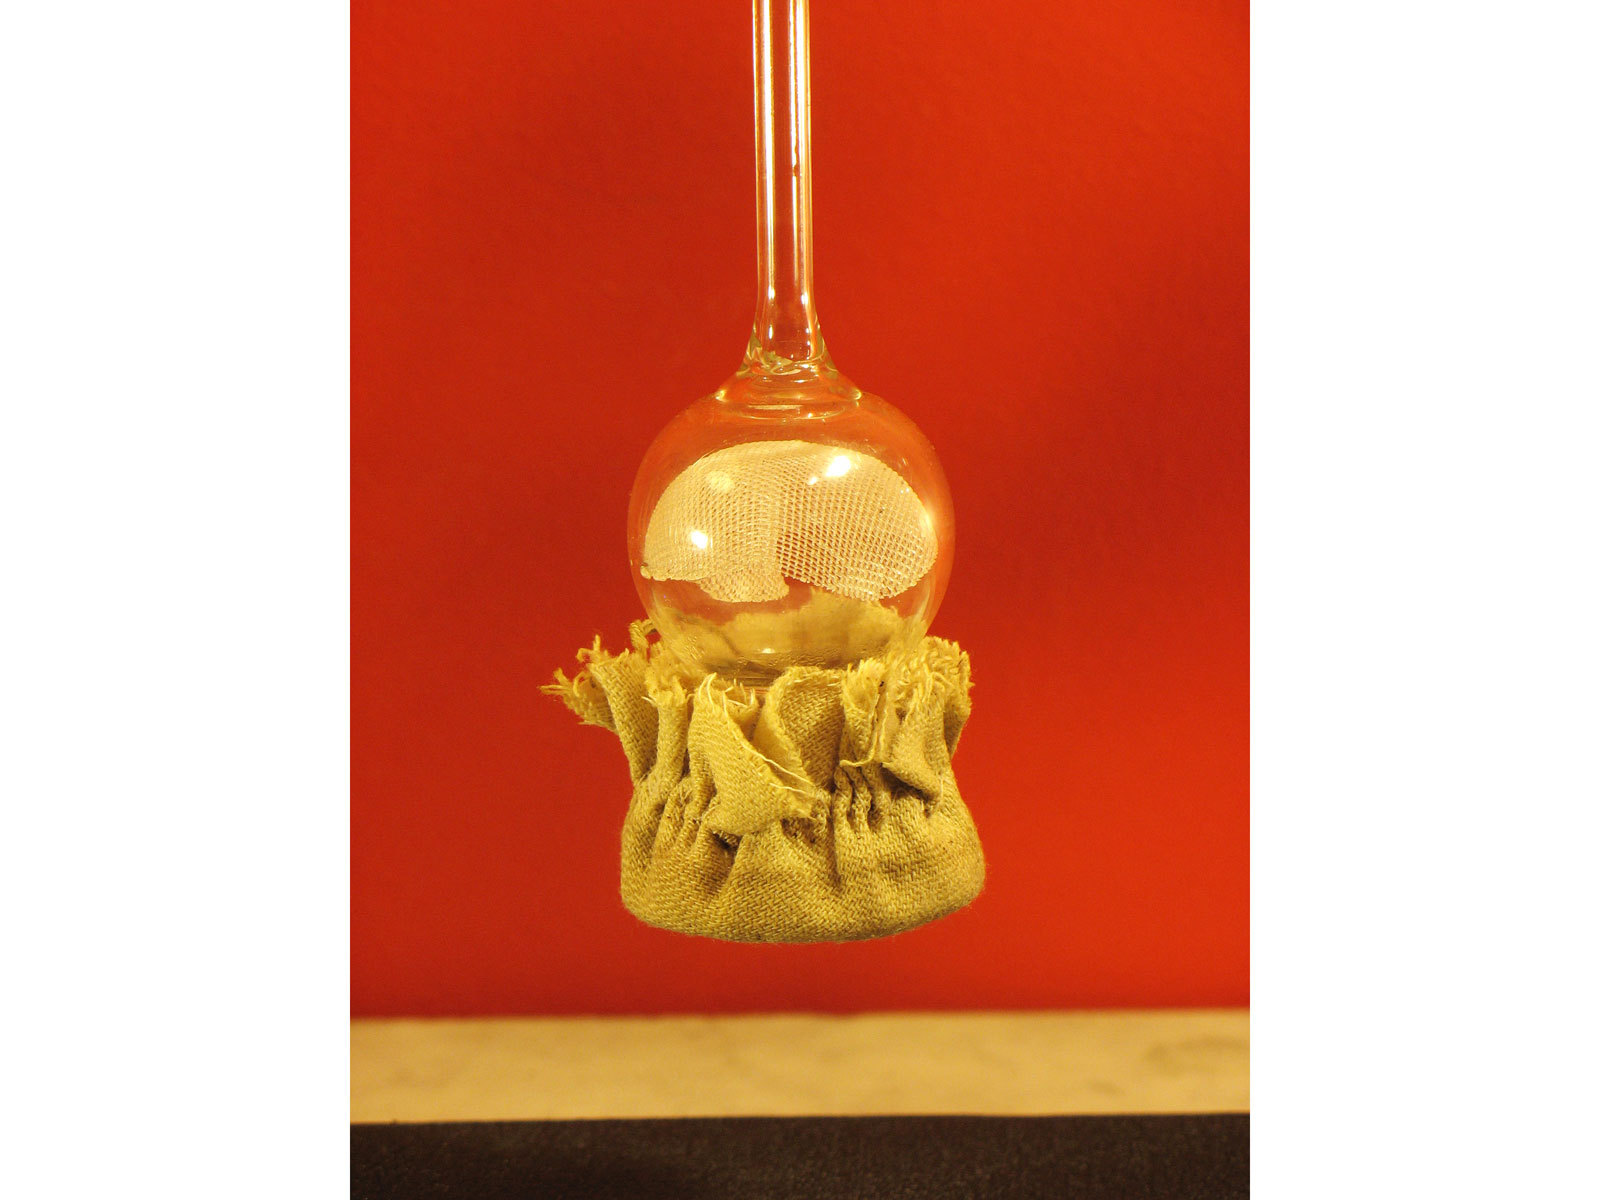
  • The tube must have a filter, to allow the water to flow through but not the grounds.
  • The filter must be submerged during brewing, so as to maintain a seal with the boiling flask.
  • The second vessel must be accessible for stirring the slurry.
  • The boiling flask must be large enough to create a sufficient vacuum as it cools to “pull” the coffee back through.

One drawback to early vacuum brewers was the constant danger of exploding glass. Today, we have plenty of high-quality borosilicate glassware that’s up to the task — it just happens to be found in the lab, not the kitchen.

Filtration was another challenge. I tinkered with a few options (including an unfortunate foray into shower heads) before arriving at an inverted thistle tube. This is a type of bulbed funnel that’s easy to cover with filter cloth. (Thanks to Dr. Jim Callan from Avogadro’s Lab Supply for this suggestion.)

I assembled my funnel, stopper, tubing, filter, and a beaker for the grounds. I filled my flask with preheated water (small burners can take a while to boil 500ml), poured 38g of medium-ground coffee into the beaker, donned my goggles, and lit the burner.

The water began to bubble quickly, and soon went straight up the glass tube and over to the grounds. After about a minute, the flask was nearly empty and I extinguished the flame. At this point, there was an abundance of expanded water vapor (steam) inside the flask, which prevented the water from returning.

I stirred up the slurry with a stick and then waited with great excitement. Would the siphon be able to draw the coffee back up? At just about the 2-minute mark, I saw the gorgeous brown liquid begin its ascent. This is due to the vacuum created by the cooling and contraction of water vapor in the boiling flask. It was tentative at first, but as the boiling flask continued to cool, the coffee started to move quickly up the tube, over and then back down to the flask below. Within another 20 seconds, the journey was complete: 420ml of coffee made it back, leaving 80ml of water behind with the grounds.

I removed the stopper and poured myself a cup. It was perfect! Smooth, bright, clear, and clean. Vacuum coffee is a step above a French press, and leagues above drip. Plus, when you brew with the Florence Siphon you get to don your lab coat and cackle maniacally. What more could you want from a cup of coffee?

Here’s how to build your own Florence Siphon.

Project Steps

Build it.

I purchased all the lab supplies from Avogadro’s Lab Supply.

Use only brand-new lab equipment. Used glass can contain seriously scary things that can kill you.

Wash the glassware with a small amount of dish soap and warm water.

Assemble your stands and clamps as shown in the photo. Put the burner, Florence flask, and Griffin beaker in place. To connect the 2 vessels, you’ll need to put two 90° bends in the glass tubing.

Measure the height of your Florence flask, then add 3″. This is the length from one end of your glass tubing to the first bend. Place a mark there with a grease pencil or crayon. Measure the distance between your tubing clamps. This will be the distance between the two 90° bends. Mark this distance from the first bend on the tubing.

Turn your butane burner on high heat, don your gloves (or optional mad scientist gauntlets), then place the glass rod at the first bend mark. Roll the tube in the flame, putting gentle pressure on it so you can tell when it begins to soften. When it’s soft enough, gently bend it to 90°. I’d never done this before this project, and it sure is fun!

Wear thick leather gloves and long sleeves when bending or inserting glass tubing.

Using the same method, bend the glass tubing at the second mark. It’s important that the bends are aligned on the same plane, so you may need to reheat and adjust.

You should also heat the ends of the tube and roll them in the flame to round off the sharp tube edges. Don’t overheat them and close off the ends!

Using either a drill bit or a stopper boring tool, make a 4mm hole through the center of the rubber stopper. Lubricate the hole with glycerin and very carefully push the long end of the glass tube into the top of the stopper hole. This can be dangerous if done too quickly, so take your time, think happy thoughts, and wear gloves and long sleeves. The stopper should hold the glass tube about ½” off the bottom of the Florence flask when properly seated.

Cut a 2″ length of latex tubing, and use it to couple the glass tubing and the thistle tube.

Place the cloth filter over the end of the thistle tube’s funnel mouth, then pull the drawstring tight and tie it off. (I had also inserted a Teflon screen that proved unnecessary.)

Attach the filter/tube assembly to the 2 tube clamps, so that they hover above the Florence flask and Griffin beaker. You should test pushing the assembly down so that the stopper is in place and the filter rests about 1″ above the beaker floor.

You can adjust these heights with a greater length of latex tubing, or use a stand to prop up the beaker, as I did. I found a disused wine bottle holder that did the job nicely.

Brew it.

Preheated water can be a timesaver. Raise the filter/tube assembly, then pour 500ml of hot water into the Florence flask.

Grind fresh coffee beans on a medium-fine setting, somewhere between a drip and an espresso. You’ll fine-tune this over time. Pour the grounds into the Griffin beaker.

Lower the filter/tube assembly until the rubber stopper is firmly in place. The stopper must have a good seal all the way around. The filter end will be dug down into the grounds at this point.

Don your safety goggles, then ignite the burner. It should take a few minutes for a butane burner to bring the water up to temperature. Watch for the water to rise up the tube, defying gravity. It’s a very exciting moment!

Once nearly all of the water is in the Griffin beaker, start your timer. Lower the heat enough to maintain a low, bubbling roil in the small bit of water that remains behind in the Florence flask. This will keep things from progressing too quickly.

Give the water-saturated grounds a few stirs with a spoon or rod. If your coffee is fresh you’ll see it “bloom” as gases are released.

After 1½ minutes have passed (you’ll learn to adjust this timing, so keep notes), turn off the burner and remove it.

As the flask cools, steam will contract and draw the coffee out of the grounds and back to the flask.

When the coffee has stopped flowing, carefully unstopper the flask and raise the filter assembly tube. Remove the flask of coffee.

Pour yourself a cup of the most delicate, nuanced coffee you’ve ever brewed. Drink and enjoy madly.

Conclusion

The Method Behind the Madness

Why is siphon coffee so good? Two reasons: Ideal water temperature and optimal contact between the grounds and the water. Water turns to vapor prior to boiling, and then heads out of the boiling flask and into the ground coffee. This means your water is right around 200°F when the brewing begins. Electric drip brewers are notorious for their wildly inaccurate brew temperatures (and the sour brews they can produce as a result).

All of the water in a siphon brewer is in contact with all of the grounds during the entire brewing process. This gives the water the greatest chance to extract the things we want out of the coffee grounds. In all but the best drip brewers, a tiny stream of water flows quickly through the center of the grounds, leaving behind much of the flavor.

Once you get the hang of your siphon brewer, you can brew for a very precise amount of time. When the vacuum pressure is great enough, it will pull the coffee back into the flask rapidly. You can instigate this by cooling the flask with cold water, or even a wet cloth, although I’d be careful not to shock the glass too much with an ice bath.

This project first appeared in MAKE Volume 17, page 63.