





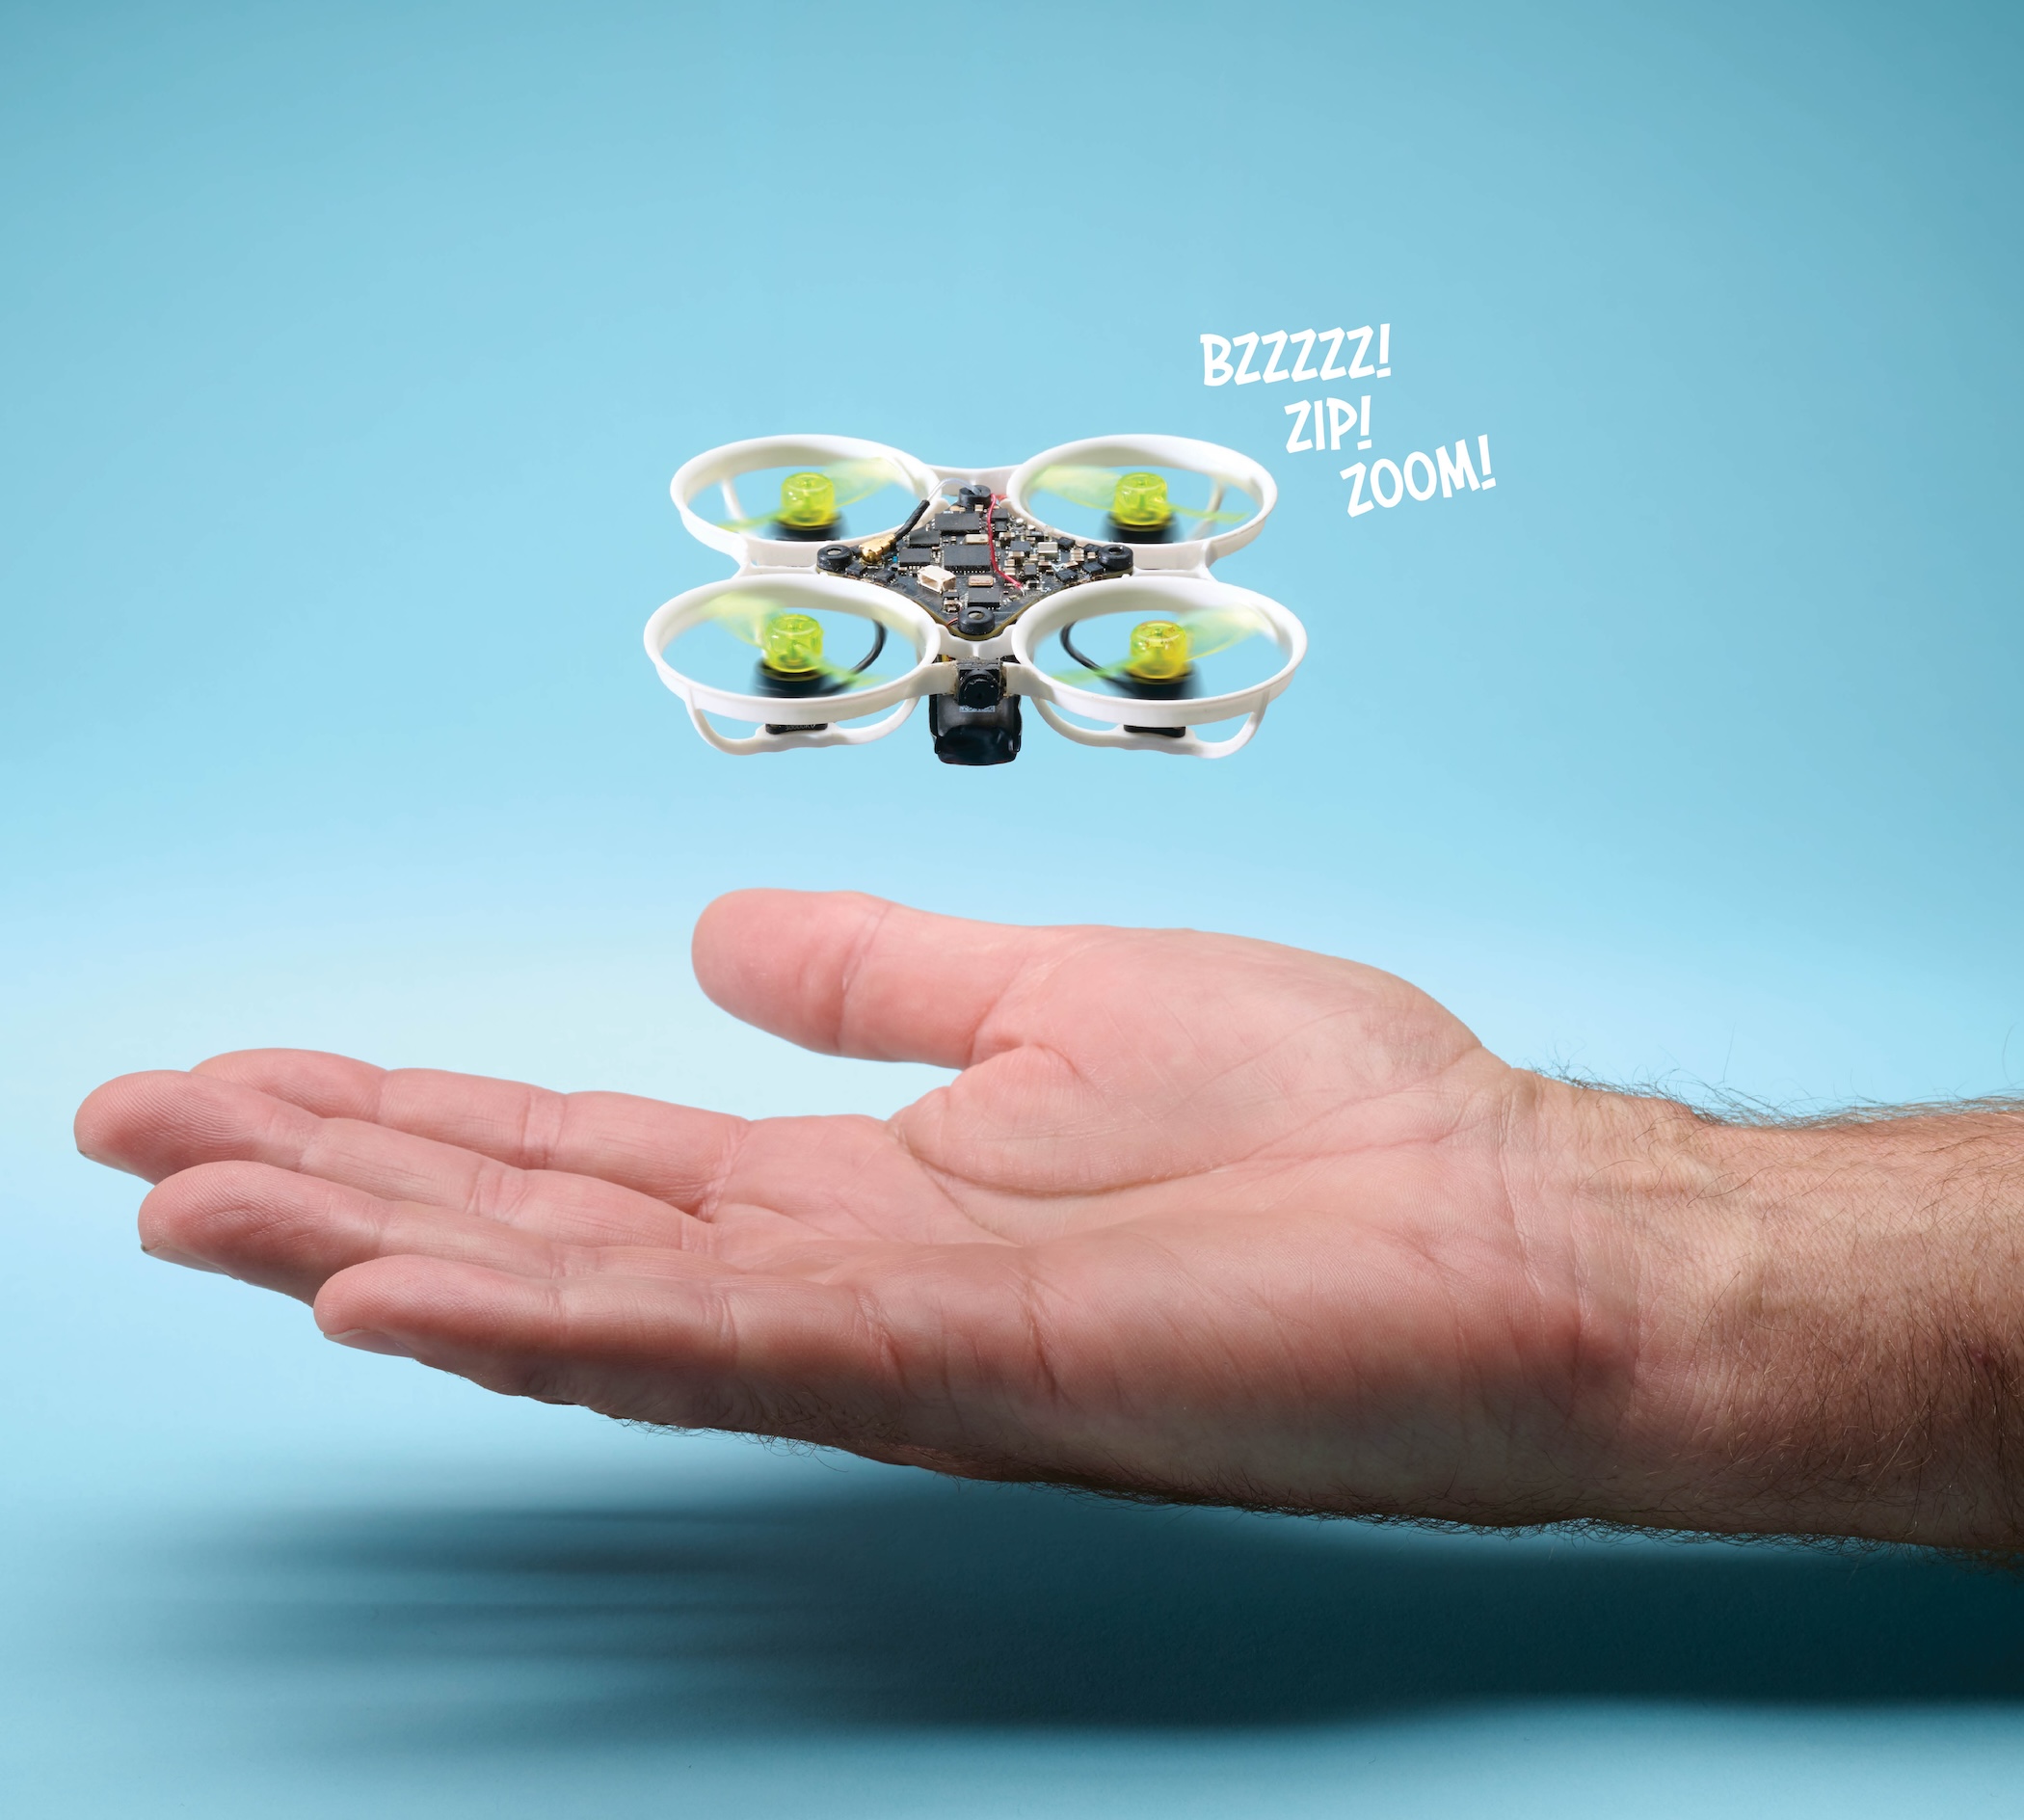
Cover of Make Volume 98. Headline is "Action: Projects that go Zoom! Bang! Woosh!". A small, ultralight drone that weighs less than 3 nickels is featured on the cover above a banana for scale.
This article appeared in Make: Vol. 98. Subscribe to Make: for the latest articles.

Build this remarkably lightweight, outdoor-capable, standard-sized 65mm brushless whoop-style drone using off-the-shelf parts, combined with a bit of fine soldering work. If you follow the instructions below, your finished ultralight whoop complete with first-person video camera should weigh between 13.5 to 14 grams — less than three nickels (15g)!

Note that this project requires moderate to advanced soldering skill and steady hands for fine soldering of small components. I recommend you use loupe glasses to magnify your work.

Also, you’ll need to know how to configure and troubleshoot Betaflight brushless drones. This is also true for piloting this drone, as it moves very fast!

Know Your FPV Drones

When first-person view (FPV) video drones broke out in the late 2000s, makers quickly adapted them for different purposes. Today they’re made for cinematography, for industry, and for war — but these are the ones we make for fun.

Photo by Mark Madeo
  1. Whoops aka micro whoops are mini quadcopter drones with ducted prop guards for safety. Fast and popular for FPV piloting and racing, they commonly measure 65mm or 75mm across, with 31mm or 40mm propellers.
  2. Ultralight whoops are the lightest and most nimble, with weight-optimized components and ultra-tiny FPV cameras that trade video quality for acrobatics and pure speed.
  3. Toothpicks are similar mini racing drones but open frame, no prop guards.
  4. Cinewhoops typically sport 3" props and motors strong enough to carry a GoPro-type action camera for excellent video and images.
  5. Freestyle FPV drones are all-arounders: fast and agile for acrobatic flight but still burly enough to carry a quality camera.
  6. Long-range FPV drones are built for extended flights up to 20+ miles, with more powerful radios to stay in contact. Ultralight versions are popular too.

—Keith Hammond

Build your ultralight whoop drone

Project Steps

1. Remove Motor Connectors

To start this project off, we’ll remove the motor connectors on the Matrix flight controller to cut weight. The easiest way is to carefully clamp the controller into a hobby vise so that it sits level in the jaws, with its motor connectors on the bottom. Alternatively you can use helping hands, but take care to attach the clamps where they won’t damage any of the SMD components.

Once the controller is in place, add a bit of flux to the solder points of the motor connectors, indicated by the red arrows. (Note that the photos here show an older model of flight controller, but the Matrix has essentially the same layout.)

Attach clamping tweezers to a motor connector so they hang beneath, suspended only from the connector. Now use your soldering iron to heat the connector’s solder joints. I like to cover all three with a small blob of hot solder to help melt them. After a few seconds the weight of the tweezers will make the connector fall out.

Repeat for the other three, then apply flux and use your solder wick to remove excess solder.

2. Attach Motors

Tin all the motor pads on the underside of the flight controller: apply flux to them again and heat them up one by one, carefully applying solder. During all these soldering steps, always keep your tip clean and free from buildup or debris.

Now solder each motor to its pads as shown, with the spindle of the motor pointing away from you as you solder.

3. Replace Camera Wires

The wires that come attached to the camera are too thick and inflexible. Replace them with 1.3" silicone wires and a length of fine enameled wire, soldered to match the image. But first the tips of the enameled wire need to be scraped, or tinned with burning hot solder, to remove the enamel.

NOTE: Be careful when soldering the black ground wire on the right to the timing crystal on the camera circuit. If you apply too much heat for too long, the crystal will likely slide off, so be quick as it is a bit tricky to replace!

4. Attach FPV Camera

Start by soldering the silicone wires from the camera to the flight controller’s camera pads labeled GND and CAM. As before, flux and tin the pads, then solder the wires in place to match the image, with the lens of the camera facing you.

The flight controller is designed to power 5V cameras but our ultra-tiny FPV camera needs 3.3V. Fortunately the controller comes equipped with what we need, a 3.3V regulator on board, but it’s not broken out as a power source. To access 3.3V, you’ll solder your camera’s enameled wire to the left side of the SMD capacitor indicated by the red arrow. Apply a bit of flux at the point indicated, then a small amount of solder to use for the joint. Now solder the camera’s enameled wire into place to look like the image.

Photo by Mark Madeo

5. Prepare Battery Connector

Remove any wires attached to the PH 2.0 battery connector by unsoldering them, then bend the connector leads flat. Note the orientation of the notch indicated by the red arrow.

Flux and tin the leads and then solder the red and black battery wires (measure 1.6" in length) to the connector. Connect a charged battery and use the electrical tester to verify the red wire is positive while the black wire is negative/ground, and fix as necessary. To save a bit of weight you can strip the black wire.

Solder the other ends of the battery wires to the flight controller battery terminals, red to + and black to –.

6. Assemble Your Drone

First it’s imperative to inspect all your solder joints to verify that all joints are clear, with no bridging. Use loupe magnifiers or the macro zoom on your camera phone. Any solder bridges can destroy the controller board on power-up!

Now place the four rubber grommets into the holes at each corner of the flight controller. Carefully thread each motor through the frame hole for the flight controller and position them into their nacelles. Next, do the same with the battery connector and the camera. Now gently push the flight controller into place, lining up the grommets with their supports, so that it seats fully in the frame.

Secure each motor in its nacelle using three PEEK plastic screws. Our 15-pack has three spares, and they’re fairly robust, but be careful to not overtighten them because their heads can snap off and it’s tricky to remove the headless screws from their holes!

7. Mount the Camera

Place a dab of E6000 glue on the back of the camera and then press it centered onto the frame. Clamp the camera gently in place while the glue sets; here I used a bit of enameled wire to lasso it. To prevent your image being askew during flight, make sure the camera is aligned from above and from the front.

8. Trim Weight

Once the glue sets, unclamp the camera and trim any excess glue with your X-Acto blade. You can also reduce a bit of weight by trimming the motor screws as in the before and after photos.

9. Mount (Or Make) Antenna

Attach the Hummingbird antenna to the U.FL connector on the controller.

If you didn’t source this antenna, you can prepare one yourself using an antenna wire fitted with a U.FL connector. Starting about 1" from the connector, carefully cut away the black sheath and outer metal ground shielding to reveal the interior antenna wire in its clear plastic covering.

Now cut the interior silver wire to precisely 12.92mm long, starting from the black sheath, using your calipers to measure precisely.

10. Mod and Mount Propellers

Our propellers are a yellow color that fluoresces well in UV, which is great for locating a lost drone with a UV flashlight after dark. Trim two blades off each, from opposite sides. Fingernail clippers easily remove the whole blade leaving no nubs.

Place your four trimmed props in their position on the motor shafts. I recommend the “props out” manner as shown.

Whoop There It Is!

All that’s left is to connect your ultralight whoop to Betaflight to test out your video feed and configure the drone, particularly its motor directions. I recommend you fly low and slow for your first five flights, in case a build or configuration issue pops up. Have fun piloting and flying your new FPV racing drone!

Photo by Mark Madeo

Your finished ultralight whoop at 13.5 grams, flanked by two earlier versions. Let me know how it goes, at drone-maker@d.ro!


This article appeared in Make: Volume 98.


Featured photo by Mark Madeo. All other photos by Scott Stevenson unless otherwise specified.