Skip to content
POPULAR SEARCHES:
  • Arduino
  • CNC
  • Raspberry Pi
  • Woodworking
  • 3D Printing
  • IOT
  • Robot
  • Maker Faire

Make: Logo

  • Explore
    • Make: Magazine
      • The premier publication of maker projects, skill-building tutorials, in-depth reviews, and inspirational stories, accessible by all ages and skill ranges.
    • Maker Faire
      • A celebration of the Maker Movement, a family-friendly showcase of invention and creativity that gathers together tech enthusiasts, crafters, educators across the globe.
    • Maker Shed
      • A smart collection of books, magazines, electronics kits, robots, microcontrollers, tools, supplies, and more curated by us, the people behind Make: and the Maker Faire.
    • Make: Books
      • Maker-written books designed to inform and delight! Topics such as microcontrollers including Arduino and Raspberry Pi, Drones and 3D Printing, and more.
    • Maker Campus
      • Maker Campus is a place to connect, learn, and make together. Find enriching and interactive events, classes, workshops, and more. Let’s grow together!
    • Maker Camp
      • A free program that lights children’s creative fires and allows them to explore projects in areas such as arts & crafts, science & engineering, design, and technology.
    • Make: Community
      • Membership connects and supports the people and projects that shape our future and supports the learning initiatives for the next generation of makers.
    • Make: Projects
      • A project collaboration and documentation platform.
  • Learn
    • Books & Kits

      Get hands-on with kits, books, and more from the Maker Shed

    • Classes and Workshops

      On Maker Campus facilitated by makers but for everyone

    • Transformational Learning

      Make: Learning Labs for young adults

    • Young Maker Projects

      Find projects for young makers

    • Watch and Learn

      Skill builder, project tutorials, and more

  • Experience
    • Magazine

      Subscribers' Digital Portal

    • Membership

      Access Make: Community

    • Faires

      Find a Maker Faire near you

    • Classes and Workshops

      Register on Maker Campus

    • Makerspaces

      Find a Makerspace near you

  • Participate
    • Organize

      Start a local Maker Faire

    • Write

      Share a book or article proposal

    • Engage

      Become a Make: Community member

    • Teach

      Host a class or workshop

    • Share

      Post a project

  • Shop
    • Kits, Books, & More

      Maker Shed, the official store of Make:

    • Classes and Workshops

      From top makers on Maker Campus

    • Make: Magazine

      Subscribe to the premier DIY magazine today

    • Make: Membership

      Community access, print, and digital Magazine, and more

  • Awards
Subscribe
Get Make: Magazine Issue 79
Subscribe Today to Make: Magazine
Log In
avatar
avatar
Log Out
  • All Stories
  • Magazine Projects
  • Board Guide
  • Maker Spotlights

Projects from Make: Magazine

The NES MPS – A Stage-Worthy LSDJ/Nanoloop Workstation

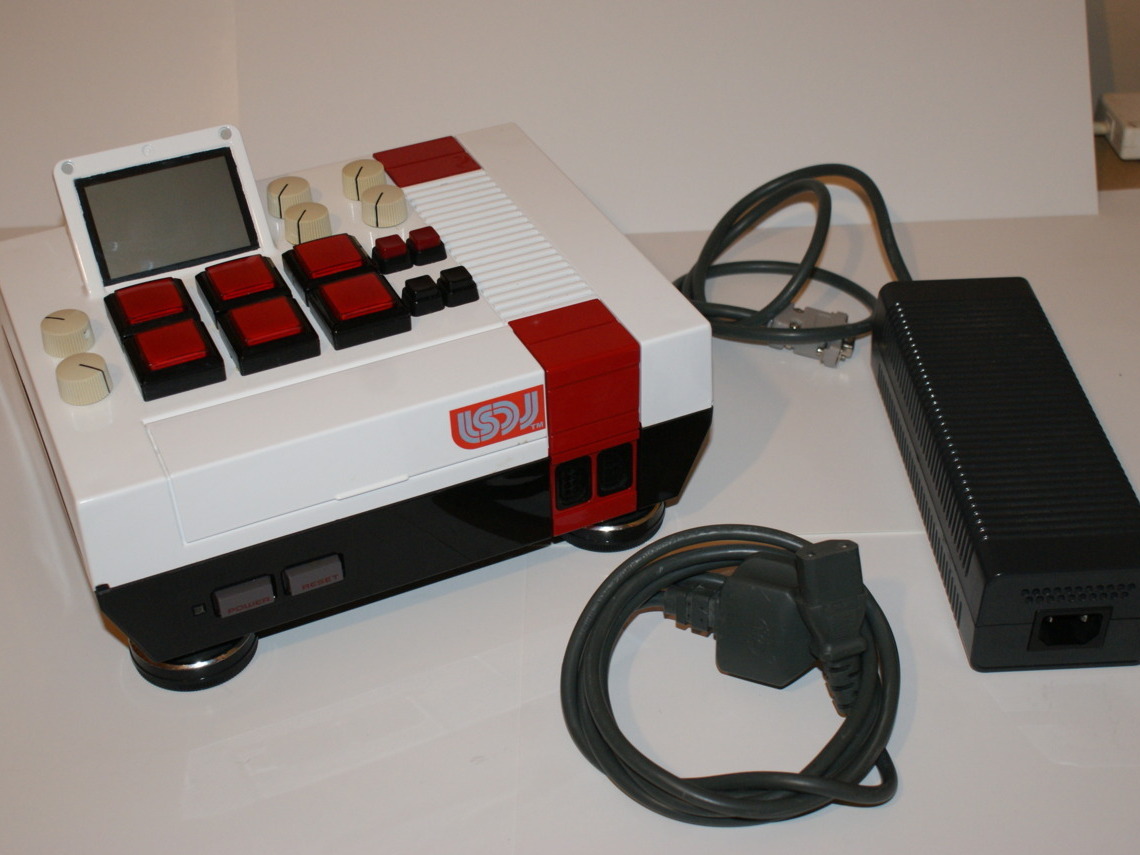
The NES MPS is basically a GBA SP and a 16bit FX processor housed in an NES shell. The aim is to create a stage-worthy and tactile interface to run LSDJ or Nanoloop.

  • By LoFi Future
  • Print this Project
Share via
  • Facebook
  • Like
  • Twitter
  • Pinterest
  • LinkedIn
  • Digg
  • Del
  • Tumblr
  • VKontakte
  • Print
  • Email
  • Flattr
  • Reddit
  • Buffer
  • Love This
  • Weibo
  • Pocket
  • Xing
  • Odnoklassniki
  • WhatsApp
  • Meneame
  • Blogger
  • Amazon
  • Yahoo Mail
  • Gmail
  • AOL
  • Newsvine
  • HackerNews
  • Evernote
  • MySpace
  • Mail.ru
  • Viadeo
  • Line
  • Flipboard
  • Comments
  • Yummly
  • SMS
  • Viber
  • Telegram
  • Subscribe
  • Skype
  • Facebook Messenger
  • Kakao
  • LiveJournal
  • Yammer
  • Edgar
  • Fintel
  • Mix
  • Instapaper
  • Copy Link
The NES MPS – A Stage-Worthy LSDJ/Nanoloop Workstation
December 18, 2012, 10:55 pm PST
  • Parts

Parts

  • Small push button switches (4)
  • Square arcade buttons (6)
  • FX processor (like the Alesis PicoVerb) (1)
  • Gameboy advance SP (1)
  • Empty NES Shell (1)

Advertisement

Hot Topics

  • Learn Electronics with Make: Kits and Books
  • Fix Our Planet

Advertisement

Steps

  • Project Steps View All
  • 1. An idea is born.
  • 2. I started with the screen...
  • 3. After paint, I began to...
  • 4. Now for the tricky part:...
  • 5. Mounting the hardware and PCB...
  • 6. For power I decided to...
  • 7. One of the last things...
  • 8. That's it, really; this was...

Advertisement

Step #1:

NextPrev
The NES MPS – A Stage-Worthy LSDJ/Nanoloop WorkstationThe NES MPS – A Stage-Worthy LSDJ/Nanoloop WorkstationThe NES MPS – A Stage-Worthy LSDJ/Nanoloop Workstation
  • An idea is born.
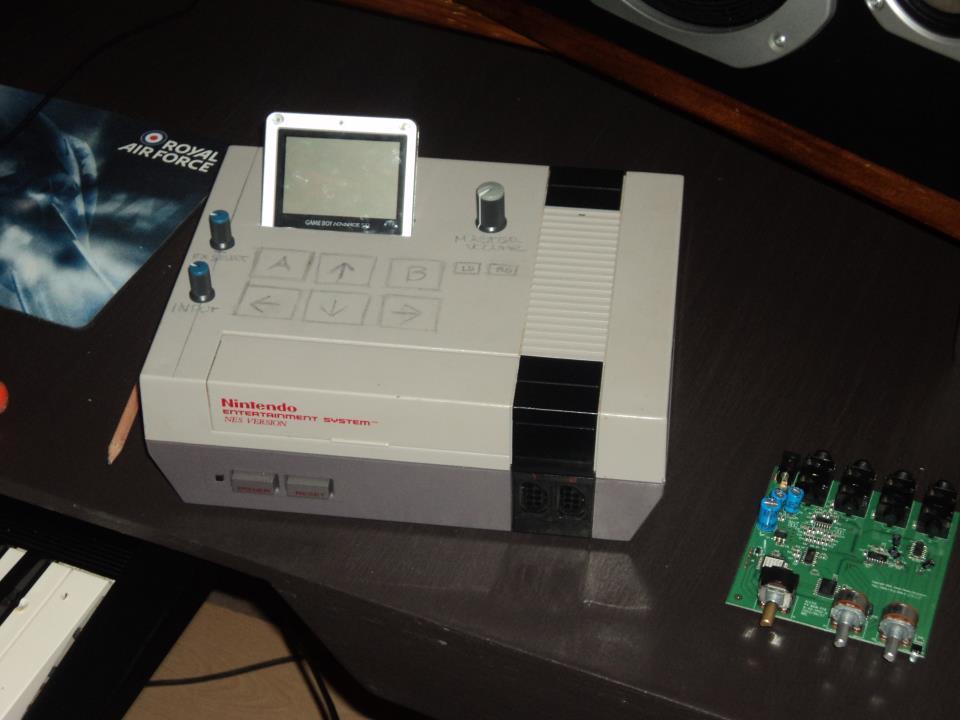
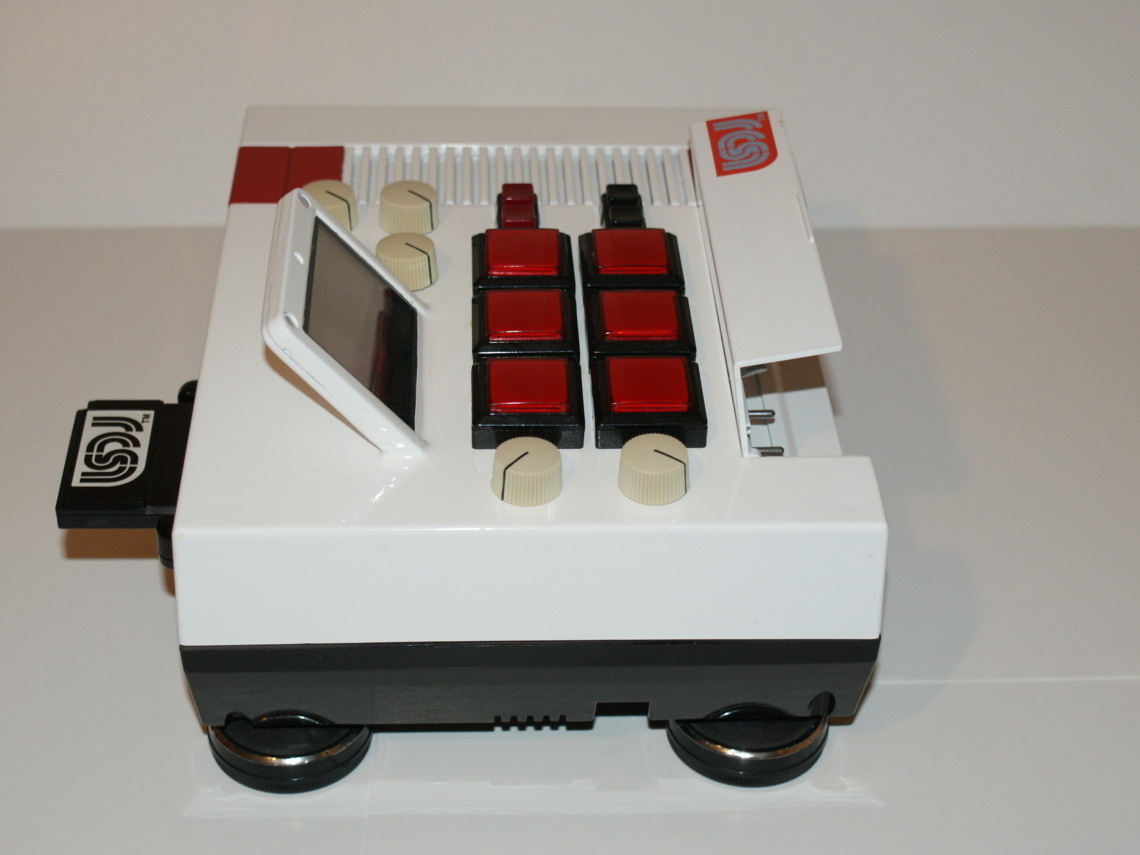
  • I was trying to come up with a cool new project idea one night when I stumbled across a broken NES and a GBA SP. The idea quickly sprang to mind to house the Game Boy inside the NES shell somehow. After placing the screen I noticed how much it looked like an MPC and decided to use square buttons to really give it the MPC look.
  • I decided to incorporate an old Alesis PicoVerb that I had lying around into the project to give it some more functionality. (On the next one I plan to add an analogue LP filter.)
  • After I settled on the design I began to order the parts and start the fabrication process.

Step #2:

NextPrev
The NES MPS – A Stage-Worthy LSDJ/Nanoloop WorkstationThe NES MPS – A Stage-Worthy LSDJ/Nanoloop WorkstationThe NES MPS – A Stage-Worthy LSDJ/Nanoloop Workstation
  • I started with the screen placement. After I decided where to put it I cut a rectangular hole and laid the screen in it. I then scuffed up the area where the screen meets the NES and applied body filler all around the gap. I then sanded it to a nice smooth curve all the way around.
  • The only thing I don't like about this mounting method is the fact you can't remove the screen; something I'm definitely going to change in the next design.
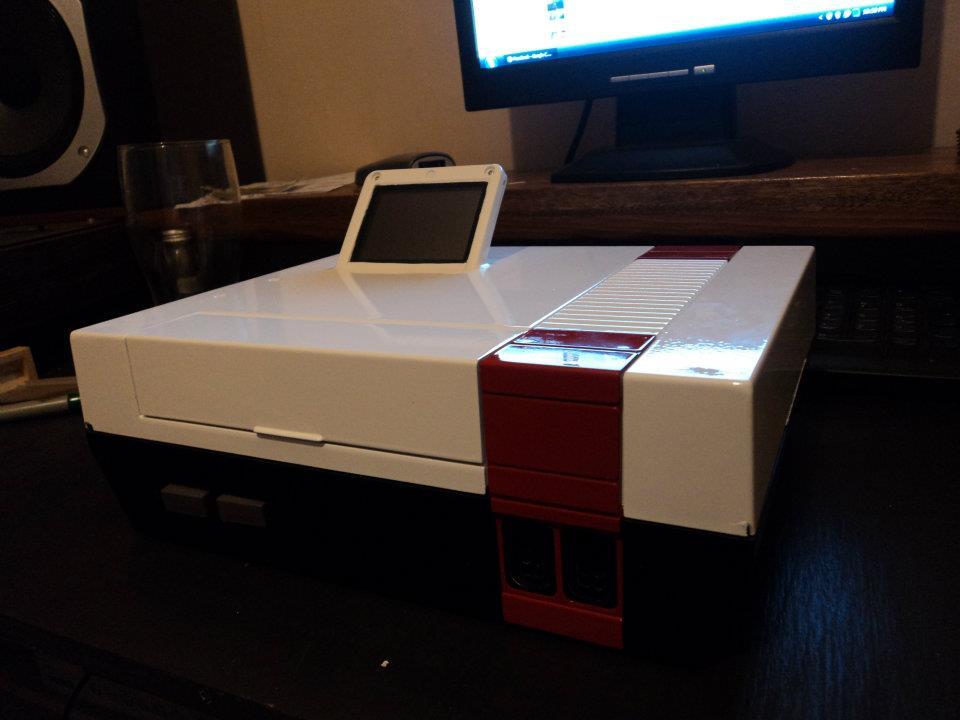
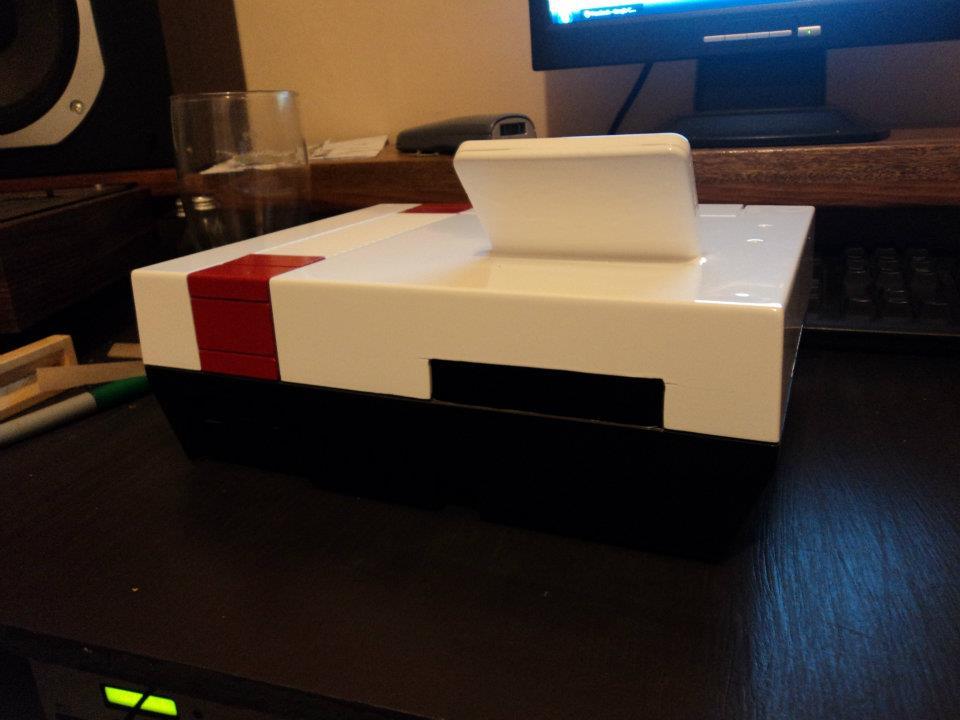
  • After the screen was mounted and the hole at the back was cut and I sent it off to be painted. This was done in a professional spray booth but the same effect can be achieved with something like Krylon Fusion.

Step #3:

NextPrev
The NES MPS – A Stage-Worthy LSDJ/Nanoloop WorkstationThe NES MPS – A Stage-Worthy LSDJ/Nanoloop WorkstationThe NES MPS – A Stage-Worthy LSDJ/Nanoloop Workstation

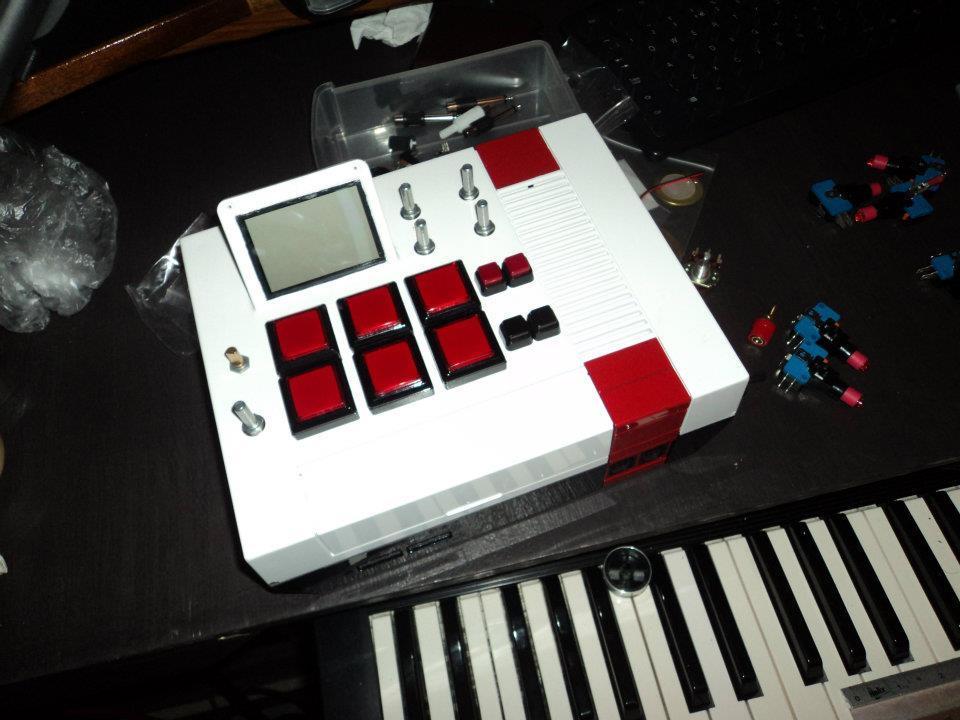
After paint, I began to mount the switches and pots. I like to figure out where the controls are going first so then later I know how long the wires must be.

Step #4:

NextPrev
The NES MPS – A Stage-Worthy LSDJ/Nanoloop WorkstationThe NES MPS – A Stage-Worthy LSDJ/Nanoloop WorkstationThe NES MPS – A Stage-Worthy LSDJ/Nanoloop Workstation

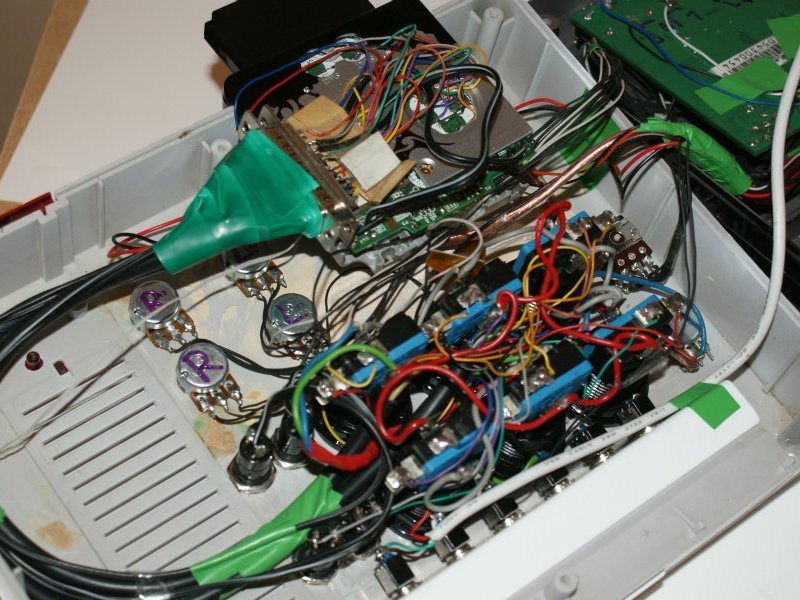
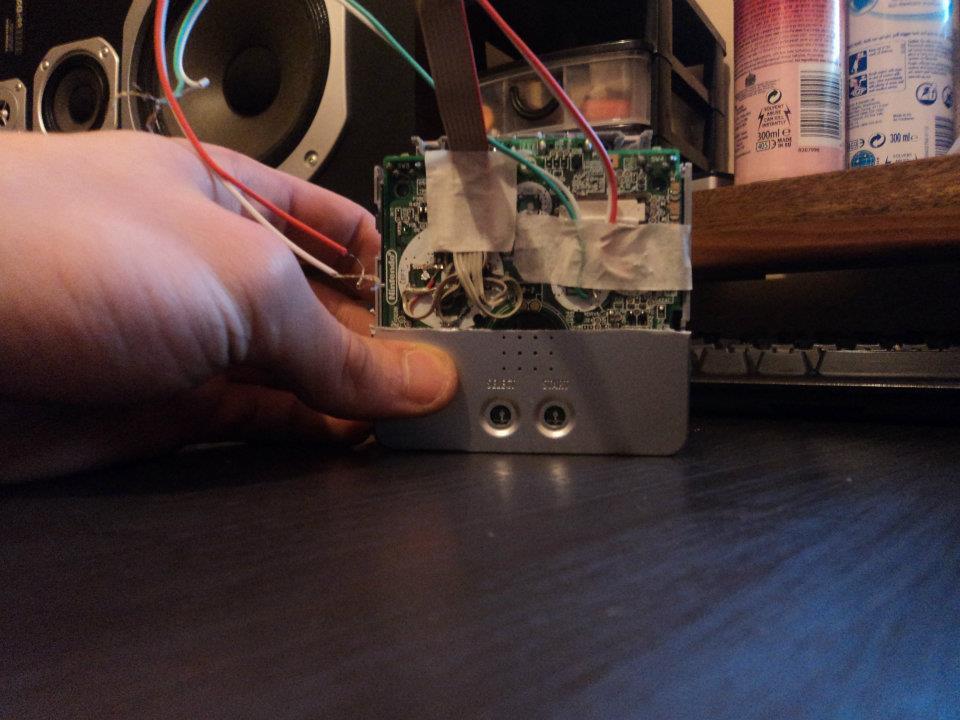
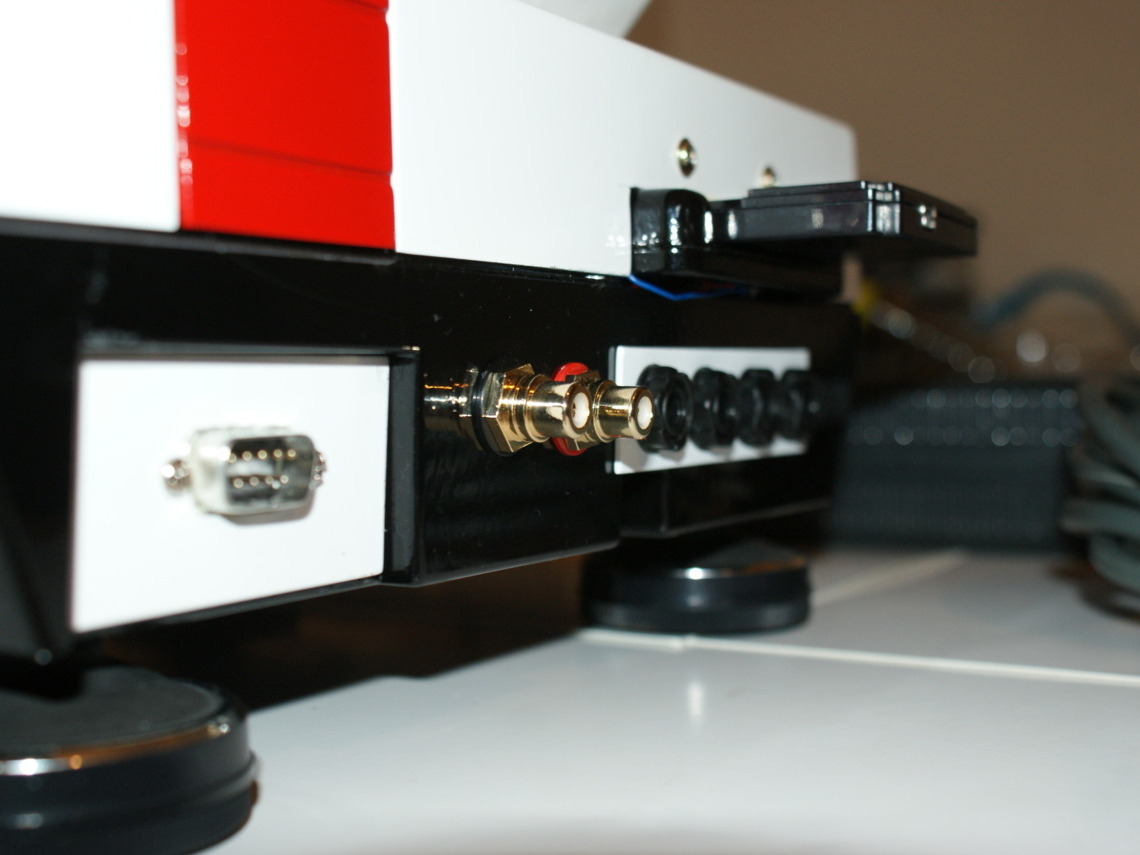
Now for the tricky part: Soldering all the control wires and audio wires to the Game Boy circuitry. This was a rather time-consuming task and after two failed attempts I tried one final time and even added a 25 pin D-sub connector so the GBA can easily be disconnected from the rest of the device.

Step #5:

NextPrev
The NES MPS – A Stage-Worthy LSDJ/Nanoloop Workstation
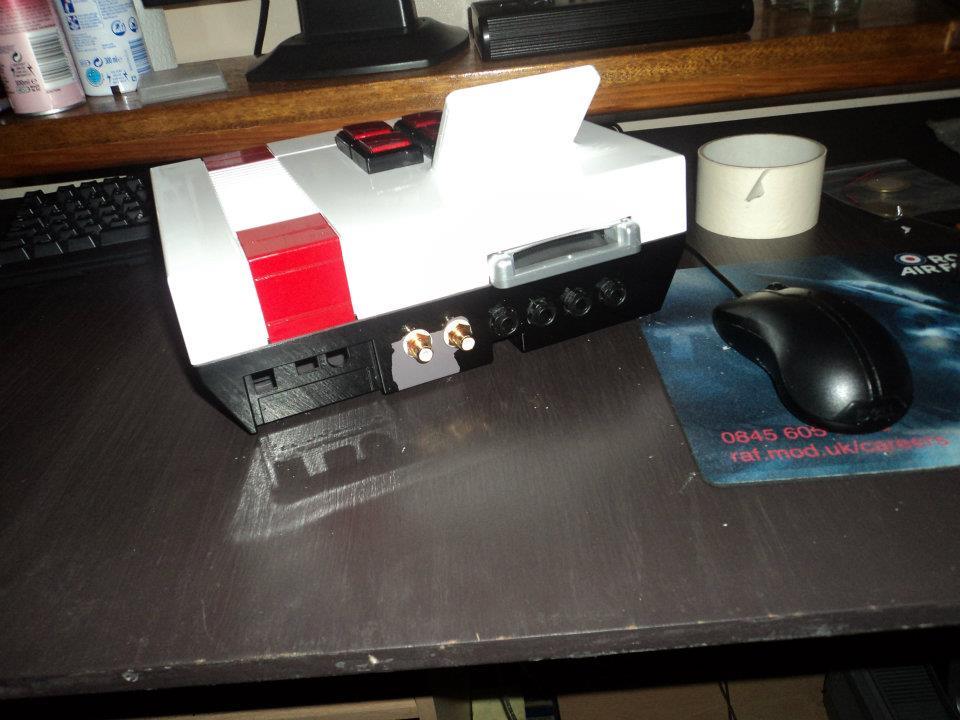
  • Mounting the hardware and PCB was pretty easy. The 1/4" jacks were soldered directly to the board of the PicoVerb and supported the PCB fine. After installing the RCA outputs I got a piece of metal machined out to hold a D-sub connector where the original power jack was situated.
  • The GameBoy is attached to a wooden bracket which is then fixed to the shell with 2 screws.

Step #6:

NextPrev
The NES MPS – A Stage-Worthy LSDJ/Nanoloop Workstation

For power I decided to gut an old Xbox power brick and install the 3 transformers I needed. These were to supply 3 rails out of the one cable. The rail voltages needed were 12V DC (for the lights) 9V AC (for the PicoVerb) and 5.2V DC (for the Game Boy).

Step #7:

NextPrev
The NES MPS – A Stage-Worthy LSDJ/Nanoloop Workstation
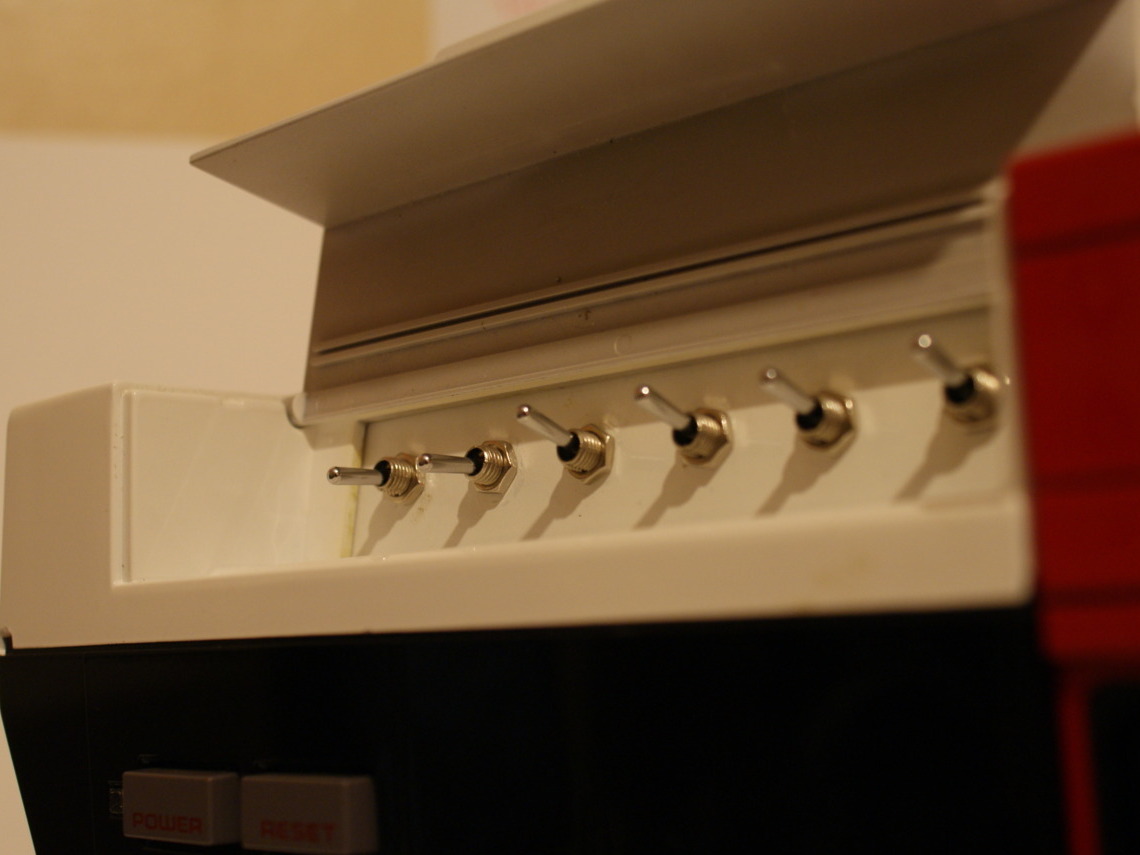
  • One of the last things I had to do was make use of the cartridge slot on the NES. I decided to get a metal plate machined out and mount the power switches on it under the hood. Two of these switches let you select whether the GBA signal goes to the PicoVerb or straight out of the dedicated RCA outputs. The remaining 4 switches are for the PicoVerb power, the LED power and 2 that I have left unconnected for the next owner to do what they wish with (yes, it is for sale!).
  • The power and reset switch on the NES are the GBAs power and backlight.

Step #8:

NextPrev
The NES MPS – A Stage-Worthy LSDJ/Nanoloop WorkstationThe NES MPS – A Stage-Worthy LSDJ/Nanoloop WorkstationThe NES MPS – A Stage-Worthy LSDJ/Nanoloop WorkstationThe NES MPS – A Stage-Worthy LSDJ/Nanoloop Workstation
  • That's it, really; this was a very brief tutorial as this is just a prototype. This particular unit is for sale on eBay at the moment (just search NES MPS) and with the money I get for it I'm going to build a couple more so I can create a full step-by-step video tutorial. I am also planning to build a MIDI interface in the next one to add some more flexibility when used in the studio or on stage.
  • For now, check out my blog for build processes and updates!
  • Thanks for reading. I hope you enjoyed the guide and are interested in building your own unit. Now, go make something!
LoFi Future

LoFi Future

When you buy through links on our site, we may earn an affiliate commission.

Subscribe & Save

  • Get dozens of projects in every issue covering DIY electronics, 3D printing, craft, and more
  • Learn tips and skill-building tutorials from experts in the maker community
  • Save over 40% off the annual cover price for a full year (4 issues) of Make:
SUBSCRIBE TO MAKE: MAGAZINE
Make: Community brand logo Publishers of Make:Magazine Producers of Maker Faire Logo
  • About us
  • Our team
  • Advertise with us
  • Help Center
  • Contact us
  • Support Make:
  • Find a Maker Faire
  • Manage Magazine Subscription

Make:
Maker Faire:
Privacy Policy
Terms of Use
©2022 Make Community LLC. All rights reserved
Special Pinterest-only offer!
One year of Make: Magazine for just $19.99
Cookie Settings
We use cookies to continuously improve our websites for you and optimize its design and customization.
We'll assume you're ok with this, but you can opt-out if you wish.

Our websites use cookies to improve your browsing experience. Some of these are essential for the basic functionalities of our websites. In addition, we use third-party cookies to help us analyze and understand usage. These will be stored in your browser only with your consent and you have the option to opt-out. Your choice here will be recorded for all Make.co Websites.

Allow Non-Necessary Cookies
Send this to a friend
FEEDBACK