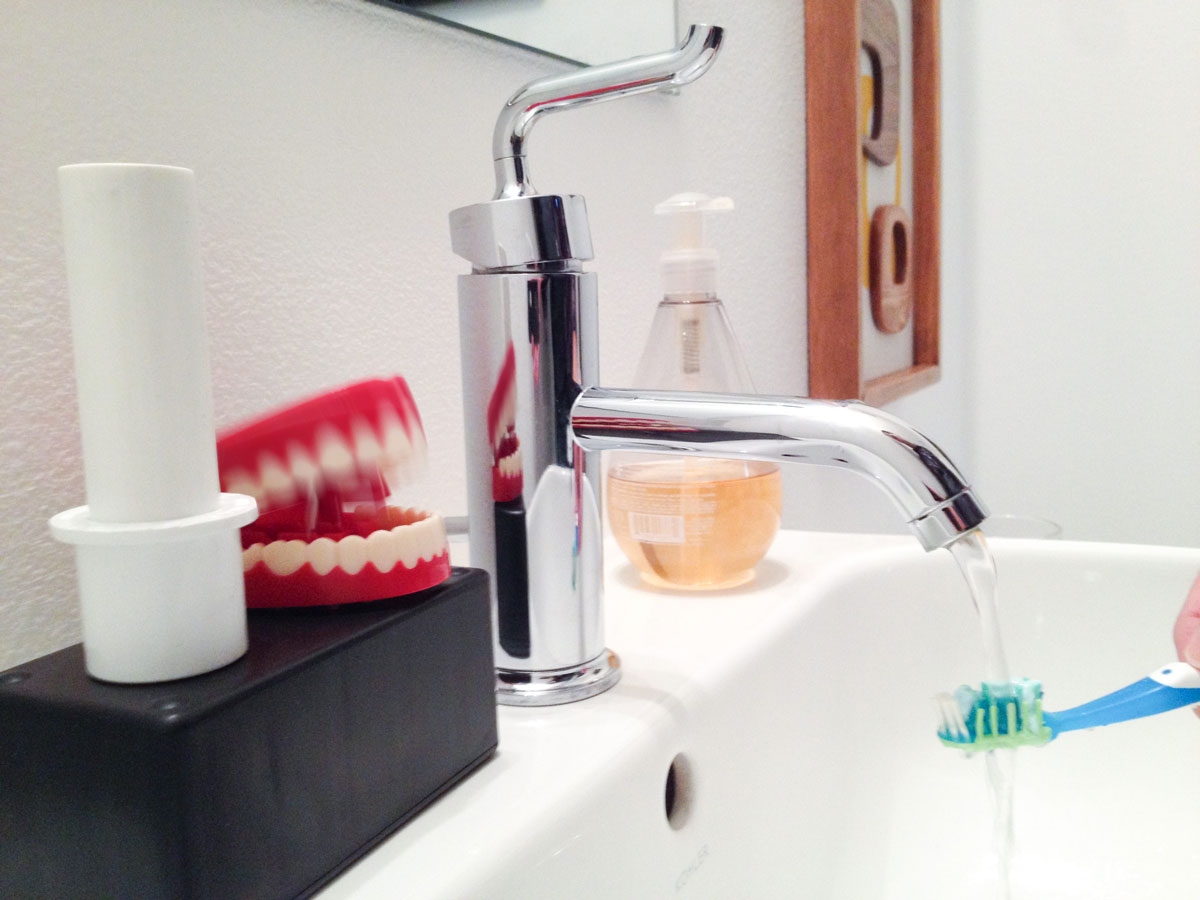
Children and adults alike sometimes need help maintaining good toothbrushing habits. Experts suggest you brush for two minutes twice a day, but most people don’t come close to that. The Toothy Toothbrush Timer will help you get those recommended 120 seconds each time you brush. When the toothbrush is lifted from the holder, the teeth start chomping and continue cheering you on until your time is up. When the teeth finally come to a stop, just replace the toothbrush to turn it off.

It’s resistant to steam and occasional water splashes, so it will stand up to most bathrooms and keep your chompers in the best health.

tooth-timer-use_1

How It Works

A switch is mounted under the toothbrush holder. When the toothbrush is lifted, the switch connects the battery to a timer circuit, which powers a servomotor. As the servo spins, it pushes a rod up and down. The rod opens and closes the teeth. When the timer is up the motor stops and the teeth go silent. When the toothbrush his returned to the holder the battery is disconnected.

We could have designed this timer using an Arduino or other microcontroller, but it’s so simple that all you really need is that trusty timer chip, the 555. Here’s how to make yours.

What will the next generation of Make: look like? We’re inviting you to shape the future by investing in Make:. By becoming an investor, you help decide what’s next. The future of Make: is in your hands. Learn More.

Project Steps

Prepare the teeth.

Chattering teeth come in several different designs, which will determine how to prepare them. The goal is to keep the hinge intact while removing any mechanism that makes them open. (You’ll add your own mechanism in a later step.)

The most basic teeth have a simple lap hinge. Carefully pry them apart by sliding a knife between the 2 halves and prying.

Some teeth have plastic or metal pins in the hinge. Use a thin screwdriver or knife blade to pry these out and you’ll probably find a lap joint behind them. Take it apart as noted above.

After you have the jaws apart you’ll find a spring and a wind-up mechanism behind a screw panel. Remove the screws, the wind-up mechanism, and any springs.

The fanciest teeth use the mechanism as an integral part of the hinge. For these, just remove the spring in the back that holds the mouth open.

Prepare the motor.

Now you’re going to convert the servomotor into a regular gearmotor. First, put a piece of tape around the front panel of the servo to keep it from falling off and spilling gears all over the floor.

Remove the screws from the back of the servo.

Desolder the 2 biggest solder points that connect the circuit board to the motor. (These can be hard to desolder. If you have trouble, you can simply cut away the circuit board.)

Remove the circuit board. NOTE: If the potentiometer is glued to the case, proceed to the next steps in opening the front cover, and push the pot out by pressing it on a hard surface.

Cut and strip two 6″ wire leads, and solder one to each of the 2 motor connections.

Prepare the motor (cont'd).

Carefully remove the front cover, holding the servo upright so the gears don’t fall out.

The large gear has a nub that prevents it from turning fully. Carefully remove any gears covering the large gear, remembering their location and orientation. (Taking photos at the start of this step can help if you forget.) Remove the large gear from the servo. Use a craft knife or rotary tool to cut the nub away completely and cleanly. Return the gear to the spindle in the servo and replace any other gears you removed.

Put the cover back on and replace the screws.

With a fine-bladed saw or a rotary tool, remove the mounting wings from both sides of the case.

Test it by putting batteries in the battery holder and touching its leads to the new ones you soldered to the motor. The motor should turn freely. If it hangs up or binds, carefully open it up again and be sure the modifications to the gear are smooth and clean.

Assemble the toothbrush holder.

Cut a 4″ length of ¾”-diameter PVC pipe.

Cut the flanged end off of the PVC plug. The remaining part should fit smoothly inside the ¾” pipe. If not, sand the outside of the plug a bit until it slides through.

Smooth any sharp edges, then wash and clean all the parts. If there are factory markings, you can remove them with a household cleaner and an abrasive scrubber or fine (#0000) steel wool.

Push the 4″ pipe into the reducer bushing.

Connect the power switch.

Cut and strip two 4″ wires and solder one to each of the 2 outside terminals on the switch. (If you’re using a different switch, connect it to the terminals that are shorted when the switch is not pressed.)

Using needlenose pliers, carefully bend a loop in the last ¼” of the metal lever on the top of the switch.

The “lid” of the project case will actually be the bottom cover in this project. So, on the top of the project case, measure ¾” in from the center-left edge and drill three 5/32″ holes to match the terminals at the bottom of the switch.

Thread the wires through the case and hot-glue the switch in place on top of the case.

Wire the electronics.

Use a small piece of perfboard to solder the components in place, following the schematic diagram here.

IMPORTANT: Be sure to orient the battery, 555 timer, electrolytic capacitors, and diode correctly!

When the circuit’s complete, put batteries in the battery holder and, if the battery holder has a switch, turn it on. If everything is working correctly the motor will turn for a minute or three and then stop. Pressing on the switch and releasing will start the motor again. Pressing the switch at any time will stop the motor and reset the timer.

If it doesn’t work correctly, check the orientation of all the components and the continuity of all connections, making sure no connections have been bridged accidentally. And check that the batteries are fresh and the power switch (if any) is on.

Make the teeth chatter.

Connect the round servo horn to the servo and secure it with the screw that came with it.

Use hot glue to attach the servo housing to the inside of the case. Mount it vertically on the right end, with the servo horn toward the bottom of the case.

Hot-glue the lower jaw of the chattering teeth to the top of the case, aligned with the right edge.

TIP: Rubbing alcohol can be used to easily remove hot glue.

Make the teeth chatter (cont'd).

Drill a 3/32″ hole through the jaw and the top of the case, 1-7/8″ from the edge. It should be lined up with the center of the servo horn.

Straighten a paper clip, then bend the last ¼” of it 90°, forming an L shape.

Put the straight part of the clip through the hole you just drilled, and poke the short leg of the L though one of the holes in the servo horn. Bend the inside of the L up so it doesn’t fall out of the horn. Run the motor and make sure the wire moves up and down without binding anywhere and without falling out of the horn.

Rotate the motor so the wire is in the lowest position, and reattach the top jaw of the teeth. Bend a loop in the wire so it just barely touches the inside of the top teeth, then cut off the remaining wire.

When the motor runs it will now raise and lower the teeth.

Finish up.

Use hot glue to attach the circuit board to the side of the case.

Glue the toothbrush holder in place over the switch. Slide the plug into the holder so the flat side is down.

Be sure the battery pack is turned on and tuck it inside the case.

Calibrate it.

With batteries in and the bottom cover off, turn on your Toothy Toothbrush Timer and time how long the motor runs. Turn the trimpot to get the time to about 2 minutes and 10 seconds. (The extra 10 seconds give you time to put toothpaste on the toothbrush, see.)

With the time calibrated, seal up the case. If the battery pack has a switch on it, be sure to turn it on.

Next, calibrate the switch in the toothbrush holder. Placing a toothbrush into the holder should open the switch. (You’ll hear it click or it will stop the motor if it’s running.) If your toothbrush isn’t heavy enough, add small coins into the bottom of the toothbrush holder (U.S. nickels fit perfectly) so that the weight of the toothbrush activates and deactivates the switch.

Use it!

Place a fresh toothbrush into the holder and place it next to the sink. Whenever the brush is picked up, the teeth will go into motion, stopping when the brushing time is up. Returning the brush to the holder turns off the timer and readies it for the next brushing.