M38-Unwired-Desk-figure-G

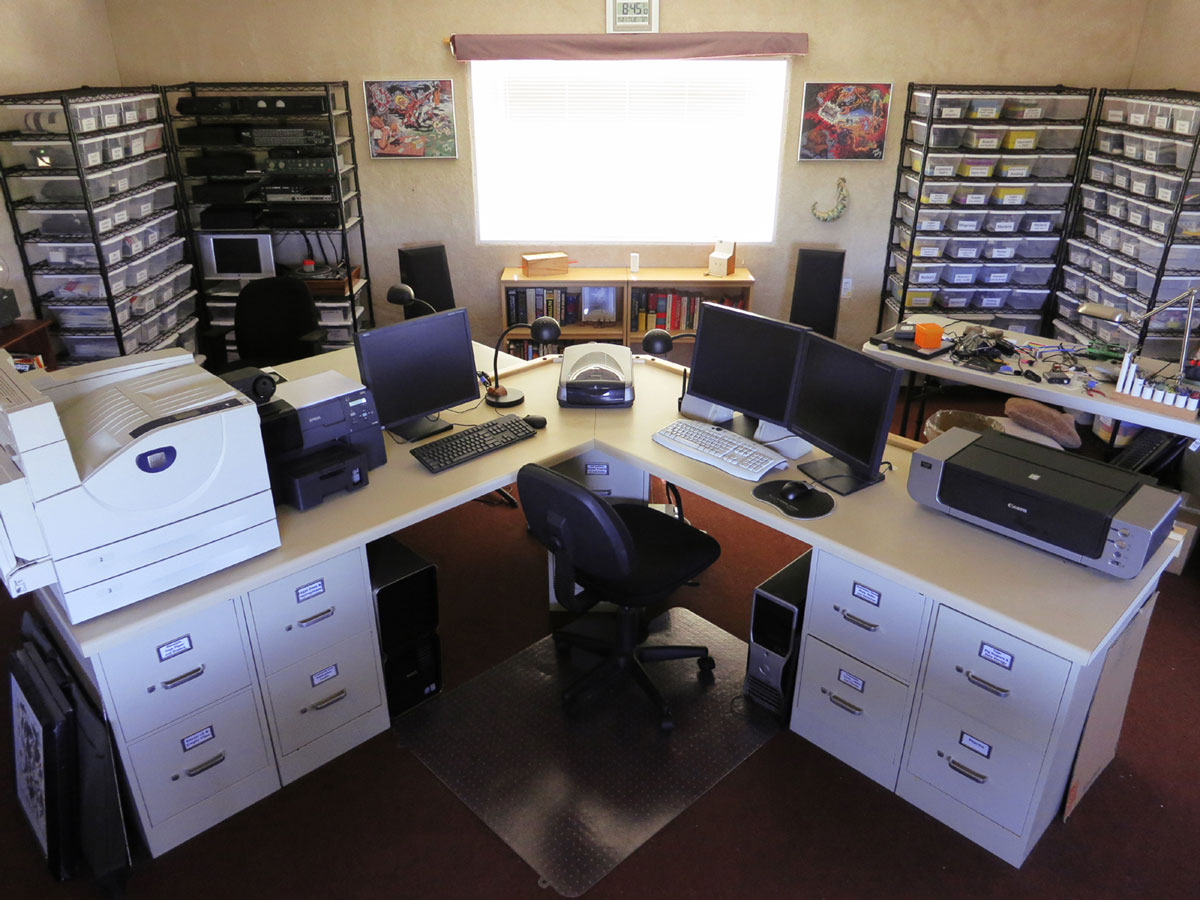
I had accumulated too many devices. There were 16 on my desktop: three printers, a scanner, three monitors, two mice, two keyboards, two speakers, two desk lamps, and an electric pencil sharpener.

Finding space for everything wasn’t a problem: I simply acquired a bigger desk.

The wires were the problem. Most of the devices required AC power, and many were also connected to one of two computers that sat on the floor. Each new acquisition added to a horrible, undisciplined tangle of wires, and also made me feel less inclined to untangle it — until I realized that it was preventing me from vacuuming some areas of the carpet. Breadcrumbs, fragments of orange peel, and a couple of dead crickets were down there. It was ugly.

Steve Jobs seems to have been obsessive-compulsive about wires. He minimized them by building a computer into the same enclosure as a monitor, and developing keyboards and mice that connected wirelessly. But even if I migrated to an iMac, I would still have printers and lamps and, yes, the electric pencil sharpener, and a tendency to accumulate more gadgets in the future. Plus, I don’t really like wireless connections, because they require batteries, which will probably die precisely when I absolutely, positively have to meet a deadline. Will I be provident enough to keep spare batteries in stock? Probably not.

I decided I had to get serious about becoming unwired (or at least, hiding the wires) in my own way.

Project Steps

Install hidden power outlets

I mounted a 12-outlet power strip on a section of 1″×4″ poplar that I added to the back edge of the desk. That edge had been unfinished, so I was happy to cover it.

To energize the power strip, I dropped its power cord down to a surge suppressor on an outlet at floor level. Naturally, before sharing one surge suppressor among 12 outlets, I made sure I wouldn’t exceed its rating, even if I turned everything on simultaneously.

Because I have an L-shaped desk, I duplicated this setup for both sections of the L.

Drill your desk and tame the wires

The next step was to drill holes in the desktop with a hole saw, as close as possible to the devices so that their wires could disappear through the holes. This was traumatic, as the desktop had been a relatively expensive acquisition, and the holes were unsightly. But 1½” diameter is the minimum for VGA or DVI connectors, and I wanted all the holes to be the same size, to make them easier to fill later.

Wires from monitors, mice, keyboards, and printers were bundled with double-sided velcro and routed to the rear of each computer. You can get a 5-yard roll, ¾” wide, for about $5. You can use cable ties instead, but you’ll end up cutting and replacing them every time you add or subtract a piece of equipment.

All the wires were longer than I wanted them to be, but now that they were hidden, I could coil them and suspend them from screw-in hooks underneath the desk. This was still a bit messy, but the mess was now concealed, so it didn’t bother me anymore.

Plug the holes

So far, so good. But what to do with those ugly holes? I needed some removable 1½” circular inserts, each with a cutout just big enough for the wires. Unfortunately, dowel isn’t normally available in such a large diameter, and hole-cutting tools generally aren’t designed to create a solid plug. I considered drawing circles on plywood and then cutting them out with a band saw or jigsaw, but that would not be a whole lot of fun.

My motto: when in doubt, look in the McMaster-Carr catalog (mcmaster.com). Here I found just the thing: a 12″ rod of solid ABS plastic, 1½” in diameter. It was expensive (about $15) but I was in no mood to compromise. I sliced the rod into sections ½” thick, then added a cutout to each slice to accommodate the wires by drilling a ⅜” hole near the edge of the circle and making two saw cuts. The finished inserts, aka grommets, are shown in the photos.

WARNINGS

If you cut ABS with a power tool, the ABS tends to melt, and it can stick to a saw blade. If you’re using any kind of circular saw, it can throw the ABS at you with terrible force. Don’t even think of cutting ABS with a table saw, and if you use a miter saw, be sure to clamp the ABS firmly and stand to one side while cutting.

Check the saw blade frequently to see if a sticky residue is accumulating. The residue will build up more quickly if you use a thin blade, because that will get hotter, faster. Blades designed for cutting plastic are thicker, to absorb the heat.

Conclusion

The result of my efforts is about as unwired as a desktop cluttered with 16 devices can be. Note the pleasing absence of wires on the floor. I can now vacuum my carpet — although I must admit, I haven’t quite gotten around to it yet. But the dead crickets will be cleaned up real soon now.