Admit it, you’ve got something to hide. There’s gotta be some little secret private thing you keep stashed in the back of a drawer or deeply sandwiched between your mattress and box spring — perhaps you’ve even got it stowed in some elaborate cubby that requires a stepladder and a screwdriver to access.

Maybe the goods aren’t against the law, and maybe they wouldn’t reap much at a pawnshop, but if it’s special enough to keep under wraps, that’s reason enough to give it a proper hiding place. Consider this stylish, recycled book stash.

Project Steps

Select and configure the books.

Larger-sized hardcover books free of their dust jackets work best, and the trim size and number of titles are completely dependent upon how vast you want your cache (the books used here were approximately 6½”×9″ to 8½”×11″). The overall configuration used here measured 12″ tall, allowing for a stash 9″ deep. The top and bottom books of the stack remain intact, serving exclusively as the safe’s “door” and base.

Tear 2–3 pages from the largest book, preferably the front matter on the heaviest paper, and set them aside. The smallest book of the stack will determine the stash perimeter. Measure and cut a cardboard template for the cache boundaries within the cover of the smallest book, leaving at least 1½” of solid cover trim on all 4 sides. You’ll be using this template repeatedly. Stack the books from largest to smallest, bottom to top. Remove the top book (the “door”) and set it aside.

Mark the books.

Center your template on the book to be positioned on the top of the stack (under the “door” book). Trace the template onto the book cover with a Sharpie marker.

Use the spring clamps to hold the book closed, and place the book over a pair of sawhorses (or another viable support). Use the C-clamp to secure the book to the sawhorse, making sure that the book’s cut lines clear the sawhorse supports.

Hollow the books.

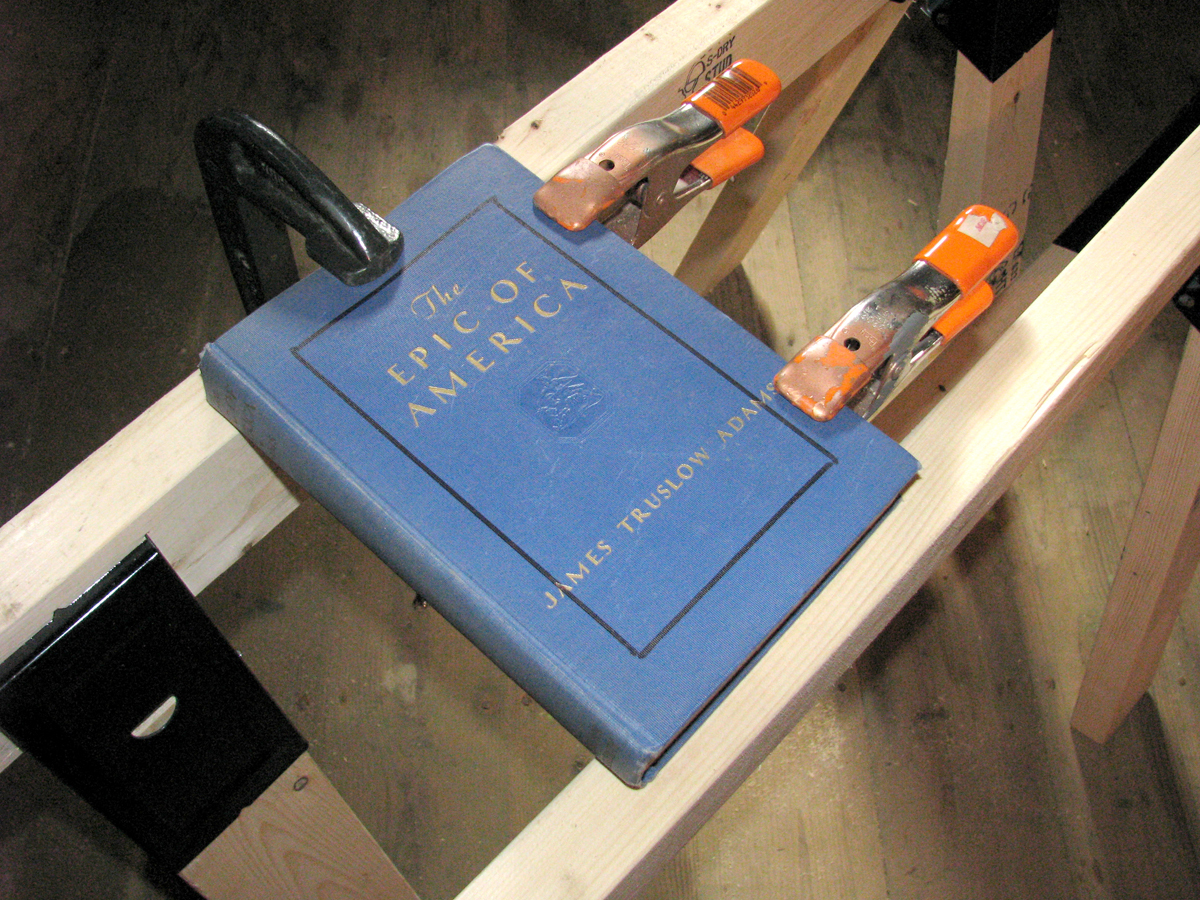
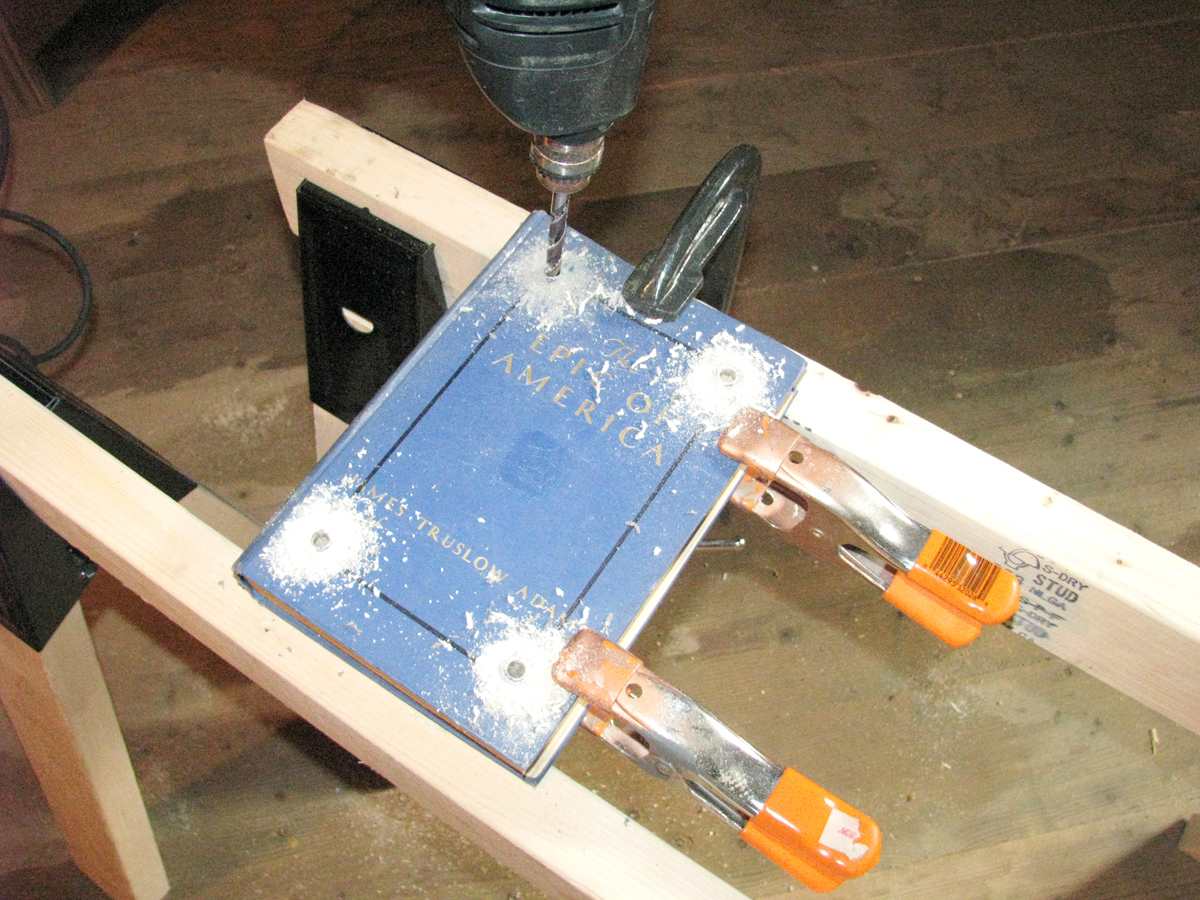
With the 3/8″ drill bit, drill 1 hole just inside each corner of the traced template border — these 4 holes will serve as points of entry for the jigsaw blade. Insert the jigsaw blade into 1 corner hole, and cut along each traced line, stopping, removing, and repositioning the blade at each corner. Depending on the size of the book, you might find it necessary to stop and adjust the clamp or vise positioning to accommodate the saw foot.

When cutting, work slowly without forcing the blade, allowing the saw to do the work. While cutting the final line, reposition the sawhorses so that the center section of the book is supported from underneath, in order to keep the cut pages and cover from jumping and separating while the blade is in motion.

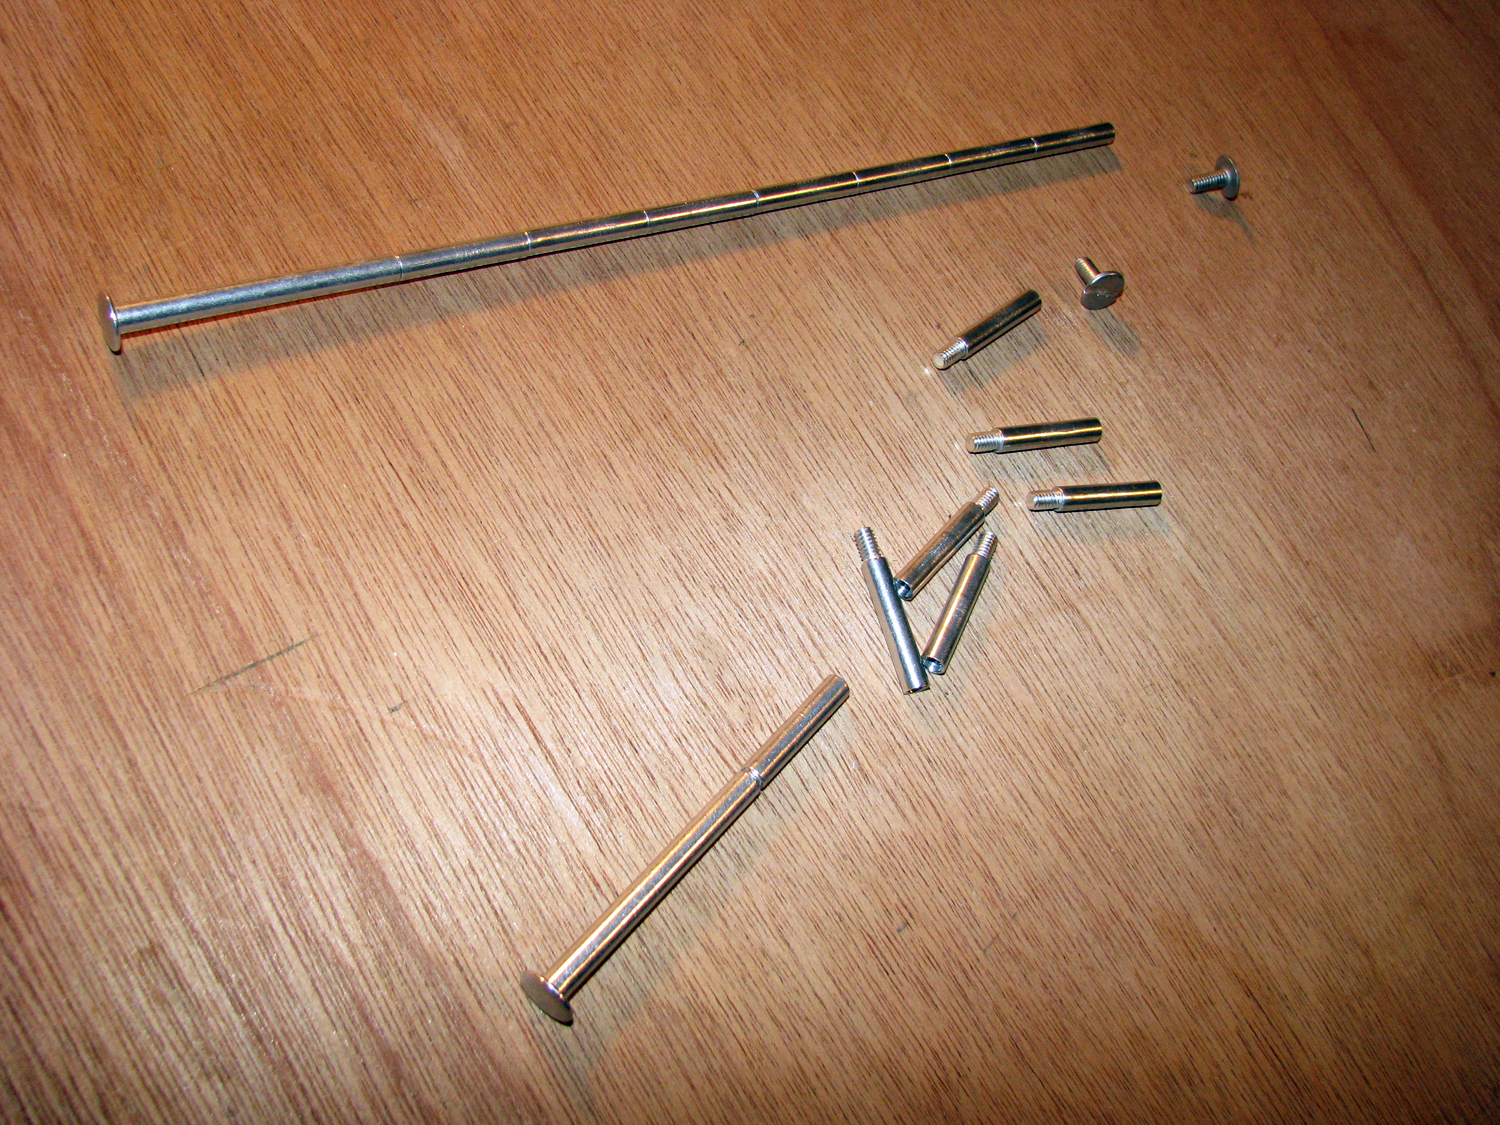
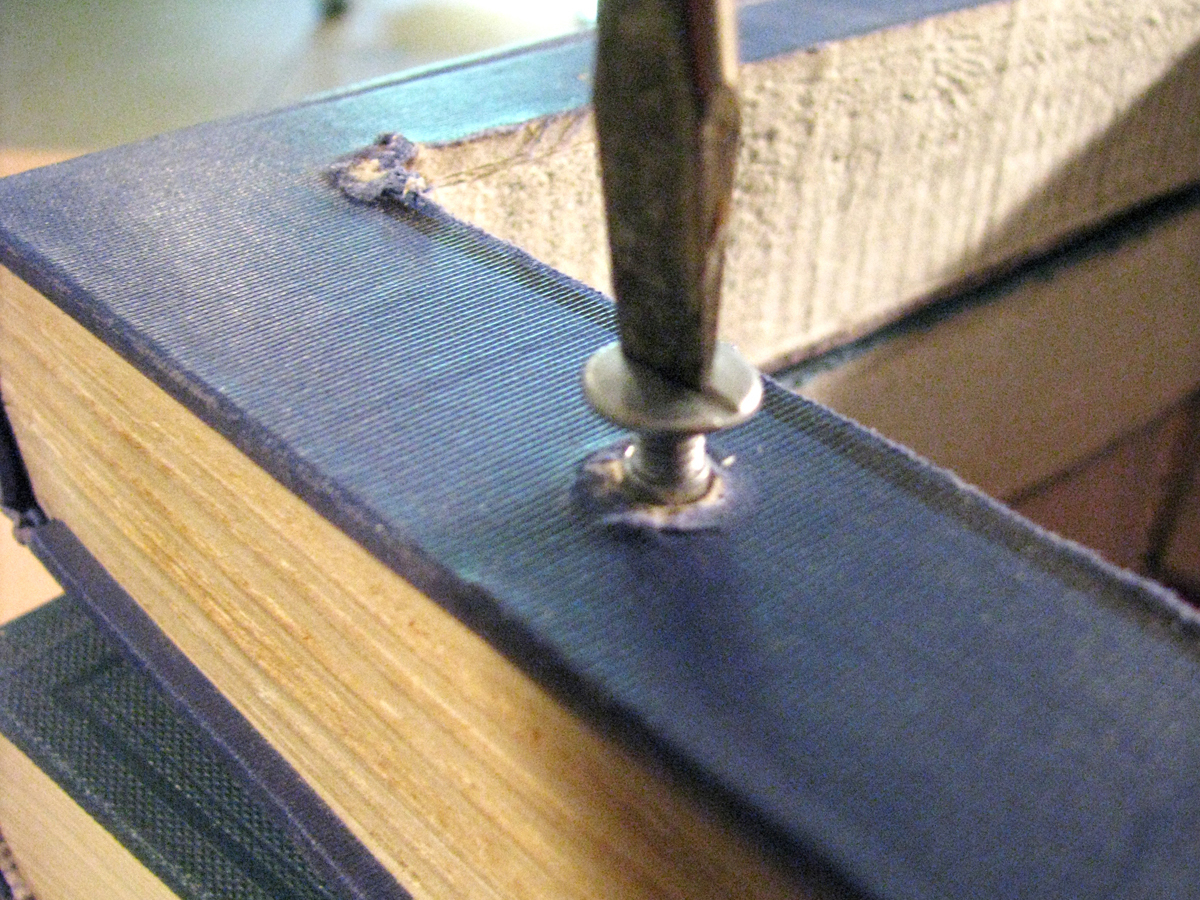
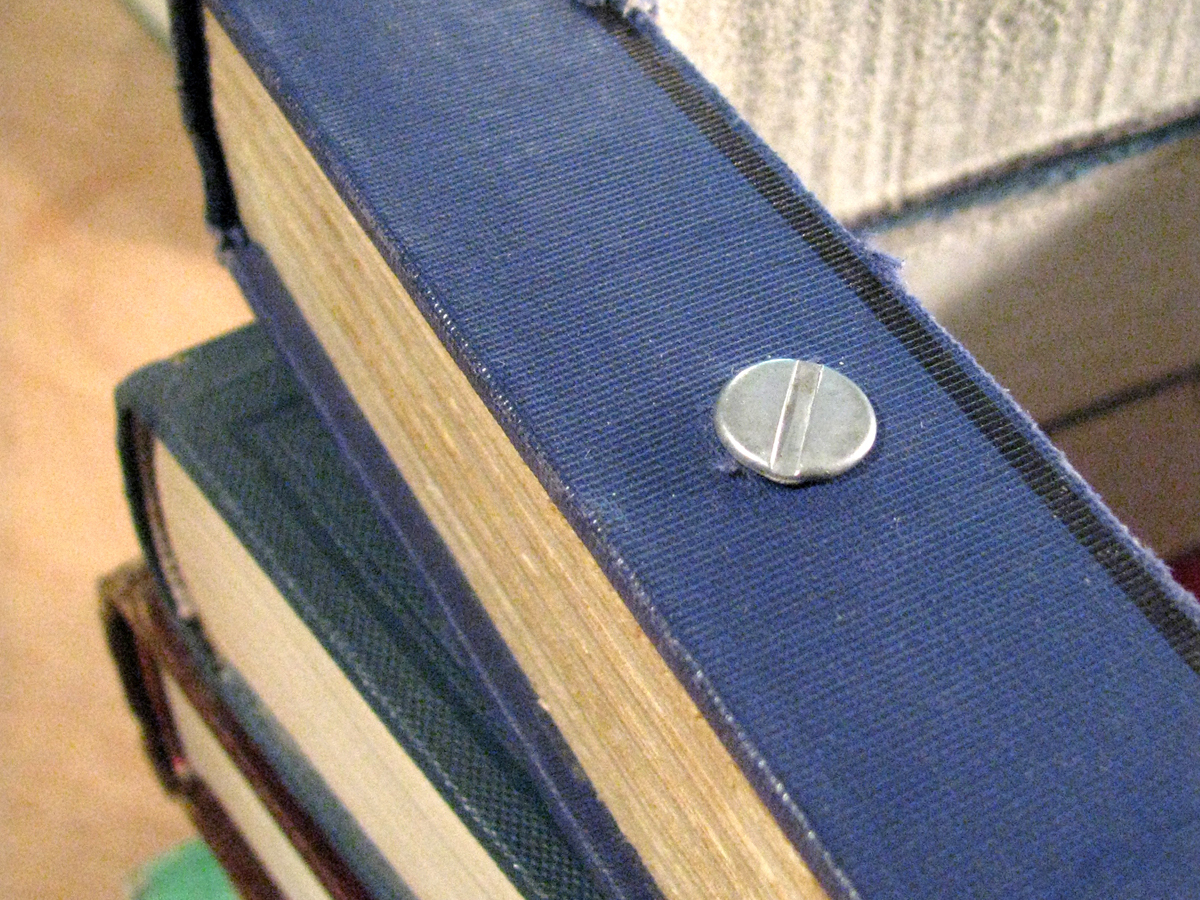
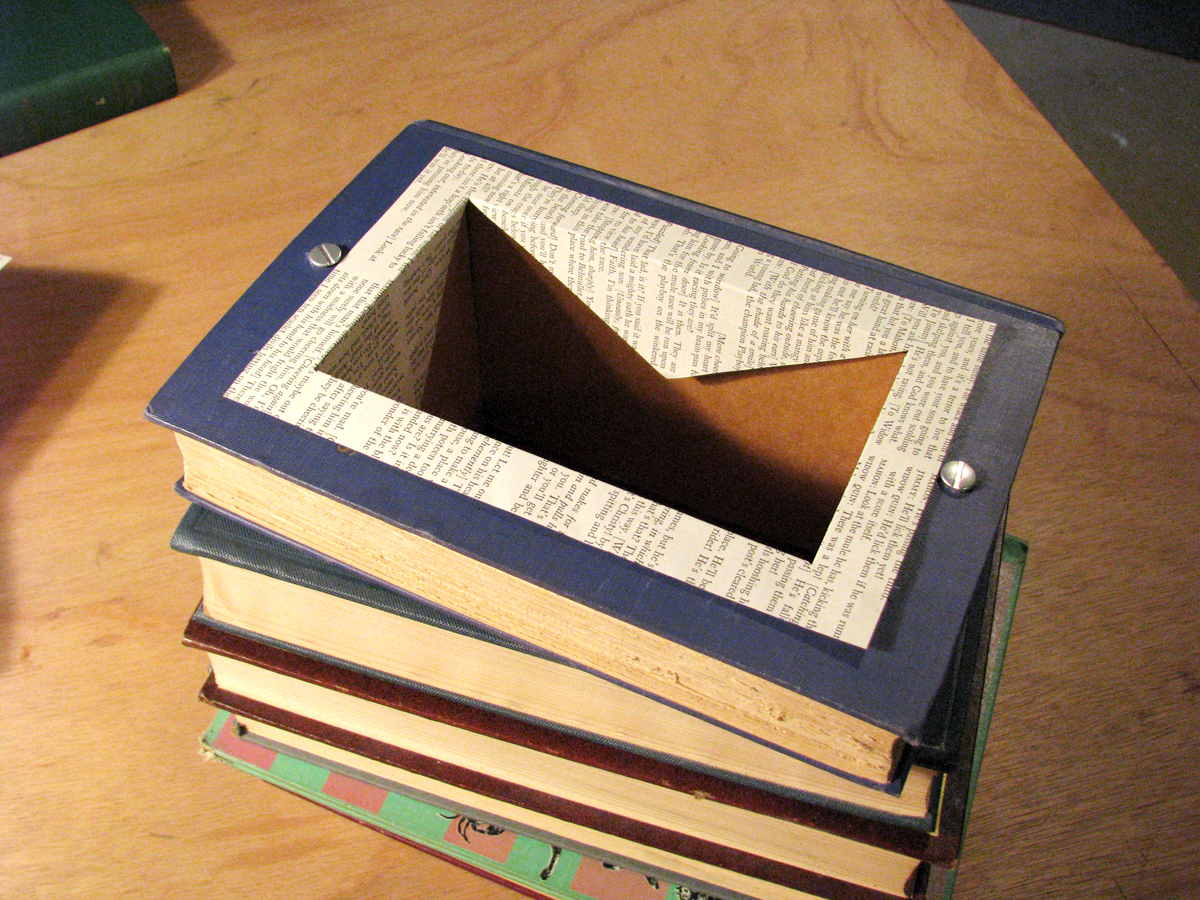
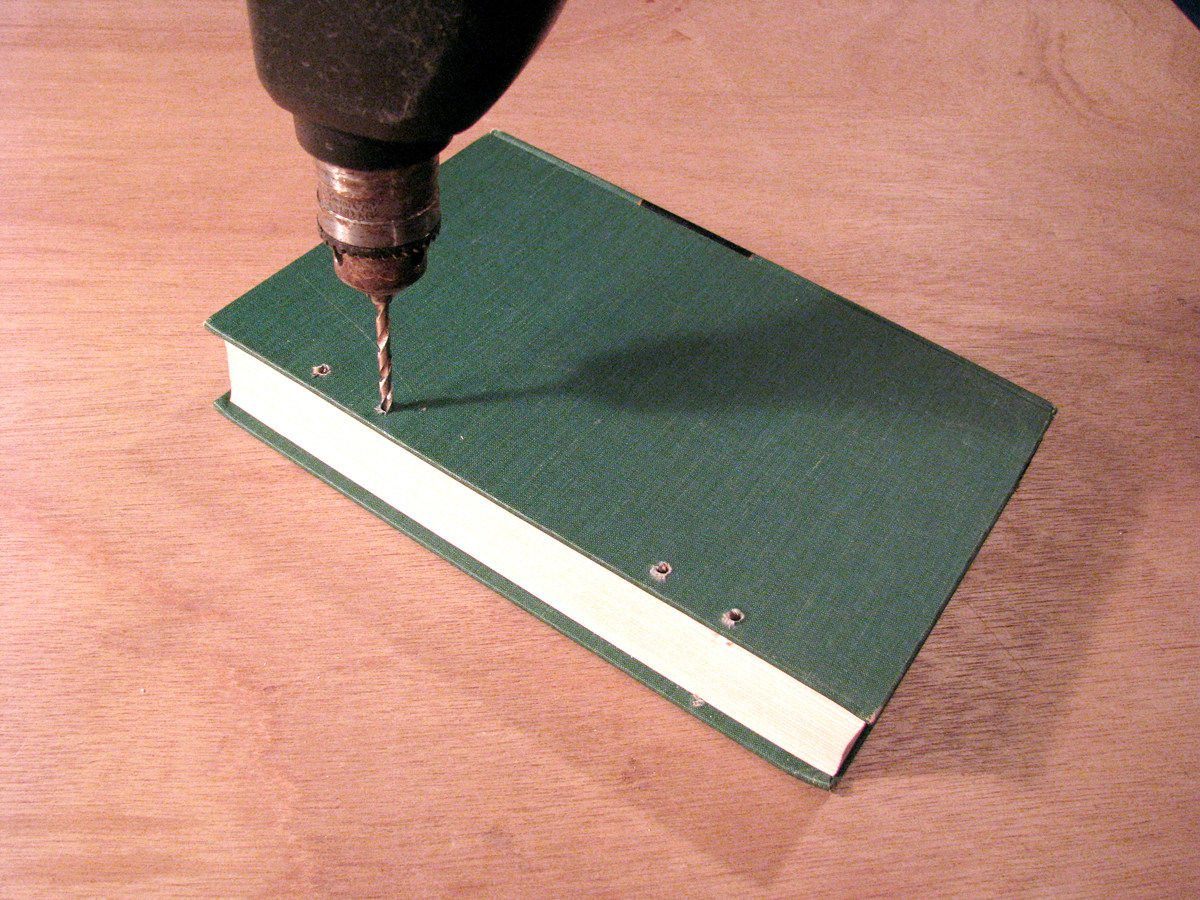
With the 9/32″ bit, drill 2 holes on the cover, one centered about ¾” above the top of the hollow and the other ¾” below the bottom of the hollow. These will be the channels for the binding posts.

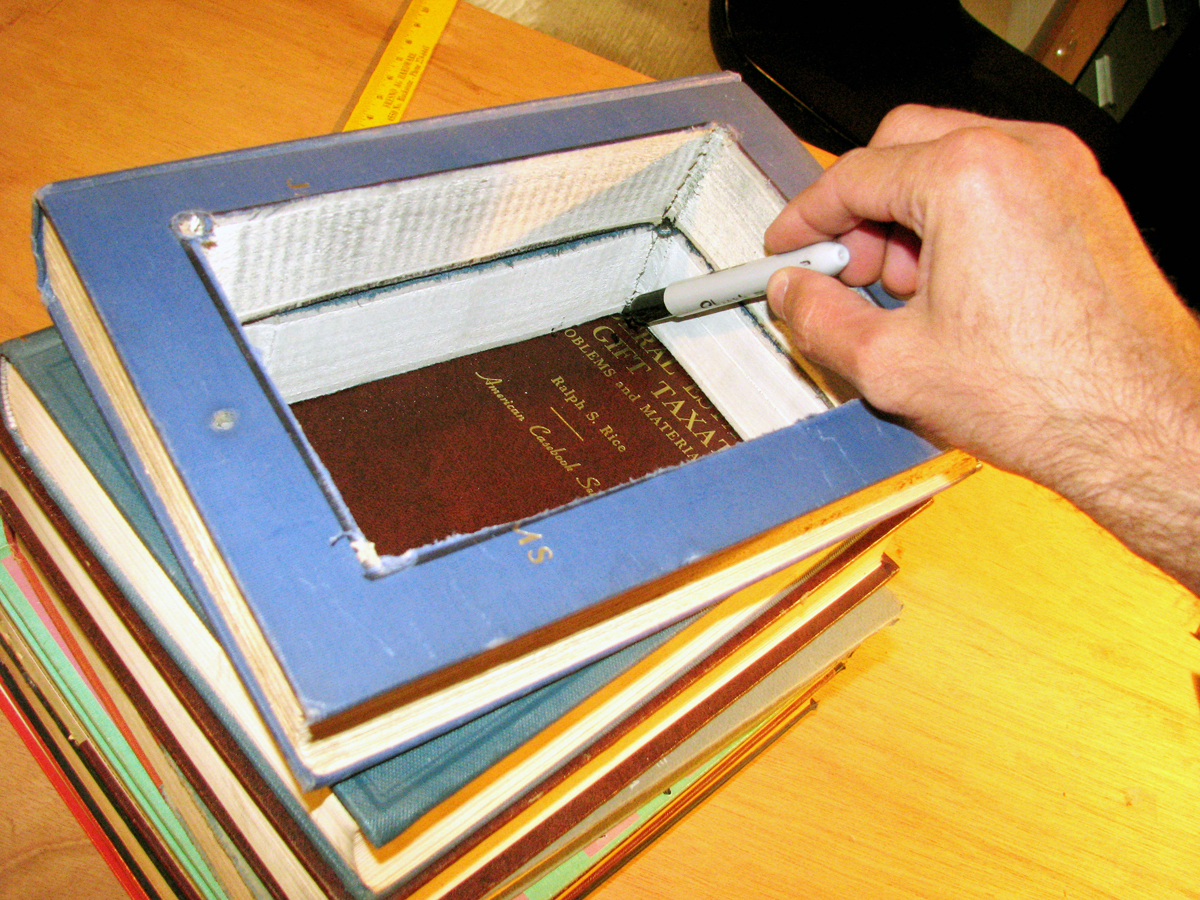
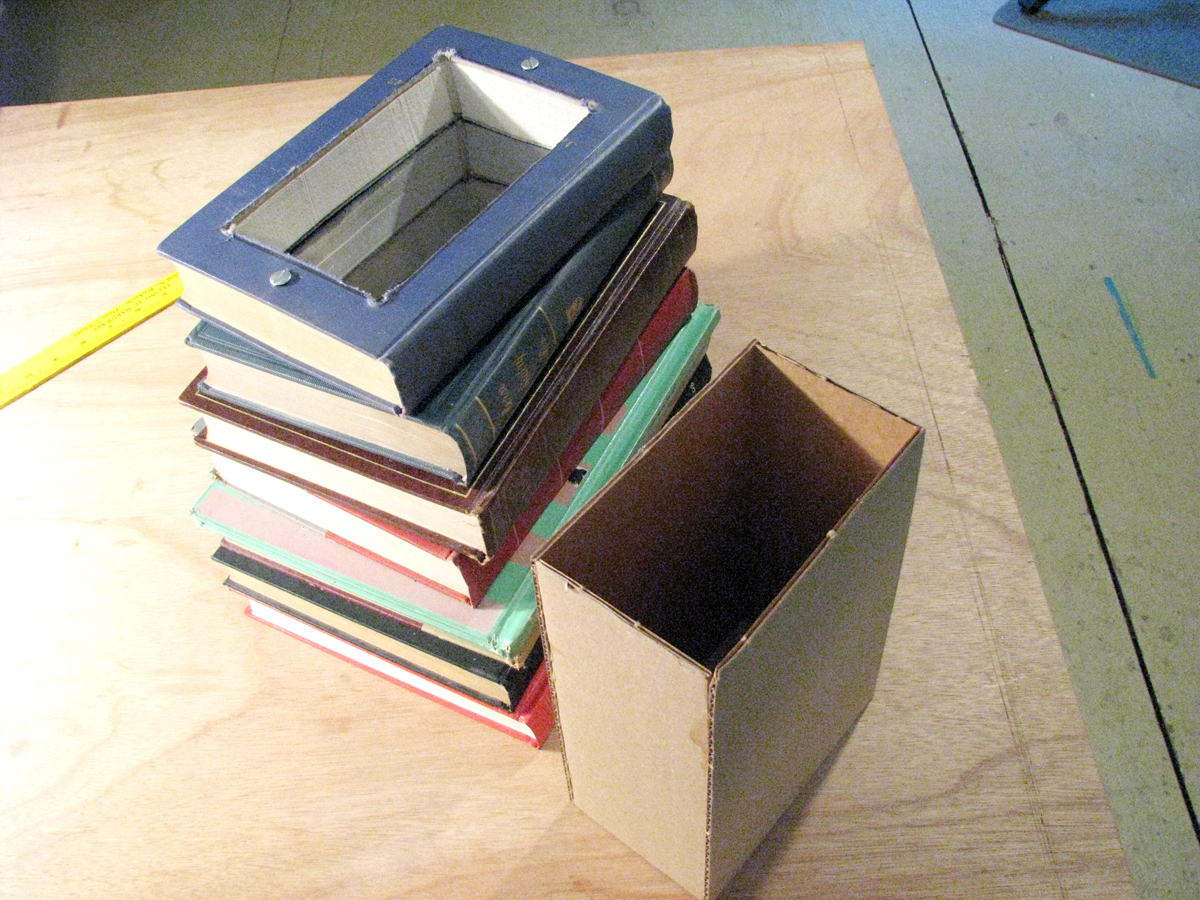
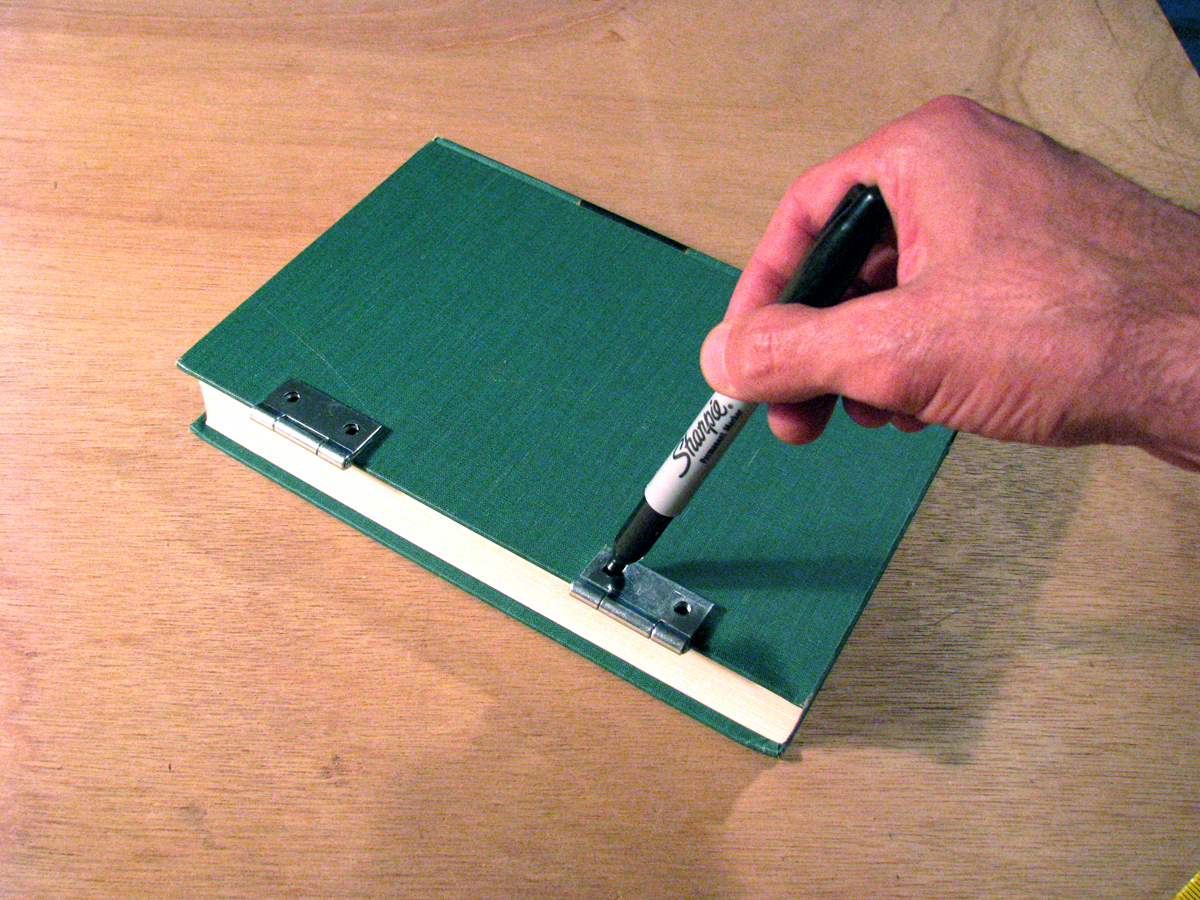
Using a whisk broom or a dry paintbrush, clear the sawdust from the book and reposition it at the top of the stack configuration. Working from within the hollow, mark the inside of each cut corner onto the cover of the book below with a Sharpie. Remove the hollowed book, and using those marked corners as your guide, trace your template onto the next book. Repeat the drilling and hollowing process with all but the bottom book in the stack.

Secure.

The flat head of the binding post is smooth. The head of the threaded binding post screw is slotted. Starting with the smooth-headed post, attach as many extenders as necessary to create a post equal to the height of the hollowed stack. Working from the stack’s bottom book, slip the open end of the assembled posts through each drilled channel, 1 book at a time. When the top book is placed, the open-threaded end of the binding post should reach flush (or just shy) of the top book’s cover. Top the open-ended post with the binding screw, and tighten only enough to secure the stack.

For a tighter stack, you can add a couple of thin dots of Gorilla Glue between the covers of each book, as per product directions, but this is not necessary.

Bind the stacks.

Smear a very scant line of Gorilla Glue on the cover of the solid bottom (“base”) book, along the area on which the last hollowed book makes contact with the base book’s cover. Place the bound stack on top of the base book and allow the glue to set. Adding some extra weight to the top of the stack — extra books or anything heavy that will keep the stack pressing against the area of contact — will help to make a stronger bond.

Build the cache wall.

From within the hollow, measure the depth of the cavity from the cover of the base book to the top edge of the top cut cover (the depth of the stack assembled here was 9″). Using a ruler and an X-Acto knife, cut 4 pieces of heavy cardboard the length of the depth measurement (in this case 9″). Next, make the width of each piece of cardboard match the measurements of your original template, less ¼”. For example, the template used here measured 4¼”×7″, so 2 pieces of cardboard were cut to 4″×9″, and 2 pieces were cut to 6¾”×9″.

Then run a bead of hot glue along the cut edges of the narrow pieces, assembling an open-ended box.

Slide the box into the hollow. The top edge of the box should be flush with the cut edge of the top cover. If it stands a little too high, trim it to fit. If it stands just shy of the cut open edge, that’s fine. Once the fit is satisfactory, remove the box from the stack.

Finish the cache wall.

Place one of the reserved book pages flat on a work surface, and center an open end of the box onto the page. Trace the outside edges of the box onto the page. Place the box back into the hollow.

Draw an X within the tracing. Now trim, leaving a ¾” border around the tracing. Using a ruler to guide you, cut both lines of the X with the X-Acto knife, and fold each cut tab over the edge of a ruler (the side of the page facing down will be the topside).

Brush the backside of the page with glue. Place the page with the pointed tabs positioned into and against the walls of the cache box, smoothing all areas of the page to ensure contact.

Hinge the door.

Place the “door” book on your work surface, with what’s to be its underside facing up. Working along its paged edge, place each hinge 1″ from each end of the cover, so that the hinge is lying flat and the hinge pin rests over the cover’s edge. Mark the screw hole positions with a Sharpie.

Using the 5/32″ bit, drill each hole just deep enough to accommodate the screw. You may need to use your hand or a spring clamp to place pressure on the cover to keep the pages from separating while drilling. Brush the dust from the cover, and align the first hinge with the drilled leads.

Working with 1 drilled lead at a time, squirt just enough hot glue into the lead to fill it, and immediately slide the screw into place before the glue begins to set. Repeat with the 3 remaining holes.

Position the hinged book at the edge of the top hollowed book, so that the unattached hinges lay flat and the hinge pins rest over the edge of the cover. Mark the screw placement as before. Remove the book, drill the screw leads, and use the same hot glue method to secure the remaining hinge screws.

Finish!

Close the lid, allow the glue to set, and gather your stashables!

Conclusion

This project first appeared in CRAFT Volume 09, page 90.