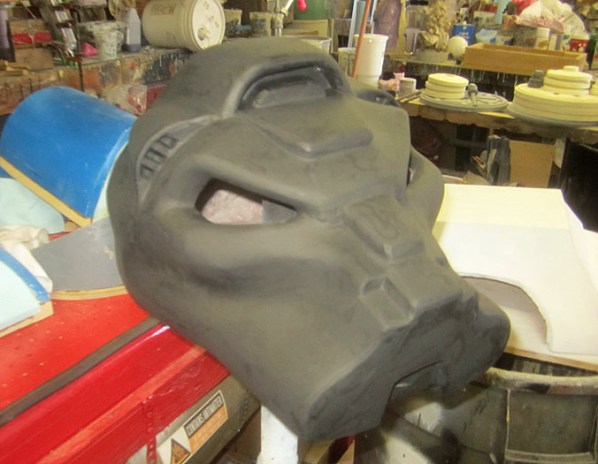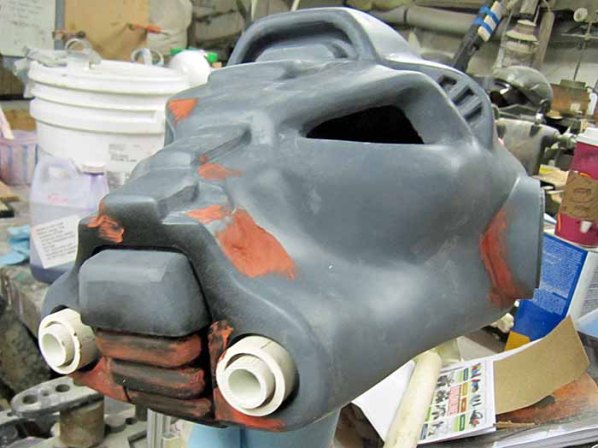

It’s hard to imagine a number of Shawn Thorsson’s amazing props and costume parts, which look so otherworldly and industrial as finished product, start out as papercraft models. The process starts with a 3D model of the prop and the Japanese shareware program Pepakura Designer, which translates 3D data into a 2D printable format. Thorsson details his entire process for making this Warhammer 40K Terminator helmet on his blog.
In a nutshell, Thorsson prints out the 2D version in parts on 110lb cardstock, cuts the pieces out with a sharp hobby knife, then painstakingly (read: super time-consuming) glues them together with cyanoacrylate adhesive. Pictured above is the result “after a couple of long evenings of cutting, gluing, cursing, and peeling [his] fingertips off.”
Then he coats the paper model with fiberglass resin to reinforce it, which makes it strong enough to stand on without crushing.
Next up is smoothing it out so it looks sleek, which he accomplishes with multiple iterations of coating the helmet with Bondo body filler, sanding, coating, and sanding, followed by a coat of primer.
Pinholes and tiny scratches are then filled in using “Glazing and Spot Putty,” an automotive product available at the hardware store. Then details are added on using MDF and bits of plastic.
Next comes another coat of primer and a multi-step painting process that includes yellow mustard. Yes, yellow mustard. He writes:
I use mustard because I was able to determine through a months-long series of clinical trials that it has just the exact right pH balance to counteract the corrosive activity caused by the solvents in the spraypaint.
Actually, no that’s not true. In reality you can get away with anything viscous enough to stay where you put it. Ketchup will probably work. Salsa Verde will probably not. The point is to use something water-based that the oil-based paint can’t stick to.
More paint, eyes formed out of 1/8″ red tinted acrylic sheet, and the end result is quite impressive. Hard to believe it started as paper.
21 thoughts on “Prop Building with Pepakura and Papercraft”
Comments are closed.
ADVERTISEMENT
Join Make: Community Today


[…] Read the full article on MAKE […]
Pepakura is how I made my Stargate helmet, but instead of fiberglass and Bondo I used paper mache and spackling paste-
http://www.instructables.com/id/Animatronic-Stargate-helmet/
Rad helmet, Honus! Thanks for sharing.
unclear. pepakura designer or viewer? shareware or freeware and how so?
cool though.
You want the designer. You only need to pay for it if you want to save any changes or import/export models or make your own. I use the free version so I just keep track of the sizing changes that I make for the armor pieces for my 6’4″ husband.
Anyone know how to open up and print Pepakura using a MacBook Pro, or iMac?
Pepakura is unfortunately a Windows only program at the minute. Your best option is to use Bootcamp or a virtual machine system like VirtualBox. It may also work in an emulator like WINE, may take a bit more work though. It is a bit of a pain to be honest, but until a Mac/Linux friendly version appears there isn’t much choice.
Thanks! I guess I’ll have to try and make friends with someone that has a PC.
If I remember rightly, it is possible with some versions of Pepakura to export the 2D parts in PDF format, complete with all the tabs. Depending on what you are planning on building, you may be able to find some of these PDF versions online. You lose the ability to scale them properly, but for practice it can be useful.
Either way, good luck finding a friend to help (With any luck you can get them to help cut it out too ;) )
:) And build for me, but that’s all the fun, right?
http://monsterlegendshack.aplicacionesyjuegosandroid.net
Prop Building with Pepakura and Papercraft | Make: