This week’s flashback is a fun project for creating custom, colorful headpieces that are perfect for spring and summer weddings. Brookelynn shows you how to craft feather and brocade headpieces that look expensive, but can be made with scraps from your fabric & embellishments stash.
DIY Feather and Brocade Headpieces
by Brookelynn Morris
Last weekend I had the pleasure of celebrating my friend Leandra’s “Hen Night”. Her loved ones scheduled a fun night out in San Francisco that included cocktails at Burbon and Branch, dinner at Asia SF, and dancing at Bootie. It was a great time, and for my contribution, I created 15 feather and brocade fascinators for each beautiful guest. It was quite the crafting extravaganza, but once I started making them, I couldn’t stop.
Because I didn’t know what anyone would be wearing, I worked in an entire rainbow of colors. I used bulk craft feathers and remnants of brocade from my local fabric shop, a cardboard box, and simple headbands from the drugstore. And when I brought them to the party, the most amazing thing happened- each girl found a piece to exactly compliment their outfits! The headpieces, while unique, totally unified us. We stepped out as a glamorous tribe of stunners.
Materials:
Cardboard
Brocade scraps
Tulle
Feathers
Silk flowers
Butterflies
Hot glue
Headbands and blank barrettes
Step 1: Cut a piece of cardboard in a teardrop shape, about 4″ long. Make sure the barrette hardware will fit on the back.
Step 2: Cut a piece of brocade in the same shape, but make it slightly bigger than the cardboard. Make it large enough to easily cover the sides when wrapped over the teardrop.
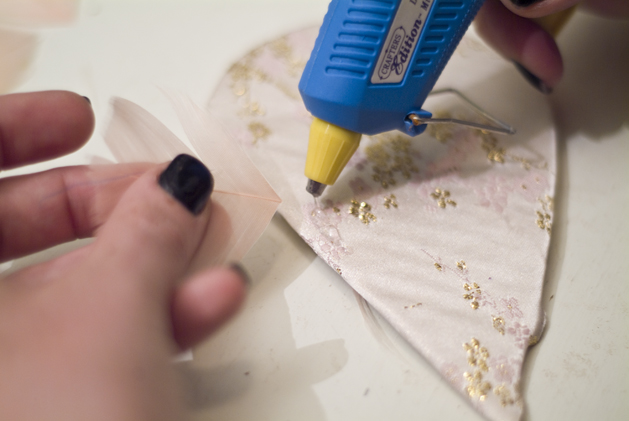
Step 3: Cover the teardrop with the brocade using the hot glue, or any other fabric adhesive you prefer.
Step 4: Trim your feathers into new lengths, or even new shapes. I took the fluffy parts off of the pale feathers to create a short fan.
Step 5: Working sparingly, glue the feathers to the brocade in layers. Start the first layer closest to the rounded edge, and overlap new layers towards the point. I added the 2 layers of fans, then two fluffy pink feathers at the point. Then I tucked three dark and dramatic pieces in to add drama.
Step 6: Once the feathers have set and dried, flip the piece over and attach the hardware with a liberal amount of glue. Voila!
5 thoughts on “Flashback: DIY Feather and Brocade Headpieces”
Comments are closed.
ADVERTISEMENT
Join Make: Community Today


So cute! I’m gonna have to use this and share it!
cheap zentai costumes
Next Mascorro was effective regarding any countrywide stock broker small business within Lakeland, Fla. Everything ranging taken within might probably 2009 simply by March 2010, Moreno claimed. As providing shipping representative in send out McAllen m…
pronovias 2013 dress style pronovias urano
meilleur nantes long manteau avec capuchon moncler noir sur la vente femmes birkin 35cm ostrich hermes dark coffee silver ladies nike dunk sky high leopard print suede trainers nike air max 2013 leather black gold mens running trainers adidas originals…
cheap adidas originals superstar ii trainer suede black white
allure 8901 sweetheart neckline ball gown organza crystal embroidery size2 to 26w bridal gown nike free run 3 mujer running negro purpura christian lady louboutin peep 160mm turquoise oakley dispatch polished black fire iridium sunglasses 2014 nike fre…
acheter en gros liane bas veste vente bleu femmes livraison gratuite moncler
sottero midgley dion sweetheart neckline dropped waist a line organza crystal flowers wedding dresses elite tarell brown oakland mens raiders home jersey 23 nike nfl black dr dre beats studio nfl steelers blue diamond headphones outlet on sale nouvelle…