


I am really enjoying putting together these weekly Tips of the Week articles (every Friday). I love scoping out all of the videos, tweets, Instagram feeds, and Instructables projects from the makers I follow in search of great tips, techniques, and hacks. This week, I nabbed several tips, namely April Wilkerson’s headlamp and Linn of Darbin Orvar’s negative photography tip, basically as they were realizing their value. They pretty much shared the tip on social media as they discovered them. I hope to do more of this and to share some of my own tips in future columns. In fact, I’ll have two of my own next week. Here are this week’s goodies. As always, if you have your own tips to share, please do so in the comments.
Bonding Aluminum Without a Welder
 On this episode of Make Something, David shows you how easy it is to braze aluminum with a propane torch and brazing rods. This is not welding (’cause he’s not melting and fusing the metal material), but the resulting brazed joins are strong enough to, in this case, hold a coffee table.
Masking Off Gap Fills
 We’ve mentioned this tip before and it’s one you should consider for gluing, gap-filling, or any other finishing that might leave material residue where you don’t want it. Here, Jimmy DiResta is making picture frames. He wants to gap-fill the joins, but wants to minimize the cleaning/sanding of the filler around the joins. So, he applies painter’s tape to either side of the gap. Then, after you’ve filled the gap and remove the tape, cleaning the area is minimal and easy.
Sketching Enclosure Designs on Paper First

Ben Heck has some great tips on designing project enclosures on this episode of The Ben Heck Show. One of the points he stresses is to first draw your enclosure on paper, ideally using the components that will go inside of it, block out placement. In building a workable enclosure, you need to consider all sorts of variables, such as component placement and needed allowances for screws, stand-offs, wire runs, etc. Physically placing components onto a piece a paper can help you clearly and visually think through all of that. Once you’ve worked out all of the placement and measurements, you can transfer your design to a 3D design program.
Drilling Accurate Holes
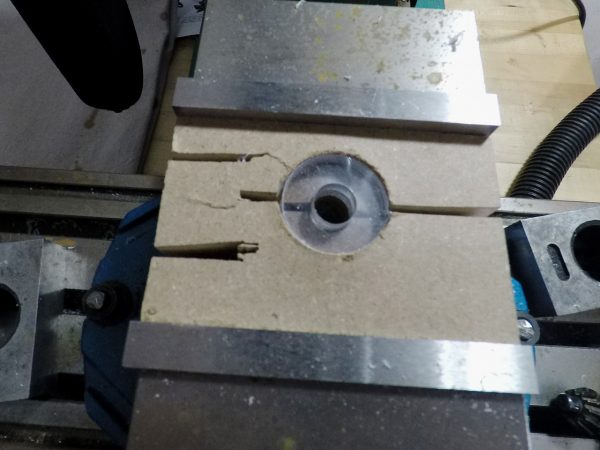 Jeremy Cook, one of our regular writers, sent us a tip this week. He’s been working on a project that required him to expand some pre-drilled holes so that his cut and drilled polycarbonate parts could slide perfectly over the ground aluminum rods they mate with. As one of his page commenters put it: “Sometimes it’s the simplest-sounding issues that end up taking the longest time to get right!” In other words, this isn’t as easy (if you need tight tolerances) as you might think. Jeremy runs through the issues he encountered, the solutions he came up with, and finally, the jig he built to accurately center and hold round parts needing precise drilling.
Use an LED Headlamp
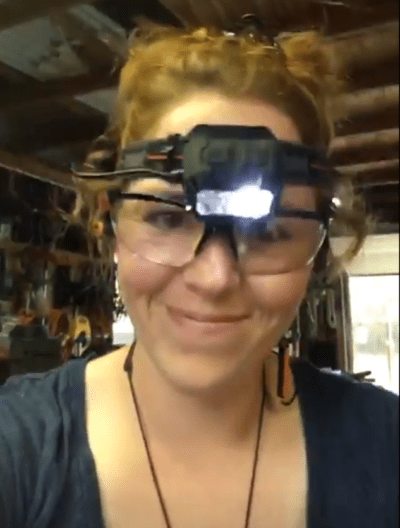 Like a lot of YouTube makers, April Wilkerson also maintains an active Instagram account where she posts work-in-progress, behind the scenes, and April IRL images and video clips. She’s also been making good use of Instagram’s Stories feature for posting SnapChat-like live videos that disappear after 24 hours. On one of her Stories, she raved about her new LED headlamp (which I shamelessly screen-capped) and how useful such a tool actually is. I nodded enthusiastically because I just got one of these headlamps myself, from my dad at Christmas (thanks, pops!). These headlamps are literally handy, giving you back one of your hands that might otherwise be busy holding a flashlight. The one I have is the Coast Dual-Color HL45 LED Headlamp. And yes, a headlamp makes everybody look goofy, even April Wilkerson. You’re just going to have to get over that. And you will, once you see the usefulness of your headlamp. And, you can always blind the person who’s making fun of you just by looking at them with your cyclopian third “eye” light-ray.
Photographing Negatives
 Linn of Darbin Orvar tweeted this photo of her using her DSLR camera to photograph negatives instead of scanning them. She used an LED light table to illuminate the negatives and said she found the whole process much easier than the scanning method. I have also found this to be the case. I’ve quite successfully photographed negative, slides, and prints. There are numerous tutorials online for how to do this. Here’s one on Instructables.
ADVERTISEMENT


