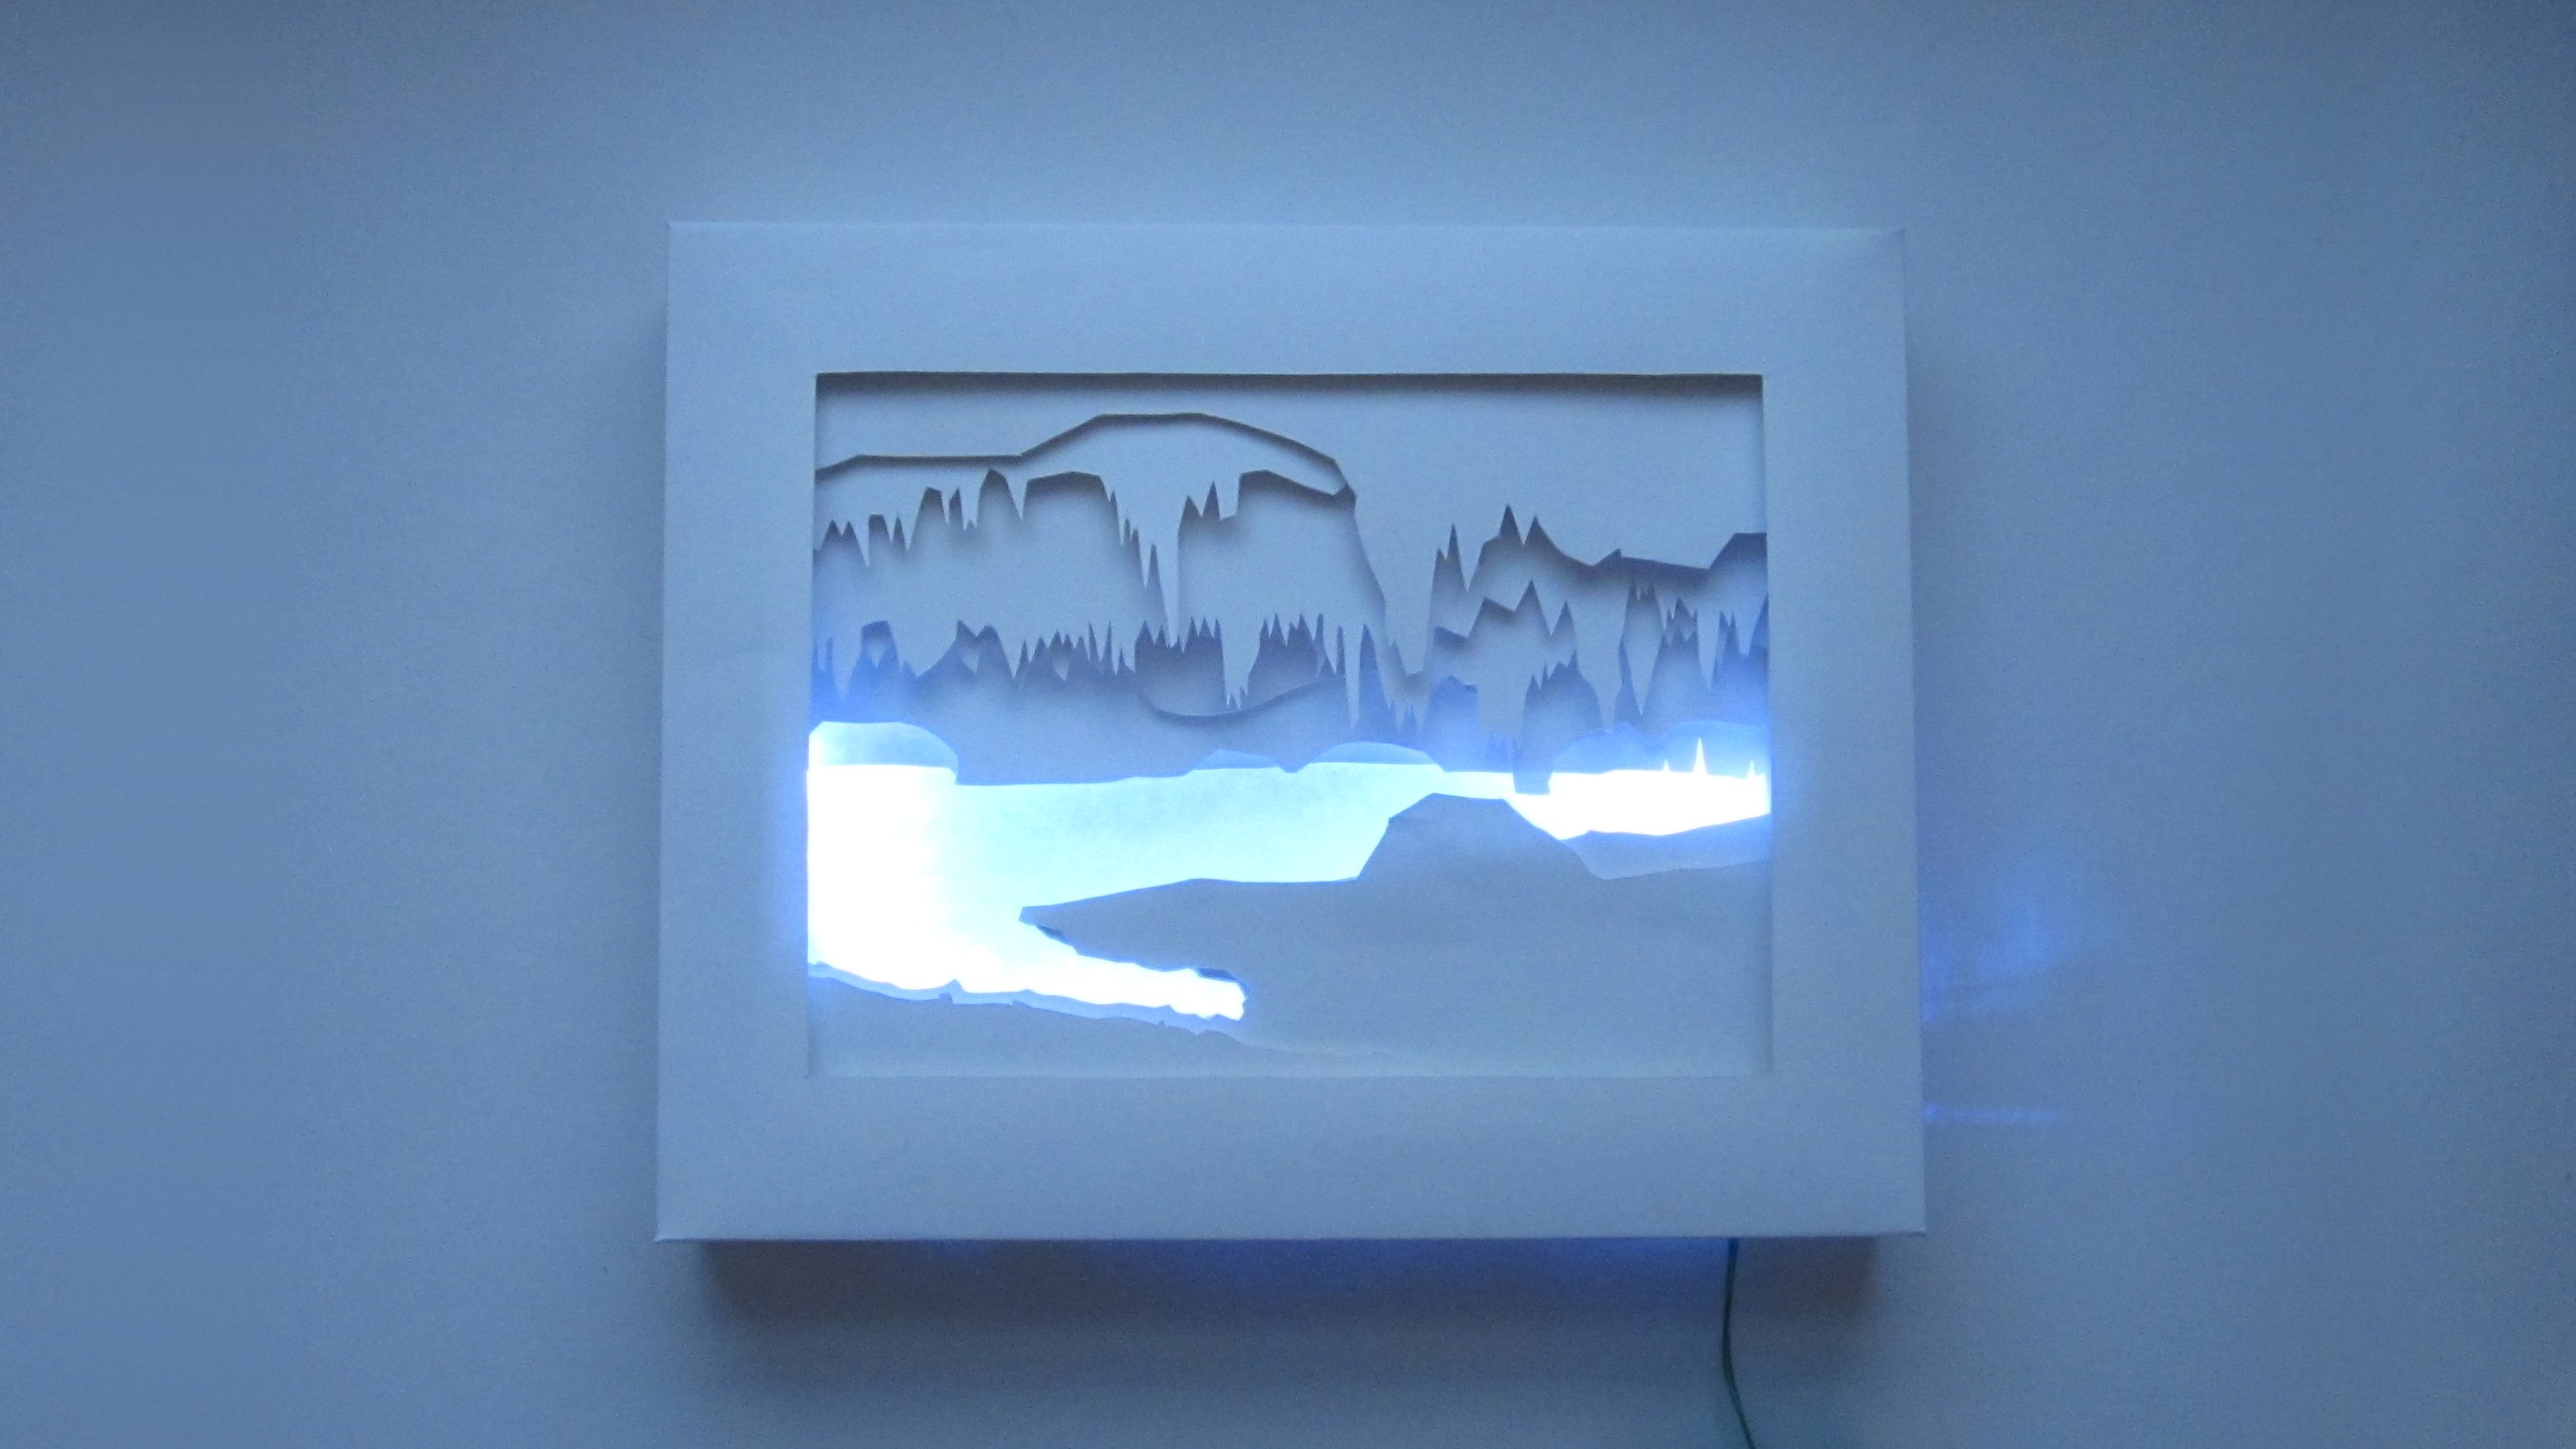
In this project, I am going to show you how to turn a photograph into a 3D silhouette light box. This is done by separating the picture into different layers based on how far away the objects are in the scene. Each layer is then turned into a silhouette cutout. The layers are reassembled with spacers in between each one, giving the image the appearance of depth and creating a 3D effect. You can also add lights behind the cutouts to make your images glow and create shadows between the layers.
Projects from Make: Magazine
3D Silhouette Light Box
- Like
- Digg
- Del
- Tumblr
- VKontakte
- Flattr
- Buffer
- Love This
- Odnoklassniki
- Meneame
- Blogger
- Amazon
- Yahoo Mail
- Gmail
- AOL
- Newsvine
- HackerNews
- Evernote
- MySpace
- Mail.ru
- Viadeo
- Line
- Comments
- Yummly
- SMS
- Viber
- Telegram
- Subscribe
- Skype
- Facebook Messenger
- Kakao
- LiveJournal
- Yammer
- Edgar
- Fintel
- Mix
- Instapaper
- Copy Link
Steps
Advertisement
Step #1: Select a Picture
- The first thing that you need is a picture to use as a template. You can either take one yourself or find one online. For the best results, try to get a picture with a lot of depth. You want to have interesting objects at different distances from the camera. My favorite scenes to use are caves, forests, and valleys.
- These images provided through Creative Commons by:
scott1346 @ www.flickr.com/photos/bluecorvette/with/8178999673
echoroo @ www.flickr.com/photos/22544551@N04/6728284947/
Artur Staszewski @ www.flickr.com/photos/arturstaszewski/with/8442008652