


I was in Japan eight years ago and like a good tourist, I went to many Japanese gardens, which were amazing. A ubiquitous feature of Japanese gardens is concrete and stone lanterns in endless shapes and sizes. When I came back home, I decided to build one myself.
This lantern is my design; it’s not based on any particular build, but it’s representative of many traditional garden lanterns.
While making this lantern is not difficult, there are lots of steps, so for the sake of brevity I drew some diagrams that Makers can follow.
All the forms for casting the pieces of the lantern are made from 5/8″ plywood. I used inexpensive CDX grade, which leaves a subtle wood grain texture on the concrete. You can use a smoother grade of plywood if you want a smoother finish.
Cast Your Concrete Lantern
The lantern has 6 pieces: a base, column, pedestal top, window box, canopy, and cap. You can download PDFs of the full-size diagrams or click the images below to view them in your web browser.
Build the basic forms
You’ll use mainly 1″ screws, or simple 1″ angle brackets with ½” screws, to connect the plywood pieces together. If desired, you can sand down rough spots or smooth them with wood filler.
Starting with base/pedestal top form (Figures A and B), cut all pieces as indicated, then screw them together. I used 1½” screws to fasten the walls to the base, but 1″ are probably fine. Note that you’ll use this mold twice: for both the base and the pedestal top.


Next build the canopy form (Figures C,D, E, and F). Since this is a complex shape, it’s a lot easier to use duct tape to hold the pieces together, and the shape of the form (a truncated pyramid) actually makes for a sturdy mold using just the tape.


Now build the column form (Figure G), which is a simple box shape, and next the cap form, which is a small piece, but is 2 forms built into one (Figures H, I, and J).


Build the window box form
This form is trickier — it creates negative spaces inside the box to make the windows. The outer form is a simple box; the inner form is a smaller box with foam blocks duct-taped to each wall. Once the concrete has set, the foam blocks are removed to create the windows.
Build the outer and inner form boxes as shown (Figures K and L).


Cut out 10 pieces of 1″ foam, each 5½” square. Using 2″-wide duct tape, attach 2 pieces together by wrapping tape around all 4 edges to make a 2″-thick block (Figure M). Repeat to make 4 more blocks.

Using more duct tape, attach one foam block to the bottom of the inner form. Then tape a block on each side, 2″ up from the bottom (i.e., flush with the bottom of the plywood) (Figures N and O).


Insert the inner form inside the outer form (Figure P). Make sure it’s a tight fit, otherwise it can float out of position when you pour the concrete. If it’s too tight, use sandpaper to trim the foam blocks, or just remove one side of the outer box, insert the inner box, and then replace the outer panel. It’s OK if the foam is compressed a little.

Mix a batch of concrete
I’ve found it’s best to start with 4 parts concrete to one part water, and then add more water to get the consistency you want. In a plastic tub or bucket, measure out 4qts of concrete mix using a 1qt measuring cup. Then add 1qt of cold water, stirring until the mixture is completely dissolved (Figure Q). Now add a little water if needed, until it has the consistency of pancake batter.

Continue stirring for 5 minutes. I suggest you only mix batches about this size — any larger and it gets hard to stir, and trust me, you have a lot of stirring ahead of you!
Pour the pedestal and cap
IMPORTANT: Place your forms on a level surface before pouring concrete. If they’re not level, the top surface of the piece you’re casting will not be parallel with the bottom surface! Use a bubble level (or a level app on your smartphone) and shims if needed to level the form.
Pour the concrete into the base/pedestal form until it’s level with the top. Then pour into the cap form until it’s level with the top edge (Figure R). Let both cure overnight, ideally 24 hours.

NOTE: Pour any leftover concrete into a heavy-duty plastic bag, and scrape as much off the tub as possible. Then use a garden hose outside to rinse the tub. Don’t rinse in a sink until almost all the concrete is gone, or you run the risk of plugging up your sink drain with sand and concrete!
Before making any more pieces, check that the pedestal and cap have cured properly. Unscrew the pedestal form and carefully remove the side panels. You may have to pull hard to get the concrete to release from the plywood, but don’t worry, it’s not fragile. Save all the panels, as you’re going to cast a second piece (the base) from the same form.
For the cap, carefully remove all the panels (Figure S). The piece with the square hole in it might be tricky to remove, if the top of the cap is wider than the hole. If needed, use a handsaw to cut this piece away (Figures T and U).


Pour the base, column, and canopy
Assuming both the pedestal and cap came out fine, move on to the other pieces.
Reassemble the base/pedestal form, and make another identical piece for the base.
The column is a big piece, so you’ll need more than one bag of concrete. It’s hard to mix that much concrete at the same time, so think in terms of 4 batches to fill up the form. Again, make sure it’s level.
This piece will be particularly heavy, so if you’re not that strong or don’t have a friend to help, I suggest making the column shorter by just filling the form halfway. The lantern still looks great when shorter!
For the canopy, it’s important that the concrete fill the entire form, especially the thin angled edges. Make the first batch a little thinner than usual so that it fills the whole cavity. Then you can go back to regular pancake-batter thickness. You may see some liquid concrete seep out corners; that’s fine. It’s more important that there are no air pockets. Give the whole thing a good shake, then fill the form all the away to the bottom edge of the square hole. Let it set for at least 24 hours — ideally 48 hours since this mixture is a little thinner (Figure V).

Then simply remove the duct tape and the panels should pull off (Figure W). If some of the edges come out a little rough, that’s OK — in my experience people prefer the “rough” look.

Pour the window box
Now that you’re a concrete expert, it’s time to tackle the trickiest piece, the window box. This piece has some thinner sections, where regular quick-set concrete would likely crack. So you’ll use a specific concrete called “construction grout” or “structural grout.” Mix a normal-sized batch, about ⅓ of the 50lb bag. Once again since the cement needs to get into tight corners, make the mixture a little on the liquid side.
Pour into one corner and check that the mixture fills the bottom of all 4 corners; you can use a stick of 2×2 lumber to push the mixture down. Then fill all the sides, pouring directly into each side, until the mixture is level with the top edge (Figure X). Let it set at least 24 hours; 48 hours is best.

To remove the inner panels, use the small socket wrench to remove all the hex head screws, then gently wiggle out all 4 panels, starting with the narrower ones (Figure Y). Remove the outer panels with a screwdriver.

To remove the foam blocks, first drill a ½” hole in the foam near the corner of the block (Figure Z), then use a keyhole saw to cut out most of the foam. Peel off the duct tape, and you have a window! Do this on all 5 foam blocks and window box is done (Figure AA).


Assemble your lantern
Each piece on its own is not that heavy (except for the column), but once assembled the lantern will be too heavy to move. So find the place where you want to put the lantern and move each piece separately to that location.
 Don’t just stack the pieces — it’s important that you glue them together so that the lantern doesn’t accidentally topple over and injure somebody! Use Quikrete Construction Adhesive or something equivalent. You’ll be using a lot of glue, so cut the tip for wide diameter and fast flow.
First make sure the base is on solid ground and adjust it with small rocks or gravel until it is perfectly level in all directions. The rest of the pieces you can eyeball for level (or plumb, for the column).
To put the column on the base you’ll need a helper! Once in position, adjust for level/plumb by adding bits of gravel under the column bottom. Then tilt the column slightly, apply the adhesive liberally, and tip the column back. Let dry for 24 hours.
Place the other pedestal on the column and let cure for 2 hours. Then proceed with gluing the window box. Then glue the canopy and cap (Figure BB). Your lantern is complete!

Build the lantern windows (optional)
For each window’s frame, cut 2 wood pieces approximately ½”×1″×5½” and 2 pieces ½”×1″×3½” (adjust as needed to fit your window holes).

For the center pieces, cut 2 pieces ½”×½”×3½”. Cut a small lap joint on each pair, about ½” wide and ¼” deep.

If desired, finish all pieces with simple stain on the front. Then slot them together and glue up the whole window.


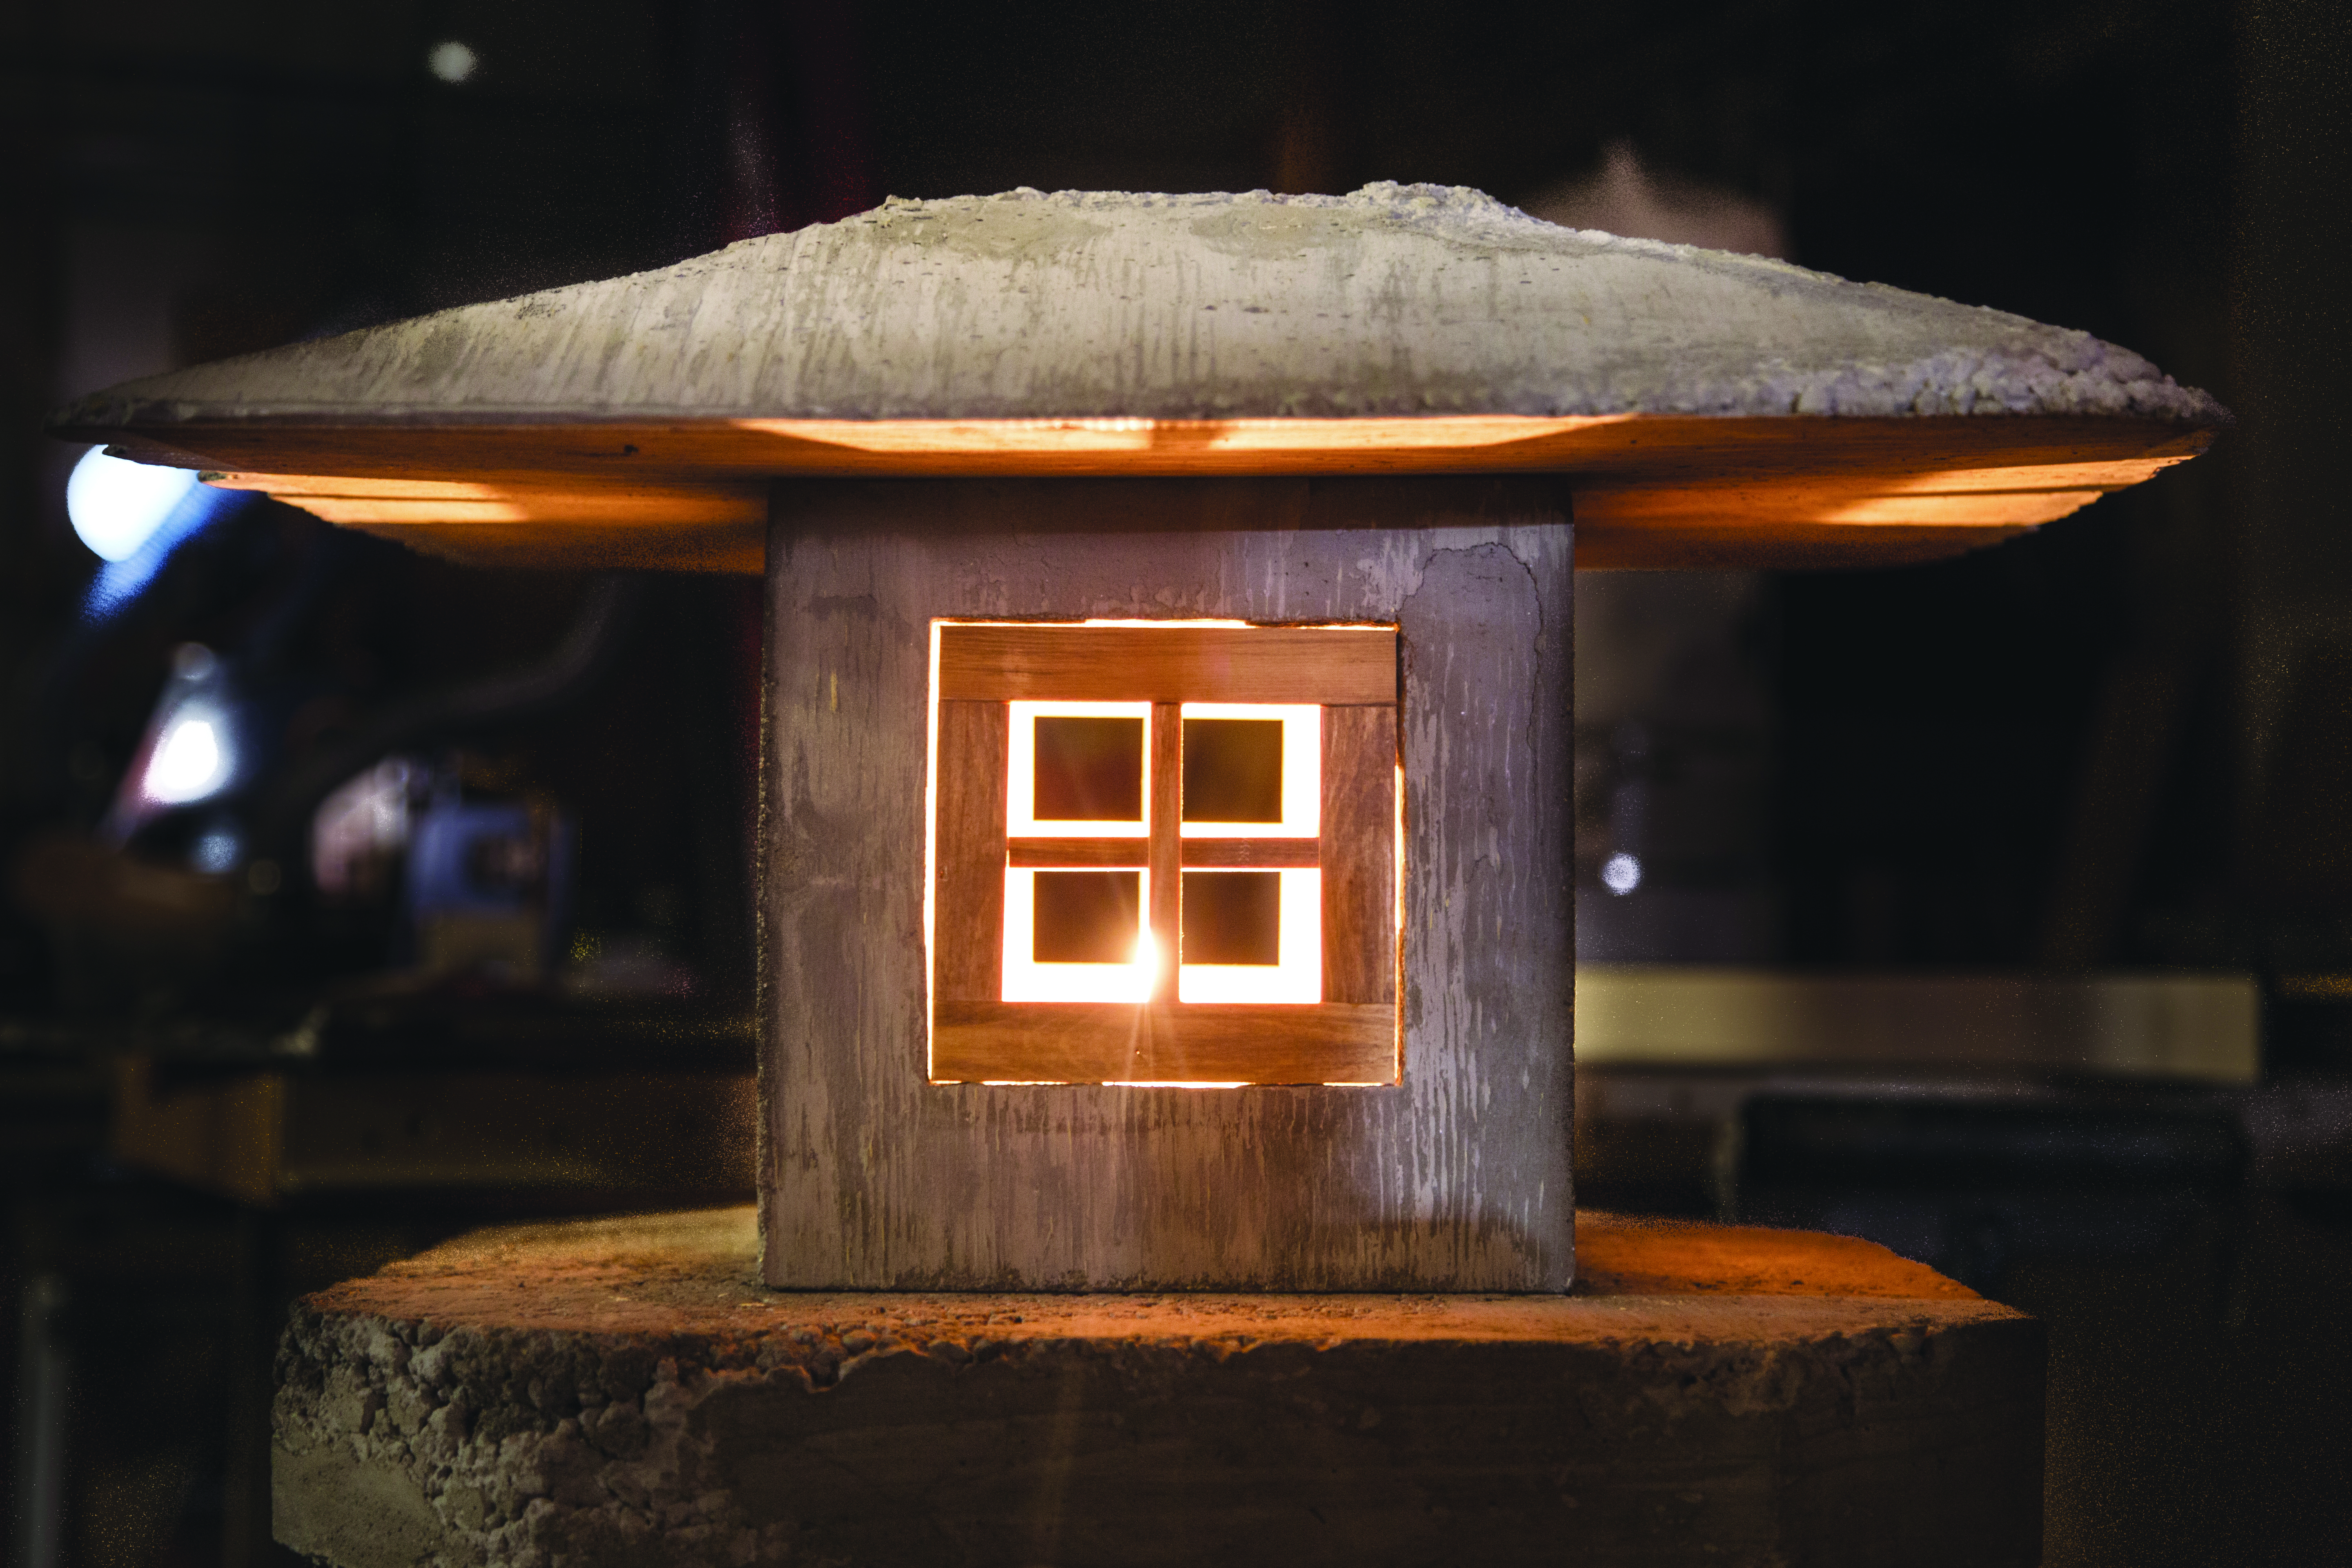
Light it Up
Of course you can make it a real lantern by adding a candle (Figure CC) or LED lights. Make your own tiny weatherproof LED lanterns, or try Dark-Detecting LEDs.

To add permanent lighting, you might try gluing a length of pipe, ½” diameter or wider, into the center of the forms for the column and pedestal, to leave an open conduit for wiring.
Going Further
The variety of Japanese stone lanterns is amazing. Search online for styles you like, and then modify the forms I’ve provided to create your own design. Some ideas:
- Top it with a traditional jewel-in-the-lotus shape, by carving your own mold.
- Use an old satellite dish to cast an umbrella-shaped canopy; try a trash bag or nonstick cooking spray as a mold release.
- Create incised details or symbols on the column, by gluing raised shapes inside the mold. If you do 3D printing, let your imagination go wild!
- Add window frames. Make: engineering intern Matt Kelly built the beautiful wooden window frames shown here.
Building molds for concrete is really rewarding, and definitely not something most people do. Enjoy your lantern — it’s one of those rare things that looks better as it gets older. And start thinking about other things you can make out of concrete!