fig 10

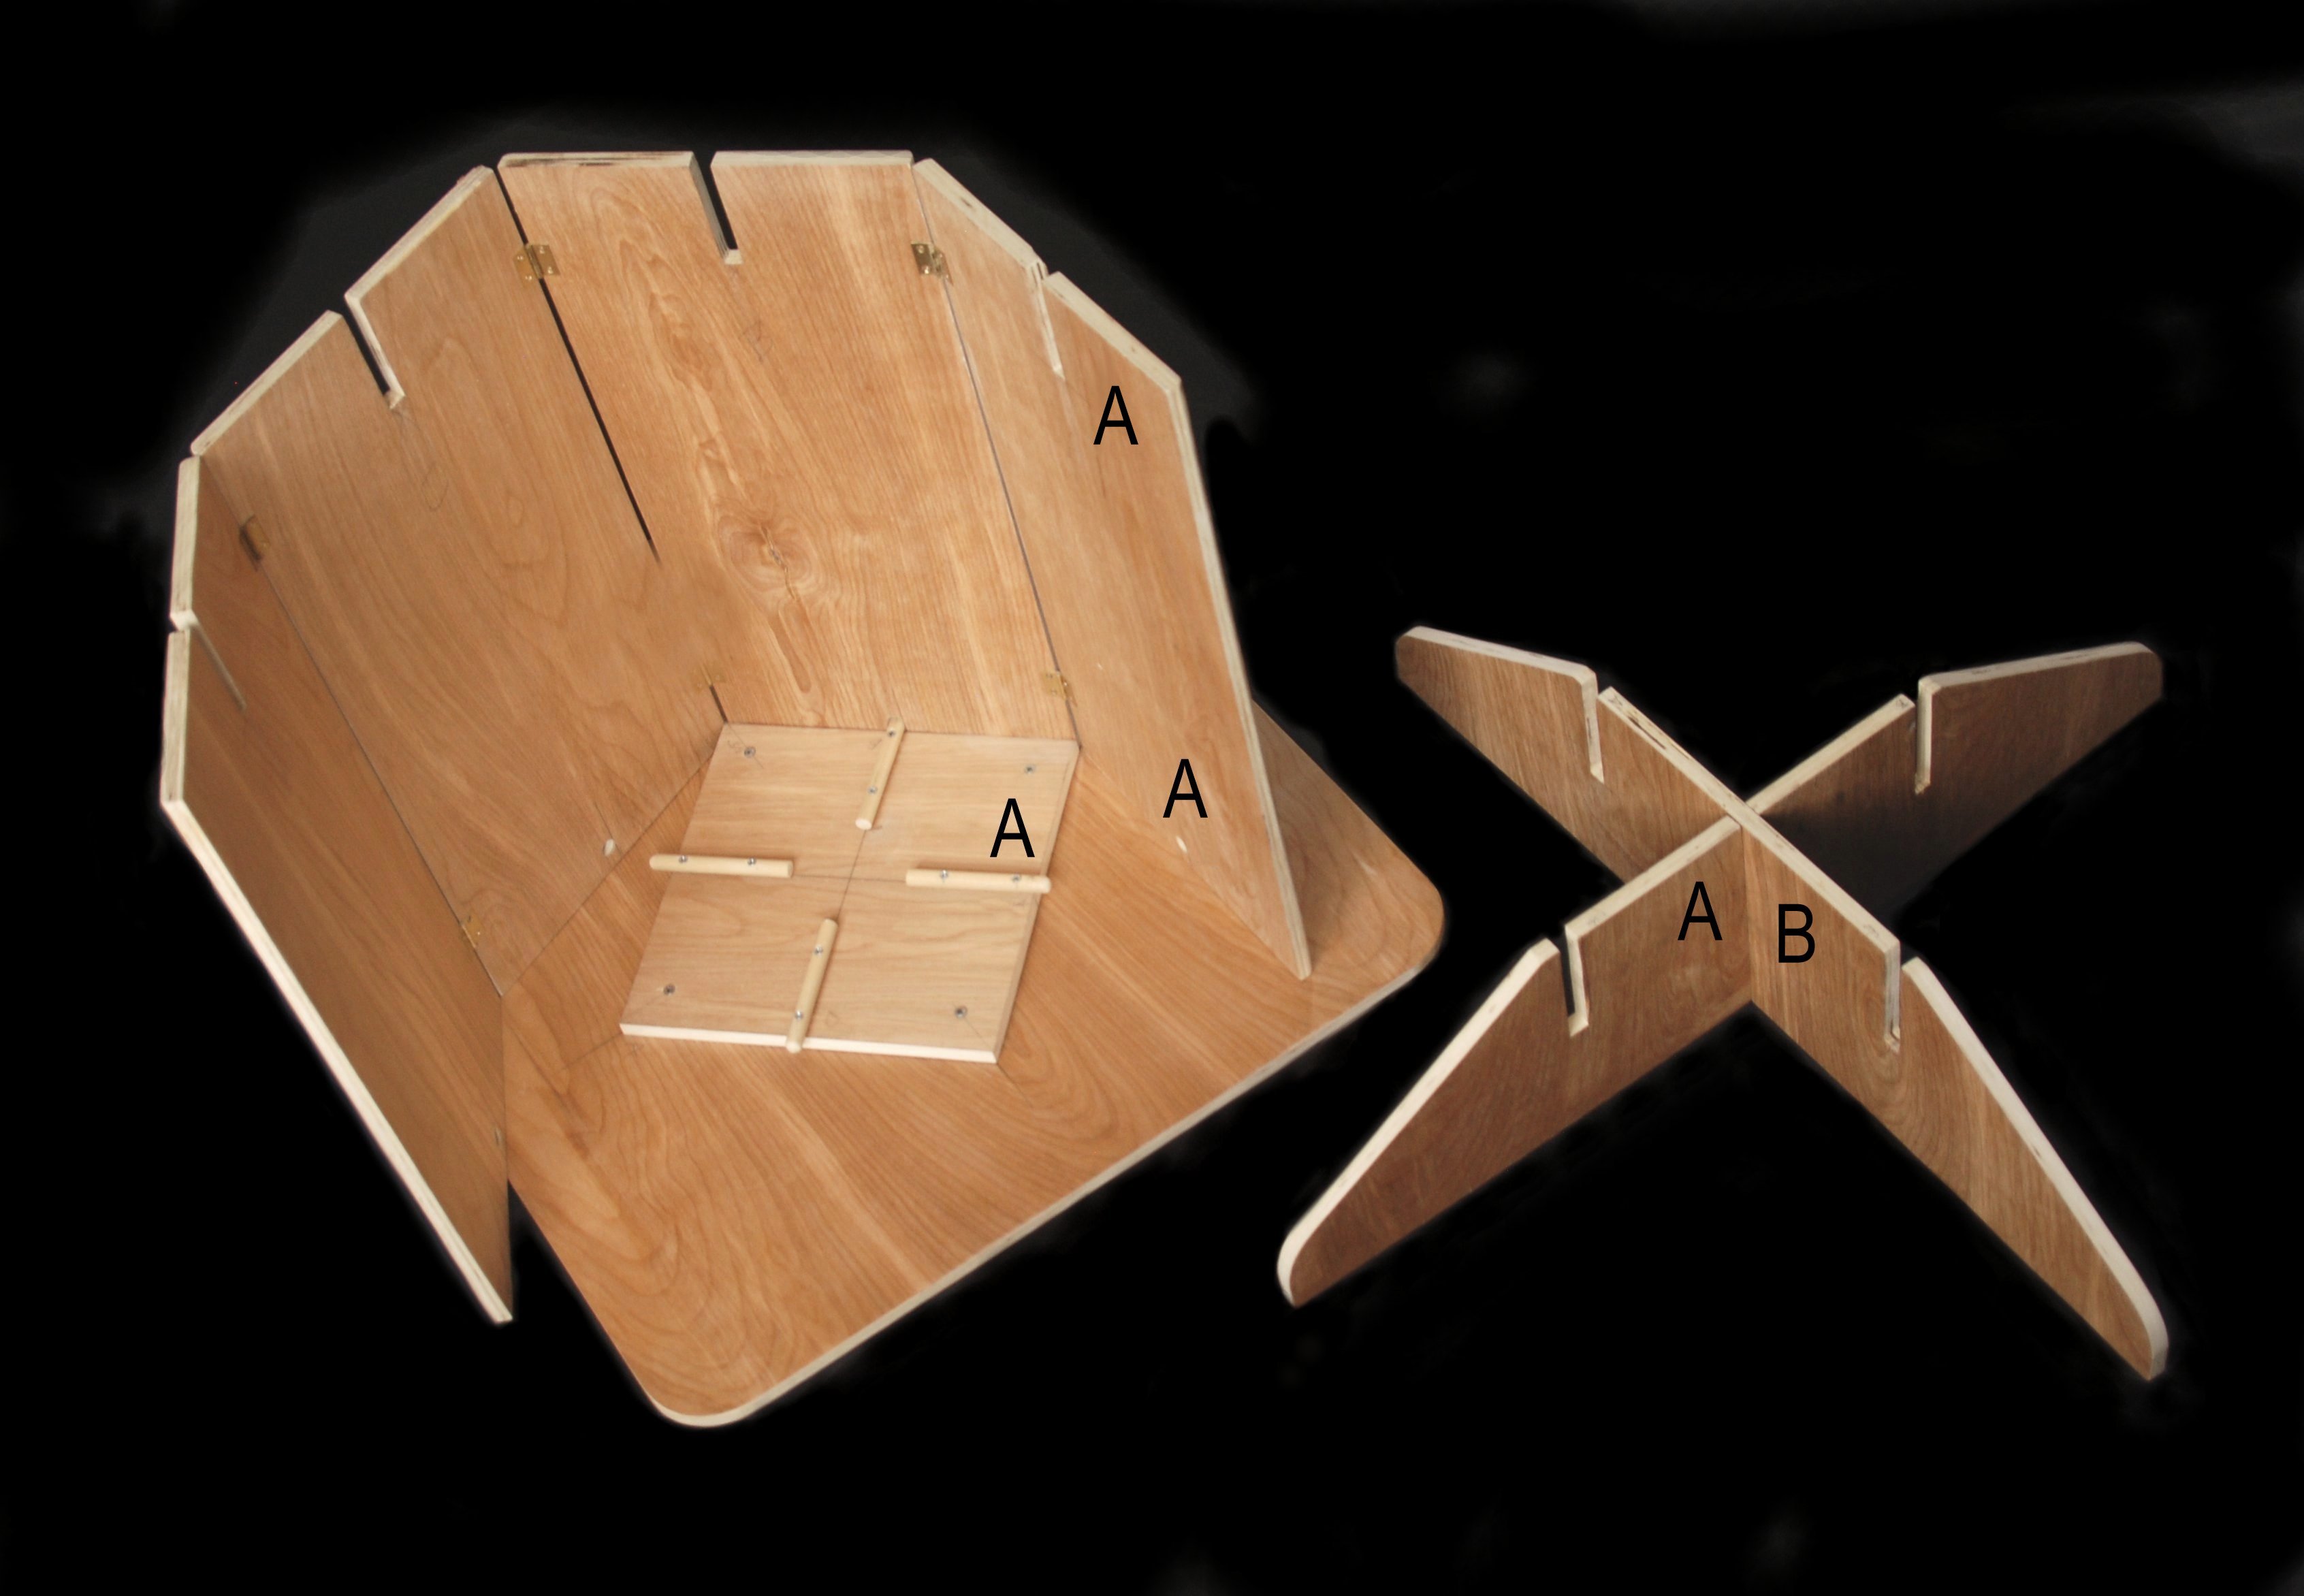
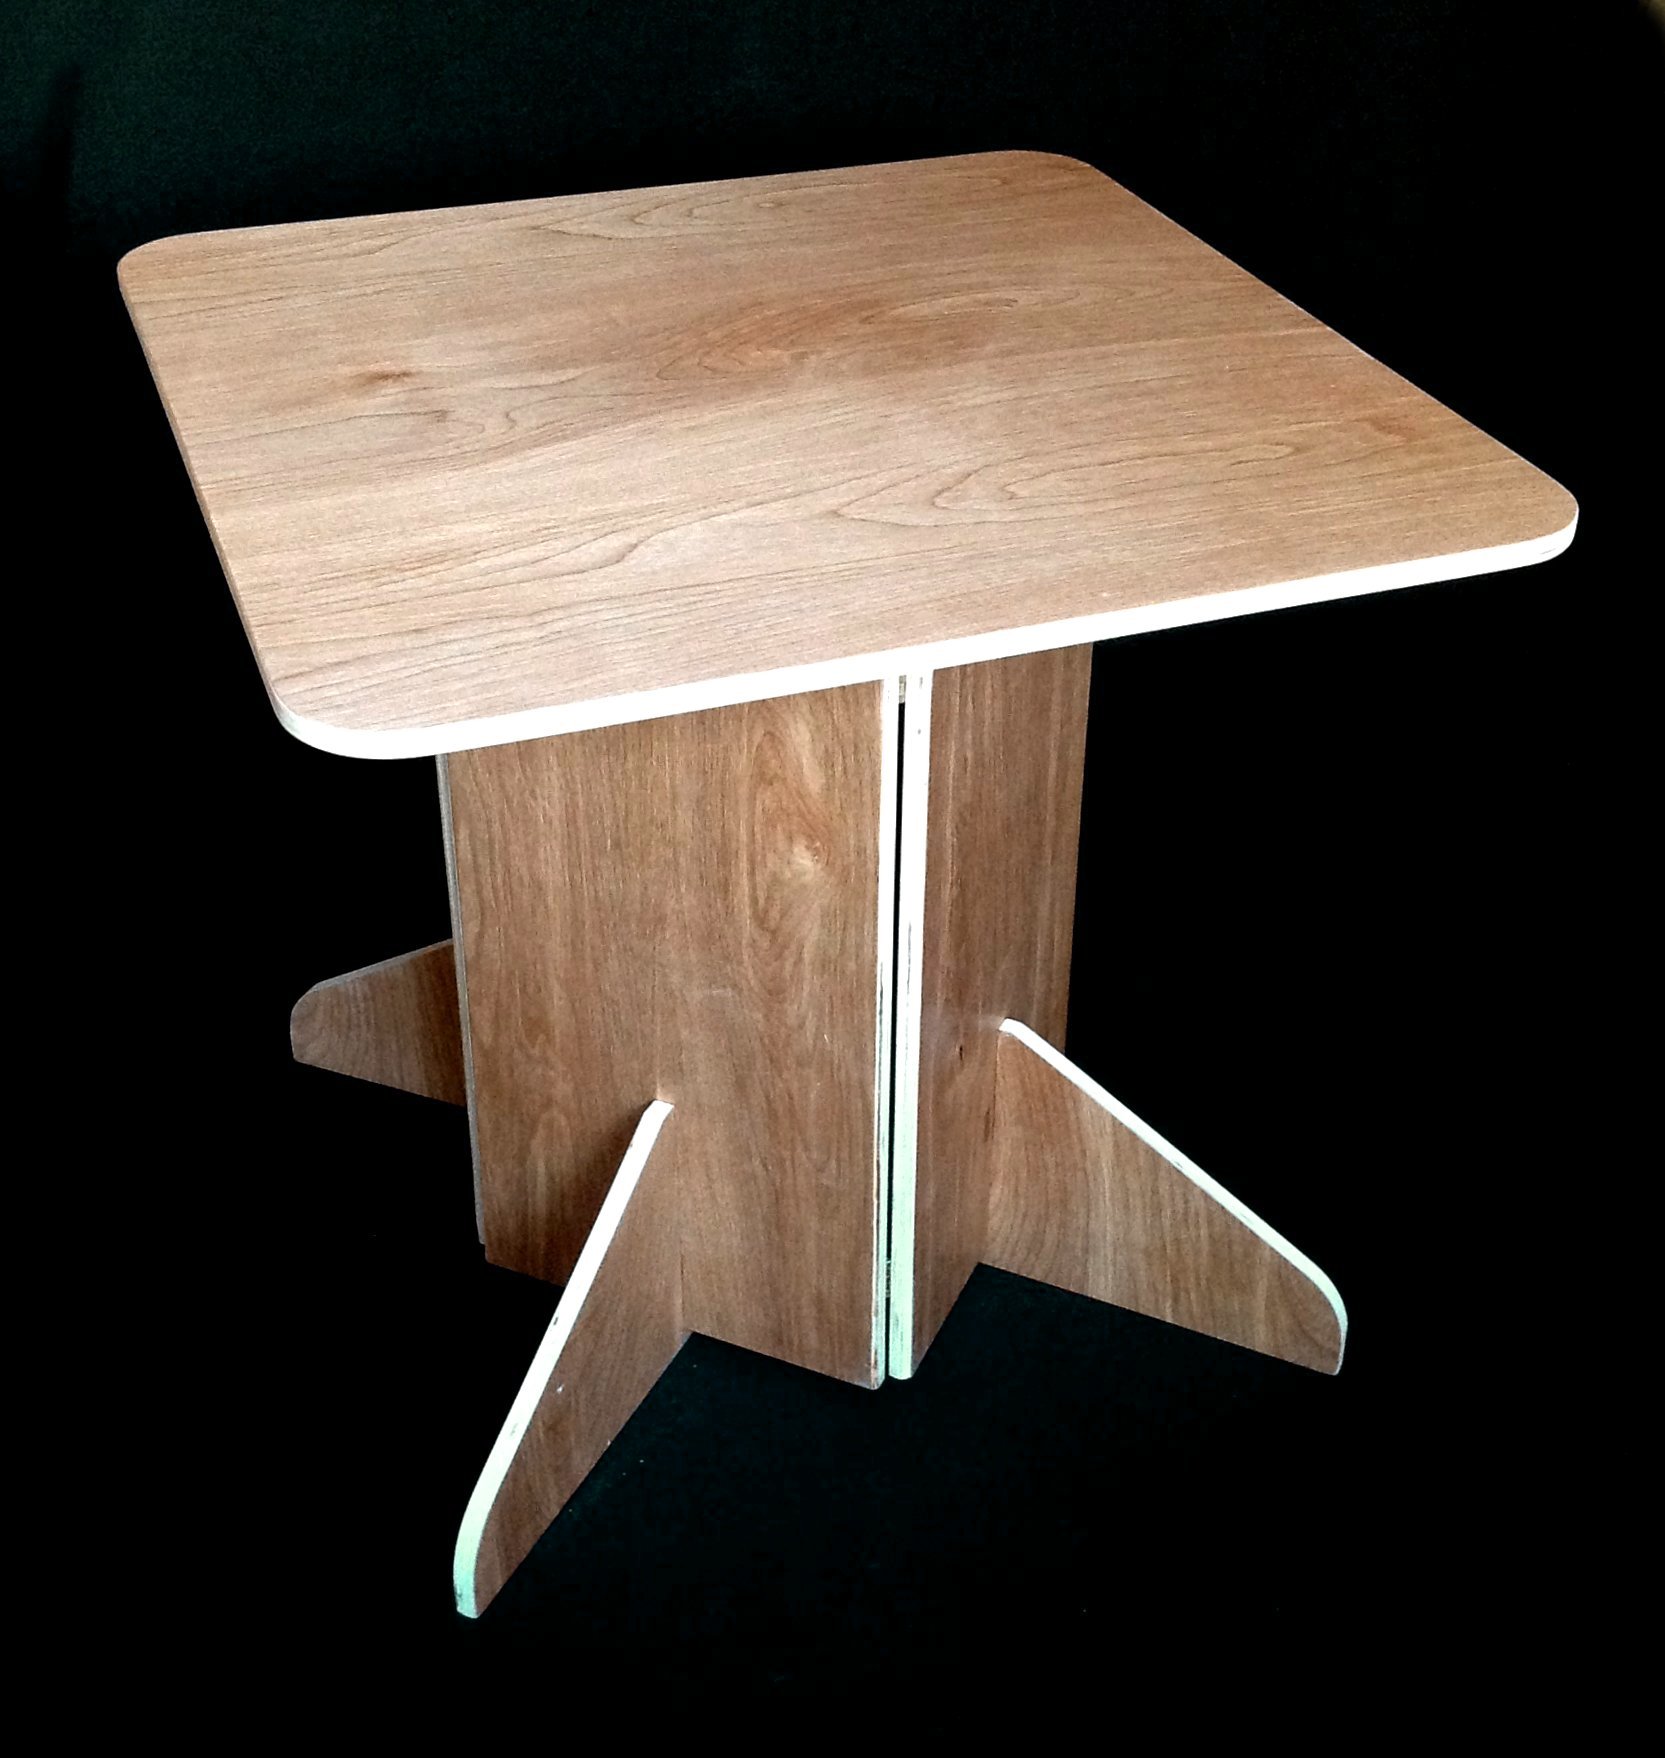
This sturdy table assembles in seconds without tools, and stores flat in a closet or under a bed. You can make it over a weekend from a ½”×4’×4′ sheet of finish-grade plywood.

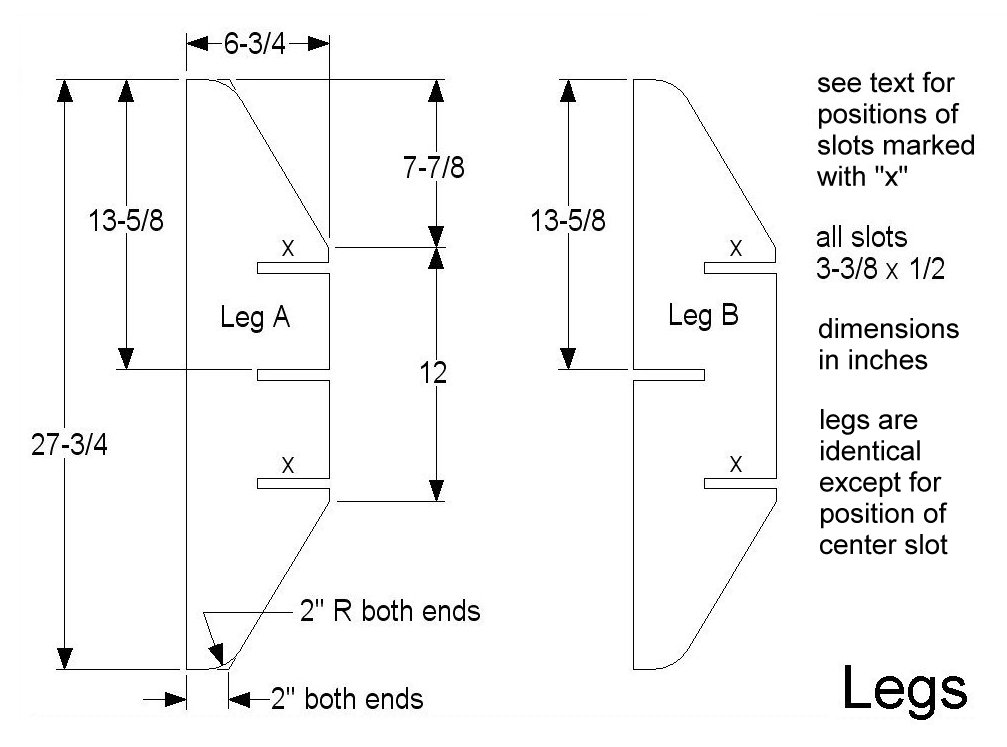
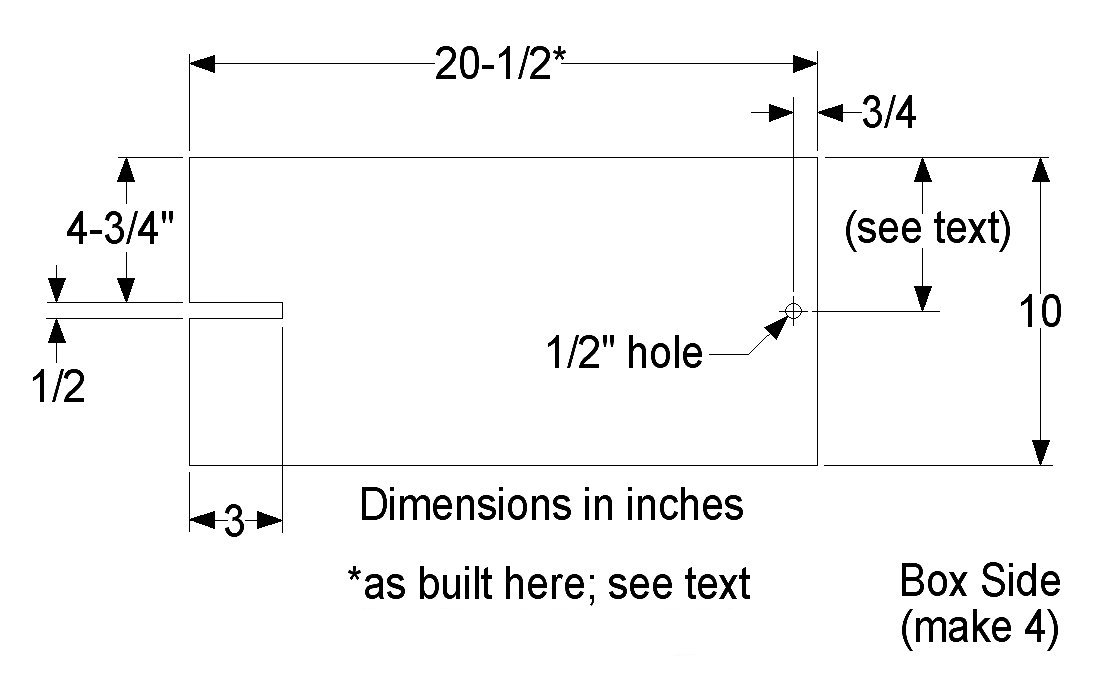
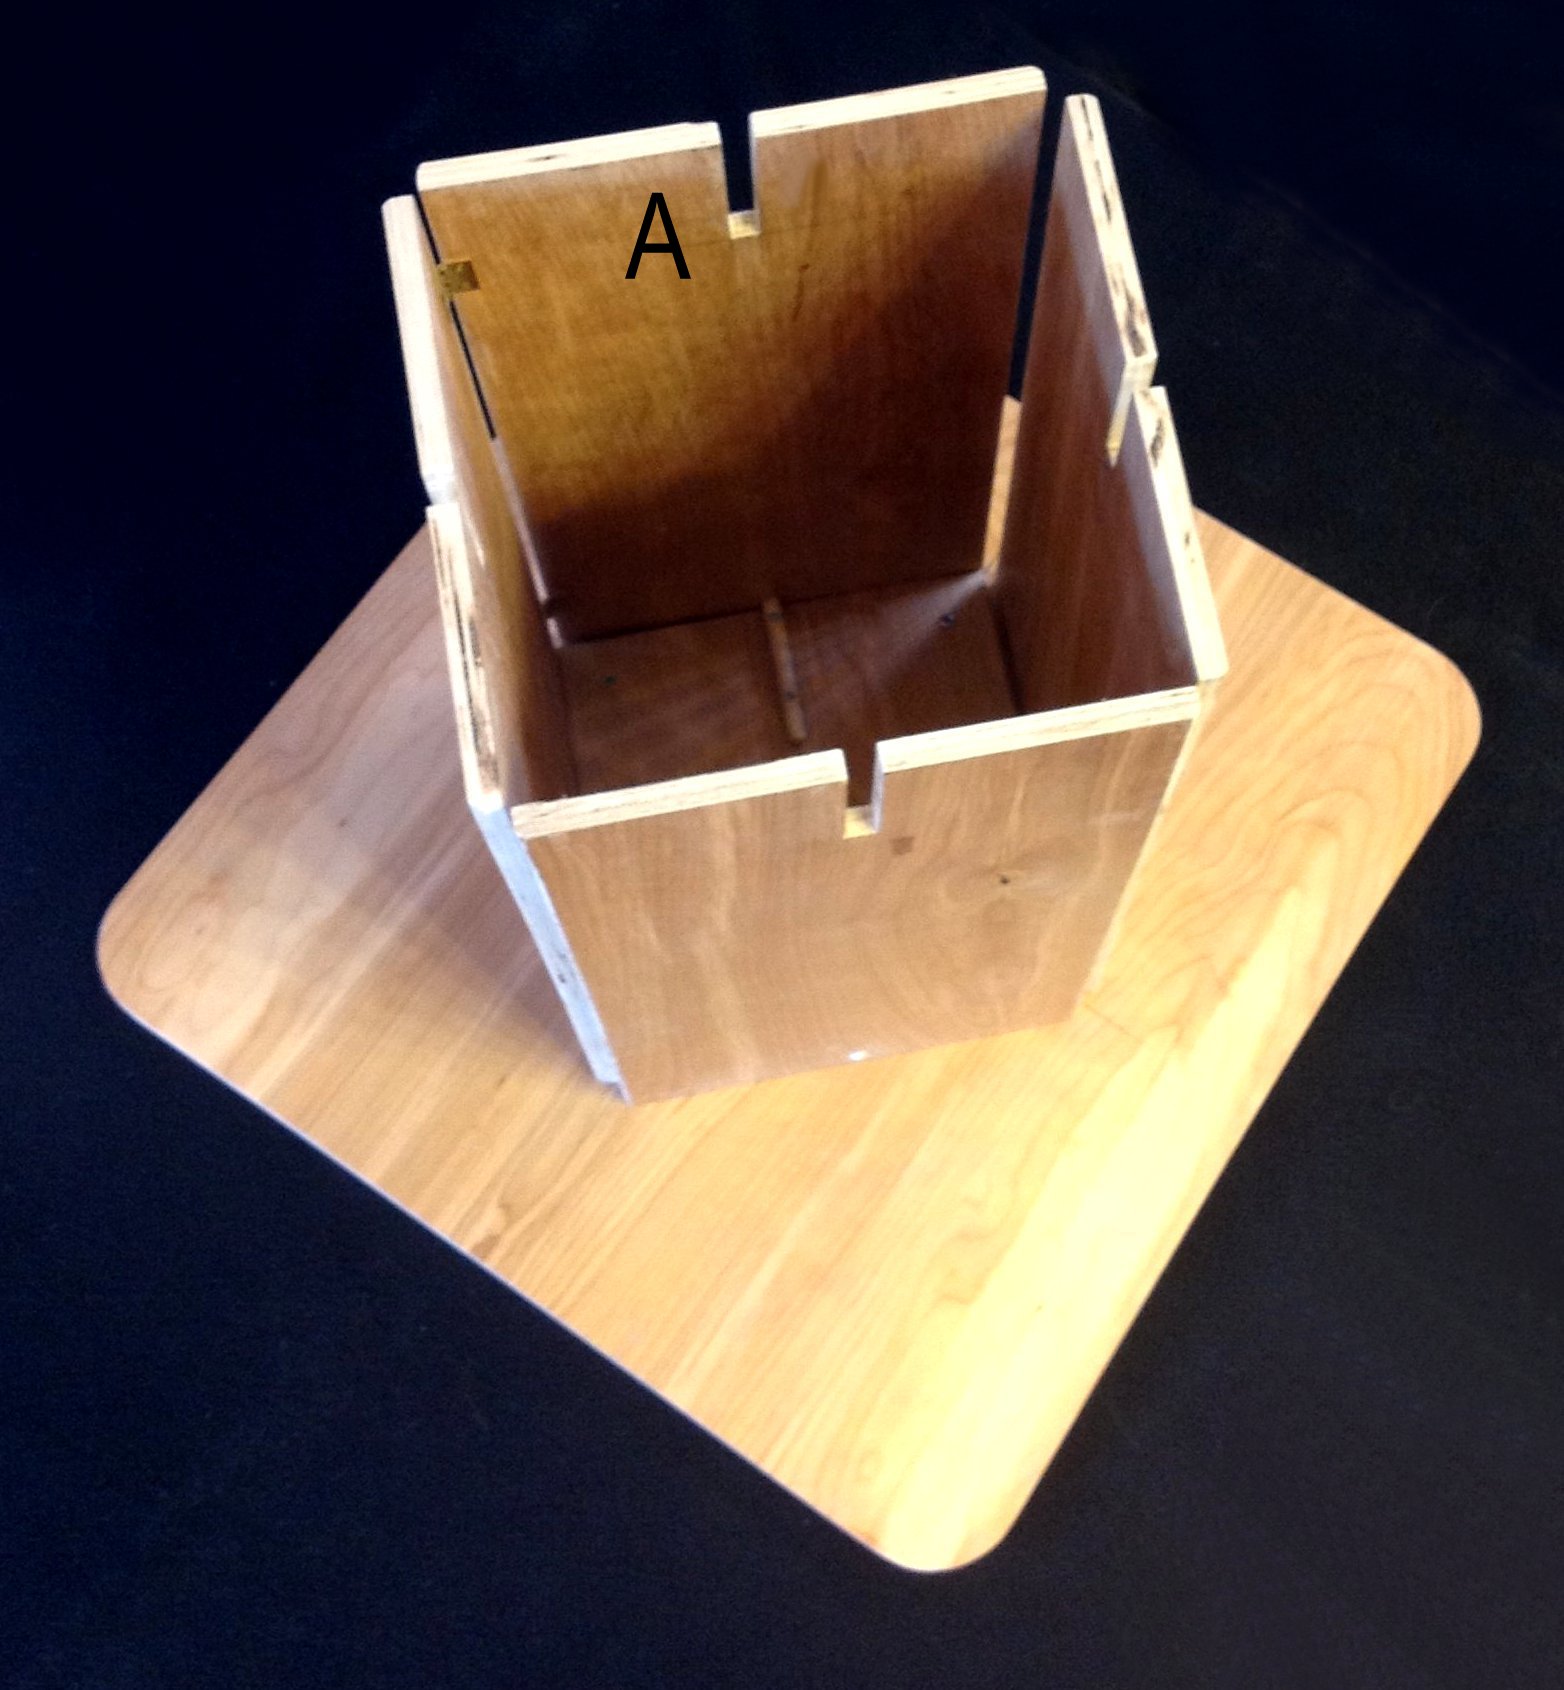
The table shown is intended for children ages 5–7. For bigger kids or adults, change the box panel lengths accordingly. (Suggested table heights for various ages can be found online.) Reducing the box-panel slot depths by up to 1″ will also increase table height.

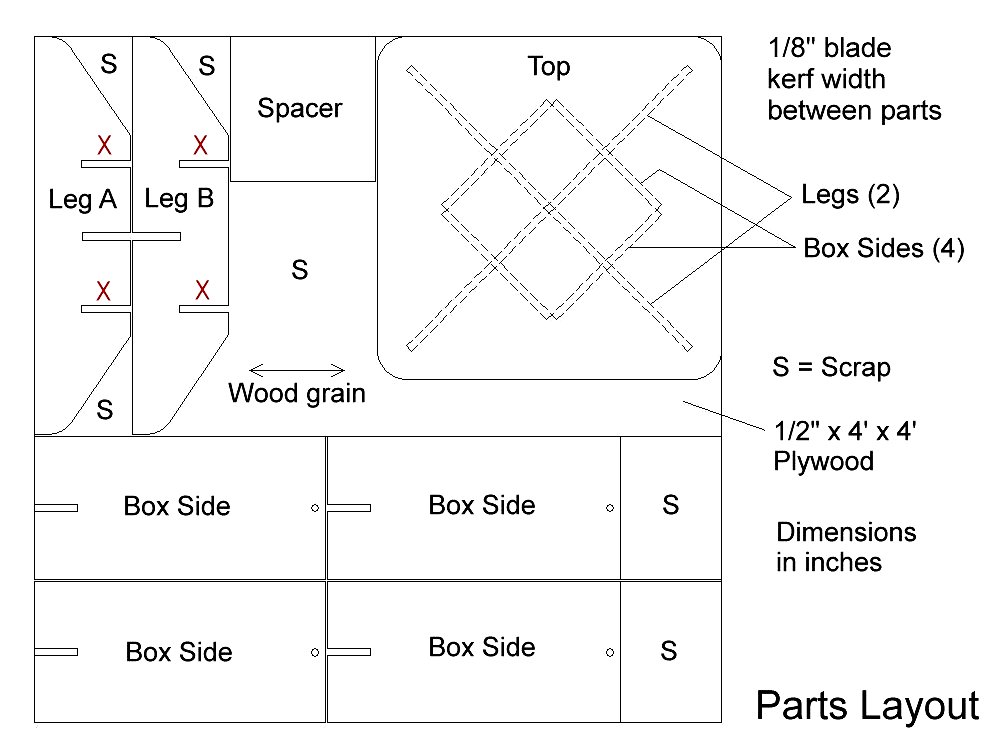
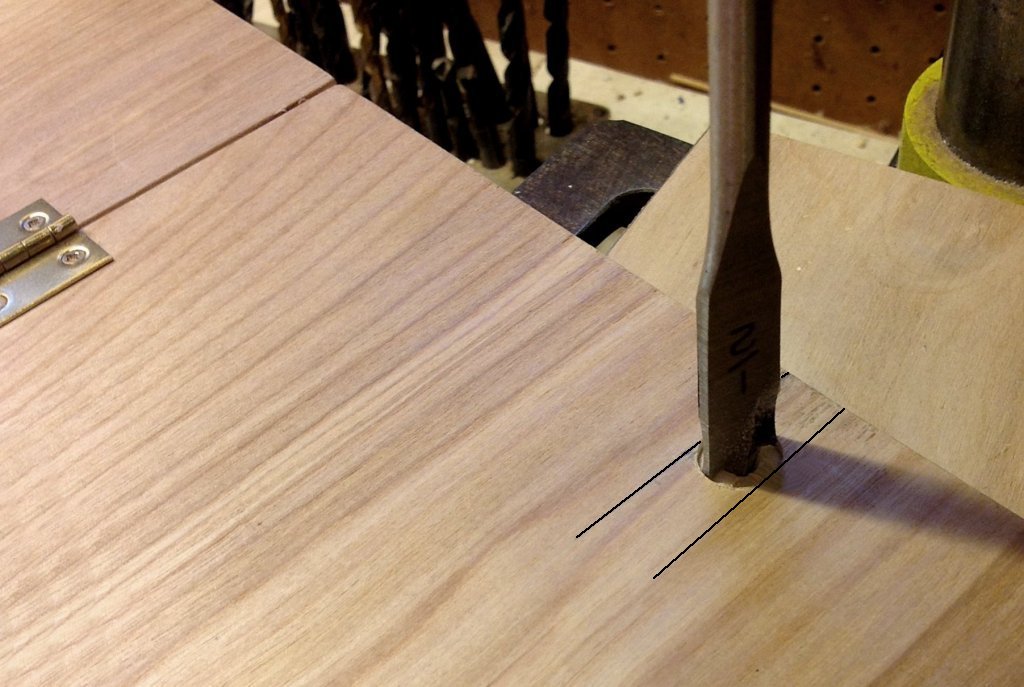
A table saw, band saw, and disc sander will speed the work, but a circular saw and jigsaw will do. The layout shown allows for saw kerfs.


Project Steps

Cut out the parts

Using the layout diagram shown here and the parts drawings in Steps 1–3, cut out all the parts except for the slots and holes.

Sand all edges smooth. Any edge voids can be plugged with a no-shrink wood filler. (Bondo also works.)

Cut and assemble the legs

Cut only the center half-lap slots in the table leg cross-pieces to match the plywood thickness, which should measure ½”. (Use a piece of your plywood scrap to check, fit, and widen the slots as necessary by sanding the edges with a thin backing block.)

Assemble the 2 leg cross-pieces. Mark one of the interior corners A and B as shown here. You’ll be marking other parts so that the table can be assembled the same way every time.

Cut the box panel slots and add hinges

Cut the slots in the 4 box panels and adjust slot width using the plywood scrap. Chamfer or round-over the 2 long edges on the better face of each box panel.

Lay out the 4 box panels with all chamfered edges down, making sure all panel ends opposite the slotted ends are aligned.

Keeping the panel long edges tight together, drill and install 2 hinges on each of the 3 long-edge joints, each hinge located 3″ from the panel ends. A center punch will help locate all drilled holes accurately.

Trace and cut the leg slots

Fold the box panels inward to form a square, and slide this box down onto the assembled legs, placing the end panel that has only one edge hinged over the A leg. Mark that panel A at both top and bottom ends. Make sure the unhinged gap is the same width as the hinged gaps.

Trace the 4 panel slots onto the legs.

Cut the slots (labeled X on the layout and legs drawing), and sand them to fit. Final fit of all slots should be snug yet easy to disassemble.

Build the box panel spacer

Cut 4 dowels to the drawing, and round the ends with sandpaper. Mount them onto the square spacer as shown. Countersink the screws ⅛” for better penetration.

Using the spacer/dowel assembly and a small square, and keeping each side of the spacer centered on its respective box panel, mark with 2 short lines the location of each dowel on the interior of the box panel. For the A box panel, mark that spacer/dowel edge as A also.

In the center of each set of these dowel marks, on each box-panel end, and ¾” from the top edge, drill a ½”-diameter hole (see the box side drawing).

Mount the box panel spacer

Mount the box panel spacer assembly onto the bottom center of the tabletop with four ¾” screws, countersinking ⅛” for better penetration. For more strength, add wood glue.

Finish the parts (optional)

Finish the surfaces of all parts with at least 2 clear coats, fine-sanding between coats. (You might elect to stain surfaces to match existing furniture before clear-coating.)

Mask and fill any exposed holes in the plywood with wood filler or Bondo, then opaque-paint all exposed plywood edges.

To prevent skidding, you could add ½”-diameter rubber bumpers to the bottom ends of the table legs.

Assemble your knockdown table

To assemble, place the tabletop upside-down. Wrap the box panels onto the spacer and dowels, matching the As.

Put the leg crosspieces together (matching As and Bs) and slide them down into the box panel slots, again matching the As.

Use your knockdown table as an auxiliary end table or bedside table, an occasional children’s dining table, or a temporary game table. Then knock it down for storage in seconds!