m45_DIYKidsFUNiture_Final
Photo by Hep Svadja.
Build this project and more in Make: Vol. 45. Don’t have the issue? Get yours today!

A “few” years back, as a final-semester project at the NC State University School of Industrial Design, I made a kit of plywood parts from which could be assembled several useful pieces of children’s furniture. I called it “FUNiture.”

Thanks to help from my good friend, prolific author and skilled craftsman Phil Bowie, this resurrected easy-to-make kit is now more ergonomically correct, safer, and suitable for ages 2 to 6. (The younger ones will need help with assembly.) The furniture needs no fasteners; gravity and cross-half lap joints do the trick. The parts can be stored flat, taking up very little space. The project takes about a weekend to complete and can cost around $40 – $50.

The author’s cousins Bob and Cheryl — and Mr. Bim — enjoy the original FUNiture more than 50 years ago.

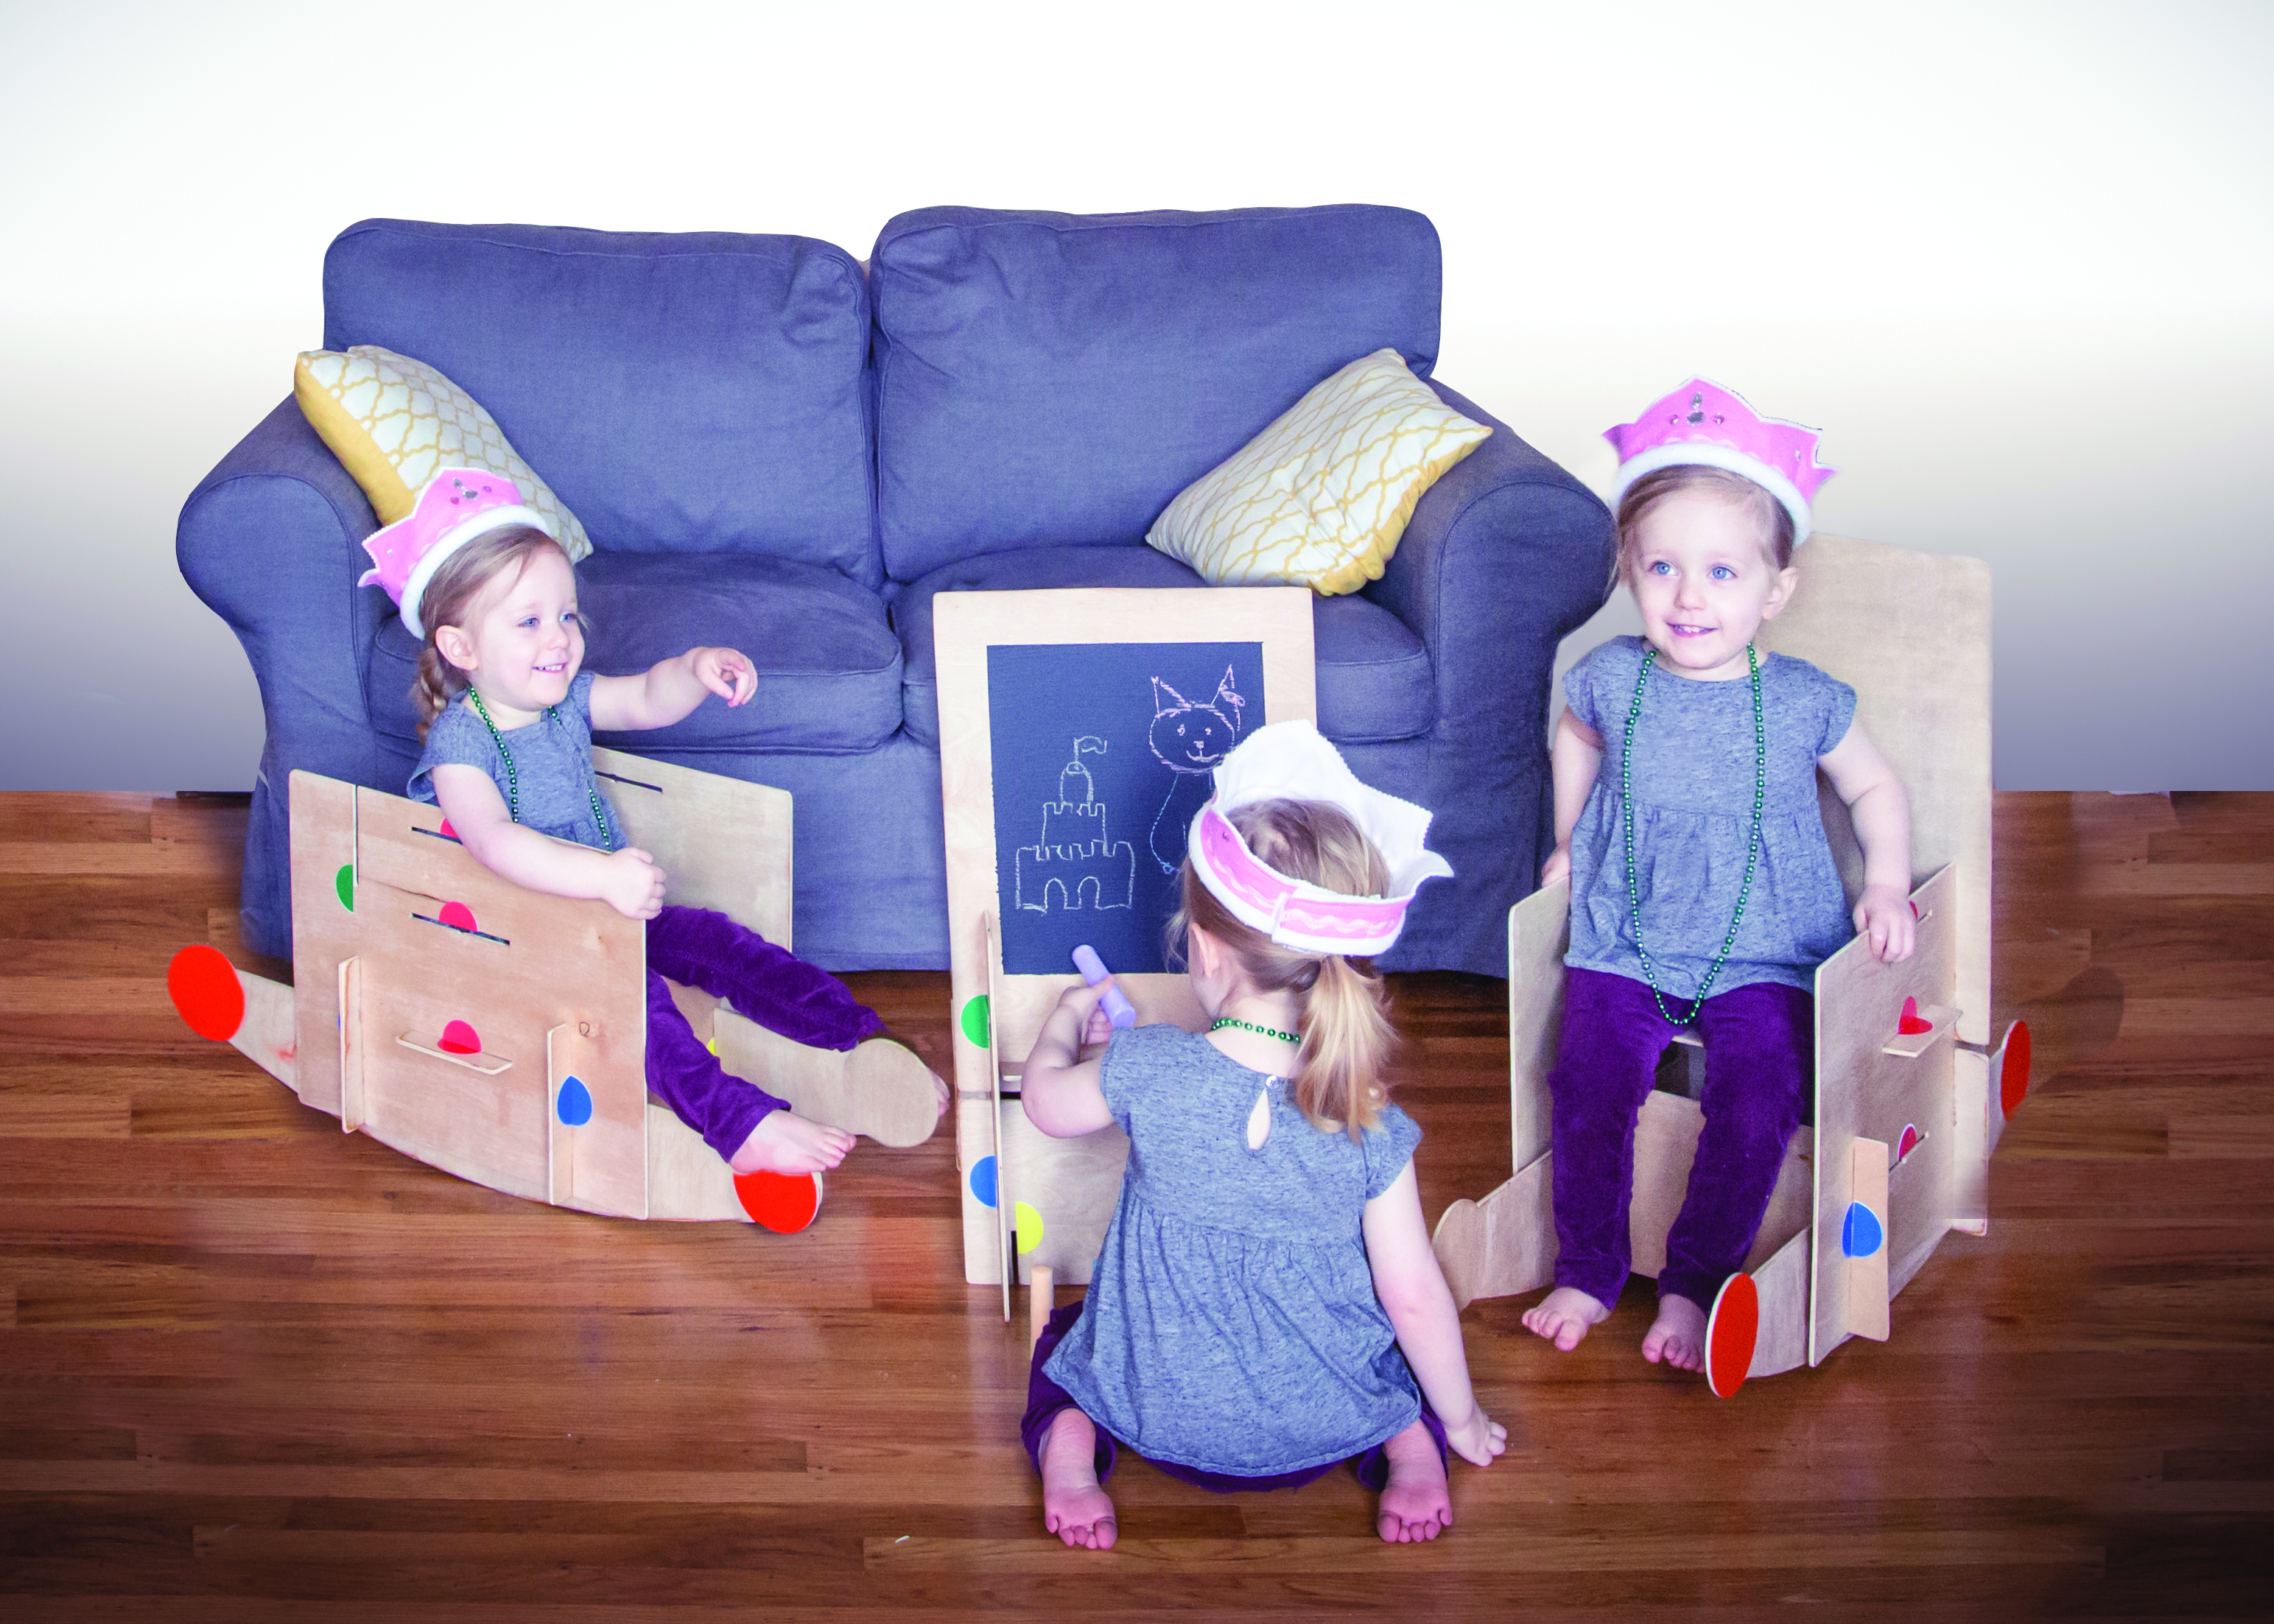
Colorful stickers at the joints help kids put the FUNiture together correctly by matching the colors of slots and tabs, to make a stool, chair, chalkboard, “boat,” and rocking chair. Younger kids will probably ignore the color-coding, which can yield interesting, if impractical, creations.

Project Steps

Prepare the plywood

All parts are cut from one 4’×4′ piece of ¼” (nominal thickness) plywood, available from Lowe’s, Home Depot, and others. Buy the thickest, flattest piece you can find. (We don’t recommend fir because of its wild grain, relatively rough surfaces, and greater tendency to warp.)

To ensure the plywood is as thick as possible, bring your calipers to the store and measure the sheets’ thicknesses. As with most wood, plywood is rarely sold at its nominal thickness. We measured so-called ¼” (0.250″) plywood from 0.189″ (just over 3⁄16″) to 0.243″ thick; we bought the latter.

Thoroughly lacquer-coat both sides and all edges of the plywood soon after bringing it home, to minimize warping. Let it dry, then sand both sides with 320-grit paper. You may want to apply an additional coat for extra scuff and weather resistance.

Lay out the parts

We offer 2 methods of transferring the parts’ dimensions to the plywood. Once you decide which method you like, stay with it, because the two techniques’ parts will probably not be interchangeable.

An efficient layout is shown here. (The 2 side pieces are identical, except that one is flipped to ensure the better side of the plywood faces out in the finished furniture.)

Here are the 2 methods:

Layout Method 1: Template of full-size parts

Download our full-size parts template here; it’s faster than laying out the parts by hand. It’s in the DXF file format, so the line widths will be preserved when it’s enlarged.

Ask an office supply store to print the drawing to fill a 36″×48″ sheet of paper, with top and side margins no more than ½”. Ask to see a preview before printing. (Other printer settings to be aware of: plot area/extents, plot scale/fit to paper, and centering the plot.) We paid about $8.

Select the lacquered plywood’s better-looking face and, taking note of the wood grain direction, temporarily glue the template to it with a mixture of 1 part water to 2 parts Elmer’s Washable School Glue. This ratio makes it relatively easy to remove the template after cutting. Line up one edge of the template with a plywood edge and tape it in place using masking tape. Brush the glue mixture onto the plywood as you (or a helper) roll out the template. A few minor wrinkles are OK.

Layout Method 2: Dimension drawings

You can also lay out the parts by hand, following our complete dimension drawings. Download all 7 drawings here.

Again, noting the grain direction of the lacquered plywood’s better-appearing face, draw the parts on it with a sharp, soft-lead pencil or fine felt-tip pen. Pay particular attention to the slots’ perpendicularity and parallelism to the sides.

Cut out the parts

Carefully cut out the parts with a portable jigsaw and a new plywood blade. Do not cut the slots yet.

Sand all edges for comfortable and safe contact by little hands.

NOTE: If you have really little kids, you could round off the corners even more than we’ve shown here.

Lay out the slots

For easy, wobble-free assembly, all slots should be just slightly wider than the thickness of your sheet of plywood. Certain pairs of slots must also match in distance apart, length, and parallelism.

Open- and closed-end slots are shown on the template and drawings as one long line (an edge) and 1 or 2 short lines (the ends). Make a slot-tracing gauge from a scrap of plywood (roughly 2″×6″) to draw the other long edges of the slots.
For each slot, place your gauge adjacent to (but not covering) the long line. Carefully trace your gauge to create the missing edges of the slots.

IMPORTANT: The short lines also indicate which side of the long lines to place the gauge.

If you’re using the template, some slots are labeled “A” (on the sides and rockers) and “B” (on the spreaders and seat back). Dimension A on all 4 parts must be the same, and dimension B on all 3 parts must be the same.

Read the last few paragraphs again. Accurate slots are paramount to the success of this project. A misdrawn or badly cut slot is difficult if not impossible to correct, so go slowly here.

TIP: Use an X-Acto knife with a new #11 blade to mark all slot edges. This will slice through the outermost layer of plywood and will result in burr-free cuts that require less sanding.

Cut the slots

Using the portable jigsaw, carefully cut all the open-end slots.

Drill 3/8″ blade-access holes in the centers of the 6 closed-end slots in the sides, then cut both ways with the jigsaw.

One slot in the seat back must be angled to hold the chalk tray. Drill a centered 3/8″ blade-access hole at a 60° angle from either side of the back. On the same side, cut half the slot with the jigsaw’s shoe set to a 60° angle. Starting at the hole again, cut the other half of the slot with the shoe set to a 60° angle the other way.

TIP: To avoid flipping the shoe, you can drill the angled hole at one end, then make all cuts at the same shoe setting.

Test-fit the joints

For template users, slowly peel the paper off each part. If the glue adheres excessively, soak the residue with a wet sponge, let stand, then remove.

Check the slots with your gauge. Then, using the photos of the finished rocking chair as a guide, test-fit every joint. If they bind, find where the binding occurs, then sand the slots with medium sandpaper wrapped on a thin scrap of wood, say, ⅛” or so.

Brush or spray lacquer into the slots to seal them against moisture, allow the lacquer to dry, and test-fit the joints again.

Paint the rockers

On the better side of each rocker, mask the circles at the ends with masking tape, then cut the curves with an X-Acto knife with a #11 blade guided by a 4″ diameter object, such as a can or container lid.

Paint them a bright color. We chose orange, which isn’t a sticker color used for the assembly.

Paint the chalkboard

Temporarily put the tray into its angled slot in the seat back so that it tilts upward. On that side of the seat back, mask your chalkboard shape for painting, leaving about a 1″ border all around.

Similarly to the rockers, round the corners by applying masking tape, then cutting the curves using a 1″-diameter object (a bottle cap works fine) as a guide.

Remove the tray and apply 3 coats of chalkboard paint, lightly sanding between each, before unmasking. Wait 24 hours before using.

“Season” the chalkboard by rubbing it all over, in several directions, with the side of a piece of chalk, then erasing it. Now it’s ready to use.

Stickers!

Two half-circle stickers form a circle of the same color when a joint is correctly assembled.

Using Avery’s label template, print fifteen 2″ round labels (Avery 22817) in bright colors: 4 yellow, 4 red, 2 green, 4 blue, and 1 purple. Cut them in half to get 30 half-circles. Apply the stickers as shown in the image.

Center the stickers on the ends of open-end slots, and on the sides of the closed slots. (If the seat stickers drag on those slots, widen the slots slightly.)

On the seat back, the 3 stickers must be on the outside, i.e. the chalkboard side. On the rockers, stickers go on the inside, i.e. on the sides opposite the painted 4″ circles.

You can make an optional sticker locator jig for perfect alignment (download the drawing on the project page), or just eyeball their locations.

Assemble

You can make 5 different creations by following the color-coded stickers:

Stool

The simplest piece of FUNiture is a stool, which uses the sides, seat, and spreaders. The 3 slots in each side allow 3 different heights.

Follow the color coding; it’s best to start with red. (Or you can let the assembler discover this.)

Chair & Chalkboard

Add the seat back and its tray to the stool.

Color coding ensures a seated child doesn’t lean against any chalk art.

Boat

Build the stool with the seat in its lowest position, then add the rockers with painted circles facing out.

Rocking Chair

Add rockers to the chair.

You’re done. Rock on, kids!