Cover of Make Volume 95. Headline is "Super [Tiny] Computers". A Raspberry Pi 500+ with RGB lights and an Arduino Q board are on the cover.
This article appeared in Make: Vol. 95. Subscribe to Make: for more great articles.

Meshtastic is a tool for communicating without the need of cellular service. In simplest terms, think of it like a walkie-talkie for texting. It’s a distributed, off-grid, mesh communication system, and just as with the venerable walkie-talkies of old, you don’t need a license or special permit to use it. Meshtastic utilizes a low-power, long-range radio technology (LoRa) that can provide much greater ranges than walkies, and it utilizes encryption by default, so you can keep your conversations private and secure — no strange people dropping into your conversation unannounced.

When to Use It

Any time you anticipate not having cell service is a good time to make use of Meshtastic, such as while backcountry hiking, backpacking, or camping. But it’s also useful back in civilization. In most locations, cellular is ubiquitous to the point where it is taken for granted — until it doesn’t work, at which point it can be a major headache. Maybe you’re attending a music festival with 50,000 of your closest friends, and despite the best efforts of major telecom companies, smoke signals would be more effective than texting. Or worse yet, a disaster has struck and cellular infrastructure no longer works at all.

Another major difference from old walkies is that Meshtastic, being digital, can send more information in the background. Beyond just text-based messages, Meshtastic can also convey GPS location information, for near-real-time location tracking and telemetry data. This means you could use off-grid weather stations or remote sensors to collect river data, and receive the data without needing to pay for multiple SIM cards.

Range and Repeat

The range of Meshtastic can be impressively long, with a current record of more than 200 miles, however keep in mind that it uses radio and cannot violate the laws of physics. In a more average situation, a pair of handheld Meshtastic nodes will get 3–5 miles of range. The distance is controlled entirely by the environment between the two nodes. In downtown San Francisco with its plethora of tall concrete and metal buildings? Less than a mile. On a hilltop with a clear view to the horizon? 50 miles.

But your message can travel much farther. While Meshtastic isn’t magic, it does have one trick up its sleeve, and that’s the mesh network. A Meshtastic node that can hear a message will then rebroadcast it for other nodes to hear, similar to a repeater. The more nodes you have on your mesh, the more resilient your messaging becomes and the farther your message can go. The mesh allows your Meshtastic communications to do “impossible” feats like cross over a mountain (with a node on top to repeat messages) and travel greater distances than any single node-to-node operation could go.

Meshtastic Is Open Source

LilyGo T-Deck (right).
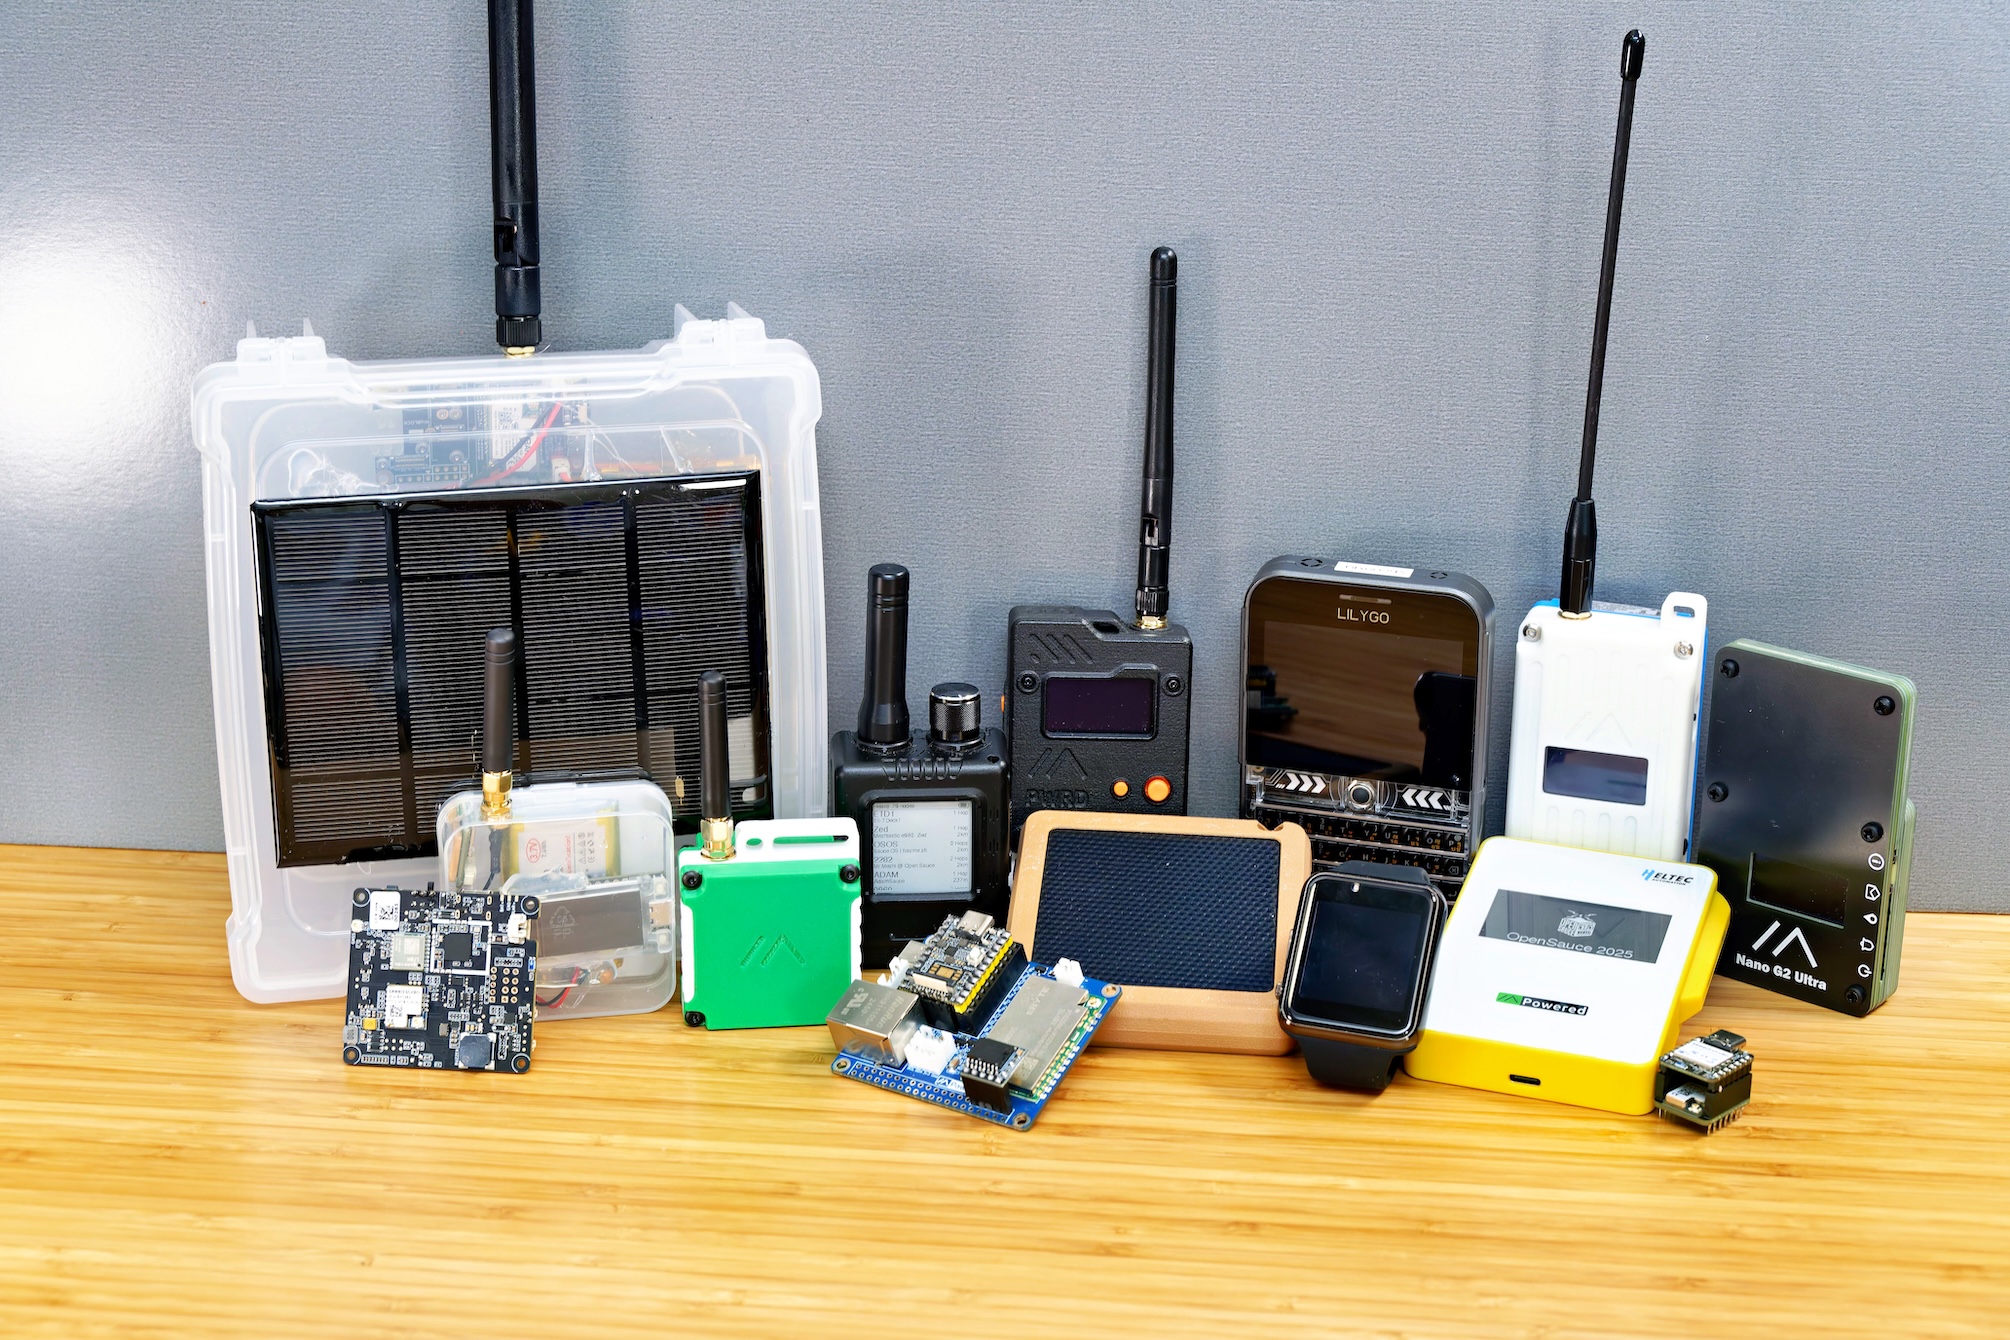
Photography by Jon “ShakataGaNai” Davis.

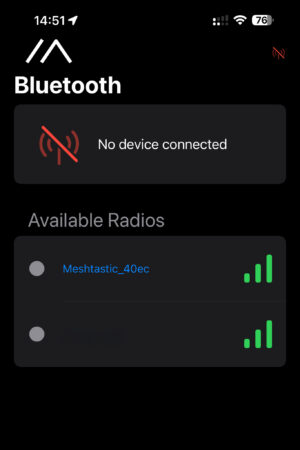
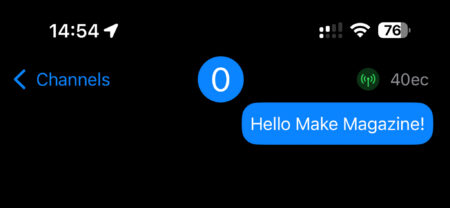
Mesthastic is an open source software project that runs on different types of nodes, some off the shelf and some purpose built. There is node hardware that has a built-in screen and keyboard, like the LilyGo T-Deck, but most users choose to interact with Meshtastic using their phone; the node pairs to your iOS or Android phone via Bluetooth and the companion Meshtastic phone app. Anyone who’s sent an SMS text or used something like Find My will find themselves quite at home already. As such, the node hardware form factors run the gamut from those retro-Blackberry all-in-ones, to basic nodes like the LilyGo T-Echo (left), to waterproof “cards” such as the Seeed SenseCAP Card Tracker T1000-E (center).

But it’s more fun (and sometimes cheaper) to make your own. There are a number of dev kit options available for those who prefer the more “DIY” route or need something more flexible.

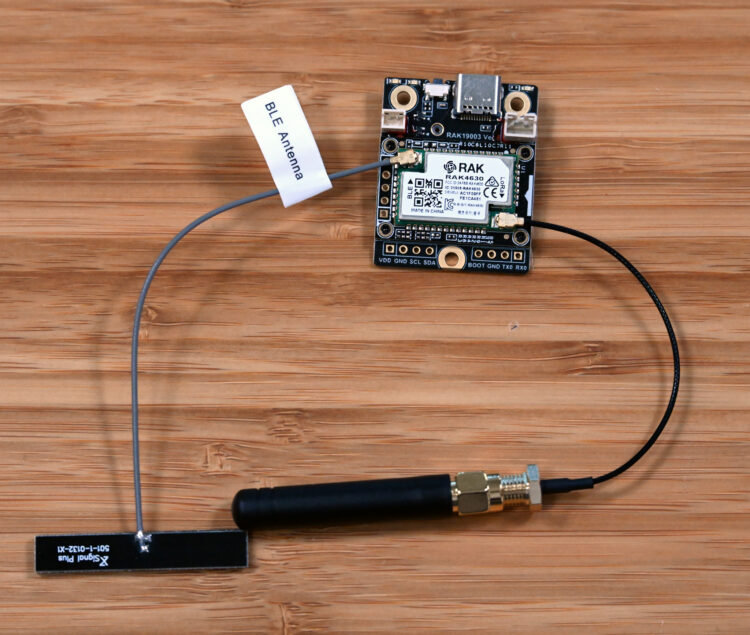
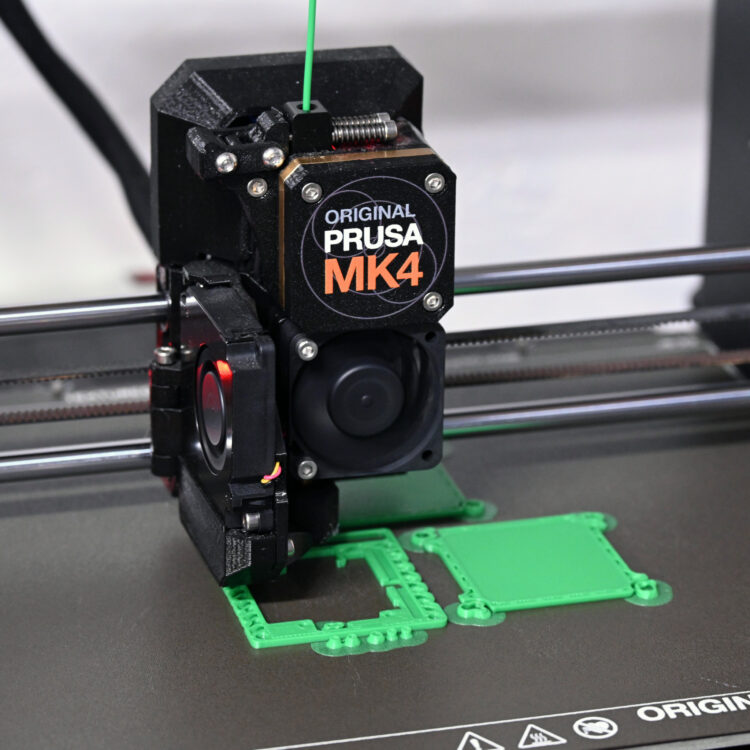
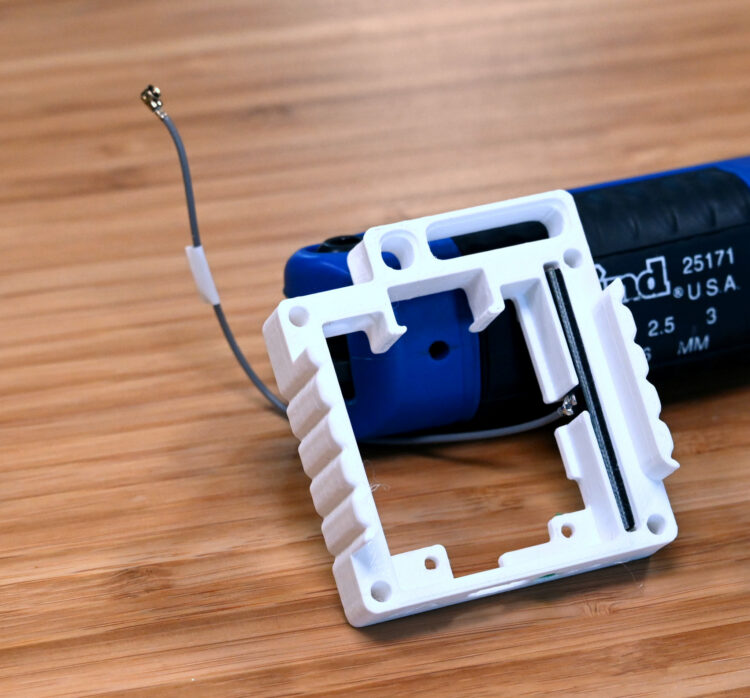
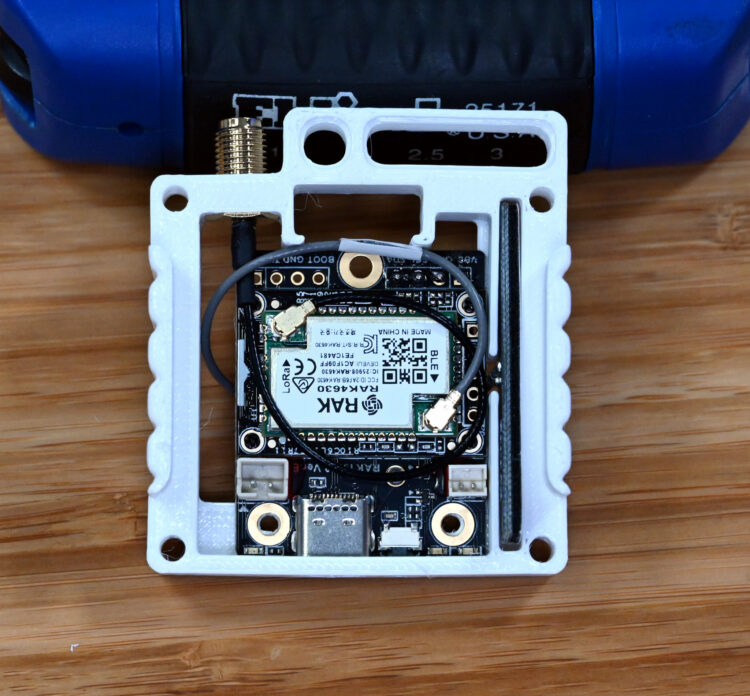
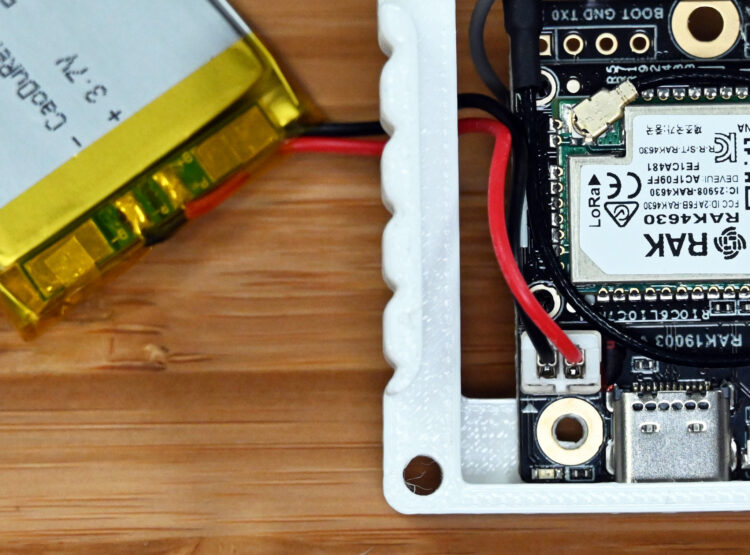
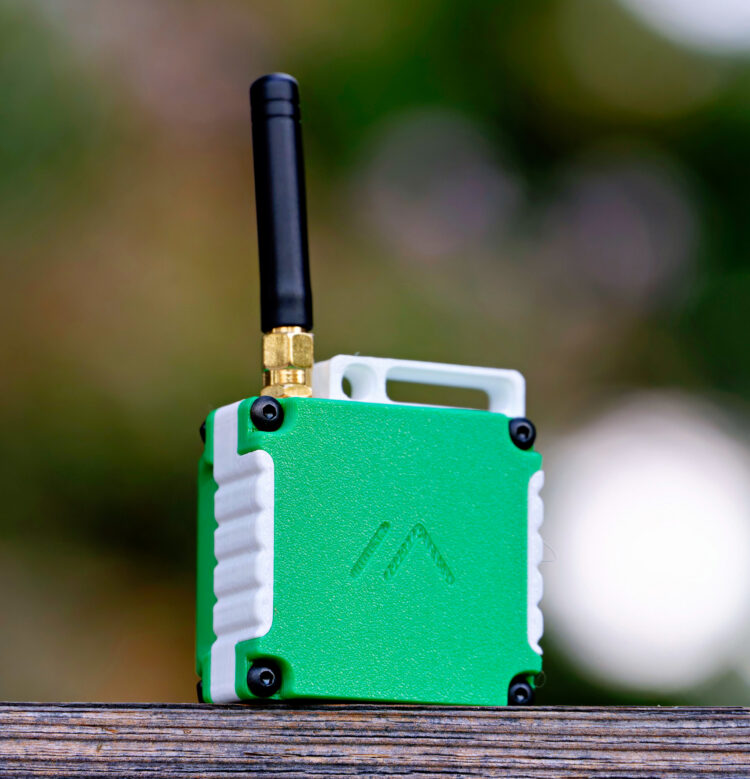
Make a Meshtastic Walkie-Textie

If you build it, it will mesh! In this project, we start with the most common of the Meshtastic-compatible dev kits, and then build it up into a usable handheld node including extra sensors and a 3D-printed case. We’ll also show how you could use the same hardware in other form factors, such as a solar-powered infrastructure node. Of course, while this demonstration shows just a single Meshtastic node, you should buy two. It’s much more fun to give one to a friend/roommate/loved one/random person on the street so you have someone to chat with!

Project Steps

1. Build Your “Bare Minimum” Node

For this you need only the RAKwireless WisBlock Mini Meshtastic Starter Kit.

1a. Plug in the BLE Antenna into the IPEX port labeled “BLE”. Plug the IPEX-to-SMA adapter into the IPEX port labeled “LoRa” and attach the stub antenna to the SMA connector.

WARNING: Always make sure you have an antenna plugged in before you power up the node, to prevent damage to the radio.

1b. Plug the WisBlock into your computer with the provided USB-C cable.

1c. Use a Chrome-based browser to head over to flash.meshtastic.org.

Under the Device heading, hit the rocket ship button to automatically detect your WisBlock. A web-to-serial popup will ask you to connect; choose the “WisCore RAK4631 Board”. Now the Select Target Device button will be relabeled “RAK WisBlock 4631.”

Under Firmware, leave it on the default — the latest Beta version.

1d. Click on Flash, then Continue, then Enter DFU Mode and select your serial device again.

1e. Finally, hit Download UF2 which will download the firmware to your computer.

1f. Open Finder or File Explorer and you should see a new drive named RAK4631. Copy the UF2 file you downloaded to that new drive. When the copy completes, the WisBlock will disconnect and start updating; it takes a minute.

1g. While you wait, download the Meshtastic app on your phone, from meshtastic.org/downloads.

1h. Open the app on your phone. On the Bluetooth screen, look for “Meshtastic XXXX” — the last four characters will be unique to your node. The pairing PIN is 123456 by default.

1i. The app will ask you to set your LoRa region. Choose your country and hit Save. Your node will disconnect and reboot.

1j. Now you can send and receive messages via Meshtastic, totally off-grid!

NOTE: Meshtastic nodes can operate almost anywhere on the globe that it’s legal to do so, though you may need to switch to an antenna tuned for different frequencies used elsewhere.

2. Upgrade to a Portable Node

USB power is not terribly convenient, so let’s make our node a little easier to carry around. For this handheld node, we’re going to add a 3D-printed case and battery, and optionally a BME/BMP280 temperature sensor.

2a. From printables.com/model/286664, download and print the four STL files for the case: the front, back, frame, and reset button. You can also purchase these from vendors listed on the Printables page.

2b. (optional) If you’d like to add the BME/BMP280, now’s the time. Solder it to the back of the WisBlock, connecting VCC to VIN, GND to GND, SCL to SCL, and SDA to SDA. Verify the pin order on your specific BME/BMP280 as they may differ. If you’re using the WisBlock BME680, click it in place on the back of the baseboard onto Slot D.

2c. Unplug the two antennas from the WisBlock.

2d. Slip the Bluetooth PCB antenna into the slot on the right side of the frame piece, with the wire sticking down.

2e. Put the reset button into the frame, and then press-fit the WisBlock into the frame. Depending on your printer tolerances this might be a tight fit.

2f. Fit the SMA connector into the cutout at top left. This is, again, a tight fit and may require some pushing, shoving, and slight flexing of the PCB to slide the SMA port past the WisBlock.

2g. Loop the SMA wire around and reconnect it to the LoRa port. Fish the Bluetooth wire around the back and plug that into the BLE port.

2h. Put the lock washer (from the WisBlock kit) and nut on the SMA port. Add the SMA antenna.

2i. Connect the battery to the bottom left port (closest to the USB), threaded from the backside.

WARNING:  Make sure your battery is wired so that the ground wire (black) is on the outside as pictured. If it’s wired incorrectly, you can fix it. The JST plugs include small locking tabs; lift these carefully, remove and swap the red and black wires.

2j. Put the battery into the back case, and fit on the front case.

2k. Use the four M3 screws and nuts to secure your new node case together.

2l. Hit the reset button on the bottom and the node should boot up. The green activity light should begin to blink and flash.

2m. Open the Meshtastic app and enjoy your new portable node!

2n. (optional) If you installed the BME/BMP280, go into Settings -> Telemetry. Under the Sensor Options section, turn on the Enabled option and save (your node will reboot). Now the sensor should automatically be detected and broadcast its sensor data, which is visible under Environmental Metrics Log.

3. Potential Upgrades

One common feature of many Meshtastic nodes is integrated GPS, and this 3D-printed case supports the RAK12500 GNSS module. (It’s also got room for the RAK18001 piezo buzzer.)

Meshtastic also supports a number of I²C sensors, including current/voltage sensors, light sensors, and even entire weather stations; explore options at meshtastic.org/docs/configuration/module/telemetry.

Another popular upgrade is solar power. On the front of the RAK WisBlock you might have noticed that there is a second, smaller power port, which will accept any 5V solar panel via a JST ZHR-2 connector (female, 1.5mm pitch).

Conclusion

Mesh Around and Find Out

Meshtastic puts reliable, license-free messaging, location, and telemetry in your hands when networks go dark. Range is terrain-dependent, but the mesh turns ordinary radio technology into a resilient neighborhood of relays — handy for hikes, festivals, and storm season alike. Because it’s open source and runs on everything from ready-made cards to DIY dev kits, you can start small, add a rooftop or solar node to widen coverage, and keep chats private with encryption by default.

There are hardware options to suit most needs, including pre-made, ready-to-go nodes for friends and family who are less excited about wiring and soldering. and lots of DIY projects out there for the more adventurous.

Infrastructure Nodes

Remember, each Meshtastic node extends the total range of your mesh by acting as a repeater. Not willing to stand on a mountaintop? A simple solar node acting as fixed “infrastructure” might be just the thing you need to bridge the gaps of a mesh. The unit shown is based on the RAKwireless WisBlock Starter Kit (non-mini), with a plastic box, solar panel, 10,000mAh battery, antenna, and magnet — all hot-glued together for under $100.

Creative Meshtastic users who were not so concerned about waterproofing have even used the plastic shipping cases a node comes in!

Diving Deeper

Take your Meshtastic node out for a weekend, turn off your cell service, and see how it works. Make sure to walk through the Getting Started Guide to learn about the other settings and options available (meshtastic.org/docs/getting-started). You’ll especially want to set up your own private channels with encryption keys, to keep your conversations private and secure. Check out the Meshtastic Community (meshtastic.org/docs/community) and see if there’s a local user group in your region.

If you enjoyed this project, come join us on the Meshtastic Discord, say hi, and let us know how the build went.

Welcome to the Mesh!

Skill Builder: Go Long with LoRa

Learn how this low-power, wide-area network IoT protocol works.

DIY Swarmbots

Use Particle’s mesh microcontrollers to build a swarmbot network of Thunder Tumblers!

“Armachat” LoRa Communicator

A DIY, Armageddon-ready, extremely low-power LoRa text-messager.


This article appeared in Make: Volume 95.