How-To: Shrinkify Your Arduino Projects

Arduino Technology
How-To: Shrinkify Your Arduino Projects

Blinking an LED with an ATTiny Chip

Ever since I started making projects with the Arduino, I’ve had a desire to shrink them down to a single, small circuit board. One of my first projects, a customizable SLR intervalometer, was packed in a phonebook-sized cardboard box and used the Arduino Deumilanove connected to a breadboard with jumper wires. I brought the box out to Central Park at 5am to make a timelapse of the sunrise, but when I got to the park, I spent 20 minutes fixing the connections between the Arduino, the breadboard, and the components. Since then, I’ve explored a few different ways of shrinking projects down and making them more robust. For the intervalometer, I designed a circuit board that had female header pins to seat an Arduino Nano. It was a huge improvement on the design, but I knew I could do a lot better.

YouTube player

I tried to teach myself AVR programming, but ran into a lot of snags along the way. By the time I got an LED to blink, I had invested hours in the project (a stark contrast to my first Arduino experience) and was feeling quite discouraged. I also tried using PICAXE chips. While it was much easier to get started with these chips than with AVR programming, I felt like I was abandoning all my years of C programming to learn a form of BASIC that’s an entirely different animal from when I used it as a kid.

When I came across this tutorial by MIT Media Lab’s High-Low Tech Group, I was elated. They walk you through the process of using the Arduino IDE and programming language to program 8 pin ATtiny45 or ATtiny85 chips. Not only that, but they also walk you through using an Arduino board to act as the programmer, or ISP. I had everything I needed, except for the chips, so I eagerly awaited my rush shipment of ATtinies.

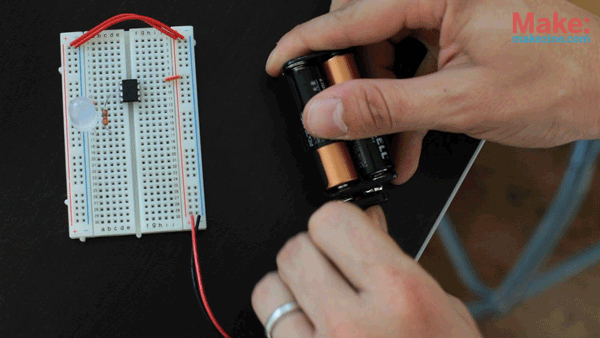
I followed the tutorial and found that it was actually rather easy to program these little chips using the Arduino code and IDE. I tried out the basic digital and analog I/O functions and they all worked as expected. I did a little experimentation with a few other functions with some success, so your milage may vary. To test it all out, I even made a cute little blinky toy within about an hour. I’m now thinking about revisiting my intervalometer project and shrinking it down from a cardboard box to a mini Altoids tin!

More:

78 thoughts on “How-To: Shrinkify Your Arduino Projects

  1. MikeGrace says:

    Genius! I have several ideas that would be great to move to a smaller chip. Thanks!

  2. Anonymous says:

    Hey matt- wow. almost the same thing happening here. I am working on an intervalometer for my FZ100 (http://www.instructables.com/id/Wireless-Shutter-Remote/) and am having a REALLY hard time fitting it into the project box. I have some gift money at tayda electronics- I will see if they carry these chips

  3. Tod E. Kurt says:

    For an already-assembled PCB carrying an ATtiny85, the above technique also works with BlinkM Smart LEDs (carried by MakerShed).

    For more details on that, check out my BlinkMuino post.

  4. Alfredo Jara says:

    Now that’s a way of going pro on arduino prototyping. Instead of a huge box full of wires, you go one step ahead and make the arduino part smaller, and doing it on a perf board, you can stick in smaller boxes. Gotta love that!

  5. Yimmy says:

    I’m not sure what I’m doing wrong, but i’m having a hard time with pwm. (analogwrite) The same sketch works fine on other arduinos but only blinks on the attiny85. (led is between pins 2 and 4)

    int LedPin = 3;void setup(){  pinMode(LedPin, OUTPUT);}void loop(){  for (int x=0; x0; x–){    analogWrite(LedPin, x);    delay(5);   }}

    1. Yimmy says:

      I figured out my issue. I was using an ATTINY85 from a previous project. The fuse bits had been altered and that’s the reason for the difference.

      1. Matt Richardson says:

        I’m glad yo figured it out and thanks for letting us know. I was scratching my head over that one.

  6. Anonymous says:

    Note that IO # 4 (IC Pin 3) can also be a PWM output.  If you have any RGB blending projects, this can be pretty useful.  I’m not sure how to let the wiki editors at MIT Media Lab’s High-Low Tech Group know this, but I’d guess it could be handy for others too.

    1. Nicholas DeJesus says:

      This post saved my project. just sayin’

  7. Anonymous says:

    If it helps anyone, I paste this into my ATtiny Arduino projects as a quick reference for pinouts:

    */
    // ATMEL ATTINY85 / ARDUINO
    //
    // +-/-+
    // Ain0 (D5) PB5* 1| |8 Vcc
    // Ain3 (D3) PB3 2| |7 PB2 (D2) Ain1 sck INT0
    // pwm2 Ain2 (D4) PB4 3| |6 PB1 (D1) pwm1 miso PCINT1
    // GND 4| |5 PB0 (D0) pwm0 mosi PCINT0
    // +—-+
    //
    //* Pin 1 is Reset and tied high on my boards
    //available digital pins are D0-D4

  8. Tobias H. Alvarez says:

    Great Video! I want to try to do the blinky toy in the video, is there any tutorial for codes or parts?
    Thank You.

  9. Peter Wellman says:

    I HAVE to try this.  Know of anywhere I can pick up an ATtiny?

  10. PJ Allen says:

    I have a “Roboduino Duemilenove” and I couldn’t get this to happen. My uploads resulted an error: stk_getsync(): not in sync:resp=0x15. I got some great help from ‘Coding Badly’, who’s one of the Admins at the Arduino Forum. The solution was to pull-up (to +5) the Arduino’s Reset via a 120Ω (!) resistor.

    Also — http://arduino.cc/playground/Main/DisablingAutoResetOnSerialConnection

  11. Graham Braly says:

    Check Ebay, they have a good selection of 85’s but not as many 45’s or 25’s.
    Another question, does this work with the the low power versions, the 85V, 45V, and 25V?

    1. Graham Braly says:

      Sorry to triple post but I may have found the problem, to qoute Atmels Datasheet:
      “– ATtiny25V/45V/85V: 0 – 4 MHz @ 1.8 – 5.5V, 0 – 10 MHz @ 2.7 – 5.5V
      – ATtiny25/45/85: 0 – 10 MHz @ 2.7 – 5.5V, 0 – 20 MHz @ 4.5 – 5.5V”
      Okay, the 85’s default speed is 1Mhz but what about the 85V, being that it has a lower max speed, and the error message I am getting in the Arduino IDE about a protocol error, I think I can deduce that the 85V can not be programmed with this method.

  12. Graham Braly says:

    Oh, to add some info I am using an UNO r2 and an Atmel 85V with a protoshield wired up to be the same as the breadboard circuit. For those buying ATtinys on Ebay make sure that your not accidentally getting the low power versions that have a V at the end of the model number.

  13. Josh says:

    I’ve been working on this project or a few days now; I keep on getting these errors:

    avrdude: stk500_paged_write(): (a) protocol error, expect=0x14, resp=0x64
    avrdude: stk500_cmd(): protocol error

    The ATtiny45 chip I’m working with says it’s 20 MHz (1 MHz and 8 MHz didn’t seem to be available; I got them from Digikey). The MIT lab and everyone else seems to link to ATtiny support files that bring in “boards” into the Arduino IDE for 1 MHz or 8 MHz, but no 20 MHz. I assume that’s my problem. Does anyone have any advice??

    1. Frank says:

      I bought the same chips ATTINY45-20PU-ND from Digi-key, so far no luck here as well. Let me know if you figure it out!

      1. redd says:

        mine havent arived yet but it would be nice to kno that they work first

      2. idahogray says:

        I was able to make this work by installing the capacitor between the Uno’s Reset and Gnd pins as well as changing the baud rate in the ArduinoISP sketch to 9600. Hope that helps.

  14. Greg Mach says:

    I’m have trouble moving the necessary folders into the Arduino software. I’m using Windows XP. Can some one walk me through this?

  15. cleo says:

    Pessoal,
    Acesse o site da EMPRETECNET, eles fabricam um KIT com uma placa compatível com arduino duemilanove, uma placa de rele, de potenciômetro, de sensor de luz, de sensor de luminosidade, de buzzer, de botão e demais componentes que podem ser realizados vários experimentos sem a necessidade de solda. Qualidade excelente!!

  16. سامي خنفور (@samikhanfor) says:

    it give me this error :(
    “e_dice.cpp:2:21: fatal error: Arduino.h: No such file or directory
    compilation terminated.”
    i am using ubuntu , please help…

    1. nemoskull says:

      i have the same problem as well. it has to do with the fact that the “boards.txt” is in a diffferent directory that it is in windoze.

    2. nemoskull says:

      okay, i got the attiny45 to show up. i had to add a folder to the sketchbook in the /home/sketchbook folder. its locked, so i had to folow the instrucions on this link.
      EDITING THIS FOLDER CAN CRASH UR SYSTEM IF YOU DO IT WRONG!!!
      http://askubuntu.com/questions/104964/need-owner-permissions-for-root-folder

      so far so good for me…

  17. Sebastian Garrido says:

    hi, i need to know if i can do something like this with a ATmega8

  18. OCMaster85 says:

    Hi,

    I have followed the tutorial exactly, and i get this error, when I try to upload the code to my ATTiny85:

    Blink.cpp:8:21: error: Arduino.h: No such file or directory
    Blink.cpp: In function ‘void setup()’:
    Blink:10: error: ‘OUTPUT’ was not declared in this scope
    Blink:10: error: ‘pinMode’ was not declared in this scope
    Blink.cpp: In function ‘void loop()’:
    Blink:14: error: ‘HIGH’ was not declared in this scope
    Blink:14: error: ‘digitalWrite’ was not declared in this scope
    Blink:15: error: ‘delay’ was not declared in this scope
    Blink:16: error: ‘LOW’ was not declared in this scope

    What is the reason for this ?
    I have uploaded the Arduino ISP
    I have created the “hardware” folder in my documents/arduino folder, witch is my sketchfolder. And added the needed files from the attiny85.zip.

    Please help :/

    OCMaster85, Denmark

    1. How-To: Shrinkify Your Arduino Projects Matt Richardson says:

      There are two versions of these hardware files, one for Arduino IDE version 022 and 1.0. Make sure you’re using the right one. Arduino.h is new in Arduino 1.0, so I would suggest upgrading your IDE.

      1. OCMaster85 says:

        Hi Matt,

        I have the Arduino 1.0 IDE installed.. But i changed to the attiny 1.0 files that your suggested.. Now i can thoose between 1, 8 and 20mhz attiny85 in the IDE.
        I read that i should thoose attiny 8mhz internal clock, and then “burn bootloader”, before burning anything to the chip.

        I’m a bit closer that last time, but i still get an error after the PAGEL and BS2 errors, witch are suppose to appear:

        Binary sketch size: 774 bytes (of a 8192 byte maximum)
        avrdude: please define PAGEL and BS2 signals in the configuration file for part ATtiny85
        avrdude: please define PAGEL and BS2 signals in the configuration file for part ATtiny85

        avrdude: stk500_paged_write(): (a) protocol error, expect=0x14, resp=0x64
        avrdude: stk500_cmd(): protocol error

        I hope you can clearify my problem here, as i think i’m very close to get it working :)

        OCMaster85, Denmark

      2. Jake says:

        After hours of trying, I get the same error message as OCMaster85.
        I have Arduino 1.0 IDE and used the correct boards.txt but I get the following error when trying to burn the bootloader

        avrdude: please define PAGEL and BS2 signals in the configuration file for part ATtiny85
        avrdude: please define PAGEL and BS2 signals in the configuration file for part ATtiny85

        avrdude: stk500_paged_write(): (a) protocol error, expect=0×14, resp=0×64
        avrdude: stk500_cmd(): protocol error.

        any guesses, clues or ideas would help.

      3. moolder says:

        I ran into the same problems as OCMaster85, AFTER upgrading to Arduino 1.0. Before, I had used arduino0018, which seemed to work: I could get the modified blink sketch working on attiny85.

        I found the following thread in the arduino forums:

        http://arduino.cc/forum/index.php?topic=87951.0

        “Where did you get the ArduinoISP sketch that you uploaded to the Uno? The one supplied with Arduino 1.0 doesn’t work under Arduino 1.0. There are a couple of threads in this section of the forum about that, with remedies.”

        I tried to lower the baud rate to 9600 baud, but that didn’t help. I also tried to use other versions of arduinoISP, but to no avail.

        Sadly, right now I have tried to upload with 0018, 0022 and 0023 and get protocol errors or things like “HIGH was not declared in this scope”. Right now I’m really out of my depth. If this were a video game, I would now watch the walkthrough…

        MAKE to the rescue!!!

  19. moolder says:

    UPDATE: I got it working after all – at least partially:

    You have to lower the baud rate from 19200 to 9600 baud in TWO places:
    1. in the arduinoISP sketch
    2. in the “programmers.txt” file

    Under windows, you find this file i.e. at C:Program Filesarduino1.0hardwarearduinoprogrammers.txt

    Search for “Arduino as ISP” in that file, and change the baud rate.

    After this change, I can now use “burn a bootloader” and then send a blink sketch to attiny85.

  20. cliff says:

    Having trouble programming the attiny85.

    When I upload blink I get this

    avrdude: stk500_getsync(): not in sync: resp=0xe0

    One issue is that when I go to pick the attiny 85 ISP I don’t have a listing for that. In that space it says attiny85 (internal 1mhz crystal)

  21. ruben says:

    Great Video, very useful.

    Currently i’m working on a project using arduino. I’m using 4 analog inputs, 1 digital input and one digital output (pwm). All based on basic code.

    Is it possilbe to achieve this with attiny85?

    i’m not sure if attiny pin 1 can also be used as an analog in and if attiny pin 5-6 can be used as a digital in/out?

    thanks

    1. Moolder says:

      I have learned thru pain that the attiny85 seems to have some problem with floating point math. I used a float-based HSL2RGB algorithm which just would not work on attiny. With atmega the same code worked fine. So I changed the algo to an integer based logic and voila, attiny worked as well. So: if you are using attiny, try to avoid float.

      1. ruben says:

        thank you for the advice, does this only concern the procedures concerning input/output or also with internal calculations?

        for instance can i take an int as an input, convert it to a float, do the calculations and convert the result into an int again for output (to minimize the loss of resolution within the calculation itself)?

        my other question is can the attiny85 process 4 analog inputs, 1 digital input and 1 digital output?

        1. moolder says:

          I commented in line by line of the float algo and at some point i got a compile error. Very strange, i guess it is an old gcc bug that i read about. So: Some simple float calculations will work, but at some point it just will be too much.

          Concerning your other question: Check the attiny85 datasheet at http://www.atmel.com/Images/2586s.pdf , page 2f: pin configurations show that you have 8 pins: 5V, GND, Reset and 5 data pins. according to the data sheet you can disable reset and use PB5 as a data pin instead. However, I am not sure whether this is supported by the arduino IDE.

          BTW, there is now an updated arduinoISP sketch which works under arduino IDE 1.0. See http://www.adafruit.com/blog/2012/03/27/updated-arduinoisp/ for details.

          Ruben, I would be happy to hear about your future progress, either here or at moolder AT gmx DOT net. or on twitter as moolder.

        2. moolder says:

          Ruben, I just saw that you are planning to use “basic code” – that would be something different than the arduino IDE, which uses the arduino language. The arduino language is based on C/C++.

          1. ruben says:

            Thank you again for your help and I will keep you updated. And I will give it a shot the get the fourth Analog input as well using the arduino IDE. I’ll keep you posted on the level of success.

            ps. By basic code i meant simple. I’m am familiar with arduino, c/c++ and actually not at all with BASIC.

  22. Peter says:

    I tried maybe everything, but was not able to run this using arduino ide 1.0.
    Then I downloaded arduino 0023 and after 5 minutes LED started blinking

    1. Moolder says:

      Peter: Check Out the updated arduinoISP For 1.0 via http://www.adafruit.com/blog/2012/03/27/updated-arduinoisp/

      1. Peter says:

        Thank you ! This was the problem :) works after 1st try with arduino 1.0 and this new ISP sketch

      2. Peter says:

        Hello, does this new arduinoISP works for you also with other chips? I tried attiny13, added it in boards.txt, but when uploading blink sketch I get error similar to the one I got using old arduinoISP: “programmer not in sync”

        1. Moolder says:

          Peter, the Way I understood Matt’s Video this seems to work only with attiny85 and attiny45.

          Greetings, moolder

          1. Peter says:

            you are right, but there is also another tutorial which says that it works (http://elabz.com/arduino-shrunk-how-to-use-attiny13-with-arduino-ide/) and I thought that everybody automatically tries other chips..

          2. Peter says:

            ok, it works, I found out that arduinoISP sketch released with arduino IDE 1.0 is needed for programming attiny13

  23. ruben says:

    Programming an ATtiny w/ Arduino 1.0:

    http://hlt.media.mit.edu/?p=1695

  24. AznGoose says:

    Hey guys~! :D

    Just wanted to let you know that for those of you using an ATTiny85 (not 45) there’s a file that needs to be fixed before the chip can be programmed. In addition, I listed all the problems and solutions I encountered.

    Before we start here is a quick solution for people who have the whole ‘OUTPUT not declared’ or something that deals with ‘arduino.h’ not being imported
    Solution: Make sure you go to ‘Tools>Board’ and select the appropriate ATTiny45/85 selection. Also go to ‘Tools>Programmer>Arduino as ISP’ before uploading the blink sketch

    System Info:
    I’m currently using Windows 7 (64-bit) with Arduino1.0.1 and Arduino Uno R3 and an ATTiny85. Also, I use the updated tutorial found at http://hlt.media.mit.edu/?p=1695

    1) COMMON PROBLEM———–
    problem: When I upload the ISP example file (file>Exapmles>ArduinoISP) I get the following error – ‘not in sync resp 0x00’

    solution: Ensure the capacitor is facing the right way (- to ground, and + to reset pin). If the problem insists ADD A FEW RESISTORS BEFORE THE (10uF) CAPACITOR.

    why: This problem occurs when the arduino resets itself too early when the sketch is being uploaded.

    2) PARTIALLY COMMON——-
    problem: When I upload the Blink example file to the ATTiny I get the following error – not in sync: resp-0xff

    solution: In the Arduino ISP example sketch, change the Serial.begin(19200) to Serial.begin(9600) – line 69

    3) – Advanced problem –
    problem: I’ve done a lot of research and even used the update version of this tutorial found on http://hlt.media.mit.edu/?p=1695. However, after successfully uploading the ArduinoISP sketch I have an error: usvdev_open(): did not find any USB device “usb”

    solution: go to your arduino folder and navigate to Arduino>hardware>attiny>boards.txt

    in the boards.txt file there should be a list like this:

    ……..(blah blah blah)………..
    attiny45-20.build.f_cpu=20000000L
    attiny45-20.build.core=arduino:arduino
    attiny45-20.build.variant=tiny8

    attiny85.name=ATtiny85 (internal 1 MHz clock)
    attiny85.bootloader.low_fuses=0x62
    attiny85.bootloader.high_fuses=0xdf
    attiny85.bootloader.extended_fuses=0xff
    attiny85.upload.maximum_size=8192
    attiny85.build.mcu=attiny85
    attiny85.build.f_cpu=1000000L <——- change to '8000000L'
    attiny85.build.core=arduino:arduino
    attiny85.build.variant=tiny8

    attiny85-8.name=ATtiny85 (internal 8 MHz clock)
    attiny85-8.bootloader.low_fuses=0xe2
    ……..(blah blah blah)………..

    why: I beleive it has to do with the fact that by default ATTiny is set to run at 1MHz whereas in this case we use the ATtiny85(internal 8MHz clock) board

  25. scott says:

    it keeps saying it cannot read output, digitalwrite and other functions..it said those functions are not defined

  26. Randy says:

    Great video! I struggled a bit to reproduce the results though.

    Hoping to help clarify….

    Here are few of things I’d wish I’d known up front. It would have saved me a few hours of scratching my head. Hope someone finds this useful….
    1. Windows users beware… You need to extract just the attiny45_85 folder from the downloaded zip. The zero byte files with duplicate names can cause problems when attempting to unzip. Don’t extract those zero-byte files that match the names of folders.

    2. The headers require a bit of tweaking to fix compile errors.
    The “attiny45_85” folder does not contain all of the needed headers. I had to copy some standard files from my arduino folder to the attiny45_85 folder. I also had to edit the copy of arduino.h (in attiny45_85 folder) and comment the following lines to avoid a conflict with similar definitions in “pins_arduino.h”

    //extern const uint16_t PROGMEM port_to_mode_PGM[];
    //extern const uint16_t PROGMEM port_to_input_PGM[];
    //extern const uint16_t PROGMEM port_to_output_PGM[];

    3. Problem uploading the sketch to attiny45 with arduino as ISP.
    avrdude reported problem with usb not found.
    Solution:
    In the IDE Under [tools]–>[programmer] –> choose… [arduino as ISP]
    In other words, it it not enough to select the proper option under [board]. You also need to set the option under [programmer].

    Hope that helps.

    1. Len says:

      Dear sir,

      i’m a window user, i just bought an attiny85 20pu as i don’t need so many I/O ports on arduino. Therefore i try to program it using my arduino so I went on and download the attiny45_85.zip file from http://www.hobbytronics.co.uk/datasheets/attiny45_85.zip as i can’t access into http://hlt.media.mit.edu/?p=1229 to download the zip file, after i extract the files out i put into the hardware folder under arduino. Uploaded the ISP into my arduino and select attiny85 with arduino as ISP. The error start to pop up.

      The error that i encounted are.

      Blink.ino:10:21: error: Arduino.h: No such file or directory
      Blink.ino: In function ‘void setup()’:
      Blink:15: error: ‘OUTPUT’ was not declared in this scope
      Blink:15: error: ‘pinMode’ was not declared in this scope
      Blink.ino: In function ‘void loop()’:
      Blink:20: error: ‘HIGH’ was not declared in this scope
      Blink:20: error: ‘digitalWrite’ was not declared in this scope
      Blink:21: error: ‘delay’ was not declared in this scope
      Blink:22: error: ‘LOW’ was not declared in this scope

      So i believe that my arduino.h file is missing, so can i trouble you to help me on this?
      Sorry for the trouble cause, hope to get an answer from you soon.

      Thanks,
      Len

  27. Gregg Maryniak, SVP Education, X PRIZE Foundation says:

    Thanks for the excellent video!

  28. ruben says:

    I’m trying to send receive IR signals using Attiny. It works great on arduino using the IRremote library. Unfortunately it gives issues compiling it for Attiny. Is there a way to include libraries for Attiny that are not standard in the arduino software:

    #include

    1. Paul says:

      Have you had any luck including the IR remote library to the ATTiny85? I thought it would work because it involved the SoftwareSerial…. Any ideas?

    2. makkapakka says:

      Have you had any luck using the attiny85? I am trying to make a tiny remote using the same library..

  29. David Davies says:

    I have shrinkified an arduino shiftout project using an attiny85 but when I power on nothing happens. If I the create a short between vcc and ground it starts to work correctly.Anyone experienced this orknow why this is happening?

    Thanks

  30. Oscar Barajas says:

    the link on the wavetable onan at tiny 45 has changed it is now http://elm-chan.org/works/mxb/report.html please check it ut itsounds awesome

  31. Johnny Rabbit says:

    You konw, you can talk without moving your head all the way around…

  32. louis says:

    please i have a problem because when I select ATtiny85 (arduino as ISP) he said :

    Blink.cpp:8:21: error: Arduino.h: No such file or directory
    Blink.cpp: In function ‘void setup()’:
    Blink:10: error: ‘OUTPUT’ was not declared in this scope
    Blink:10: error: ‘pinMode’ was not declared in this scope
    Blink.cpp: In function ‘void loop()’:
    Blink:14: error: ‘HIGH’ was not declared in this scope
    Blink:14: error: ‘digitalWrite’ was not declared in this scope
    Blink:15: error: ‘delay’ was not declared in this scope
    Blink:16: error: ‘LOW’ was not declared in this scope

    can you help me please !!

  33. Xoán Web says:

    Where I can buy that chip?

    1. cliff hartle says:

      You can buy them at Sparkfun.

  34. justin says:

    i just received my attiny45 & 85 … i sat down tonight to try to transfer some code onto it … but the pins of the chips don’t match up with my breadboard??

    do i need a different type of breadboard? i’m using the one that came with my arduino duemilanove

    1. cliff says:

      I’m going to assume that you bought standard DIP packages and not some surface mount chip or you wouldn’t be asking about a breadboard. But what do you mean they don’t fit? I’m also going to assume that you have worked with DIP IC’s and know you may have to bend the pins in towards the center a bit.

  35. Mike says:

    Do you think an Arduino Mega could be used as a programmer instead of the Uno or Due ?

    Also, could you program an AtTinty13 ? Just askin’ :)

    1. gabe says:

      yes – open example sketch ArduinoISP and read the comment section – it shows the pins you need to use with a Mega. Make sure you have version 1.0.x of the IDE

      1. Mike says:

        Thanks Gabe, I haven’t had time to try it yet, but it makes me more comfortable knowing that :)

  36. Evandro says:

    Hello friends, I use the Arduino Nano, and how can I use the ATTINY85 10PU?
    thank you

  37. Sean Shoemaker says:

    Thank you so much for putting this together. I am just getting started and it was great to be able to use my arduino to shrink itself. I made a simple light sensor to tell if a mailbox has been opened. I know Matt has actually done that with a switch, but this was very simply and required minimal mods to the mailbox. I kept a log of it on Element 14 and added some videos.

    http://www.element14.com/community/projects/youve-got-mail/blog/2013/03/17/up-and-running

  38. Scott W. Vincent says:

    Great summary of how this works! I was about to purchase some PIXAXE stuff for a project before catching a comment over at Adafruit about using the ATTiny85 w/ Arduino. Not that I think PIXAXE looks bad, it looks like a great platform too, but I like the idea of using the already familiar Arduino IDE and language to program cheaper and smaller projects.

  39. nexgen91 says:

    The link to the tutorial is down, found a new one: http://highlowtech.org/?p=1706

  40. James Taverne says:

    Nice tutorial! If you want to know how to do this with an Arduino Mega, check out my blog at: http://jamestav.blogspot.com/2014/08/programming-attiny85-microchip-using.html

  41. Amado Castaneda says:

    Thanks, I was about to purchase an Arduino shield to do this… BUT not anymore (just the chip) LOL!!

  42. prenom nom says:

    Hello, in other tutorials, it is said to remove the Atmega328 from the Arduino board. Is it really necessary or can I upload sketches to the Attiny without removing Atmega328 (as it is shown in your video) ?

    Thx

  43. peter3640 says:

    Hello, great tutorial, but can anyone explain the purpose of the 10 microfarad capacitor? Is the value critical?

    Thx

  44. Rodrigo says:

    Hi folks, any ideas on how to have the tiniest microcontroller with the tiniest bluetooth module in order to connect with a 4×4 keypad matrix (which has 8 pins)?

  45. Andrew Berg says:

    The high-low tech link is broken, here is the new page:
    http://highlowtech.org/?p=1695

  46. Upamanyu Das says:

    Can this setup be used in any way to burn HEX files?

    Thanks.

  47. Slarti Bartfast says:

    The trouble is that unlike the Nano, the 85 is not very compatible with other Arduinos, so this is a good solution only for really space-limited simple projects. The Pro Mini (particularly the 3.3v version) or Nano are better all-rounders , and yet still a lot smaller than the other Arduinos.

Comments are closed.

Discuss this article with the rest of the community on our Discord server!
Tagged

Matt Richardson is a San Francisco-based creative technologist and Contributing Editor at MAKE. He’s the co-author of Getting Started with Raspberry Pi and the author of Getting Started with BeagleBone.

View more articles by Matt Richardson

ADVERTISEMENT

Maker Faire Bay Area 2023 - Mare Island, CA

Escape to an island of imagination + innovation as Maker Faire Bay Area returns for its 15th iteration!

Buy Tickets today! SAVE 15% and lock-in your preferred date(s).

FEEDBACK