Owen Smithyman is a Content Developer at Other Machine Co. His three loves are collaboration, learning new things, and his amazing wife.
View more articles by Owen Smithyman
In order to take accurate measurements, it’s important to know how to use calipers properly. Digital calipers are your best friend when it comes to taking accurate measurements of small objects. For digital fabrication work (CNC mills, 3D Printers, CNC routers, and laser cutters) they’re downright indispensable for ensuring that your material dimensions in software are consistent with the material’s actual dimensions.
Most decent calipers are accurate to within +/-0.001″ (0.02 mm), which is enough to make sure you don’t cut too deep when milling and to know that your design will fit within the piece of material you’re using.
This guide demonstrates how to use digital calipers to take various measurements and is useful for anyone wanting to learn how to use them properly.
Editor’s note: This guide was originally published by Other Machine Co. for users of the Othermill desktop CNC mill. Since calipers are such useful tools for all sorts of Makers, we thought we’d share with the Make: community.
Anatomy of a Pair of Calipers
On/zero button: Turns on the calipers and sets the current position to zero
Thumbwheel: Opens and closes the jaws
Outside jaws: Measures the outside dimensions of an object
Inside jaws: Measures the inside dimensions of an object. These are delicate, so be careful.
Depth gauge: Measures the thickness of an object or the depth of a hole
Step gauge (not visible): Measures the distance from an edge to another point on an object
Locking screw: Prevents the caliper jaws from moving
Inch/millimeter button: Switches between inches and millimeters
ABS button: Temporarily sets the current position to zero
Battery compartment: Holds the battery
Your name: Tells people that these are your calipers. It’s important in shared workspaces!
Why use calipers instead of a ruler?
In a word, accuracy. A ruler and your eyeball might be fine for many scenarios but not when it comes to making sure your machine mills at a depth of 0.003″ and not 0.006″ or 0.001″.
Why use digital calipers instead of dial calipers?
It’s much easier to read digital calipers, and they’re often not any more expensive or less precise than dial calipers. Unless you’re really old-school or you just love dials, digital calipers are the way to go.
Zero the Calipers Before Taking Measurements
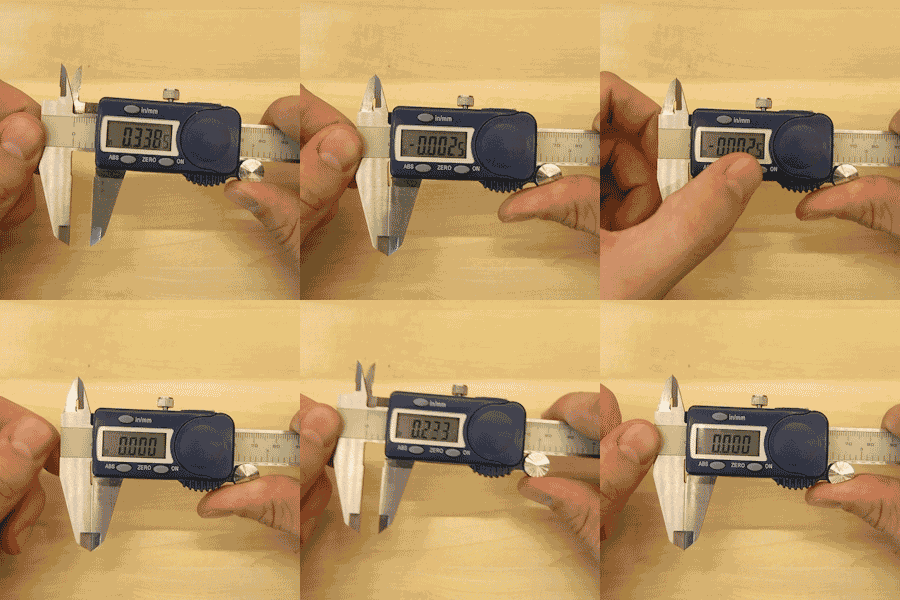
It’s critical to zero your calipers before taking any measurements. If you skip this step, your subsequent measurements may not be accurate. In the animation above, the display reads -0.0025″ when the jaws are first closed (inaccurate). The zero/on button is then pressed to set it to zero. The next time it’s closed, it reads 0.000″, so it’s ready to take measurements. Some fancy calipers, like these ones, guarantee that the zero position will always be correct, but it’s still important to make sure.
Measuring Outside Dimensions
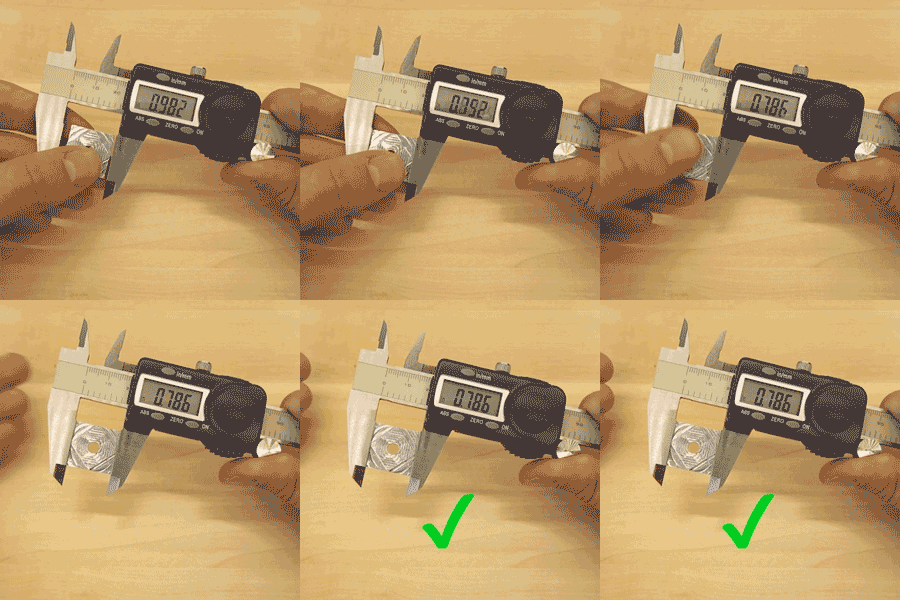
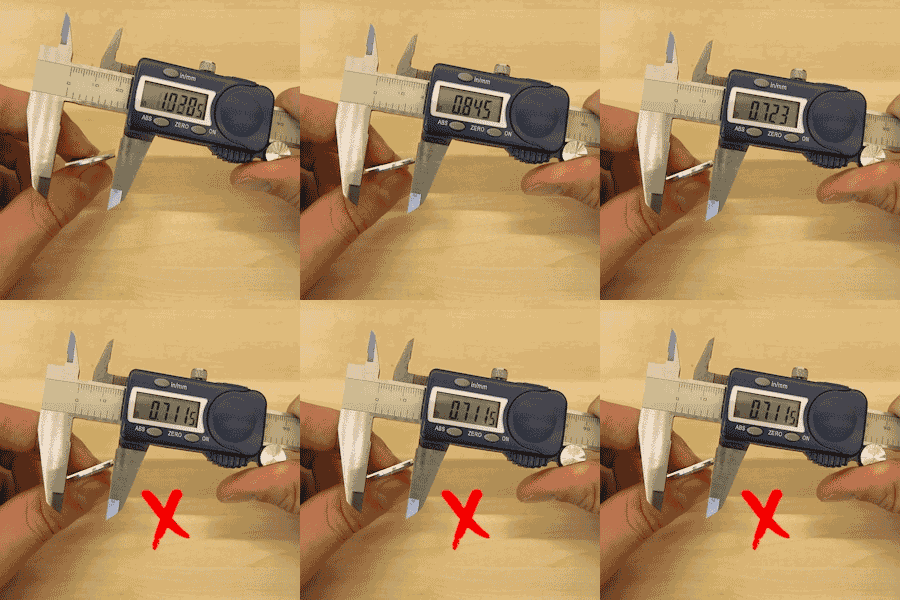
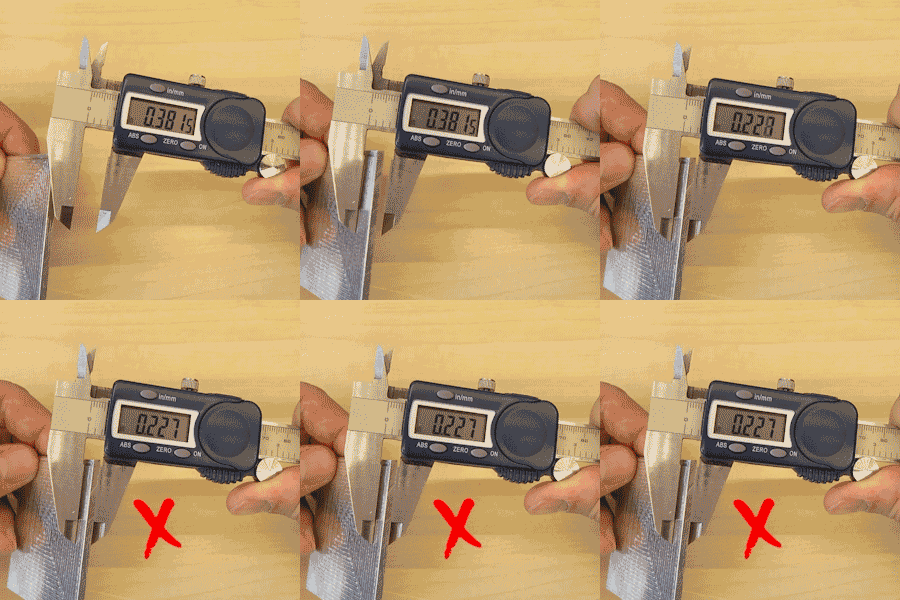
Use the outside jaws to measure the outside dimensions of an object. Make sure that the object is parallel to the jaws, or else the measurement won’t be accurate. In the animations above, the outside jaws are being used to measure the width of a piece of milled aluminum. The second animation is incorrect because the object being measured is not parallel to the jaws.
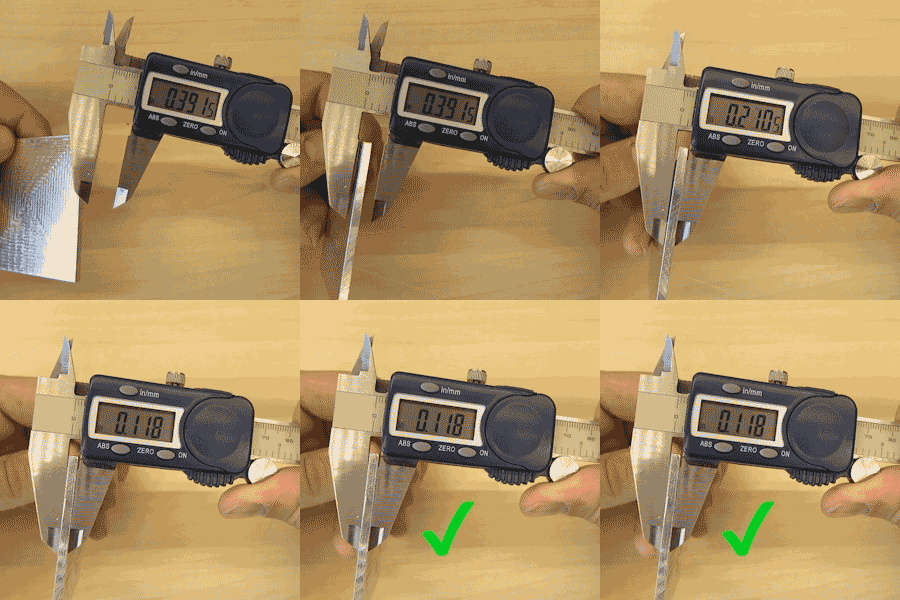
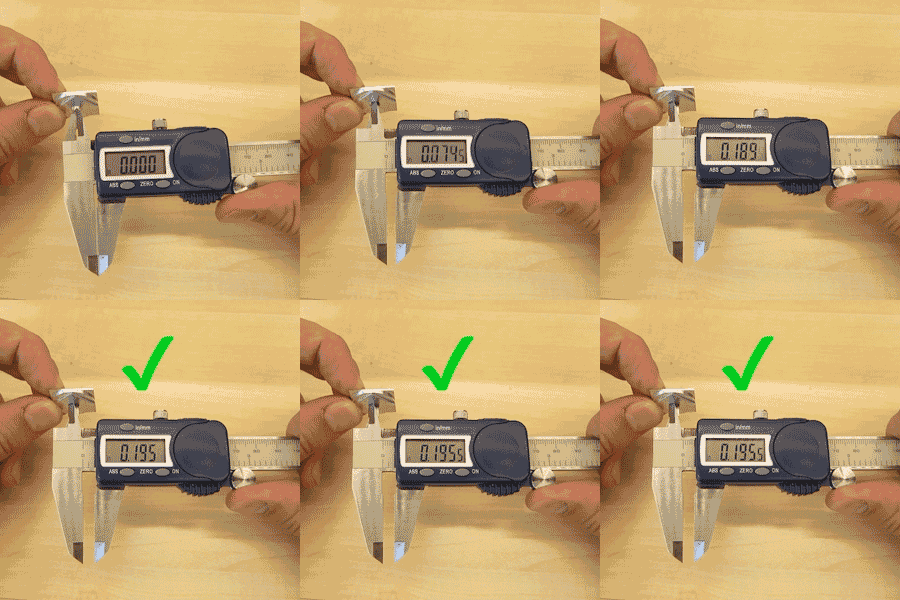
You can also use the outside jaws to measure the thickness of an object. For CNC mill users, this is the most important measurement. Your material thickness needs to be accurate or your tool will cut too deep or not deep enough. Make sure the object is perpendicular to the jaws so the measurement is accurate. In the animations above, the outside jaws are being used to measure the thickness of a milled aluminum plate. The second animation is incorrect because the object being measured is not perpendicular to the jaws.
Measuring Inside Dimensions
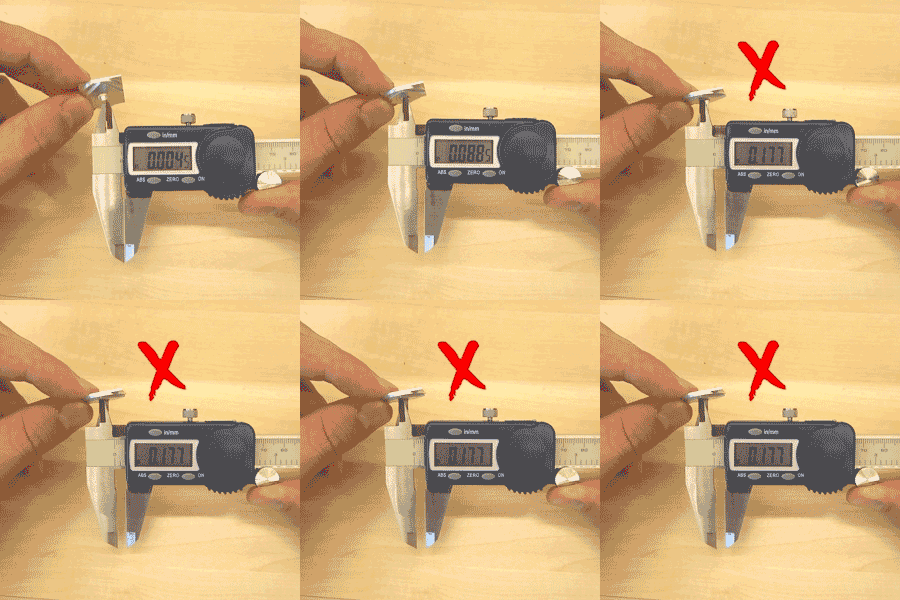
Use the inside jaws to measure the inside dimensions of an object. Make sure the object is perpendicular to the jaws. In the animations above, the inside jaws are being used to measure the inside dimensions of a hole milled into a piece of aluminum. The second animation is incorrect because the object being measured is not perpendicular to the jaws.
Measuring Depth
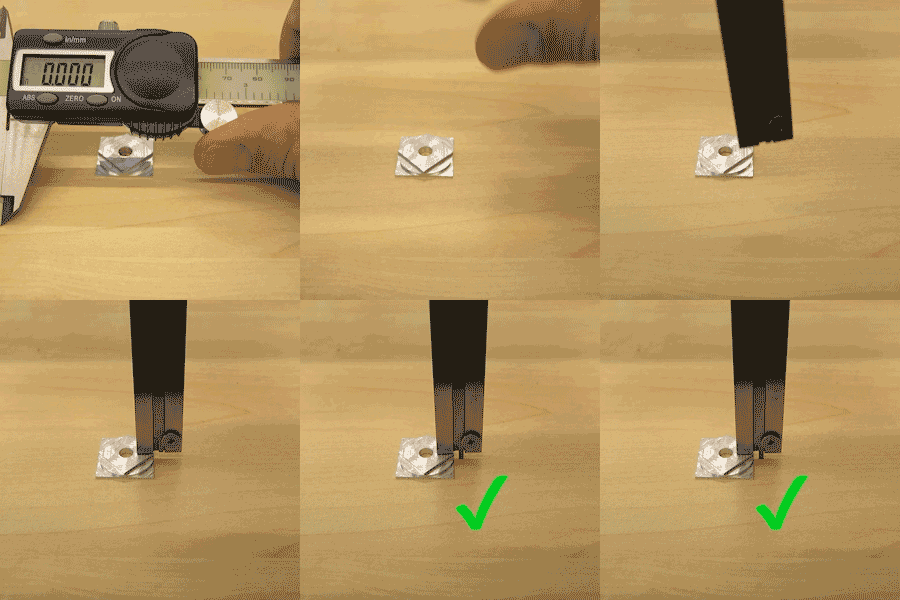
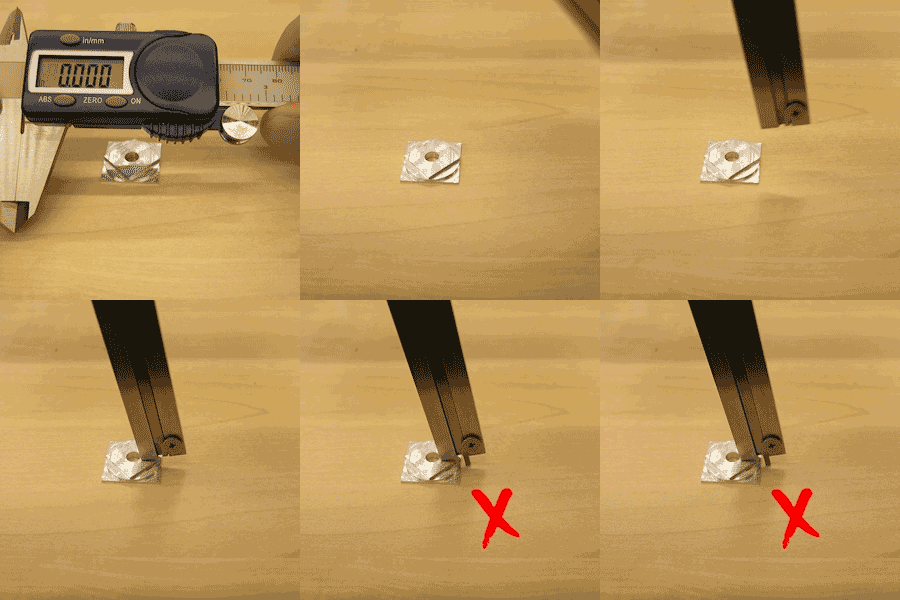
Use the depth gauge to measure the depth from one surface to the next. Make sure the calipers are perpendicular to the surface being measured. In the animations above, the depth gauge is being used to measure the distance from the surface of an aluminum part to the desk below it. The second animation is incorrect because the calipers are not perpendicular to the surfaces being measured.
Taking a Step Measurement
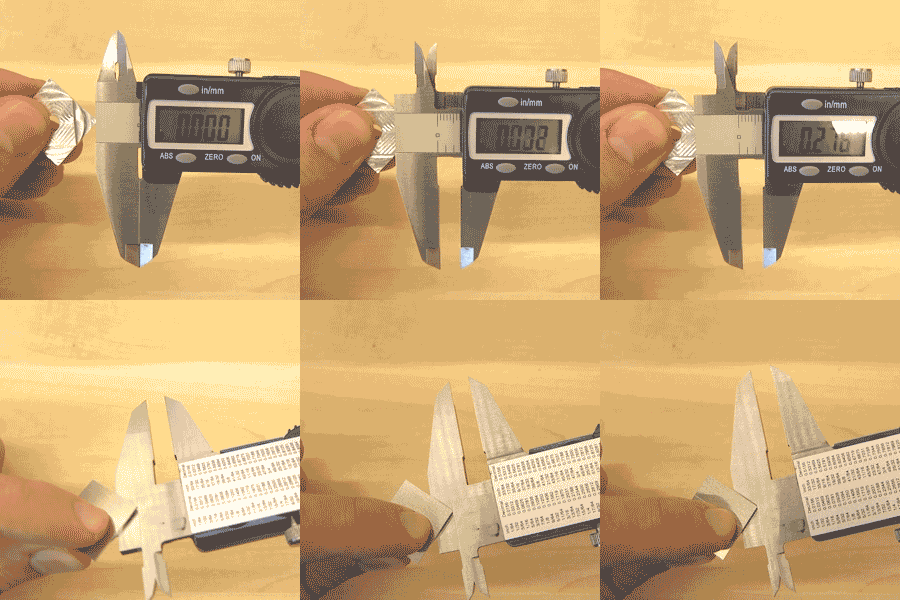
Use the step gauge to measure the distance between one edge and the next edge above it. In the animation above, the step gauge is being used to measure the distance from the corner of a milled part to the front edge of the square feature above it.
Taking Comparative Measurements
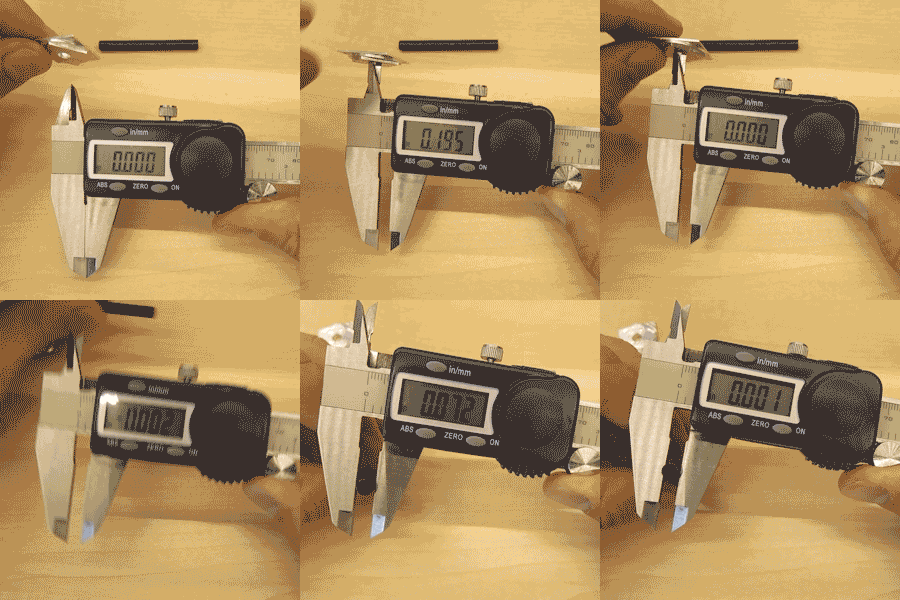
By zeroing the calipers in place when taking a measurement, you can compare the dimensions of one object to those of another. In the animation above, the diameter of a hole in a milled part is compared to the diameter of a rod to determine if the rod will fit into the hole. First, the inside jaws are used to measure the inside diameter of the hole. Next, the zero/on button is pressed to zero the calipers. Finally, the outside jaws are used to measure the outside dimensions of the rod. The reading on the screen is the difference between the dimensions of the hole and the rod.
10 thoughts on “How to Use Your Digital Calipers: 7 Tips”
Comments are closed.
Owen Smithyman is a Content Developer at Other Machine Co. His three loves are collaboration, learning new things, and his amazing wife.
View more articles by Owen SmithymanADVERTISEMENT
Join Make: Community Today




I thought I was going to make it through the day without learning something new.
Where did you get that label with fraction conversions on the back of those calipers?
A great many better calipers have it stuck on when you buy them. Sorry I can’t be more help.
Thanks. The depth and step measurements were new things for me.
The step thing was new to me. Which is why I read articles like this – even I don’t know what stuff I might have missed.
Useful comments too.
Another top tip: use the wider flats of the jaws to get better parallelism than you’ll get using just the finer tips.
You can lock the jaw position and use the calipers as a scribe on softer materials – they are hardened steel. Just be gentle!
Likewise, for comparing parts, you can lock the jaws then compare multiple parts for friction fit, far faster than writing down the actual numbers.
If you need to find a center, you can use the callipers, again locked, & again gently, as a pair of scribing compasses. Draw two arcs and then rule a line between the two intersecting points.
You can use the caliper as a rule (straight edge) too.
Hope these help!
Finally: buy good branded calipers as soon as you can, preferably one of the “Absolute” types, to avoid drifting zero (common on low batteries) ruining your expensive/long-worked-upon things!
Maybe something you could add to your tricks for measuring with digital calipers. You can measure the center distance between 2 holes (as long as they are both of the same diameter) :While measuring the inside diameter of one of the holes, you zero the display. Then you measure the distance to the OUTSIDE of both holes (with the inside jaws)
()
Because you zeroed the display with the ID of one of the holes, this effectively subtracts one measurement from the other, giving you the center distance between the 2 holes
Before you zero the calipers, you should wipe the jaws with your finger to insure that a piece of dirt or swarf isn’t causing the non-zero reading.
Could you please explain the purpose of the recessed grooves of the OD jaws near the scale? The ID jaws have them too. Thank you in advance.
Those reliefs are to ensure there is no corner radius to interfere with a full depth measurement.
http://www.ebestdigitalcalipers.com/