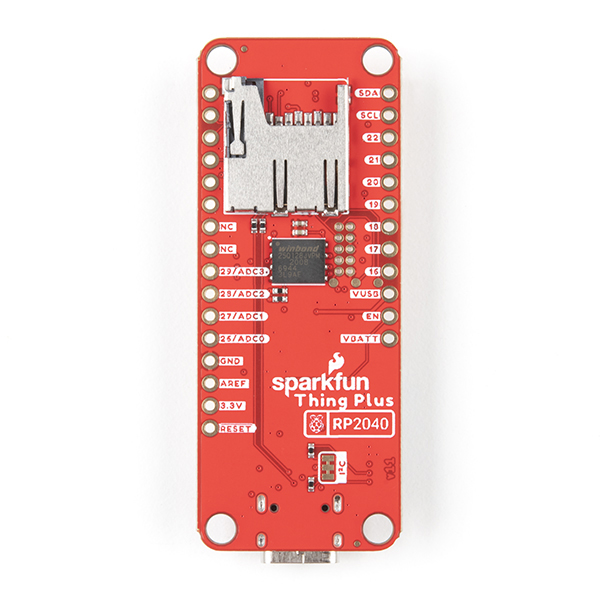
SparkFun’s Thing Plus – RP2040 is one of several new boards featuring the Raspberry Pi Foundation’s RP2040 microcontroller. The board breaks out most of the RP2040’s versatile I/O pins, while constraining itself to an Adafruit Feather’s form factor. The board is a good choice for building wearables and other devices powered by lithium-polymer batteries.
The RP2040 represents the Raspberry Pi Foundation’s first foray into custom microcontroller chips. It features a dual-core ARM Cortex-M0+ processor running at a maximum of 133 MHz. The RP2040 has native USB 1.1 device and host capabilities. The chip has a 12-bit ADC multiplexed onto four of the GPIO pins. There is also a dedicated QSPI high-speed serial interface used for off-chip program storage. The Sparkfun designers have opted to connect 16 MB of flash storage, more than many other RP2040 boards.

The 30 general purpose (GPIO) pins of the RP2040 can serve multiple roles, with each having the option to be connected to one of the eight PWM timers, for example, or to be part of an SPI, UART, or I2C bus. You won’t find all 30 pins broken out on the Thing Plus, however, owing to the number of pins in the target form factor. Eighteen of the pins are broken out, with a few leftover GPIO pins connected to an on-board micro-SD card slot. An RGB LED is connected to one of the broken-out pins. All IO pins are 3.3V.
The form factor of this board, and other Thing Plus boards, matches that of an Adafruit Feather. This includes the battery management hardware and 2-pin JST connector, allowing the board to charge and monitor a single-cell lithium-polymer battery. The Thing Plus boards also feature Sparkfun’s QWIIC connect system. The 4-pin QWIIC connector provides power and I2C connectivity for QWIIC compatible sensors and peripherals. The board comes without headers, giving you the option of installing stacking headers for add-ons. There is also space for a 10-pin header that breaks out the SWD debugging interface.
The Hookup Guide from the Sparkfun website walks through the hardware of the Thing Plus RP2040 as well as how to program the board in MicroPython, C/C++, or Arduino IDE. The guide provides a lot of extraneous links, so I will describe what’s essential. The overarching theme to programming the board is to treat it like it is a Raspberry Pi Pico, the board the Raspberry Pi Foundation built to carry the RP2040 chip. Since the Thing Plus varies from the Pico mainly in which pins are available to the user and where they are located, this generally works fine.
I first started with MicroPython. For this option, I recommend following the getting started with MicroPython guide on the Raspberry Pi Foundation’s website as it links to the required software. Click the “downloadable UF2” file link to download the latest MicroPython system for the RP2040. Getting MicroPython onto the board is a snap thanks to the UF2 bootloader. Simply hold down the “boot” button on the Thing Plus as you plug in the USB cable and the board will mount as a USB mass storage device on your computer. Copy the UF2 file you downloaded onto the board and it will reboot running MicroPython. At this point the board is in REPL mode, which allows you to issue instructions to the board over USB through any serial terminal program.
To program the board in Arduino IDE you simply need to go to the board manager and install support for Arduino Mbed OS RP2040 Boards. Choose as your board the Raspberry Pi Pico and you are on your way. There is a note in the hookup guide that to access the SD card slot in Arduino IDE requires making changes to the pins_arduino.h file to redirect SPI functionality to the particular pins connected to the SD card slot. You will lose SPI functionality on the broken-out pins, however. The RGB LED can be driven by the Adafruit NeoPixel library.
Your last option is to program the board in C/C++ using the Pico SDK. I would not recommend this for beginners. The best documentation comes directly from the Raspberry Pi Foundation website. Scripts are available to install the entire toolchain on a Raspberry Pi if you intend to use one for development, or there is a Windows installer. The SDK can be used with Visual Studio and other IDEs as described in the official documentation, or you can use it from the command line. The SDK includes a number of example programs that I found very useful in getting started.
Standout features:
- On-board support for charging and monitoring lithium-polymer batteries
- Support for SparkFun’s QWIIC connect system sensors and peripherals
- Uses the Raspberry Pi Foundation’s new custom microcontroller chip


